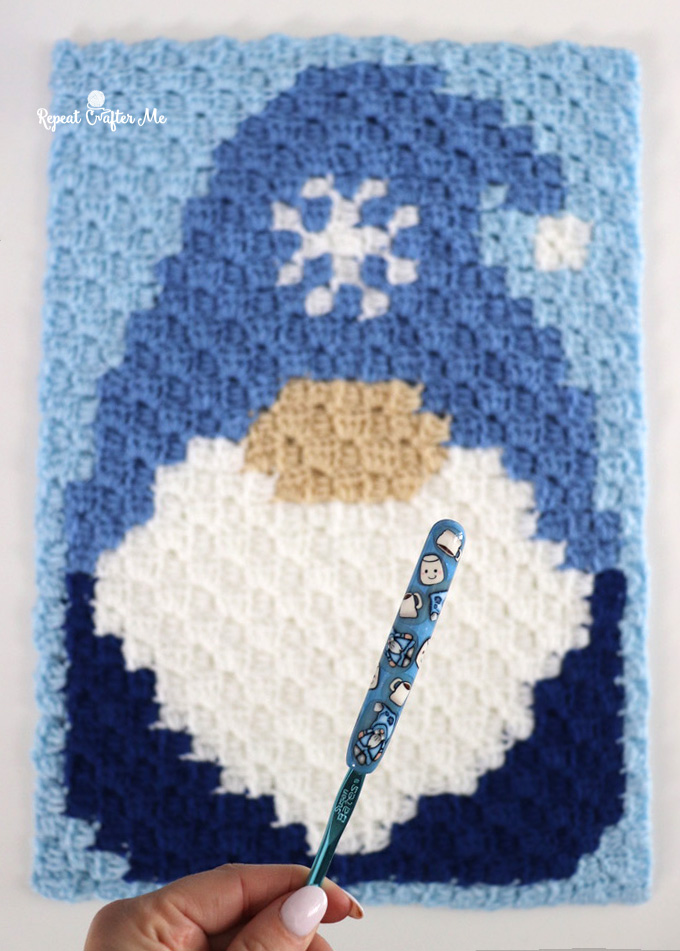
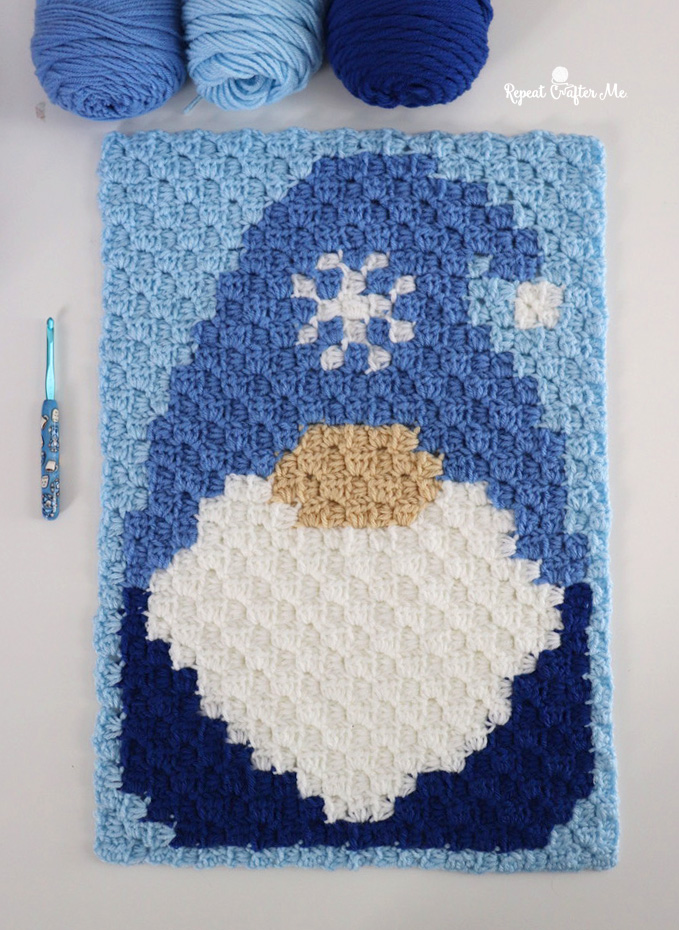
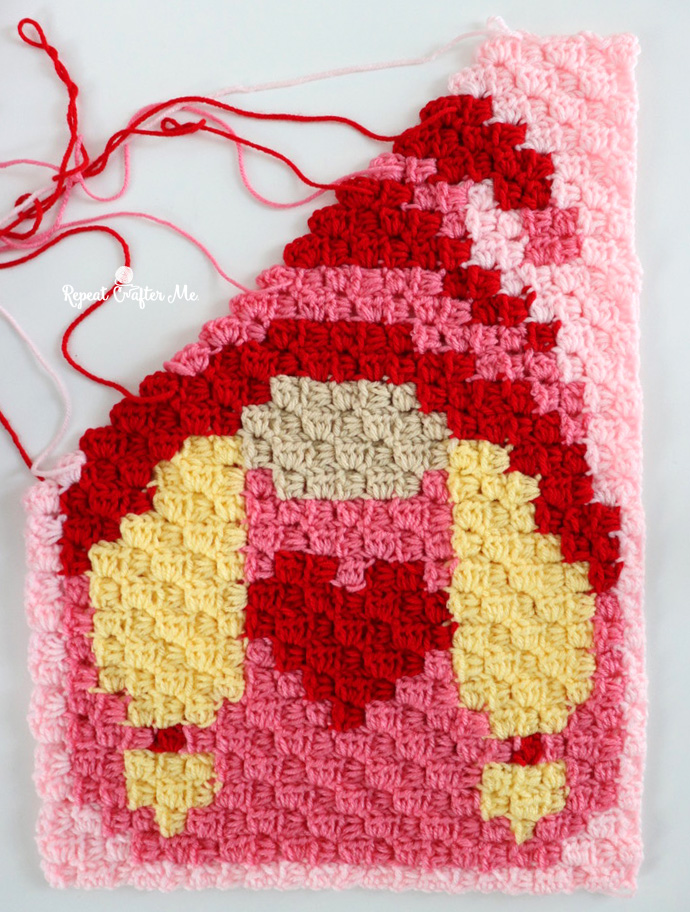
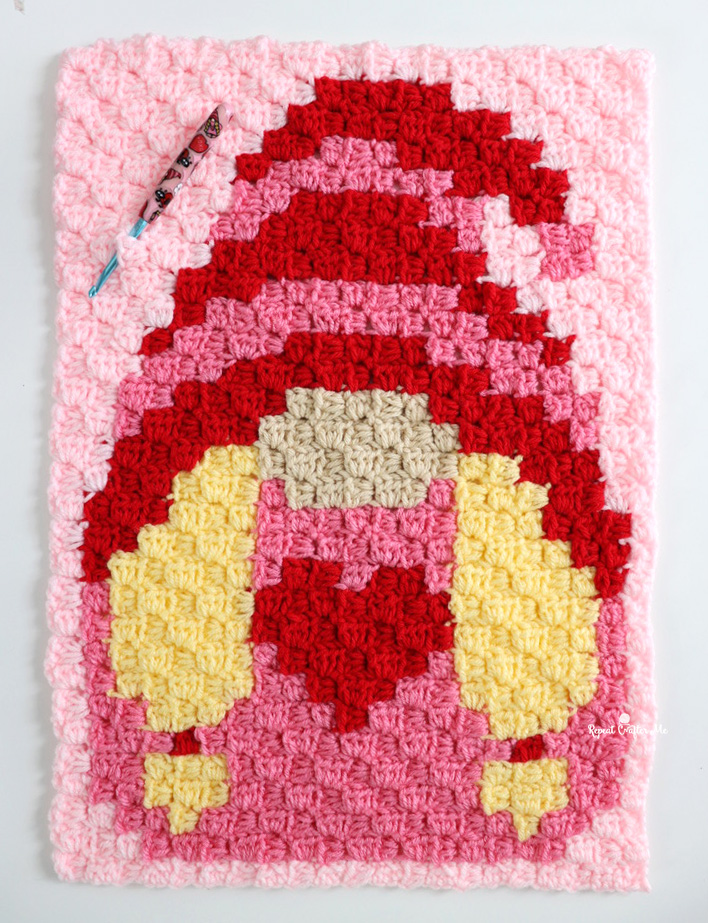
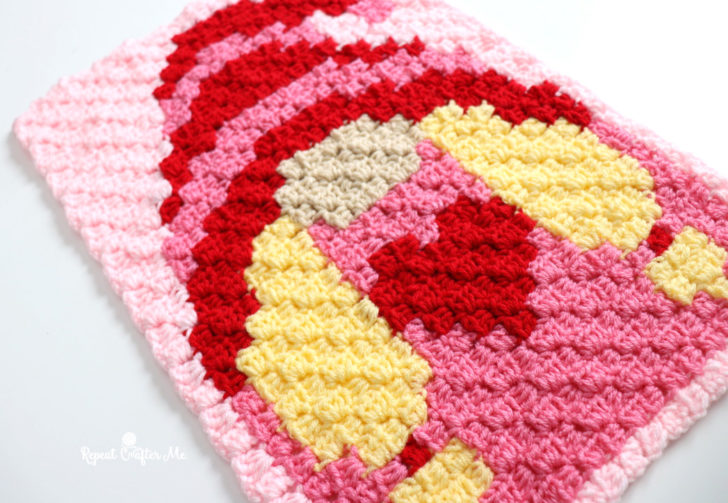
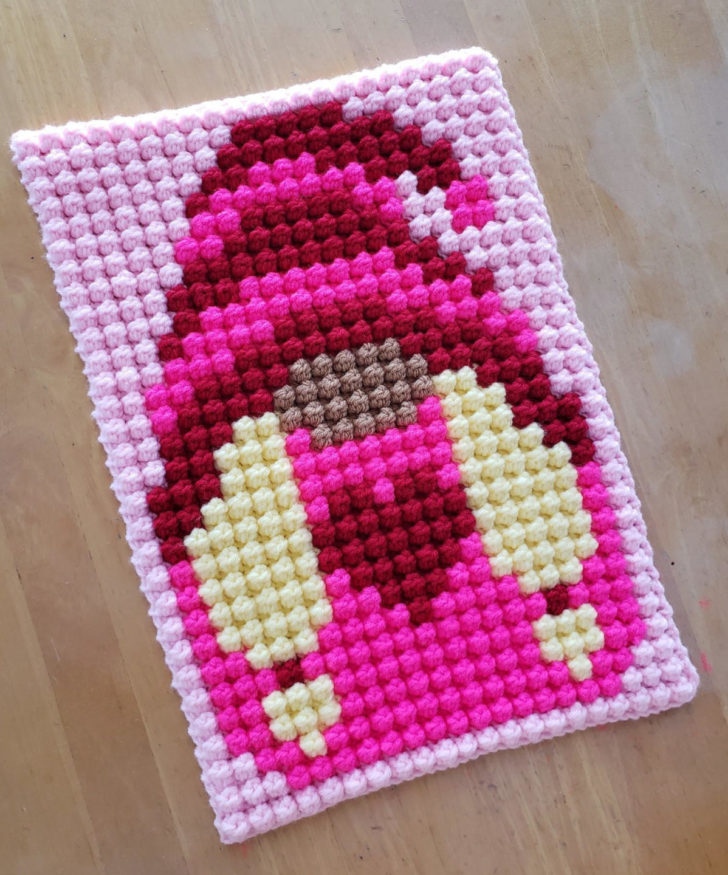
Doesn’t it feels like January was such a long month?! Especially since I know you were all anxious for the February Crochet Gnome C2C and polymer clay hook designs! If you missed the big announcement last month, Jen from Day by Day Clay and Crochet Group and I have team up for a very fun YEAR-LONG collaboration! Each month Jen will create a Gnome Polymer Clay Crochet Hook and I will create a matching Gnome Corner-to-Corner Crochet rectangle. Our designs will be holiday and seasonal themed so for the month of February we have created a sweet Valentine Gal! She has adorable pigtail braids, a striped hat, and a heart in the middle. I hope you love her as much as we do!
At the end of the 12 months I will be stitching the gnomes together to make a large blanket! I will be sure to include a tutorial at the end of the year that shows how to stitch the gnomes together. I know that C2C is a new technique for many of you so I am going to try and work on some very specific C2C video tutorials to help you through the process of crocheting these gnomes.
We have had such an overwhelming response to this project! Jen and I are VERY grateful! Jen recently decided to take her polymer clay hook designs into a full time business and I am so excited to support her and her creativity. I’ve always been a huge fan of her hooks and I was in the same position as her not so long ago when I took a leap of faith and started Repeat Crafter Me. We are both one-woman-shows. Meaning I am the only person crocheting and designing my projects and she is the only person designing and creating her clay hooks. So bear with us while we work out some kinks of how/when to post our coordinating projects. She is also limited to how many crochet hooks she can physically make. If you miss out on a crochet hook sale, don’t worry, she plans to make more at the end of the year.
Be sure to use the hashtag #2022gnomeproject in your social media posts so we can all follow along and see your finished gnomes!
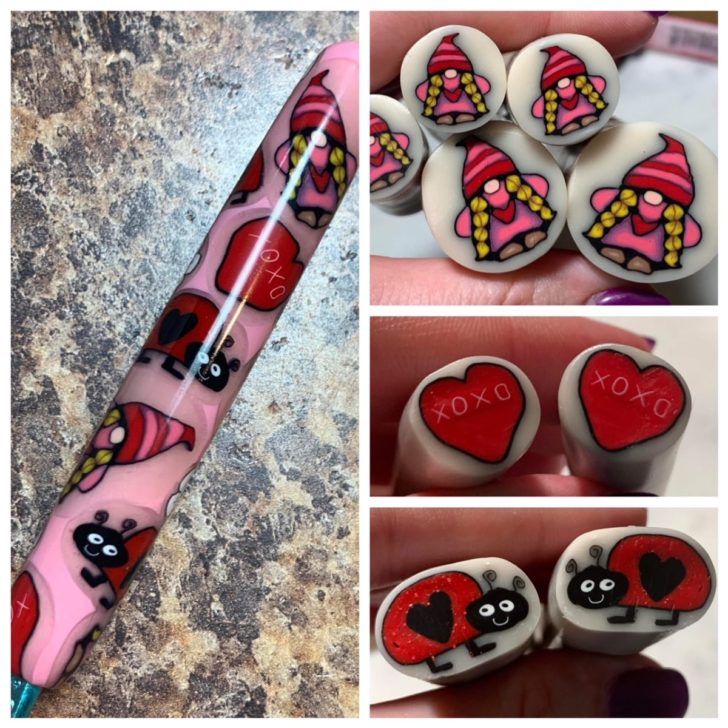
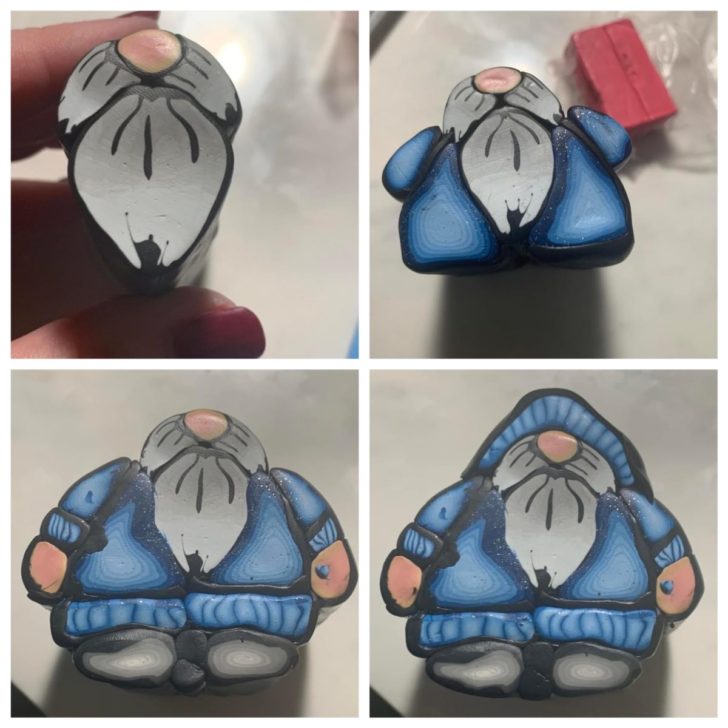
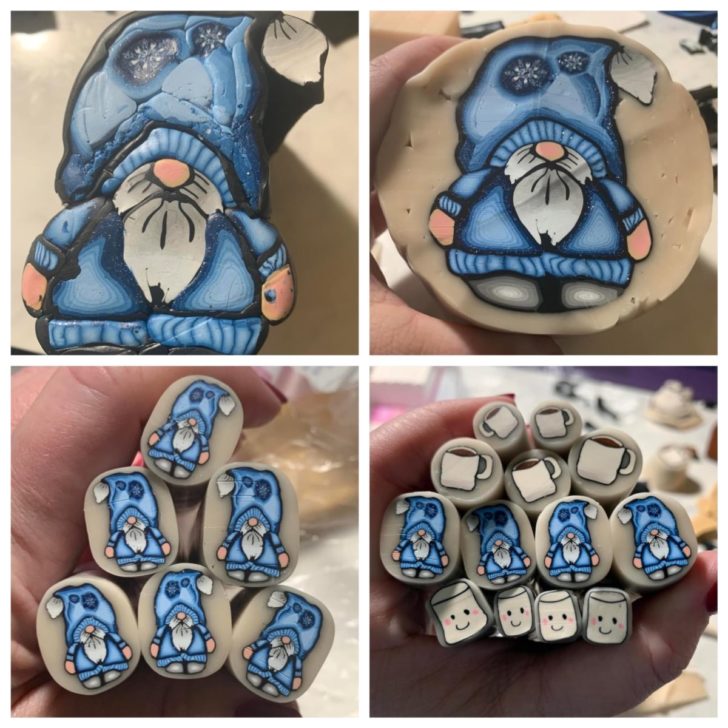
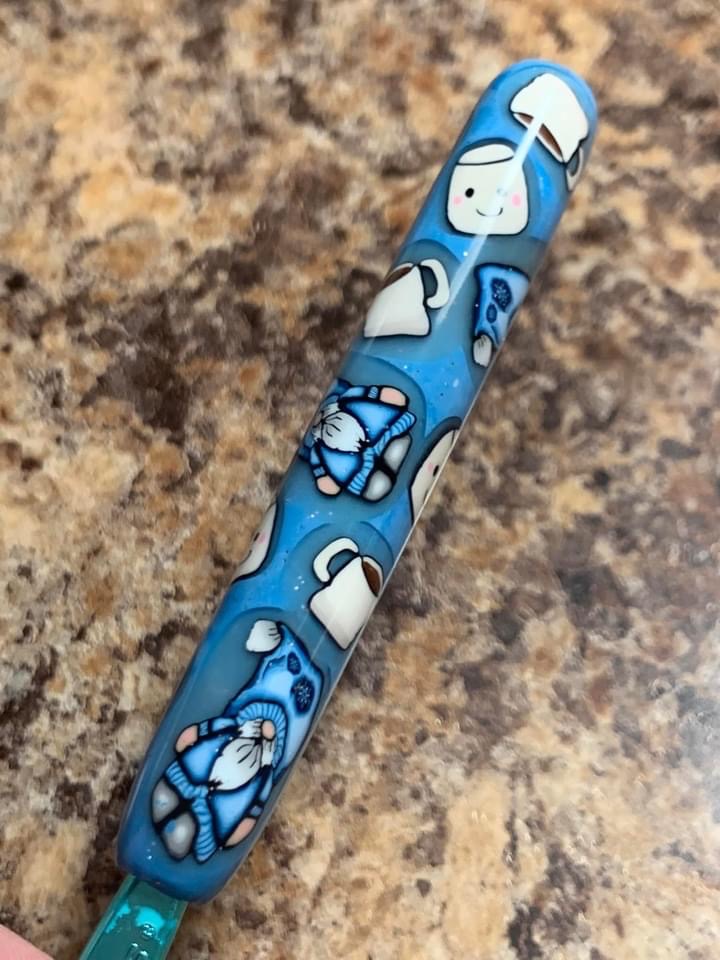
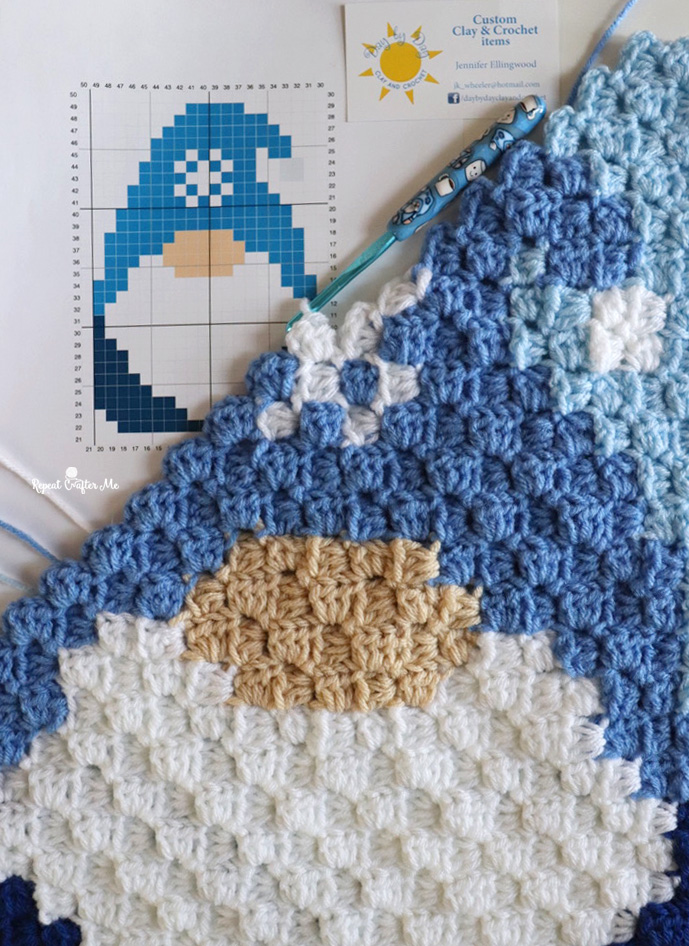
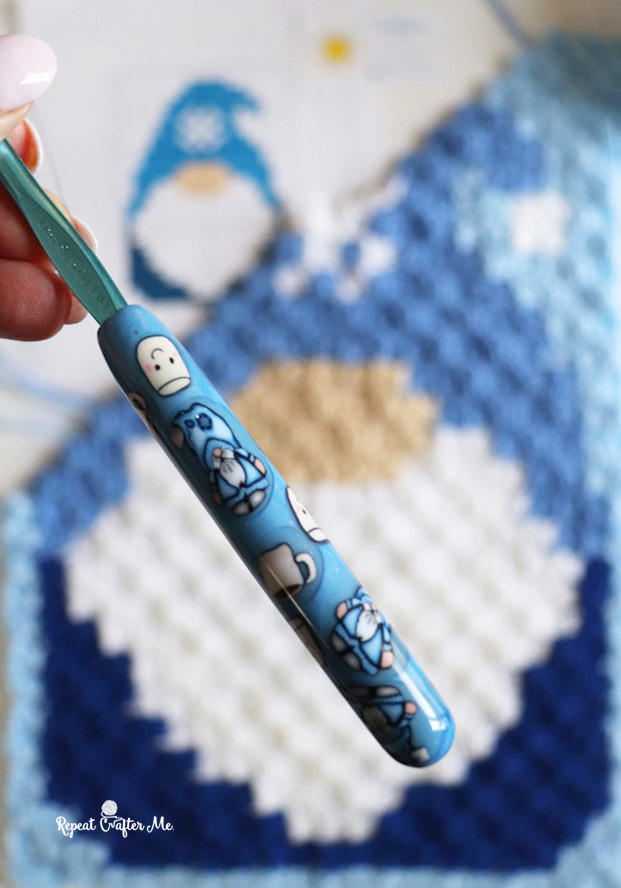
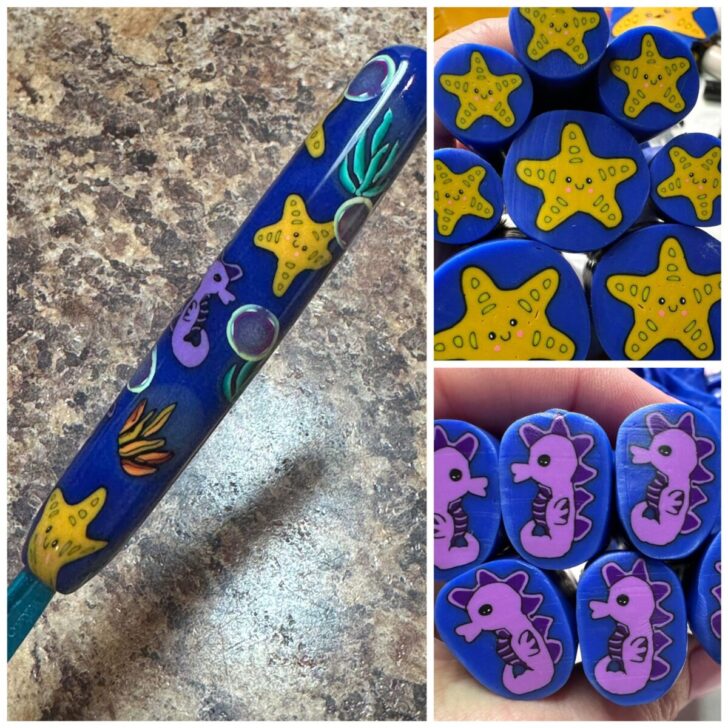
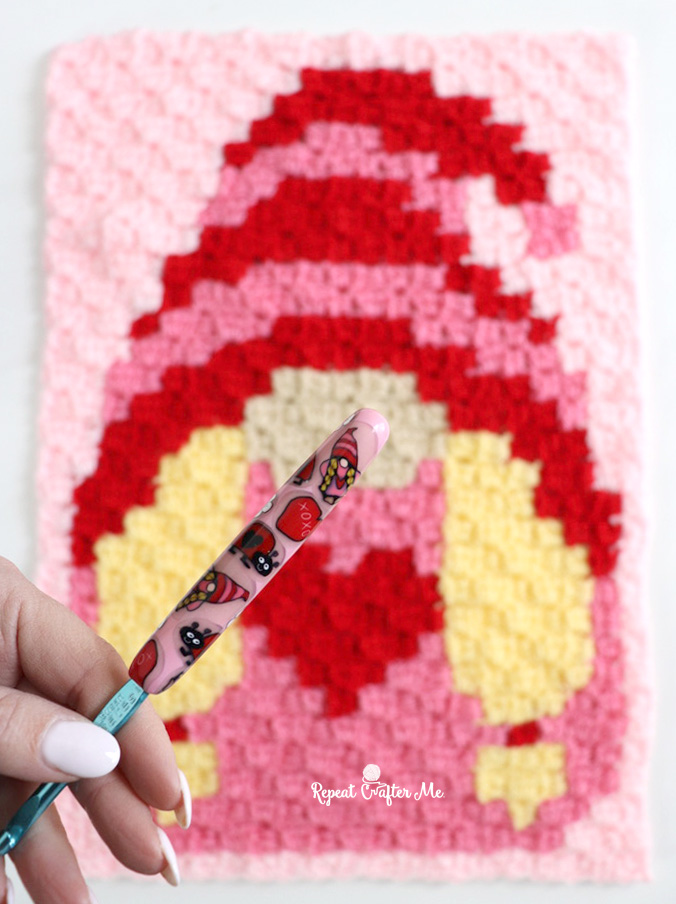
Above is a picture of Jen’s polymer clay canes and finished hook! Remember, she makes the hooks (and posts them for sale in Day by Day Clay and Crochet Group) and I make the crochet patterns (which are posted for free here each month)! I love hooks with polymer clay handles because not only are the designs fun, festive, and cute, but they create an ergonomic handle which helps to ease pain and tension caused by the motions of crochet. Read more about these crochet hooks HERE.
Valentine Gnome Materials:
–Red Heart Super Saver Yarn in Baby Pink, Lemon, Cherry Red, and Bubblegum
>>> GET RED HEART WITH LOVE IN BUBBLEGUM HERE <<<
NOTE: Bubblegum is actually from the Red Heart with Love line of yarn and I am obsessed with this specific color! You should go ahead and buy a few skeins even though you need less than 1 of each color to finish your Gnome
Shop all the colors HERE on Yarnspirations.com.
– You probably won’t need more than one skein of taupe brown for the gnome nose. Use the same skein for all 12 or change it up and use any color of your choice for the nose!
– Size H Crochet Hook
-Tapestry needle
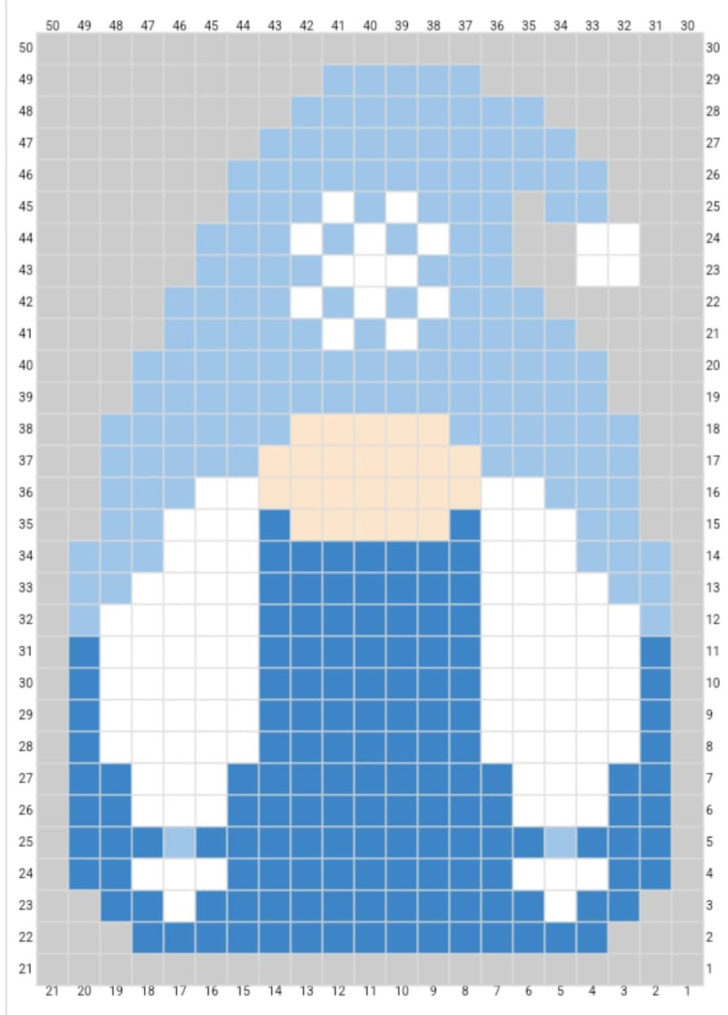
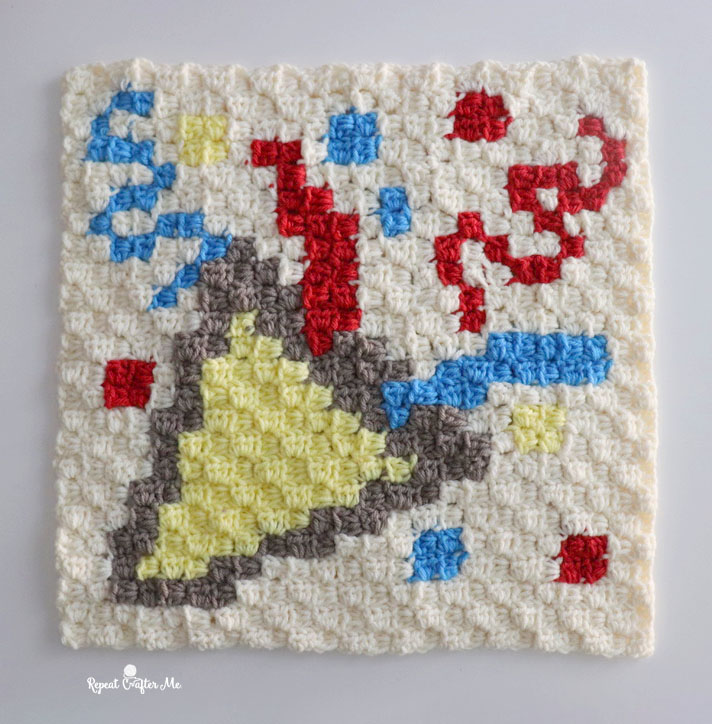
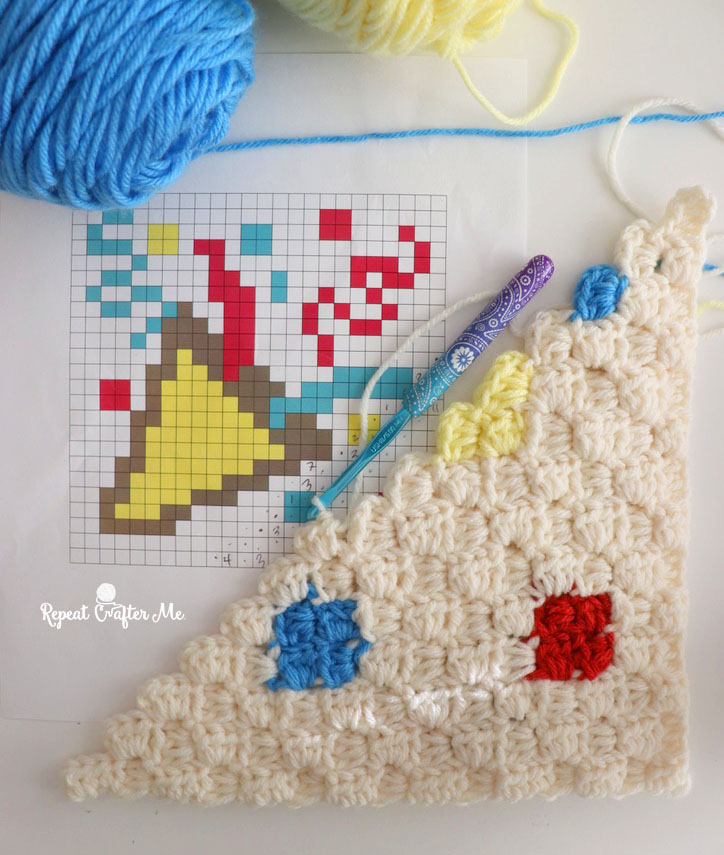
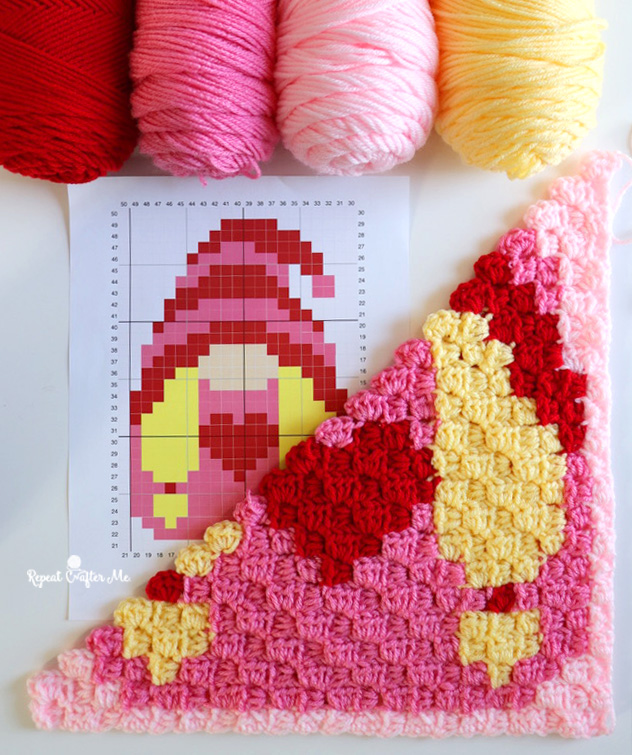
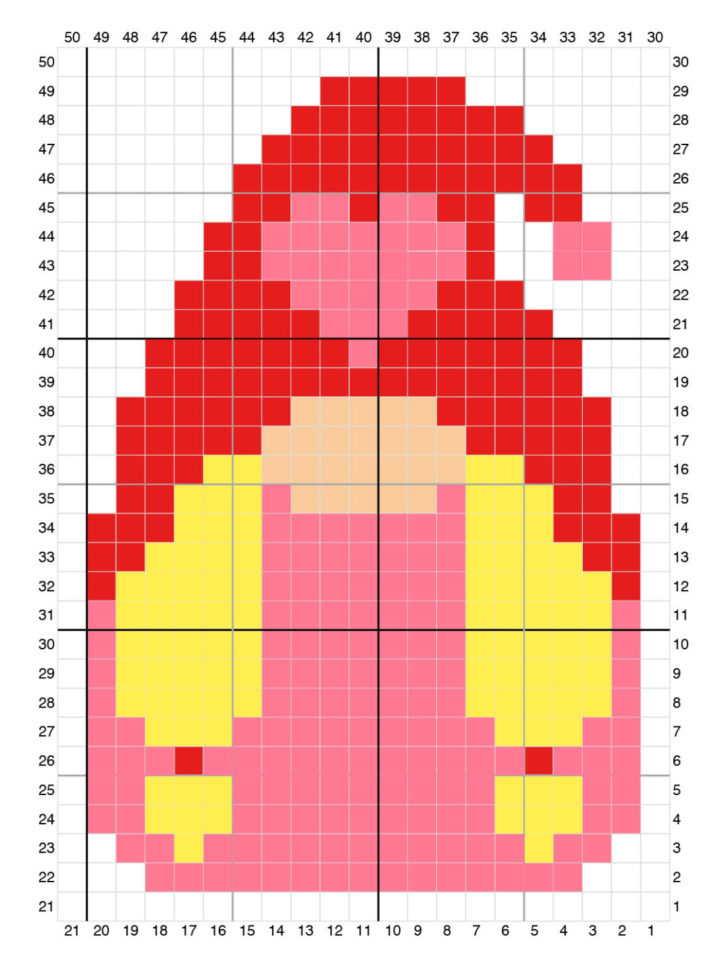
– February Valentine Gnome Pixel Graph
Finished Size of the Gnome Crochet Rectangle: 20 inches tall x 14 inches wide
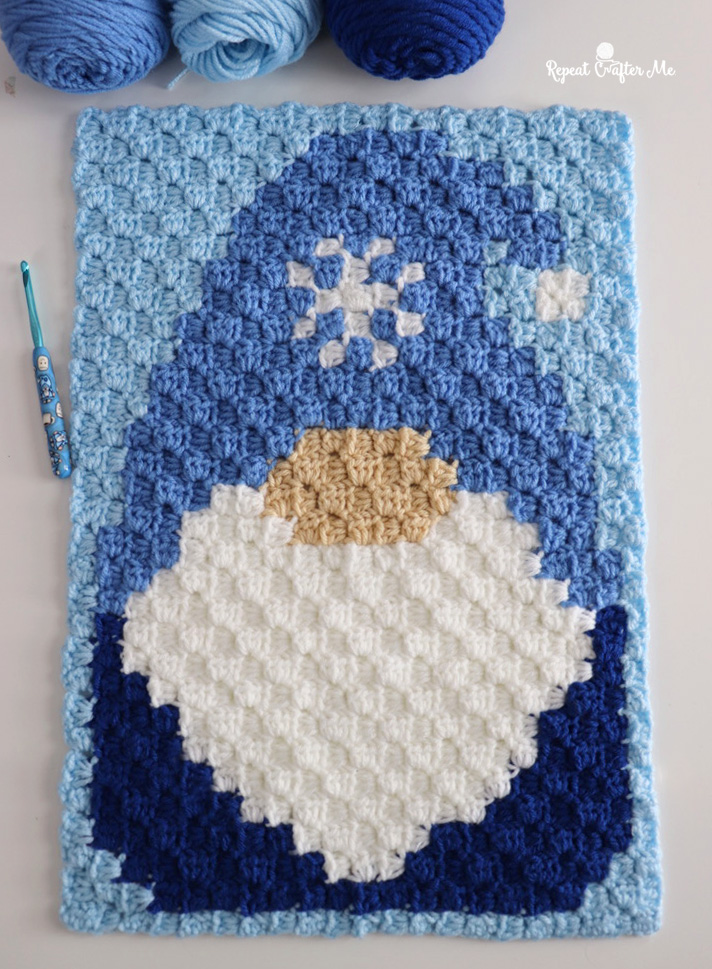
If you missed the January Gnome, you can find him HERE
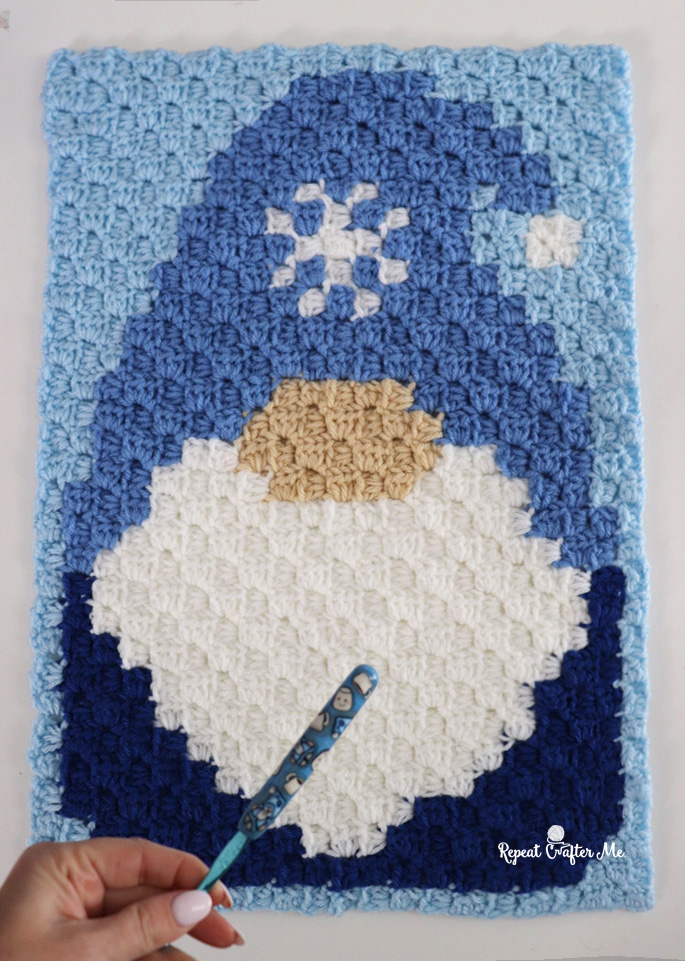
Now let’s make the Gnome Corner-to-Corner Crochet Rectangle!
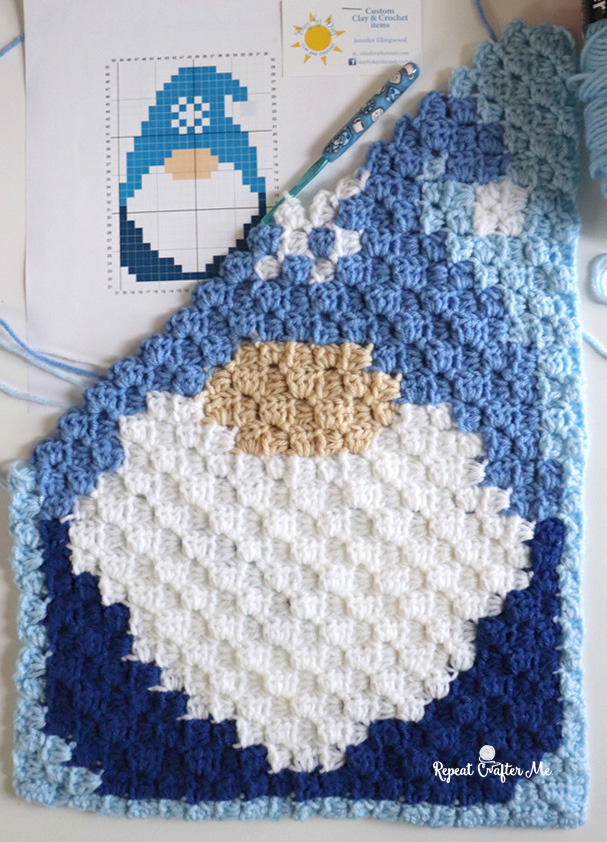
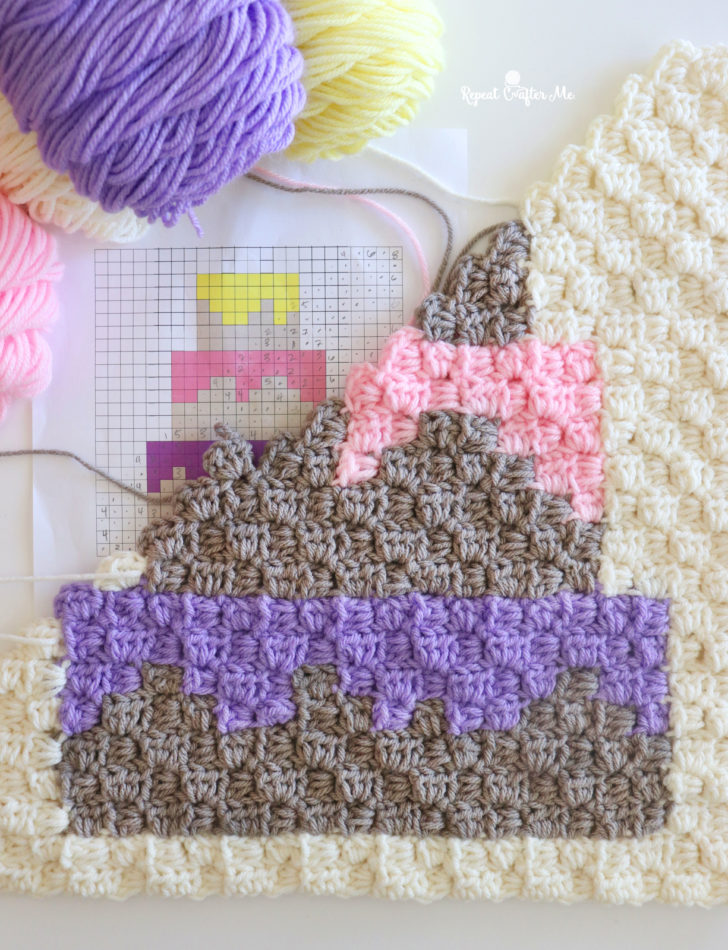
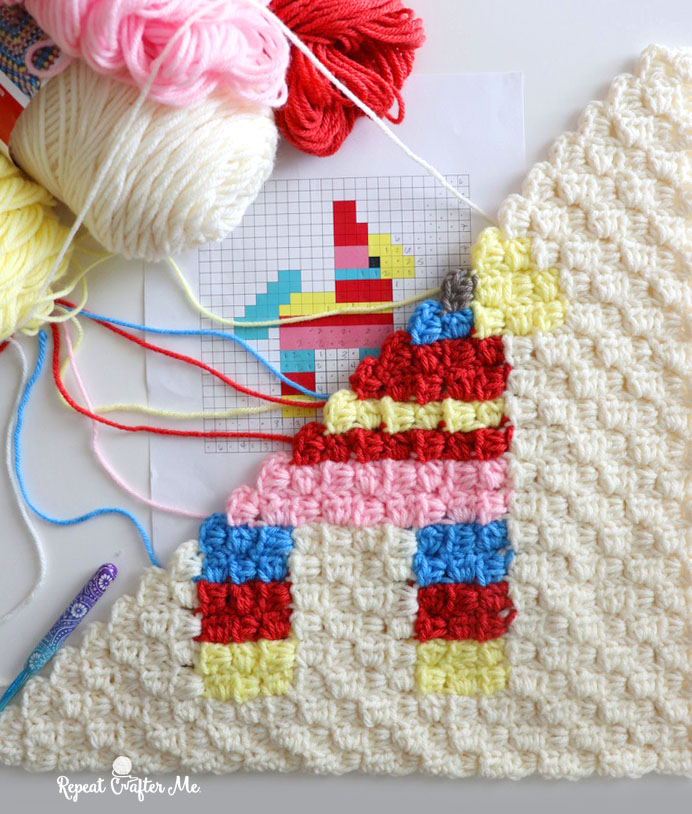
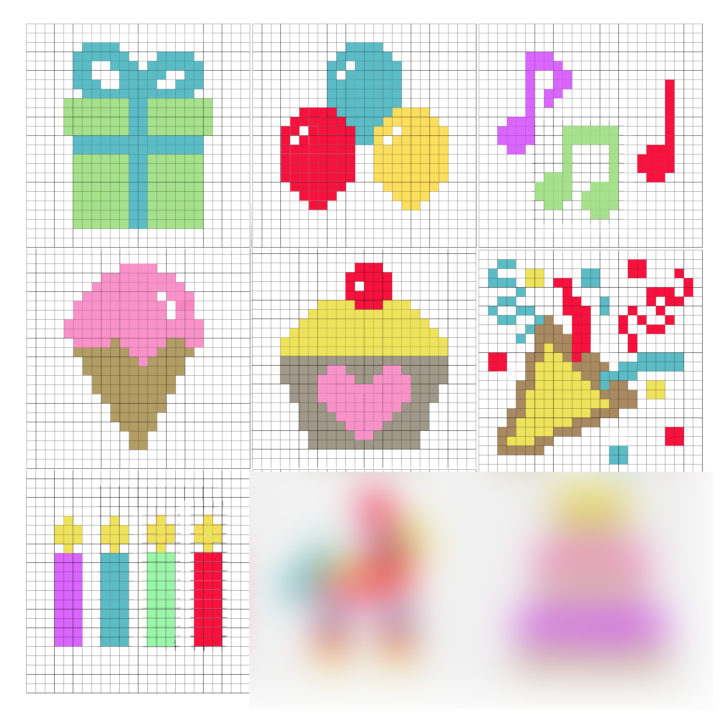
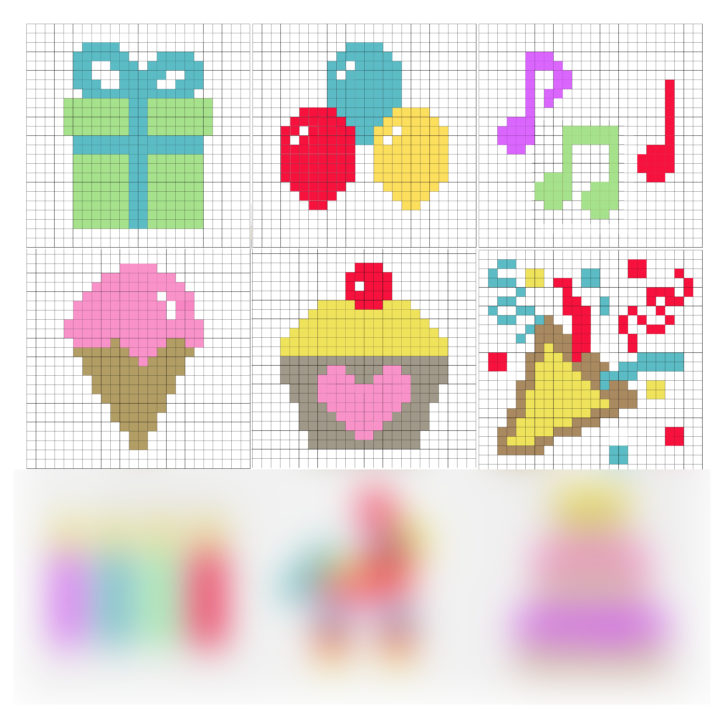
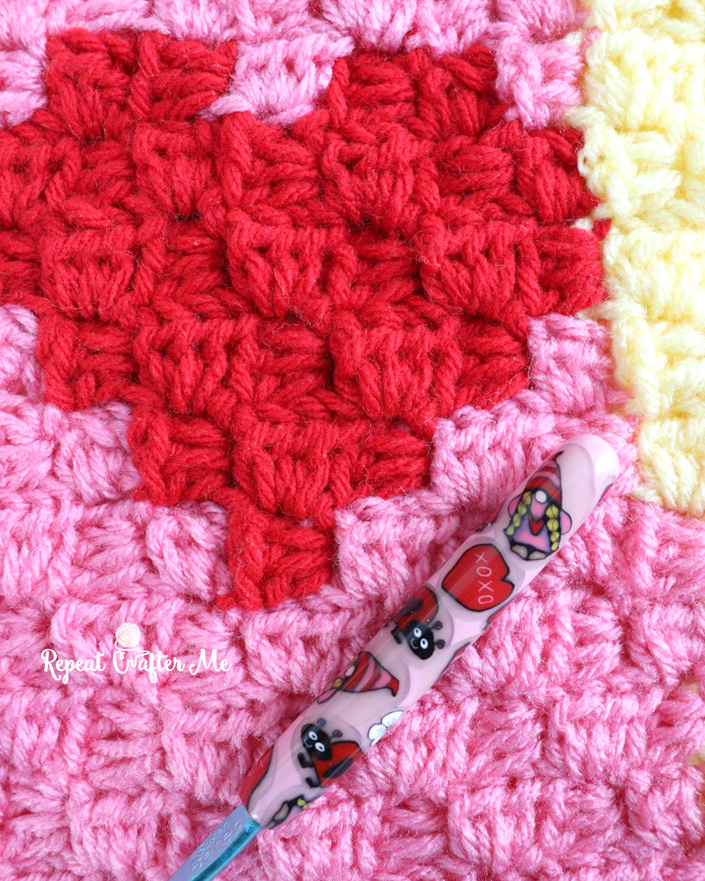
Corner-to-Corner Crochet lets you turn almost any image into a pixel graph and then from a pixel graph into a crocheted piece! The Corner-to-Corner technique basically means the you start in one corner (the lower right hand is most common place to start) and crochet diagonally in rows until you get to the other corner. You follow the pixel graph to create the color changes that make up the picture of the gnome. One pixel square = a chain 2 + 3 HDC stitches. Please note that I am using HDC stitches for the C2C instead of DC. You can use either! The DC is more common but keep in mind that your gnome rectangle will end up slightly bigger if using Double Crochet.
If C2C is confusing to you, don’t worry, my friends at The Crochet Crowd have the perfect beginner tutorial! And the best part is that they chose to use a few of my projects as the examples so you can’t go wrong! Get The Crochet Crowd Corner-to-Corner Crochet using HDC (half double crochet) HERE.
Big THANK YOU to Jennifer Freeman of “My Beautiful Disasters” (Find her HERE on FB!) for writing out the C2C written pattern for the February Gnome (and the bonus gnome patterns below)! This is very helpful since many of you like to use this to crochet instead of following the graph. HERE is a downloadable PDF of the written pattern or just follow along below:
Row 1: Background x 1 (1 block)
Row 2: Background x 2 (2 blocks)
Row 3: Background x 3 (3 blocks)
Row 4: Background x 4 (4 blocks)
Row 5: Background x 1, Pink x 3, Background x 1 (5 blocks)
Row 6: Background x 1, Pink x 4, Background x 1 (6 blocks)
Row 7: Background x 1, Pink x 2, Yellow x 2, Pink x 1, Background x 1 (7 blocks)
Row 8: Background x 1, Pink x 2, Yellow x 2, Pink x 2, Background x 1 (8 blocks)
Row 9: Background x 1, Pink x 3, Yellow x 2, Pink x 2, Background x 1 (9 blocks)
Row 10: Background x 1, Pink x 3, Yellow x 1, Red x 1, Yellow x 2, Pink x 1, Background x 1 (10 blocks)
Row 11: Background x 1, Pink x 1, Yellow x 3, Pink x 5, Background x 1 (11 blocks)
Row 12: Background x 1, Pink x 5, Yellow x 4, Pink x 1, Background x 1 (12 blocks)
Row 13: Background x 1, Red x 1, Yellow x 4, Pink x 6, Background x 1 (13 blocks)
Row 14: Background x 1, Pink x 6, Yellow x 5, Red x 1, Background x 1 (14 blocks)
Row 15: Background x 1, Red x 2, Yellow x 4, Pink x 7, Background x 1 (15 blocks)
Row 16: Background x 1, Pink x 8, Yellow x 4, Red x 1, Background x 2 (16 blocks)
Row 17: Background x 2, Red x 2, Yellow x 3, Red x 4, Pink x 5, Background x 1 (17 blocks)
Row 18: Background x 1, Pink x 6, Red x 4, Yellow x 3, Red x 2, Background x 2 (18 blocks)
Row 19: Background x 2, Pink x 1, Red x 1, Yellow x 3, Pink x 1, Red x 4, Pink x 3, Yellow x 2, Pink x 1, Background x 1 (19 blocks)
Row 20: Background x 2, Pink x 1, Yellow x 2, Pink x 3, Red x 4, Pink x 1, Yellow x 2, Red x 2, Pink x 1, Background x 2 (20 blocks)
Row 21: Background x 3, Pink x 1, Red x 1, Yellow x 2, Pink x 2, Red x 4, Pink x 3, Yellow x 2, Pink x 1, Background x 2 (21 blocks)
Corner
Row 22: Background x 2, Pink x 1, Yellow x 1, Red x 1, Yellow x 2, Pink x 1, Red x 2, Pink x 4, Yellow x 1, Red x 2, Pink x 1, Background x 3 (21 blocks)
Row 23: Background x 3, Red x 1, Pink x 1, Red x 2, Peach x 2, Pink x 2, Red x 3, Yellow x 3, Pink x 3, Background x 1 (21 blocks)
Row 24: Background x 1, Pink x 2, Yellow x 4, Red x 2, Pink x 2, Peach x 3, Red x 1, Pink x 2, Background x 4 (21 blocks)
Row 25: Background x 2, Pink x 1, Background x 1, Red x 1, Pink x 1, Red x 2, Peach x 3, Pink x 3, Yellow x 4, Pink x 2, Background x 1 (21 blocks)
Row 26: Background x 1, Pink x 1, Yellow x 5, Pink x 2, Peach x 4, Red x 1, Pink x 1, Red x 1, Background x 1, Pink x 2, Background x 2 (21 blocks)
Row 27: Background x 3, Pink x 1, Background x 1, Red x 1, Pink x 2, Red x 1, Peach x 4, Pink x 1, Yellow x 5, Pink x 1, Background x 1 (21 blocks)
Row 28: Background x 1, Pink x 1, Yellow x 5, Pink x 1, Peach x 3, Red x 2, Pink x 1, Red x 1, Background x 2, Red x 1, Background x 3 (21 blocks)
Row 29: Background x 3, Red x 2, Background x 1, Red x 1, Pink x 2, Red x 2, Peach x 3, Yellow x 5, Pink x 1, Background x 1 (21 blocks)
Row 30: Background x 1, Pink x 1, Yellow x 5, Peach x 2, Red x 2, Pink x 2, Red x 1, Pink x 1, Background x 1, Red x 1, Background x 4 (21 blocks)
Corner
Row 31: Background x 3, Red x 2, Pink x 1, Red x 2, Pink x 2, Red x 4, Yellow x 2, Red x 3, Background x 1 (20 blocks)
Row 32: Background x 1, Red x 8, Pink x 2, Red x 2, Pink x 1, Red x 2, Background x 3 (19 blocks)
Row 33: Background x 2, Red x 2, Pink x 1, Red x 3, Pink x 3, Red x 6, Background x 1 (18 blocks)
Row 34: Background x 2, Red x 3, Pink x 4, Red x 3, Pink x 1, Red x 2, Background x 2 (17 blocks)
Row 35: Background x 2, Red x 2, Pink x 1, Red x 3, Pink x 6, Background x 2 (16 blocks)
Row 36: Background x 2, Pink x 4, Red x 4, Pink x 2, Red x 2, Background x 1 (15 blocks)
Row 37: Background x 1, Red x 2, Pink x 2, Red x 6, Background x 3 (14 blocks)
Row 38: Background x 4, Red x 2, Pink x 4, Red x 2, Background x 1 (13 blocks)
Row 39: Background x 1, Red x 3, Pink x 3, Background x 5 (12 blocks)
Row 40: Background x 6, Red x 4, Background x 1 (11 blocks)
Row 41: Background x 10 (10 blocks)
Row 42: Background x 9 (9 blocks)
Row 43: Background x 8 (8 blocks)
Row 44: Background x 7 (7 blocks)
Row 45: Background x 6 (6 blocks)
Row 46: Background x 5 (5 blocks)
Row 47: Background x 4 (4 blocks)
Row 48: Background x 3 (3 blocks)
Row 49: Background x 2 (2 blocks)
Row 50: Background x 1 (1 block)
UPDATE: Just added! Huge thanks to Diane of Stitch Therapy who is completely rockin it with this project and making the gnomes using the POPCORN STITCH!
Get the PDF FEBRUARY GNOME POPCORN STITCH Pattern HERE
Frequently Asked Questions:
Where do I find the monthly crochet gnome patterns?
All of the gnome corner-to-corner crochet graphs and patterns will be posted right here on RepeatCrafterMe.com! I will do my best to post these for you towards the beginning of each month.
Where do I find and purchase the monthly gnome hooks?
All of the gnome crochet hooks are handmade by Jen and will be posted for sale in the Facebook group Day by Day Clay and Crochet Group.
Can I use another stitch besides C2C (corner-to-corner crochet)?
Yes! You can absolutely use other stitches! I have already seen many Gnomes crocheted using SC, box stitch, bobble stitch, and more! Search the hashtag #2022gnomeproject for ideas and photos!
Can I use a different yarn?
Yes! You can absolutely use other yarns! I will be telling you the color each month that I am using from the Red Heart Super Saver line of yarn but you can use any other worsted weight yarn or even something a bit bulkier or thinner. The thicker the yarn, the larger the finished product.
Are you making a border on your finished gnome crochet pieces?
I am not making a border on my gnome pieces. My plan is to crochet them together using one color at the very end. But feel free to make a nice border on yours! Completely up to you!
What will you do with the crochet gnomes at the end of the year?
I will be connecting all 12 gnomes together for a large blanket! You can follow along with me or use your gnome crocheted pieces as pillows or other individual projects. Have fun and be creative!
What comes first, the gnome hook or the gnome C2C?
Hehe 😉 Jen and I work really well together and both have similar “cutesy” styles. She approached me about this collaboration and when we worked on the January designs she said to make a winter gnome with a snowflake. I created the graph and then when she showed me her sketches, I adjusted the colors. For February she requested blond braids and a striped hat. So I worked on the graph and then she knocked it out of the park with the clay hook design! I made some minor adjusts to the graph after I saw her polymer clay canes.
What is on the backside of the C2C?
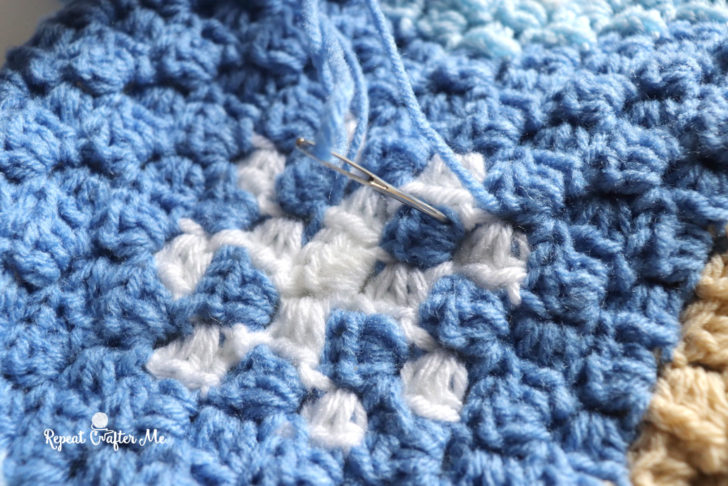
Corner-to-Corner crochet pieces are reversible! The back is a mirror image of the front. If you are finding the back is looking messy, you might be carrying your yarn too far over. Clip it off and re-attach. You will need to weave in some extra ends but it will be worth it!
Do you use bobbins? How do you organize your yarn?
No I don’t currently use bobbins. But it is great if you do! I wind up smaller balls of yarn from each skein so I have multiple balls of the same color. I carry up the yarn from the previous row when I can, when I can’t, I fasten off and re-attach the yarn in the new spot. When my yarn gets all tangled (and it usually does about once in the middle of the project), I clip off all the ends or as many as I need in order to get the strands sorted out again and continue on my way.
Do you have a list of all the yarn and amounts for each of the 12 gnomes?
Unfortunately I do not have a master list of yarn and amounts. We are working on this project month by month. But I can tell you that you need less than one skein of each color for each gnome (and sometimes much less) so feel free to re-use some of your yarn or use what you have on hand.
BONUS FEBRUARY GNOME GRAPH!
This design is a bit simpler so I wanted to include it in this post. I know color changes can be hard so I tried to minimized that with this version.
Download the free February Gnome (option #2) graph HERE
Download the free PDF Written Pattern of option 2 HERE
ANOTHER BONUS FEBRUARY GNOME GRAPH!
Don’t stop crocheting because I am including A THIRD valentine gnome option! Many of your are crocheting more than one gnome each month to make multiple blankets or matching pillows, etc. So here is just one more fun design that I had to share with you!
Download the free February Gnome Graph (option #3) HERE
Download the free PDF Written Pattern of option 3 HERE

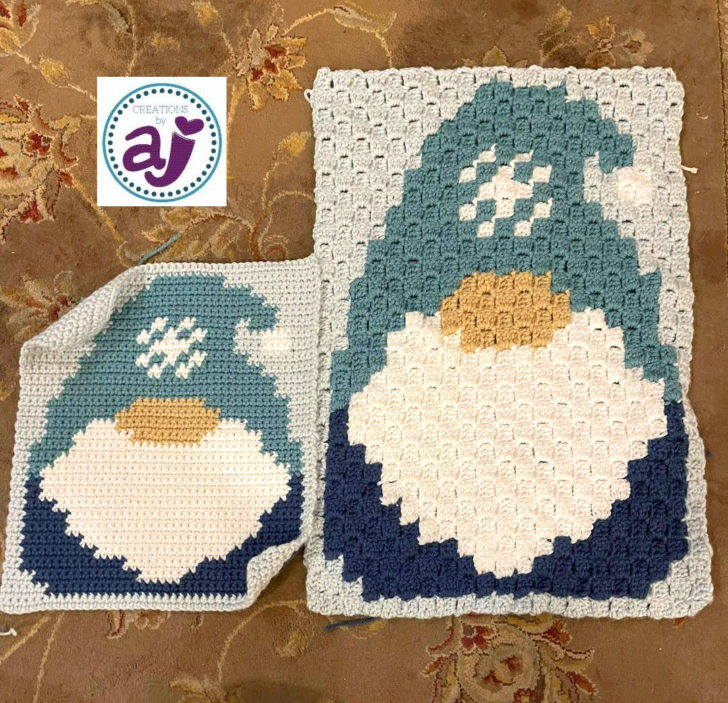
Look at how cute January and February look together!
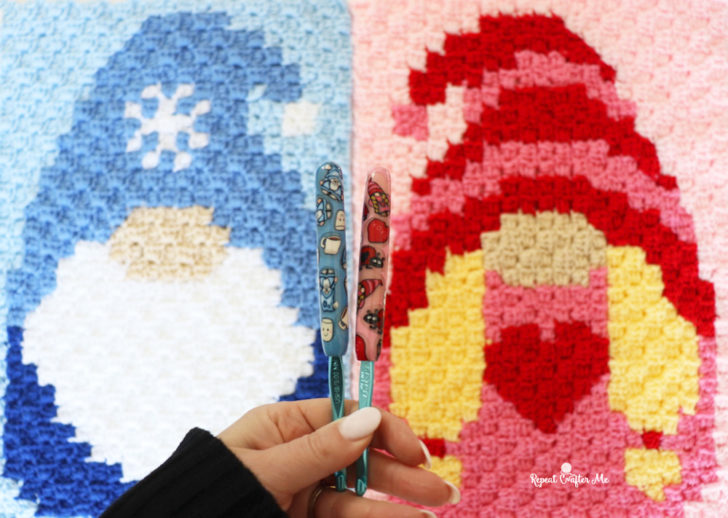
Get the January Winter Gnome C2C HERE
Be sure to post her finished gnomes and pictures of your hooks on social media using hashtag #2022gnomeproject