
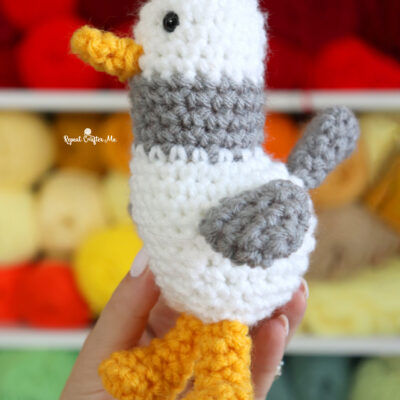
If you’ve been following my blog for awhile you have probably seen my other Lovey blankets including a monster, puppy, and robot! Now I am adding one more to the list: an owl! Since owls are very popular right now, you shouldn’t have a hard time finding owl-themed fabric at your local fabric store. I saw at least 3 or 4 different owl patterned fabric when I was shopping at Jo-Ann’s (which is where I bought the fleece for this project).
Materials:
– Fleece fabric (I purchased a yard but you will only need a 10.5×12″ piece of it)
– Worsted weight yarn: I used Lion Brand Vanna’s Choice in pink poodle, pink, white and mustard (yellow)
– Large Safety Eyes
– Rotary Cutter and Skip Stitch Blade:
I purchased my skip stitch blade from the Project Linus website but unfortunately it looks like it is no longer available there. You can find the same one HERE on the Skip-Stitch website. I have the “original skip stitch blade” (Blade #1) and you will need a Fiskars 45mm Contour Rotary Cutter
– Size H Crochet Hook
– Size G Crochet Hook
– Tapestry Needle
– Poly-fil
– Stitch Marker
Abbreviations:
Magic Ring = Tutorial HERE
SC = Single Crochet
HDC = Half Double Crochet
DC = Double Crochet
SC Decrease = Single Crochet Decrease
TC – Triple Crochet

Owl Head: (you will not join your rounds. Use a stitch marker if needed)
Use size H 5.0mm Crochet HookCh 15, SC in 2nd chain from hook and rest of way down chain. Make 2 SC in last chain (15 SC)
Now working on the other side of chain, SC down chain (14 SC)
Rd 2: 2 SC in first stitch, SC in next 13 stitches, 2 SC in next stitch, SC in next 14 stitches, 2 SC in next stitch.
Rd 3: SC in next 14 stitches, 2 SC in next 2 stitches, SC in next 14, 2 SC in next 2 stitches.
Rd 4-9: SC in each stitch around (36 SC)
Rd 10: SC in next 16, SC decrease, SC in next 16, SC Decrease.
Rd 11: SC in next 15, SC decrease, SC in next 15, SC Decrease.
Rd 12: SC in each stitch around (32 SC)
Rd 13: SC in next 14, SC Decrease, SC in next 14, SC Decrease.
Rd 14: SC in each stitch around (30 SC)
Rd 15: SC decrease, SC in next 13, SC decrease, SC in next 13.
Fasten off leaving extra long tail. Sew on eyes and nose first and then stuff lightly with poly-fil and stitch top of head closed.
With white yarn..
Magic ring, make 6 SC in ring, join, ch 1
Rd 2: 2 SC in each stitch around, join, ch 1 (12 SC)
Rd 3: 2 SC in first stitch, SC in next, repeat around (18 SC)
Change color
Rd 4: Loosely SC in each stitch around. It will curl up a little but should lay down nicely once you sew it on.


Wings (make 2)
Use size H 5.0mm Crochet HookMagic ring, make 6 SC in magic ring, do not join, continue to SC in rounds
Rd 2: 2 SC in first stitch, SC in next, repeat around (9 SC)
Rd 3: SC in each stitch around (9 SC)
Rd 4: 2 SC in first stitch, SC in next 2, repeat around (12 SC)
Rd 5: SC in each stitch around (12 SC)
Rd 6: 2 SC in first stitch, SC in next 2, repeat around (16 SC)
Rd 7: SC in each stitch around (16 SC)
Rd 8: 2 SC in first stitch, SC in next 3, repeat around (20 SC)
Rd 9: SC in each stitch around (20 SC)
Rd 10: 2 SC in first stitch, SC in next 4, repeat around (24 SC)
Rd 11: 2 SC in first stitch, SC in next 5, repeat around (28 SC)
Rd 12-15: SC in each stitch around (28 SC)
Rd 16: SC Decrease, SC in next 2 stitches, repeat around
Rd 17: SC Decrease, SC in next, repeat around
stuff with poly-filRd 18: SC decrease closed.
Feet:
Use size H 5.0mm Crochet HookMagic ring, make 6 SC in ring, continue to SC in rounds
Rd 2: 2 SC in each stitch around (12 SC)
Rd 3: SC in each stitch around (12 SC)
Rd 4: 2 SC in first stitch, SC in next, repeat around (18 SC)
Rd 5-6: SC in each stitch around (18 SC)
Rd 7: SC Decrease, SC in next, repeat around
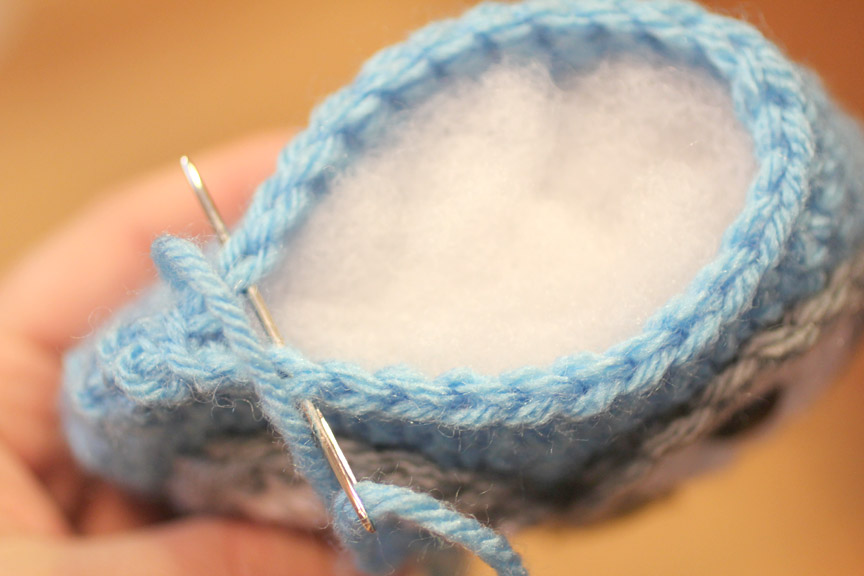
Step 1: Lighty stuff with poly-fil and sew shut.
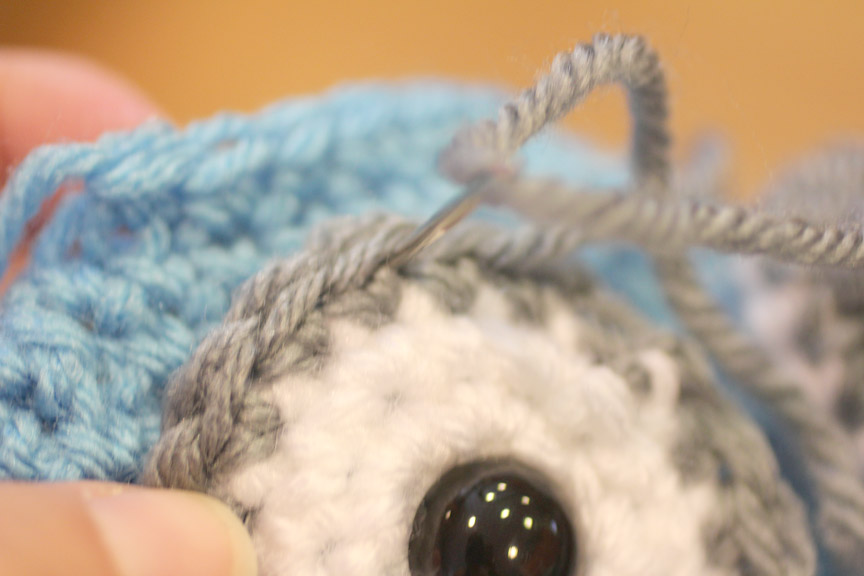
Step 2: Now take your tapestry needle and weave it back about 2 stitches.
Step 3: Loop yarn around the stuffed foot and sew your needle back through the starting point. Pull tight. Do this twice.
Step 4: Weave your needle back towards the other side of the foot and repeat step 3.

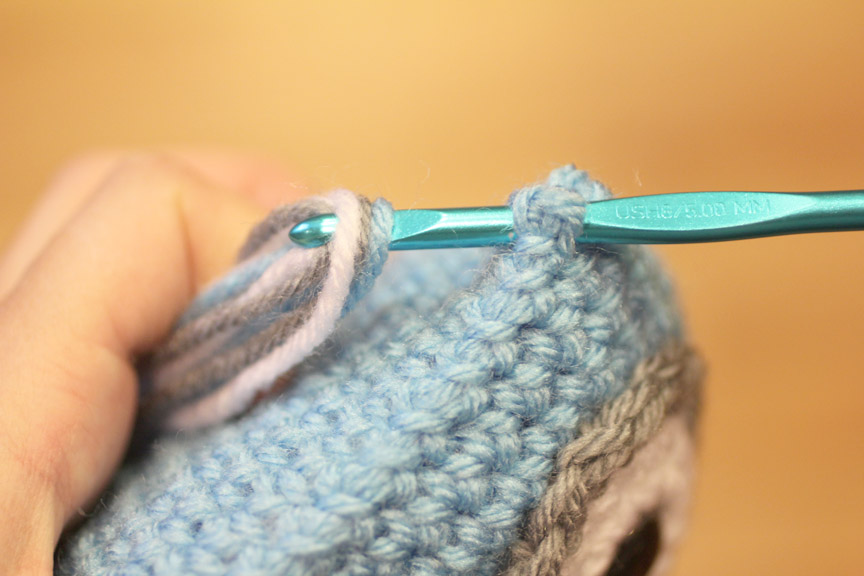
Now you are going to want to sew all your pieces onto the fabric. Cut a 10.5 x 12″ piece of fabric (this is approximate. You can make yours any size you want). Trim the corners so they are slightly rounded. Now create holes around the edge to crochet through with a skip stitch blade and a ruler as a guide. Holes should be made about 1/2 inch from the edge.

Starting in any hole (preferably NOT the corner), crochet around the edge of the fleece by making a SC in each hole, chain 1, SC in next hole, repeating around.
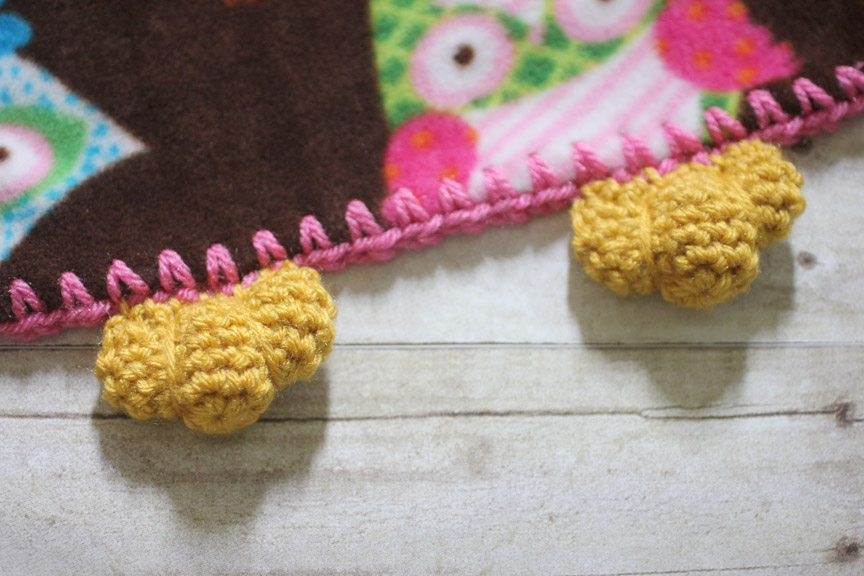
Sew all the pieces onto the edge of the fabric. I get a lot of people asking me how to sew the pieces onto the edge of the fabric. All you need to do is weave your tapestry needle under the stitches you made around the fabric and then through the bottom of each piece. Hopefully this picture will help give a better visual.

*** You may make and sell products from my patterns but if you do I ask that you link back to my post. Please do not copy and post this pattern and claim it as your own. Please do not re-publish photos as your own.***
Want more free patterns? Keep in touch on my Repeat Crafter Me Facebook Page for new pattern sneak peeks and when they will be available on my blog!
I also want to give a shout out to two of my followers who were inspired to make their own owl lovey blankets based off of my other lovey blanket patterns! They are both so cute and for sale if you are interested in placing an order with them:
The Bundled Pumpkin and La Capitaine Crochète

 Starbucks Stitch Markers and Bottled Beverages
 Crochet Christmas Tree Pixel Square
 Crochet Santa Pixel Square
 Crochet Daisy Rug with Clover Amour Large Hooks and Giveaway!
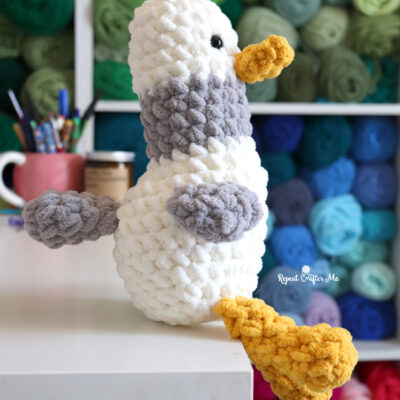

I Love it!!!
Thanks for sharing 🙂
This is so precious! MUST learn crochet!!! Until then, will be inspiring grandma with this one! 🙂 Thanks!
I need to do this once I can afford that special blade.
I need to do this once I can afford that special blade.
Sarah this is my favorite!! I LOVE it 🙂 Thank you for sharing the pattern and also the technique for adding the crocheted pieces to the finished blanket. Rhondda
Hi! I really love the blanket -would make a nice birthday present for my daycare kiddies!!Hopefully i can find a fleece fabric like yours in Austria! Thanks for sharing it! Carmen
Congrats!….you have done a great job , mu granddaughter is coming to this world in September with the Grace of God…..this is a great idea to make one for her.Thanks for sharing .
Xo,Xo,Xo………..Luna 🙂
I'm so happy you shared this!!! I've been wanting to make one for my grand-daughter since you posted your other loveys but never had the time to sit and work on my own owl pattern!!! You're AWESOME thank you!!!!!!
They just keep getting more and more fun. This is my favorite, I think. love Carol
Sarah – this lovey is incredible! I would have squealed with delight should I have received this as a gift! That owl is just too adorable!
how cute!
Debbi
–yankeeburrow
You always have THE cutest patterns! Thank you so much for these. 🙂
xoxo
Michelle @ Ya Gotta Have a Hobby
This is so cute. Every baby will love it.
Lisa
These are some of the cutest things I've ever seen! Thanks so much for sharing the instructions! I am not great at crochet, but I will certainly pass this along to those who are and hopefully work out a craft project "trade" with them in order to get one for my daughter, haha! Stopping by from Hoyby Crafts.
Very cute!Well done!
http://freestilcreatingbyvilly.blogspot.gr/
Oh My!!! I Loooooooooove it! I'm crazy about owls and this peace is super cute! loving and pining!!!
Hugs
Cami @ TitiCrafty by Camila
Adorable, thanks for sharing!
that is so cute! I never thought of adding crocheted details to a fleece blanket! Awesome! 🙂
I love these blankets, especially the owl and the robot! I'm pinning this! Thanks for sharing the pattern! I'll definitely have to make one for a Christmas present or something! 🙂
Navy Wifey Peters @ Submarine Sunday Link Party
I love these! i've been following for a while and I saw you had used the Sharp Crochet Hooks on a few of your projects. What do you think would be easier for somebody just trying to crochet edgings onto fleece, the skip stitch blade or the sharp crochet hook?
I have both & trust me the Skip Stitch Blade is WAY WAY WAY better lol
Do you have a video for this pattern? I'm confused on the head. Thanks
Yea I'm a lil lost here too lol… I figured on RND 1 instead of 14 sts I did 13, the only way I could get it to work 🙁 Then it still turned out a lil lopsided… I'm gonna keep tryin tho lol let me know if u got please!!!
Did you ever figure this out? I made on blanket and somehow it turned out but going to make the second one i’m still having the same issue with the head counts not working out and I have no idea how I did it the first time!
I've seen all the other lovey blanket patterns you posted but I missed this one. How adorable!
I've been working on a fish hat for a friend and have been stuck trying to figure out the fins. I was trying to use a pattern I found on Red Heart's website for a parrot – claws were kind of close – but it hasn't been working out in my favor. These feet are perfect! Thanks for sharing.
Alexandra
EyeLoveKnots.blogspot.com
Could you clarify rounds 1-3 or post a video. I feel like there is a number mistake. I have made this sooooo many times and it just isn’t working.
Thank you for sharing. I’m legally blind and only see 20% out of each eye. God still has blessed my that I can crochet and make other smile. I make a lot of lap blankets for the VETS. and onlyless in our area. People keep giving me bags of yarn. So you have been a blessing to me. Thank you sweet lady. Marlene