
My baby girls room is starting to come together nicely. I love seeing the room transform from blue to pink 🙂 I had wall space over her dresser that was screaming for some wall art. I was inspired by all the wooden alphabet letters that are on Etsy. But wow, they are expensive! I couldn’t find anything under $60. I especially loved this Orange Typography Collage. The monochromatic color was just the thing I wanted for this part of the room. So I set out to make my own version – on a budget! I lucked out because Michaels Craft Store had just the things I needed.

Materials:
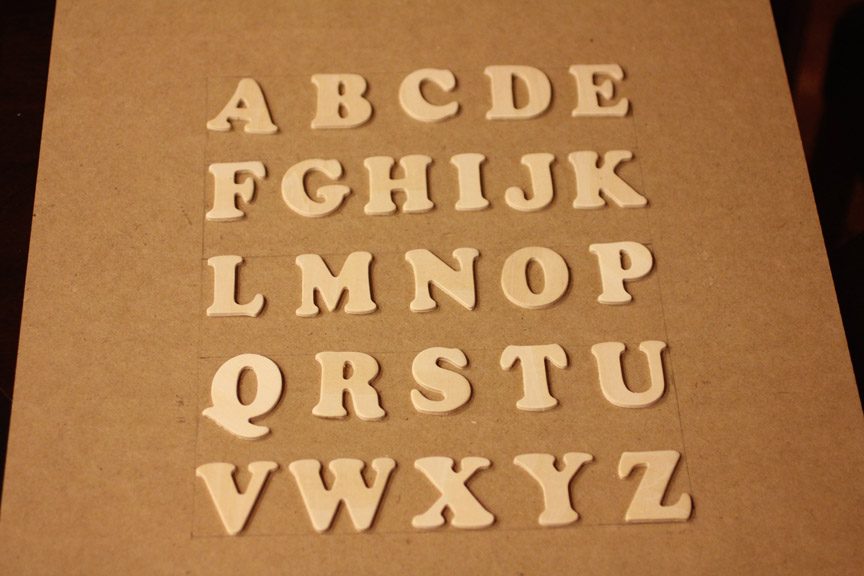
– Small wooden craft letters. I purchased ArtMinds Memoir Alphabet Letters. They are approx. 1.5″ tall. and cost me $3.99!
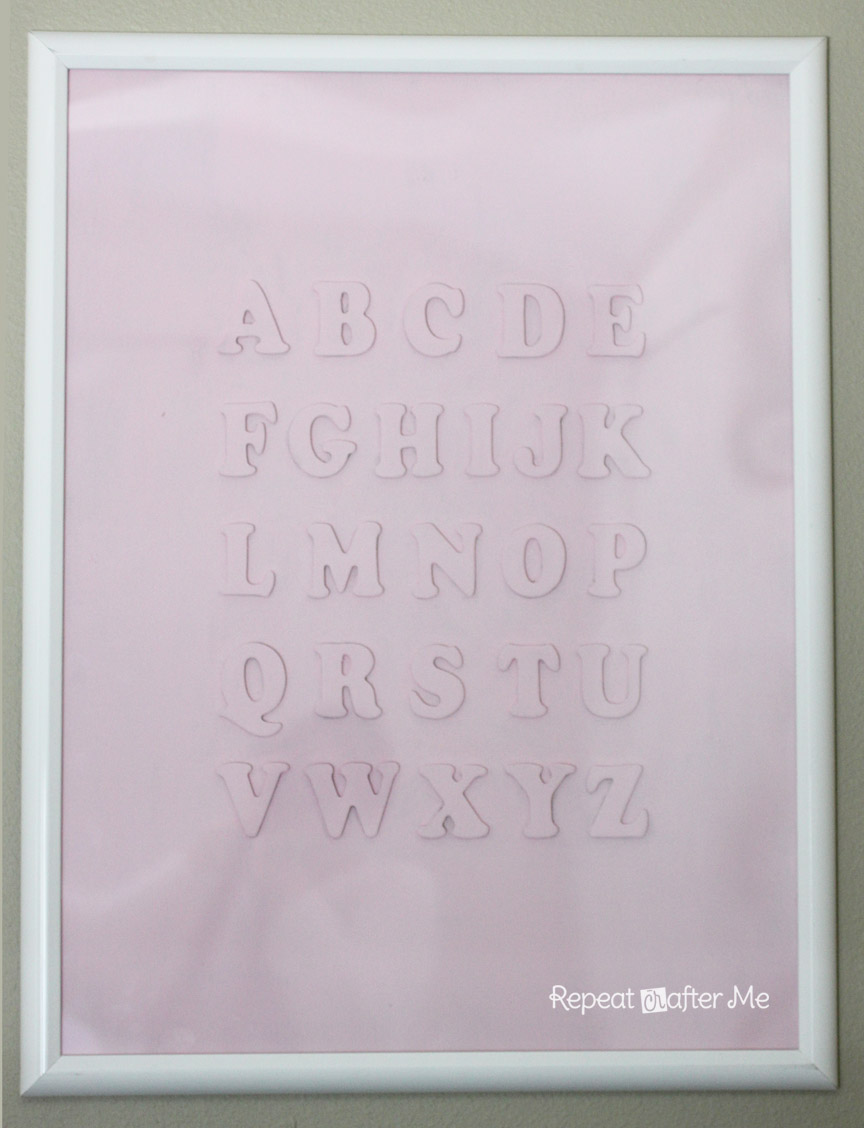
– 18×24 inch frame. I found a cheap plastic white frame on sale at Michaels for $10.00. It is light weight and still looks nice on the wall. Obviously you could go for something a little nicer…up to you 🙂
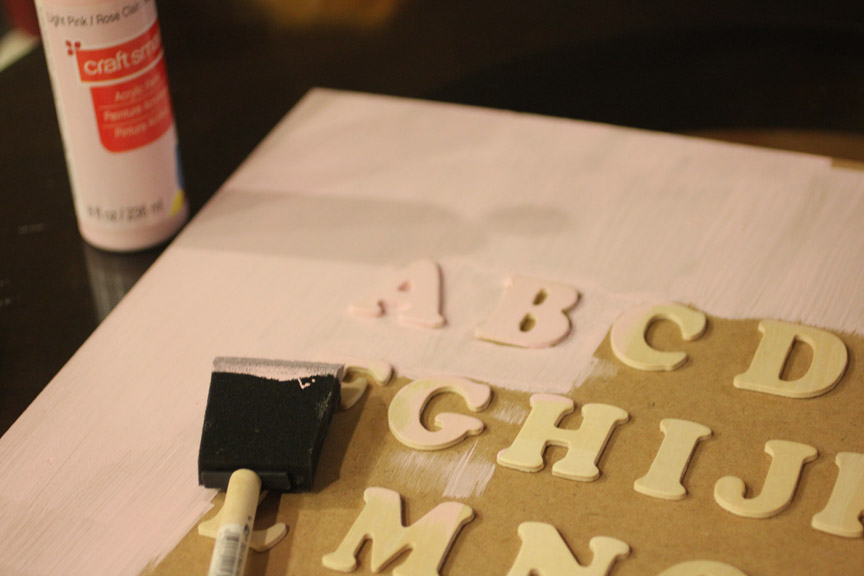
– Acrylic paint or spray paint. I’m not very good with a spray paint can so I chose to use acrylic paint. Looking back on it, I think spray paint may have been the easier/better way to go. If you do this project and use spray paint, let me know how it turns out! I used Craft Smart brand acrylic paint in Light Pink.
– Hot glue gun
– Paint brushes (if you paint with acrylic)
First order of business is to position your letters on the back of the frame (the cardboard part). I am no good at math but here is how I calculated how they should lay: I measured and marked (with pencil) 5.25″ from the top and bottom and 3.75″ from each side. This created a box that was approximately 13×10.25″. Position the top and bottom letters first and then the middle rows should have about an 1″+ a pinch between each row. You should have 5 rows of letters. The second row should have 6 letters (The “I” is skinny so you can squeeze them all in) and the rest of the rows should have 5 letters. Of course you could position the letters any way you want. Especially if you end up buying more whimsical looking letters. When everything is positioned to your liking, glue each letter down with a hot glue gun.
Now paint over the entire piece! I used a bigger brush to paint first and then went in with a small brush to get inside and around the letters. Try and get all your brush strokes to go in the same direction. You will need 2-3 coats but it should dry with a pretty consistent color. This is why I mentioned that spray paint may have been easier: No brush strokes and more of an even color (I think?).
When the paint had dried, put your piece back in the frame with the glass/plastic on top. For the sake of the photo, I had to photograph it without the glass on top because it was causing too much of a reflection, but it looks really nice hanging in the room! Note: bottom photo has the glass on top…actually its just plastic 🙂
There are so many color options for this piece. You could customize it for a boy or girl or make it multiple colors or you could paint the letters a different color from the background. So many ideas come to mind! You can make it just how you want it for your kids room or play room.


 Starbucks Stitch Markers and Bottled Beverages
 Crochet Christmas Tree Pixel Square
 Crochet Santa Pixel Square
 Crochet Daisy Rug with Clover Amour Large Hooks and Giveaway!
So simple…and so elegantly adorable! I love it!!
Love this! 🙂
Super cute! I love how subtle this artwork is!
Welcome to https://schriftarten.io/, the ultimate font generator for anyone looking for beautiful fonts.
Bring your words to life! Choose from thousands of text style options with Yazistilleri.io. Reflect your style with Instagram text styles, handwritten fonts, emoji fonts and more.
Love how you made your own wall art! I’m curious, did you try any other letter arrangements before settling on this one? Share more DIY tips!