One of my favorite fellow crochet bloggers has just released a FREE amigurumi ebook with 8 awesome patterns! You may remember Ophelie and her blog Ahooka’migurumi by her totally cute unicorn: Tinycorn! Well now she has compiled an ebook of many of her best patterns with step-by-step instructions and photo tutorials. There are projects for those who are new to amigurumi or those who want more of a challenge. You definitely don’t want to miss out on these great designs! Head over to Akooha blog to download the ebook for FREE! Plus Ophelie has graciously allowed me to post her Girl Minibuddies pattern right here on my blog! Scroll down for complete pattern.
Girl Minibuddies pattern
Approx size : 9 cm high (3.5 inches)
Materials
- Fingering weight yarn – I used Drops Safran in
color 21 : beige (skin color)
color 52 : dark brown (hair#1)
color 11 : strong yellow (hair#2)
color 13 : raspberry (T-shirt#1)
color 51 : petrol (T-shirt#2)
color 09 : navy blue (jeans)
color 16 : black (pants)
- A 2.5 mm hook (C/2)
- A tapestry needle (or yarn needle)
- A stitch marker
- Stuffing (fiberfill)
- A 10mm pair of black safety eyes per doll
Abbreviations
- st = stitch(es)
- ch = chain
- sc = single crochet
- MR = magic ring
- inc = increase (make 2sc in the next stitch)
- dec = decrease (single crochet 2 stitches together – I use the invisible decrease technique but sc2tog would do just fine)
- BLO = back loop only
- Inv.FO = Invisible finish of
- Inv.CC = Invisible color change
Both videos to make an invisible finish and an invisible color change are available HERE
- Rnd = round
- FO = fasten of
- (…,…)*x = repeat « x » number of times the instructions between brackets
Notes
– This pattern is worked in continuous round : do not join or turn unless stated otherwise.
– Mark the last stitch of the round with your stitch marker in order to check that you’ve made the right amount of stitches in the round.
– Mark the last stitch of the round with your stitch marker in order to check that you’ve made the right amount of stitches in the round.
The pattern
Legs (make 2)
With pants color :
Rnd 1 : sc6 in a MR(6)
Rnd 2 : inc*6 (12)
Rnd 3 : BLO : sc12 (12)
Rnd 4 : (sc2, dec)*3 (9)
Rnd 5 : sc in each st (9)
Inv.FO the first leg but don’t FO the second leg and go on with the body instructions. Pic.1
Body/Head
Rnd 6 : sc4 on the leg you are working on, then sc9 on the other leg and finally, sc5 on the previous leg again. (18)
Rnd 7 : sc18 (18)
Start to stuff and continue as you go. The bottom of the legs should stay flat. Pic.2-3
Inv.CC to skin color.
Rnd 8 : BLO : sc18 (18)
Rnd 9 : sc18 (18)
Inv.CC to T-shirt color. Pic.4
Rnd 10 : (sc4, dec)*3 (15)
Rnd 11-12 : sc in each st (15)
Inv.CC to skin color.
Rnd 13 : (sc, dec)*5 (10)
Rnd 14 : dec*5 (5)
Rnd 15 : inc*5 (10)
Rnd 16 : inc*10 (20)
Rnd 17 : (sc4, inc)*4 (24)
Stuff the neck firmly. Pic.5
Rnd 18 : (sc3, inc)*6 (30)
Rnd 19 : sc2, inc, (sc4, inc)*5, sc2 (36)
Rnd 20-24 : sc in each st (36)
Rnd 25 : sc2, dec, (sc4, dec)*5, sc2 (30)
Rnd 26 : (sc3, dec)*6 (24)
Insert safety eyes between rnd 21 and 22, 6 stitches apart. Stuff the head and continue as you go. Pic.6
Rnd 27 : sc, dec, (sc2, dec)*5, sc (18)
Rnd 28 : (sc, dec)*6 (12)
Rnd 29 : dec*6 (6)
FO leaving a long tail to embroider the nose. Weave the yarn tail through the front loop of each remaining stitches and pull it tight in order to close off the head. Then, embroider the nose as shown in the pictures. Pic.7-10
Arms (make 2)
With skin color :
Rnd 1 : sc6 in a MR (6)
Rnd 2-7 : sc in each st (6)
FO leaving a long tail for sewing to the body. Pin them into place and sew them on. Pic.11-12
Hair
With hair color :
Rnd 1 : sc6 in a MR (6)
Rnd 2 : (sc, ch15, sc in 2nd ch from hook and in the 13 remaining stitches, sc in the same stitch as the first sc)*5, inc in the last stitch. Pic.13-14
Rnd 3 : (sc, raise the piece of hair made on the previous round up and sc on the other side
Pic.15, ch14, sc in 2nd ch from hook and in the 12 remaining stitches, sc again in the stitch at the base of the piece of hair you’ve just made)*5, sc, inc in next st. Pic.16
Rnd 4 : (sc2, raise the piece of hair made on the previous round up and inc on the other side)*5, sc2, inc (24)
Rnd 5 : (sc4, ch12, sc in 2nd ch from hook and in the 10 remaining stitches, sc in the same stitch as the last “sc4”)*5, sc3, inc
Rnd 6 : sc2, ch11, sc in 2nd ch from hook and in the 9 remaining stitches, sc in the same stitch as the last “sc2”, (sc2, raise the piece of hair made on the previous round up and sc3 on the other side, ch11, sc in 2nd ch from hook and in the 9 remaining stitches, sc in the same st as the last “sc3”)*4, sc4, inc, sc3. Pic.17
Rnd 7 : sc2, raise the piece of hair made on previous round up and continue on the other side, (sc6, raise the piece of hair made on previous round up and continue on the other side)*4, sc10 (36)
Rnd 8-9 : sc in each st (36)
Rnd 10 : sc4, (sc, ch10, sc in 2nd chain from hook and in the 8 remaining stitches, sc in next stitch)*11. Pic.18
Don’t finish the round and Inv.FO + leave a long tail for sewing if you’d like to sew the hair on the head, or weave in the ends if you’d rather keep it as a wig.
Note : depending on the type of yarn you use, you might need to wet the hair a little bit and pin it in place while it dries so it don’t get all messy. Pic.19-20
And you’re done !
Boy Minibuddies pattern is included, with 7 more patterns, in the free eBook, available to download in English (or in French) Download the FREE Ahooka Amigurumi ebook HERE


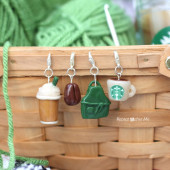 Starbucks Stitch Markers and Bottled Beverages
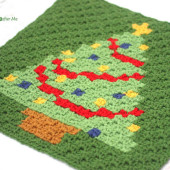 Crochet Christmas Tree Pixel Square
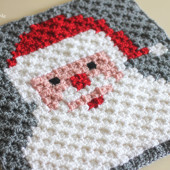 Crochet Santa Pixel Square
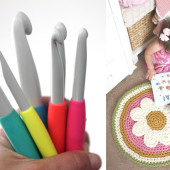 Crochet Daisy Rug with Clover Amour Large Hooks and Giveaway!
Super ! Thank you very much ! Have a nice day !
Thanks for such a brilliant free gift! Ideal for people like me wanting to go to the next step!!, ⭐️
Hi just found you web site I love your beautiful patterns and ideas I can’t wait to try some of the patterns out and to show my friends H
Very Nice site bat not Hollands ???I hope you can do iT in Hollands. Bay janny
Now that I have the information, I hope to have more information
Listen to my words my friends. I never been so excited with any online game but i found robux that is really awesome. This how do you get robux for free weblog tell you where to get that and play without spending money.
Hey there buddy I am impressed with your handcraft designs from where you have learned all these kinds of stuff? And do you need help in promotion through blogs then do message me.
Regards
But I prefer to delegate this duty to experts
I am not familiar with this information. It is quite beneficial to me. I appreciate you sharing.