Gobble Gobble! I’m cutting it close, but I finished this crochet turkey hat just in time for Thanksgiving! I know, it’s short notice, but you do have a little over a week to make one too! Or you can go ahead and pin this for later 🙂
Materials:
-Bernat Super Value Yarn in Topaz (tan brown for majority of hat), Bright Yellow, Pumpkin, Kelly Green, Taupe or Chocolate Brown, and teeny bit of Red. Shop all yarn colors at Yarnspirations.com!
– Size H Crochet Hook
– Comic Safety Eyes. You can purchase these HERE on Amazon (aff).
– Tapestry needle
Abbreviations:
Magic Ring
SC = Single Crochet
SC Decrease = Single Crochet Decrease
HDC = Half Double Crochet
DC = Double Crochet
Basic hat is crocheted in Topaz brown.
Magic ring, 11 DC in magic ring, join to first DC, chain 2
Round 2: 2 DC in each around, join, chain 2 (22 DC)
Round 3: 2 DC in first, DC in next, repeat around, join, chain 2 (33 DC)
Round 4: 2 DC in first, DC in next 2, repeat around, join, chain 2 (44 DC)
Round 5-10: DC in each around, join, chain 2 (44 DC)
Round 3: 2 DC in first, DC in next, repeat around, join, chain 2 (33 DC)
Round 4: 2 DC in first, DC in next 2, repeat around, join, chain 2 (44 DC)
Round 5: 2 DC in first, DC in next 10, repeat around, join, chain 2 (48 DC)
Round 6-11: DC in each around, join, chain 2 (48 DC)
do not fasten off, begin on earflap as written below
Magic ring, 11 DC in magic ring, join to first DC, chain 2
Round 3: 2 DC in first, DC in next, repeat around, join, chain 2 (33 DC)
Round 4: 2 DC in first, DC in next 2, repeat around, join, chain 2 (44 DC)
Round 5: 2 DC in first, DC in next 10, repeat around, join, chain 2 (48 DC)
Round 7-12: DC in each around, join, chain 2 (52 DC)
Round 2: 2 DC in each around, join, chain 2 (22 DC)
Round 3: 2 DC in first, DC in next, repeat around, join, chain 2 (33 DC)
Round 4: 2 DC in first, DC in next 2, repeat around, join, chain 2 (44 DC)
Round 5: 2 DC in first, DC in next 10, repeat around, join, chain 2 (48 DC)
Round 6: 2 DC in first, DC in next 11, join, chain 2 (52 DC)
Round 7: 2 DC in first, DC in next 12, join, chain 2 (56 DC)
Round 8-13: DC in each around, join, chain 2 (56 DC)
do not fasten off, begin on earflap as written below
Magic ring, 11 DC in magic ring, join to first DC, chain 2
Round 2: 2 DC in each around, join, chain 2 (22 DC)
Round 3: 2 DC in first, DC in next, repeat around, join, chain 2 (33 DC)
Round 4: 2 DC in first, DC in next 2, repeat around, join, chain 2 (44 DC)
Round 6: 2 DC in first, DC in next 11, join, chain 2 (52 DC)
Round 8: 2 DC in first, DC in next 13, join, chain 2 (60 DC)
Round 9-14: DC in each around, join, chain 2 (60 DC)
do not fasten off, begin on earflap as written below
Round 2: 2 DC in each around, join, chain 2 (22 DC)
Round 3: 2 DC in first, DC in next, repeat around, join, chain 2 (33 DC)
Round 4: 2 DC in first, DC in next 2, repeat around, join, chain 2 (44 DC)
Round 5: 2 DC in first, DC in next 10, repeat around, join, chain 2 (48 DC)
Round 6: 2 DC in first, DC in next 11, join, chain 2 (52 DC)
Round 7: 2 DC in first, DC in next 12, join, chain 2 (56 DC)
Round 8: 2 DC in first, DC in next 13, join, chain 2 (60 DC)
Round 9: 2 DC in first, DC in next 14, join, chain 2 (64 DC)
Round 10-15: DC in each around, join, chain 2 (64 DC)
do not fasten off, begin on earflap as written below
Size: Teen/Adult
Magic ring, 11 DC in magic ring, join to first DC, chain 2
Round 2: 2 DC in each around, join, chain 2 (22 DC)
Round 3: 2 DC in first, DC in next, repeat around, join, chain 2 (33 DC)
Round 4: 2 DC in first, DC in next 2, repeat around, join, chain 2 (44 DC)
Round 5: 2 DC in first, DC in next 10, repeat around, join, chain 2 (48 DC)
Round 6: 2 DC in first, DC in next 11, join, chain 2 (52 DC)
Round 7: 2 DC in first, DC in next 12, join, chain 2 (56 DC)
Round 8: 2 DC in first, DC in next 13, join, chain 2 (60 DC)
Round 9: 2 DC in first, DC in next 14, join, chain 2 (64 DC)
Round 10: 2 DC in first, DC in next 15, join, chain 2 (68 DC)
Round 11-16: DC in each around, join, chain 2 (68 DC)
do not fasten off, begin on earflap as written below
____________________________________________
Chain 1, SC in next 10, chain 1, turn
Row 2: SC decrease, SC in next 6, SC decrease, chain 1, turn
Row 3: SC across (8 SC)
Row 4: SC decrease, SC in next 4, SC decrease, chain 1, turn
Row 5: SC across ( 6 SC)
Row 6: SC decrease, SC in next 2, SC decrease, chain 1, turn
Row 7: SC across (4 SC)
Row 8: Make 2 SC decreases, chain 1, turn
Row 9: SC decrease, fasten off, weave in ends
Second earflap placement: Fold hat in half leaving slightly more stitches in the front of the hat than the back. Place the second earflap to line up with the first earflap (Refer to earflap placement from the pictures available at the end of my puppy hat pattern).
Join yarn, chain 1, SC in next 10, chain 1, turn
Row 2: SC decrease, SC in next 6, SC decrease, chain 1, turn
Row 3: SC across (8 SC)
Row 4: SC decrease, SC in next 4, SC decrease, chain 1, turn
Row 5: SC across ( 6 SC)
Row 6: SC decrease, SC in next 2, SC decrease, chain 1, turn
Row 7: SC across (4 SC)
Row 8: Make 2 SC decreases, chain 1, turn
Row 9: SC decrease, and continue to SC around hat and earflaps, when you get to the top of each earflap: chain 40 (or as long/short as you wish), slip stitch in 2nd chain from hook and the rest of the way down the chain. Continue to SC around the hat and fasten off when you get the entire way around.
Chain 1, SC in next 12, chain 1, turn
Row 5: SC across (8 SC)
Row 6: SC decrease, SC in next 4, SC decrease, chain 1, turn
Row 7: SC across ( 6 SC)
Row 8: SC decrease, SC in next 2, SC decrease, chain 1, turn
Row 9: SC across (4 SC)
Row 10: Make 2 SC decreases, chain 1, turn
Row 11: SC decrease, fasten off, weave in ends
Second earflap placement: Fold hat in half leaving slightly more stitches in the front of the hat than the back. Place the second earflap to line up with the first earflap (Refer to earflap placement from the pictures available at the end of my puppy hat pattern).
Row 5: SC across (8 SC)
Row 6: SC decrease, SC in next 4, SC decrease, chain 1, turn
Row 7: SC across ( 6 SC)
Row 8: SC decrease, SC in next 2, SC decrease, chain 1, turn
Row 9: SC across (4 SC)
Row 10: Make 2 SC decreases, chain 1, turn
Row 11: SC decrease, and continue to SC around hat and earflaps, when you get to the top of each earflap: chain 40 (or as long/short as you wish), slip stitch in 2nd chain from hook and the rest of the way down the chain. Continue to SC around the hat and fasten off when you get the entire way around.
Turkey Head (make 2):
With light brown yarn…
Beak pattern: chain 3, make a SC in the second chain from hook and a HDC in the last chain. Fasten off.
Sew both head pieces together.
Fasten off leaving long tail to sew on to hat. Feel free to lightly stuff if desired!
Also, for larger size hats you may want to make a few more feathers so they fit nicely around the crown of the hat.


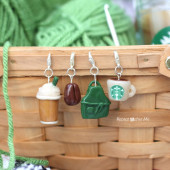 Starbucks Stitch Markers and Bottled Beverages
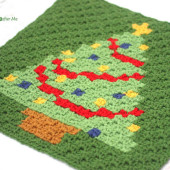 Crochet Christmas Tree Pixel Square
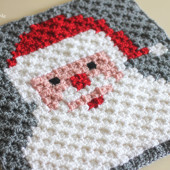 Crochet Santa Pixel Square
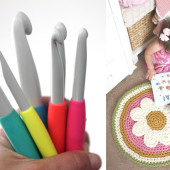 Crochet Daisy Rug with Clover Amour Large Hooks and Giveaway!
What size for the eyes?
I used Sassy Bears 18mm Flat Comic Safety Eyes. The posts were a bit long so I added a bit of batting inside the turkey to keep them from pushing through into the hat.
Do the feathers flop over or stand straight up when hat is worn? Would stuffing fix this?
Mine flopped, I think they would stand up if stuffed.
Thanks for the great pattern! I made 4 of these for my nieces and nephew. They were a hit at Thanksgiving dinner!
I made this hat and found that the feathers on top do stand up rather well once the hat is worn. i didnt stuff the feathers as they looked great without stuffing. Thank you Sarah for such a sweet pattern. Love your patterns and recommend them to many!
what size head does the adult size fit…my son has a large head 23.5 inches. thank you! 🙂
Great pattern. Made two of these, one for my daughter and one for her friend. The only tricky part for me was the beak.
https://www.ravelry.com/projects/Tinzebra/turkey-hat