
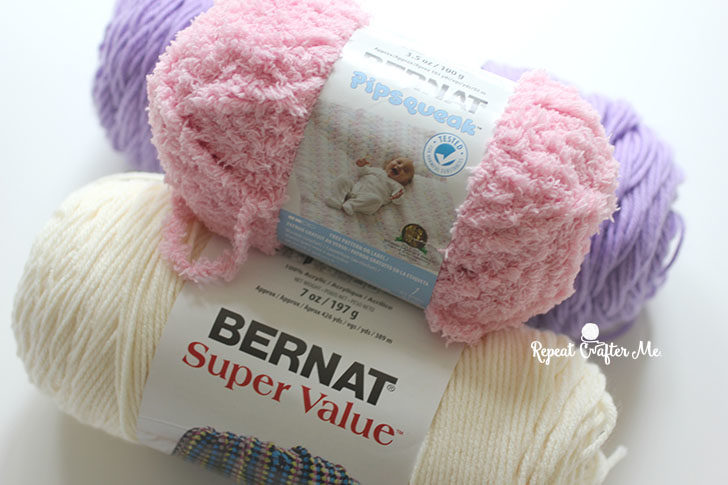
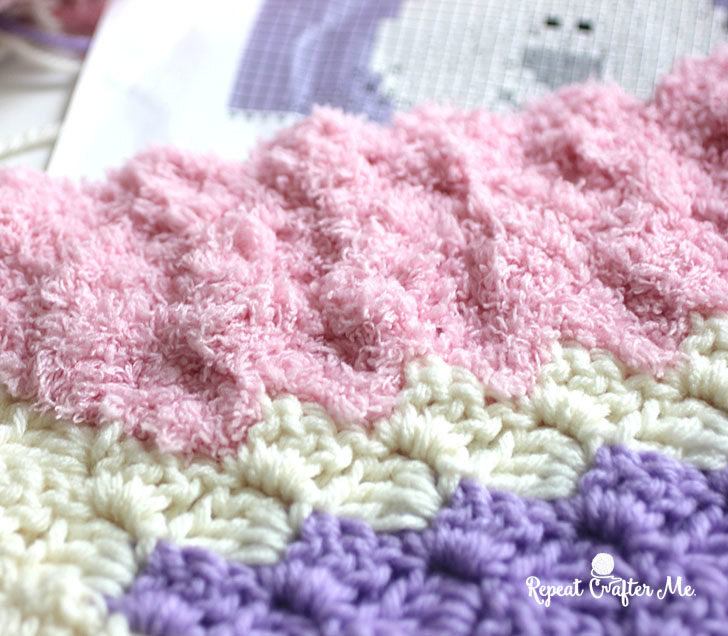
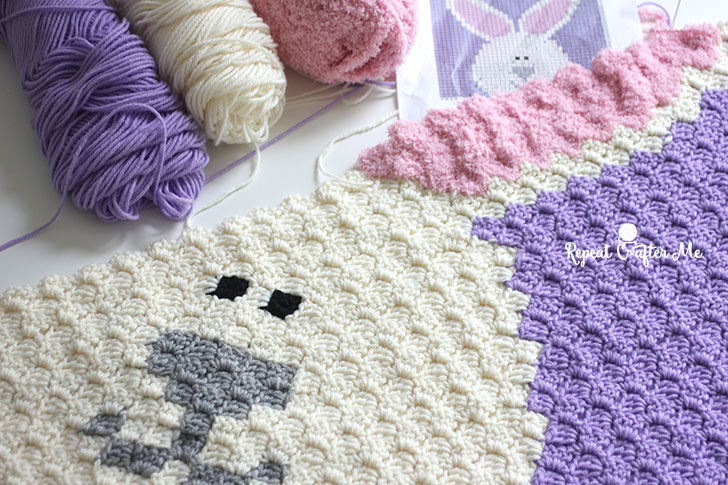
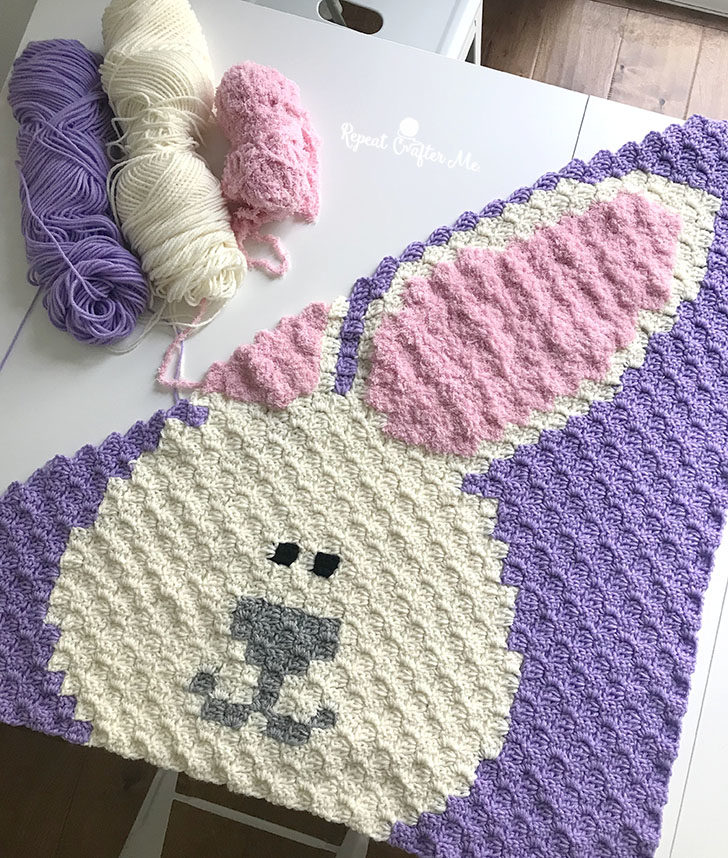
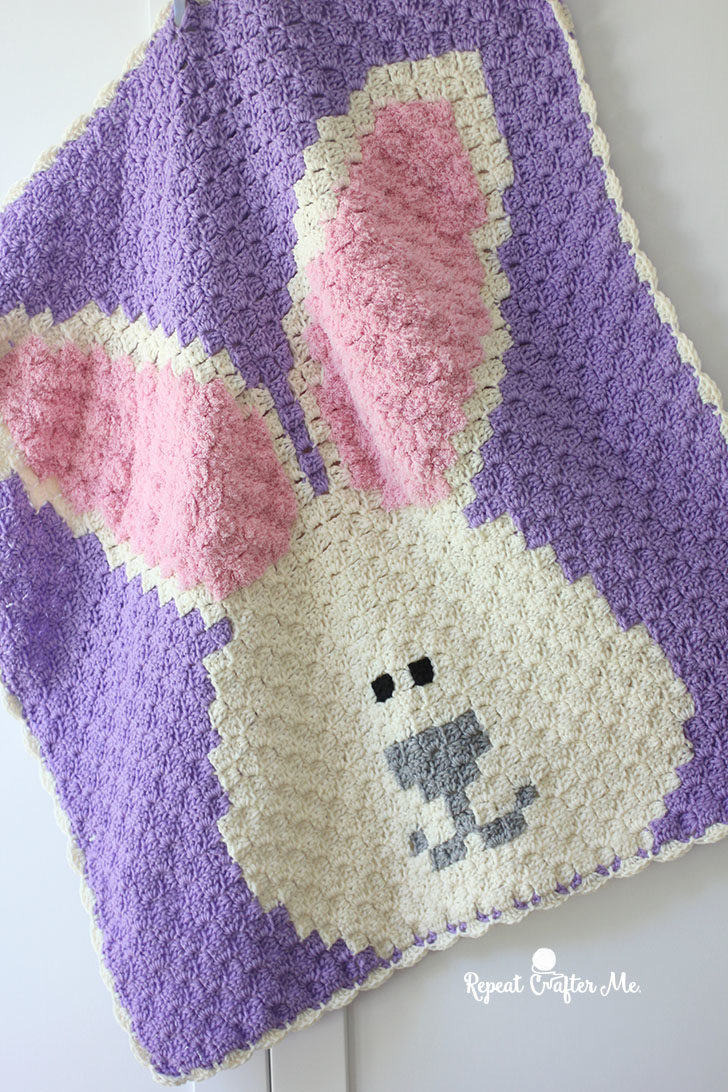
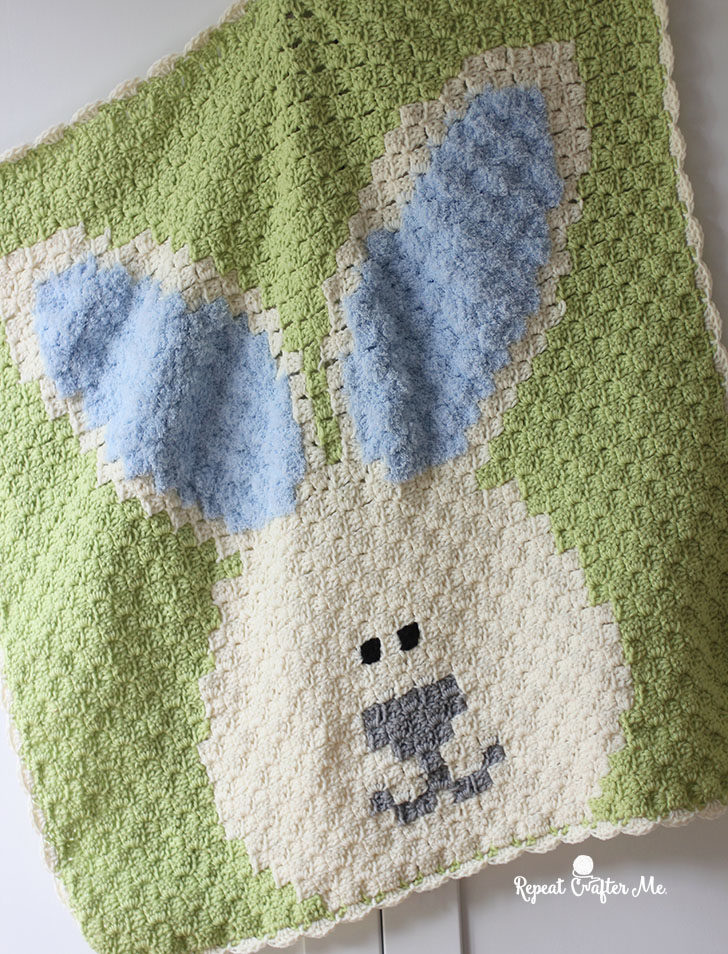
Easter is just a few weeks away but there is still plenty of time to crochet this Bunny C2C Blanket! It really only takes a few days! It also makes a perfect gift for those Spring Babies. The fun part about this blanket is that I used Bernat Pipsqueak yarn to make the ears incredibly fuzzy and soft! Typically Pipsqueak yarn can be difficult to work with because its a fur yarn which makes the stitches hard to see… but don’t fear! Corner-to-corner crochet is the a great match for this yarn! Since you are essentially crocheting over the chain from the previous rows square, there is no exact stitch that needs to be found. This yarn is such a simple element to add that gives the blanket a whole new look and feel! The rest of the blanket is made with my go-to worsted weight yarn: Bernat Super Value. Stock up on both yarns and shop all the color combos at Yarnspirations.com!
Materials:
– Bernat Super Value Yarn in Lilac (2 skeins), Natural (1 skein), Soft Gray (only small ball need) and Black (only two long strands needed for eyes)
– Bernat Pipsqueak Yarn in color Tickle Me Pink (2 skeins) NOTE: I ALMOST finished the second ear with just one skein – I had six more squares to go. I do believe you could make the bunny with only one skein by crocheting the ears tighter, using a HDC stitch instead of the DC, or going down a hook size.
– Size H Crochet Hook
– Tapestry Needle
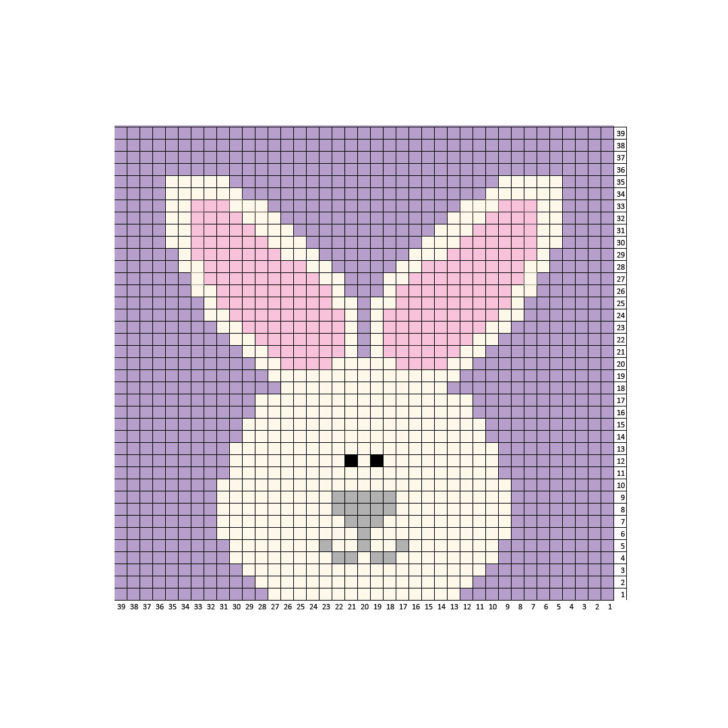
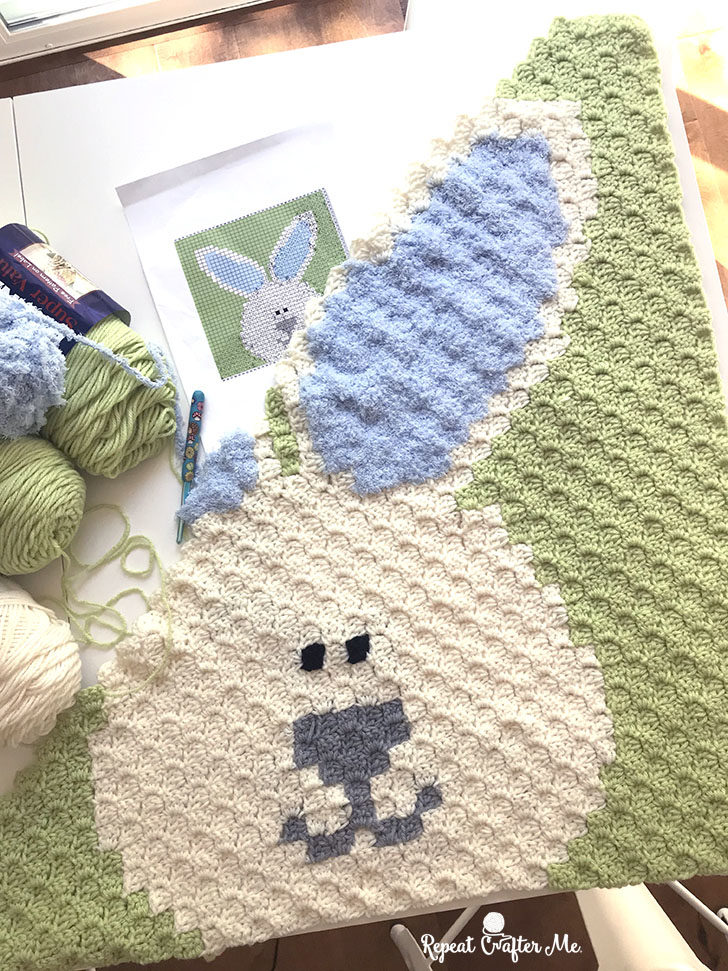
– Bunny Pixel Graph
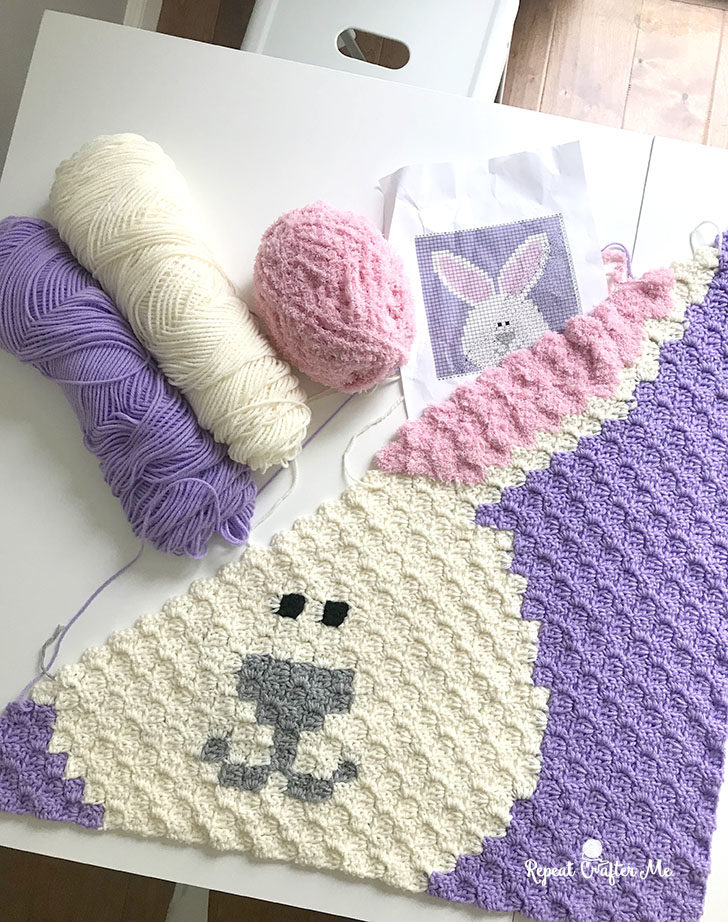
I used the Corner-to-Corner (C2C) method to crochet the graph. If you aren’t familiar with the C2C technique, I have a video class available HERE for purchase that teaches you this technique! This blanket is square so you don’t have to worry about increasing on one side and decrease on the other (like you would need to do in a rectangle blanket). So the square shape makes it less confusing if you are a newbie to corner-to-corner crochet. The Crochet Crowd also has a very helpful video tutorial for free that shows you the basic technique of corner-to-corner crochet. Check that out HERE.
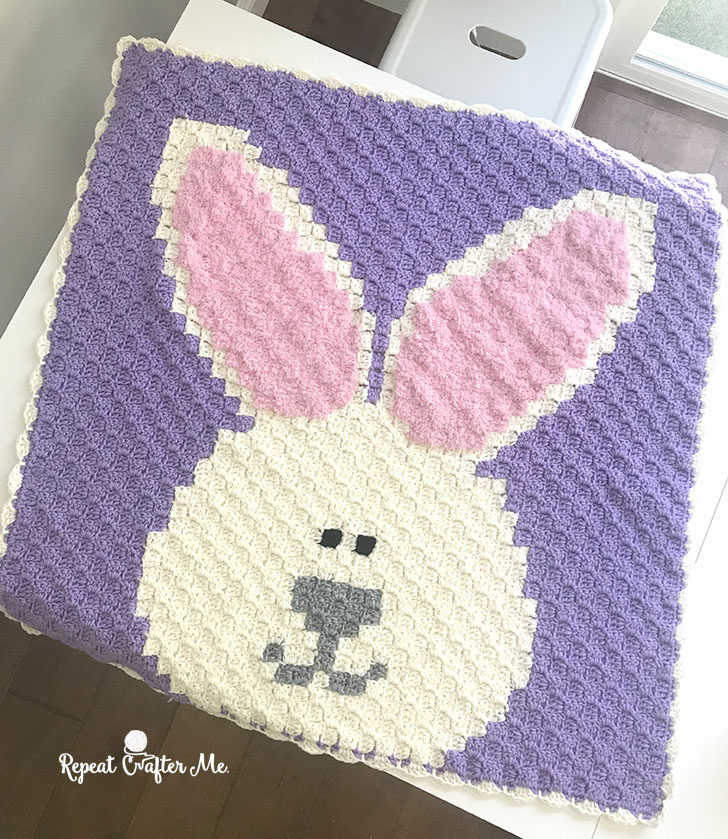
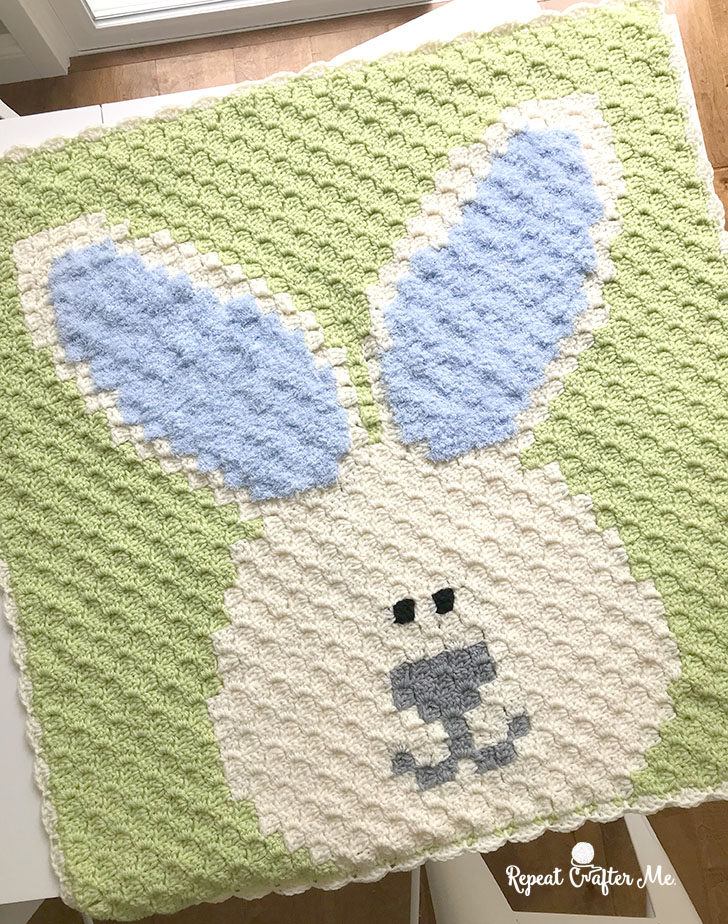
Finished blanket size is 32 x 32 inches (including the small border)
Download the FREE Bunny C2C Pixel Graph HERE
Big thanks to fellow crocheter Beth for writing out all the color changes!
V = Violet
W = White
G = Gray
B = Black
P = Pink
| C2C Bunny | ||
| Row 1 | Up | V1 |
| Row 2 | Down | V2 |
| Row 3 | Up | V3 |
| Row 4 | Down | V4 |
| Row 5 | Up | V5 |
| Row 6 | Down | V6 |
| Row 7 | Up | V7 |
| Row 8 | Down | V8 |
| Row 9 | Up | V9 |
| Row 10 | Down | V10 |
| Row 11 | Up | V11 |
| Row 12 | Down | V12 |
| Row 13 | Up | W4 V9 |
| Row 14 | Down | V8 W6 |
| Row 15 | Up | W7 V8 |
| Row 16 | Down | V8 W8 |
| Row 17 | Up | W9 V8 |
| Row 18 | Down | V8 W10 |
| Row 19 | Up | W10 V9 |
| Row 20 | Down | V9 W11 |
| Row 21 | Up | W3 G2 W7 V9 |
| Row 22 | Down | V9 W9 G1 W3 |
| Row 23 | Up | W13 V10 |
| Row 24 | Down | V10 W9 G2 W3 |
| Row 25 | Up | W3 G1 W1 G3 W7 V10 |
| Row 26 | Down | V11 W6 G3 W6 |
| Row 27 | Up | W4 G1 W1 G3 W7 V11 |
| Row 28 | Down | V11 W8 G2 W6 V1 |
| Row 29 | Up | V1 W6 G2 W8 12 |
| Row 30 | Down | V13 W5 B1 W2 G1 W6 V2 |
| Row 31 | Up | V2 W22 V7 |
| Row 32 | Down | V6 W14 B1 W8 V3 |
| Row 33 | Up | V3 W16 P6 W3 V5 |
| Row 34 | Down | V4 W3 P8 W15 V4 |
| Row 35 | Up | V5 W14 P10 W2 V4 |
| Row 36 | Down | V4 W2 P11 W14 V5 |
| Row 37 | Up | V6 W14 P11 W2 V4 |
| Row 38 | Down | V4 W2 P12 W13 V7 |
| Row 39 | Up | V8 W13 P12 W2 V4 |
| Row 40 | Down | V4 W2 P11 W1 V1 W11 V8 |
| Row 41 | Up | V9 W10 V1 W1 P10 W2 V4 |
| Row 42 | Down | V4 W7 P3 W2 V1 W1 P2 W7 V9 |
| Row 43 | Up | V10 W5 P3 W1 V1 W11 V4 |
| Row 44 | Down | V6 W7 V2 W1 P4 W1 V1 W1 V11 |
| Row 45 | Up | V12 W1 P5 W1 V14 |
| Row 46 | Down | V14 W1 P4 W1 V12 |
| Row 47 | Up | V11 W1 P5 W1 V13 |
| Row 48 | Down | V12 W1 P5 W1 V11 |
| Row 49 | Up | V10 W1 P5 W1 V12 |
| Row 50 | Down | V11 W1 P5 W1 V10 |
| Row 51 | Up | V9 W1 P5 W1 V11 |
| Row 52 | Down | V10 W1 P5 W1 V9 |
| Row 53 | Up | V8 W1 P5 W1 V10 |
| Row 54 | Down | V9 W2 P54 W1 V8 |
| Row 55 | Up | V7 W1 P5 W1 V9 |
| Row 56 | Down | V8 W2 P4 W1 V7 |
| Row 57 | Up | V7 W1 P4 W1 V8 |
| Row 58 | Down | V7 W2 P4 W1 V6 |
| Row 59 | Up | V6 W1 P4 W1 V7 |
| Row 60 | Down | V6 W2 P3 W1 V6 |
| Row 61 | Up | V5 W1 P4 W1 V6 |
| Row 62 | Down | V6 W1 P3 W1 V5 |
| Row 63 | Up | V5 W1 P3 W1 V5 |
| Row 64 | Down | V5 W1 P2 W2 V4 |
| Row 65 | Up | V4 W2 P1 W2 V4 |
| Row 66 | Down | V4 W4 V4 |
| Row 67 | Up | V4 W3 V4 |
| Row 68 | Down | V4 W2 V4 |
| Row 69 | Up | V4 W1 V4 |
| Row 70 | Down | V8 |
| Row 71 | Up | V7 |
| Row 72 | Down | V6 |
| Row 73 | Up | V5 |
| Row 74 | Down | V4 |
| Row 75 | Up | V3 |
| Row 76 | Down | V2 |
| Row 77 | Up | V1 |
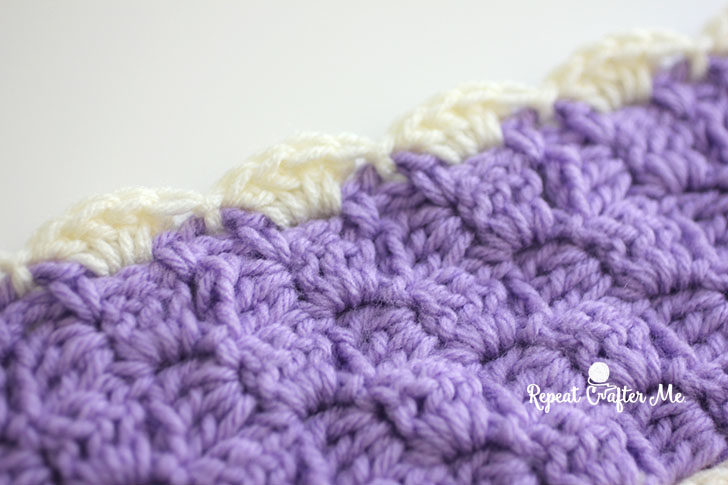
The border:
With purple, SC between the C2C square, chain 2, SC between next square, repeat all the way around edge making a SC + chain 2 + SC in each of the four corners.
Switch to white yarn
Slip stitch to join in first chain 2 space, make 4 DC in next, slip stitch to next chain 2 space, repeat around. Join to first slip stitch, fasten off and weave in ends.
Need help figuring out how to weave in your ends? I have a tutorial for that!
>>>HOW TO WEAVE IN YOUR ENDS TUTORIAL <<<
PS – there really isn’t that many loose ends in this project! It probably took me a total of 30 minutes to weave in my ends.
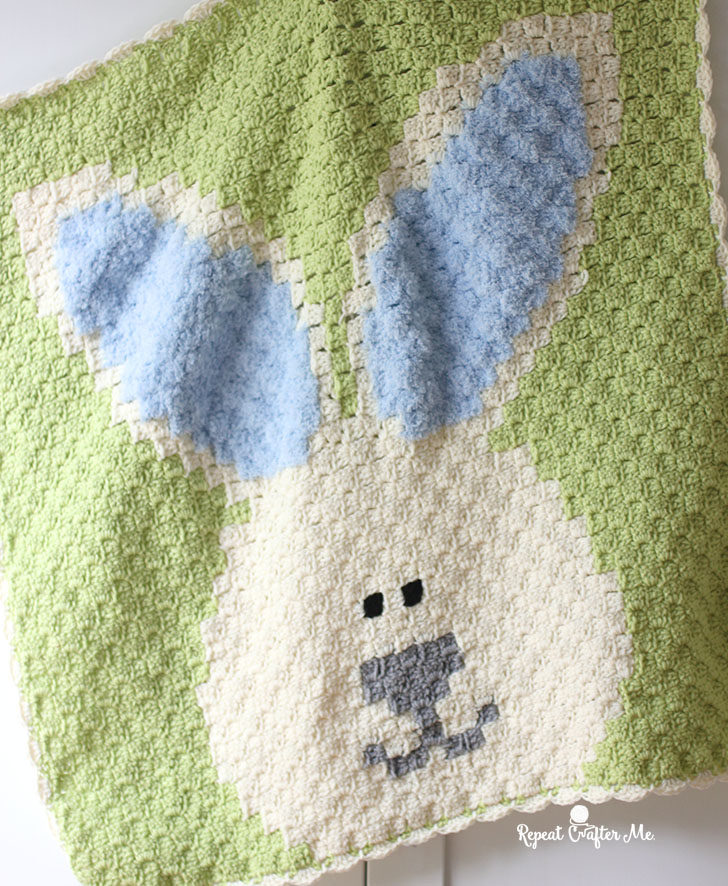
Update 3/30/18
The Blue Eared Bunny is finished! And just as cute as his sister bunny 🙂
Download the BLUE and GREEN Pixel Graph HERE
I used Bernat Super Value in Soft Fern (green), Natural, Soft Gray, and Black and
Bernat Pipsqueak in Baby Blue. Shop colors HERE
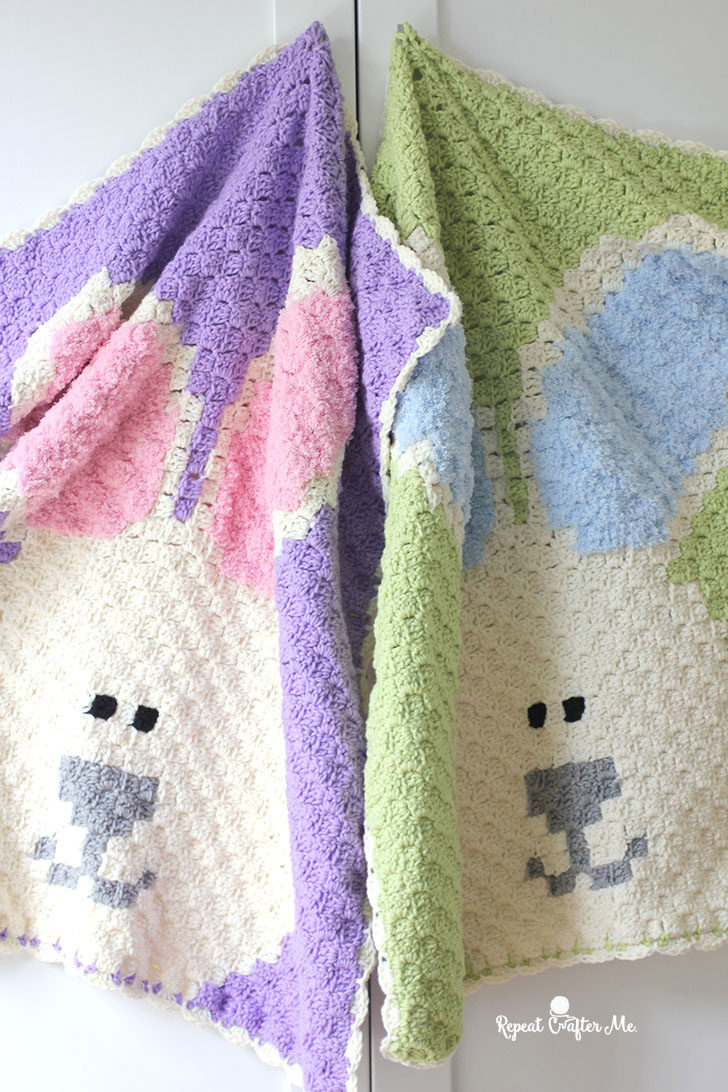
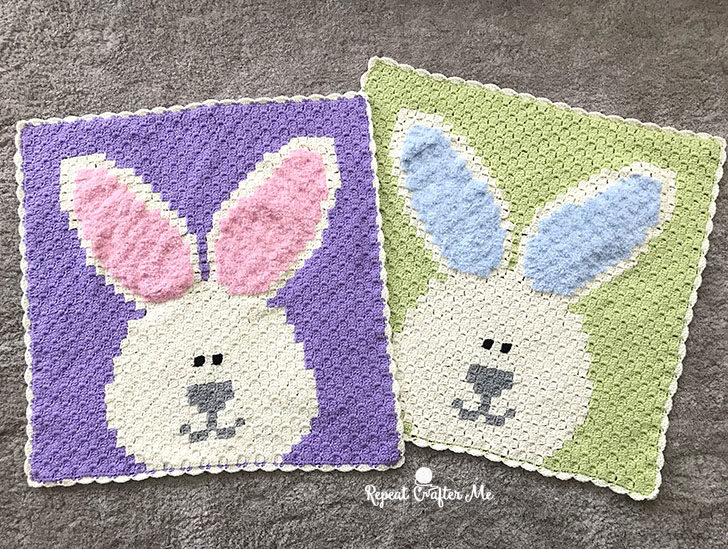
Love the two of these blankets together!
If you know anyone with boy/girl twins due this Spring, this set would be a perfect baby gift!
Happy Easter and Happy Spring!
If you make this blanket be sure to tag me on social media using the hashtag #RepeatCrafterMe and if you use Bernat Pipsqueak yarn be sure to also use the hashtag #Yarnspirations
*** You may make and sell products from my patterns but if you do I ask that you link back to my post. Please do not copy and post this pattern and claim it as your own. Please do not re-publish photos as your own.***
Keep in touch on my Repeat Crafter Me Facebook Page and my Repeat Crafter Me Instagram Page for new pattern sneak peeks and when they will be available on my blog! And feel free to post pictures of your finished hats and/or links to your shops on my Facebook wall so all can see.
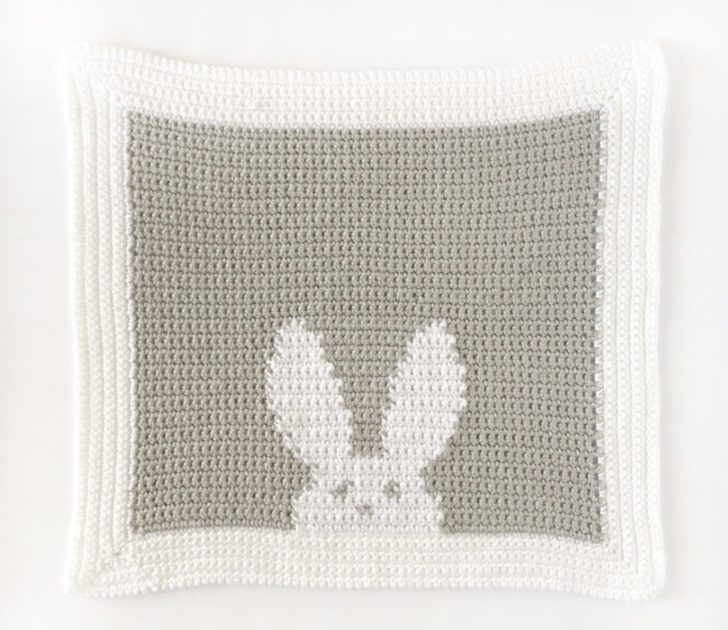
My friend Tiffany at Daisy Farm Crafts also has bunnies and pixel graphs on the brain! Head over to her blog to see her Modern Crochet Bunny Blanket! She used Bernat Softee Baby yarn and the SC stitch to make her graphgan!

 Starbucks Stitch Markers and Bottled Beverages
 Crochet Christmas Tree Pixel Square
 Crochet Santa Pixel Square
 Crochet Daisy Rug with Clover Amour Large Hooks and Giveaway!
OMG Sarha, This is too darn cute!
Are you going to post the pattern like you did for the reindeer? Row by row? That would be fantastic!
Is there a row by row pattern for this beautiful bunny available??
This looks quite cute, amazing.
After row 39 you will start to decrease?? is that correct
Hello:
Did you ever get an answer about row 40?
If buying in uk, what size ball of yarn would I need please, what is a skein equivalent to?
X
Carol,
In the UK you would need Aran weight for this pattern.
Anita
Hello: I’m working on the c2c bunny blanket and i’m Stuck on row 29. Could you please tell me what the last color is.
Green
Adorable. Thank you for another great blanket pattern.
Loved this pattern needed to make it a little bigger my twin grandchildren are about 19 months old, also put a different border on it.
Can’t figure out how to add a picture, but now I have to start the second one.
Can you share with me how did you make it bigger? Enlarged the pattern or just the border?
That looks very cute 🙂
I just sat down and did the row by row for myself and then I came on here to share your site with someone and there it was, done by Beth, Yeah Beth!!!!!! I should have waited. lol
Love this pattern, I started and I have two questions? I am following the written instructions, and need to know about row 29. What is the ending color? V=Violet.
Row 40 I keep ending with 9 (instead of V8). I took it a loose twice. Help!
Thanks
Row 40 was my nemesis. I ripped out 5 times. Even started the whole proect over again twice. I don’t give up easily. Never was ale to figure it out. What was I doing wrong?!!! after 20 ears of crochheting and knitting experience, this certainly was a humbling episode in my life. Had my heart set on bunnies, so I made the bunny hat/diaper cover set. That was a breeze. I have successfully done your owl hats, snowman hats, and frog hats, but this really stymied me. 🙁
Decrease. See my comments.
Hello, I just finished this and wanted you to know I had fun doing it. There are a few corrections on the the written pattern.
•Row 40 is when you start to decrease.
•Row 54 is not P54 it’s P4
Thanks again!
Also, Row 20 is V12 (Violet)or G12 (Green)
De crease? How do you do that?
Hi Linda
If I take account of your changes to the two rows, should it be ok? I’m a bit wary because of others’ problems with the pattern although I do know how to C2C
Thanks
Joanna
I am an experienced crocheter of many years and usually undaunted by even the advanced patterns. The C2C stitch is easy to work but the project itself is not really for a beginner. I liked the idea of writing out the chart row by row which is at the end of the instructions. I found the Crochet Crowd technique very frustrating over such a large piece. I don’t use the same yarn hold as in the Crochet Crowd Video so the “pinch” in the chain 6 didn’t really work. I just counted the stitches in the chain as usual. I had trouble making the two stitches on either side of the bunny’s mouth look attached to the other stitches. My biggest problem was the violet stitches on the bottom row 28 and 29. I ripped it out and started over several times. It just didn’t work somehow. I finally gave up on row 30 after encountering so many issues that made this no fun to do . If I were to do it over I would just join and weave in ends as in any color changing pattern. I was really looking forward to making this for my newest family member born last month. Maybe I’ll get up the energy to make it for another baby sometime in the future. Very disappointed.
Hi I am having trouble I have done the bunny over and when I get to row 40 it does match pls help
neveen
If you are interested to play the new game then this is the best option that http://solitairetimes.com when you started to play the spider game it will be unique game that you can enjoyed a lot.
I worked on this all afternoon. Did great UNTIL row 40. I am so disappointed. Wanted to give to a fundraiser. PLEASE what is wrong we can’t get past row 40???
I was wondering now if it is beginning of decrease row…if so, why was that not entered in instructions?
Written instructions for bunny blanket has 2 mistakes one is on row 54, I can’t remember the other row.
Is the count messed up on the bunny…I got to row 54 and had to frog back to 49 and still not sure if I am back far enough..trying to make it for my granddaughter…
Having read this I believed it was extremely enlightening. I appreciate you finding the time and effort to put this short article together.
I once again find myself personally spending a lot of time both reading and commenting. But so what, it was still worth it!
First copy watches india
Hey, i am quite stuck on row 36, do i need to decrease the last square on row 35?
c2c method is great, i like it:imported watches first copy
Cute project and thank the heavens for comments! If it hadn’t been for someone saying to start decreasing at row 40, I’d still be ripping stitches out trying to make this work.
Thank goodness for that “row 40 decrease” comment. I have “frogged” this blanket so many times! Not giving up, though! Too cute!
Thank you for this pattern. This is my first time trying C2C crochet and I love the results so far. I tend to crochet tight so I don’t know if that’s affecting the size. The pattern says finished size including border is 32 x 32 inches but I’m past the half way point and my blanket is closer to 24 x 24 without the border. I didn’t use the same brand of yarn but a different yarn with the same thickness (medium weight – 4) and H hook. My blanket lays flat and there’s no buckling so I’m not sure why there’s such a size difference. Anyone else had this problem?
Hi Penny, I am a newbe at C2C, when the written instructions say Row 27 UP and Row 28 DOWN, what does the UP and DOWN mean, thank you.
I am a newbe at C2C, when the written instructions say Row 27 UP, Row 28 DOWN, what does the UP and DOWN mean. Thank you.
Help!!!!
Do you start to decrease at row 40? I’m stuck…. and I’m left handed
Hi, thank you, Sarah, for sharing this free pattern. It’s adorable.
I was sorry this didn’t have any instructions except for the border, but it was easy once I knew that each block was ch3-3dc.
On the row-by-row color chart, rows 30 and rows 40, 41, 43 and 45 are missing the final stitches in each row; rows 42 and 44 are missing the final three colors. But if you look at the chart, and count it out for each row, it’s readily apparent what you need to do.
For the pipsqueak, instead of doing ch3-3 dc, I did ch3-2dc, and had plenty of yarn. The ears were still very full and fluffy. No need to get two skeins. I had plenty left over.
Rather than a pattern, this is a chart, with instructions for only the border. (I did an sc border because I thought the fancier border detracted from the design.) Still, the chart alone is the thing. And … it’s FREE. Very generous.
I would say “a few days” might be optimistic for most people — it took me almost three weeks, and I’ve been crocheting for 31 years. I spent only about an hour a day, but still, that’s a good chunk of time and more than many busy people have. So give yourself time and you’ll enjoy it. It does go quickly.
I found the post to be exceptionally informative, and I greatly appreciate the shared insights.
This is such a lovely pattern! The C2C stitch works perfectly for creating that bunny shape. I’m definitely saving this for my next baby gift project.
This is such a lovely pattern. The C2C stitch works perfectly for creating that pixelated bunny shape. I’m planning to use a soft grey and white yarn to make one as a baby gift.
This is such a lovely pattern! The bunny graph is so sweet and clear. I’ve been wanting to try a C2C project, and this might be the perfect one to start with.