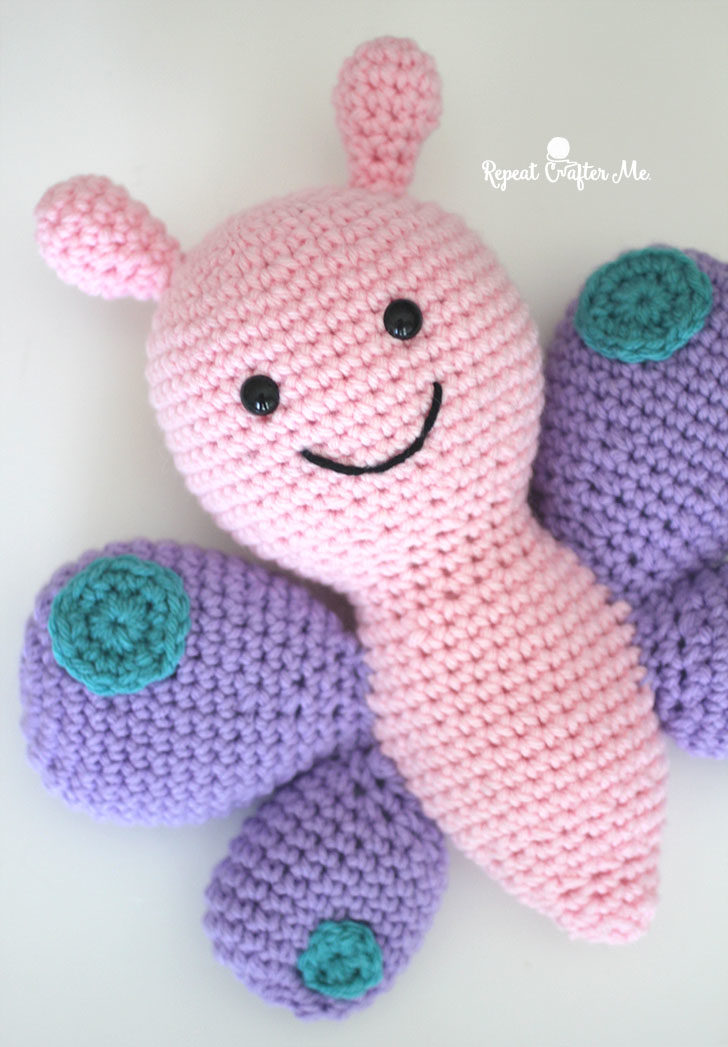
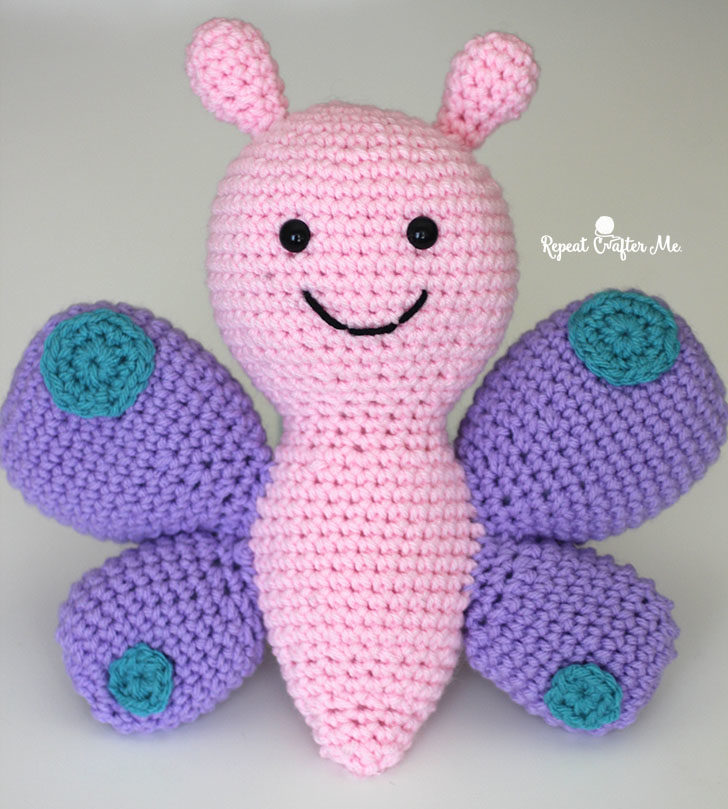
Fluttering into your crochet collection is this adorable Butterfly! With wings that could adorn any bright color combos from the Bernat Super Value line, you can customize and personalize this crochet cutie!
Materials:
– Bernat Super Value in Baby Pink (one skein)
– Bernat Super Value in Lilac Purple (one skein)
– Bernat Super Value in Aqua (just a bit!)
– Size H Crochet Hook
– Poly-fil Fiber Stuffing
– 12mm Safety Eyes
– Tapestry Needle
Finished Size: Approximately 12 x 12 inches
Head/Body:
With pink yarn
Magic Ring, chain 1 and make 10 SC in ring, join to first SC, chain 1
Round 2: 2 SC in each stitch around, join, chain 1 (20 SC)
Round 3: SC in each stitch around, join, chain 1 (20 SC)
Round 4: 2 SC in first, SC in next stitch, repeat around, join, chain 1 (30 SC)
Round 5: SC in each stitch around, join, chain 1 (30 SC)
Round 6: 2 SC in first, SC in next 2 stitches, repeat around, join, chain 1 (40 SC)
Round 7: 2 SC in first, SC in next 3 stitches, repeat around, join, chain 1 (50 SC)
Round 8-15: SC in each stitch around, join, chain 1 (50 SC)
Round 16: SC Decrease, SC in next 3 stitches, repeat around, join, chain 1
Round 17: SC in each stitch around, join, chain 1 (40 SC)
Round 18: SC Decrease, SC in next 2 stitches, repeat around, join, chain 1
Round 19: SC in each stitch around, join, chain 1 (30 SC)
Round 20: SC Decrease, SC in next stitch, repeat around, join, chain 1
Round 21-23: SC in each stitch around, join, chain 1 (20 SC)
At this point you will want to stitch on the eyes between rounds 10 and 11 then stitch on a little smile and stuff with poly-fil as you go.
Round 24: 2 SC in first, SC in next, repeat around, join chain 1
Round 25-34: SC in each stitch around, join chain 1
Round 35: SC Decrease, SC in next, repeat around, join, chain 1
Round 36-37: SC in each stitch around, join, chain 1 (20 SC)
Round 38: SC Decrease in each stitch around, join, chain 1
Round 39-40: SC in each stitch around, join, chain 1
Round 41: SC Decrease until closed.
Fasten off and weave in ends.
Large Wing Spots (make 2):
with aqua yarn
Magic Ring, chain 1 and make 10 SC in ring, join, chain 1
Round 2: 2 SC in first, SC in next, repeat around, join, fasten off leaving long tail to stitch onto larger wing.
Smaller Wing Spots (make 2):
with aqua yarn
Magic Ring, chain 1 and make 10 SC in ring, join, fasten off leaving long tail to stitch onto smaller wing.
Large part of wing (make 2)
with purple yarn
Magic Ring, chain 1 and make 10 SC in ring, join to first SC, chain 1
Round 2: 2 SC in each stitch around, join, chain 1 (20 SC)
Round 3: 2 SC in first, SC in next, repeat around, join, chain 1 (30 SC)
Round 4-11: SC in each stitch around, join, chain 1
Round 12: SC Decrease, SC in next 3, repeat around, join, chain 1
Round 13: SC in each stitch around, join, chain 1
Round 14: SC Decrease, SC in next 2, repeat around, join, chain 1
Round 15: SC in each stitch around, join, chain 1
Round 16: SC Decrease, SC in next, repeat around, join, chain 1
Round 17: SC in each stitch around, join, chain 1
Round 8: SC Decrease until closed, join, fasten off leaving long tail.
Sew onto either side of butterfly body.
Small Wing (make 2):
with purple yarn
Magic Ring, chain 1 and make 10 SC in ring, join to first SC, chain 1
Round 2: 2 SC in each stitch around, join, chain 1 (20 SC)
Round 3-10: SC in each stitch around, join, chain 1 (20 SC)
Round 11: SC Decrease in each stitch around, join, chain 1 (10 SC)
Round 12: SC in each stitch around,
Fasten off leaving long tail
Lightly stuff with poly-fil and stitch onto butterfly body.
Antennae (make 2):
with pink yarn
Magic Ring, chain 1 and make 6 SC in ring, join, chain 1 (6 SC)
Round 2: 2 SC in first stitch, SC in next, repeat around, join, chain 1 (9 C)
Round 3: 2 SC in first stitch, SC in next, repeat around, join, chain 1 (12 SC)
Round 4: SC in each stitch around, join, chain 1 (12 SC)
Round 5: SC Decrease, SC in next two, repeat around, join, chain 1
Round 6: SC Decrease, SC in next, repeat around, join, chain 1
Round 7: SC in each stitch around, join, fasten off leaving long tail.
Stitch antennae either side of top of head about 5 rounds down from top.
Let me see those beautiful butterflies! Tag me on social media using #RepeatCrafterMe!
***You may make and sell products from my patterns but if you do I ask that you link back to my post. Please do not copy and post this pattern and claim it as your own. Please do not re-publish photos as your own.***
Want more free patterns? Keep in touch on my Repeat Crafter Me Facebook Page for new pattern sneak peeks and when they will be available on my blog! And feel free to post pictures of your finished hats and/or links to your shops on my Facebook wall so all can see. Be sure to also follow me on Instagram! I love when you tag me (@repeatcrafterme)!
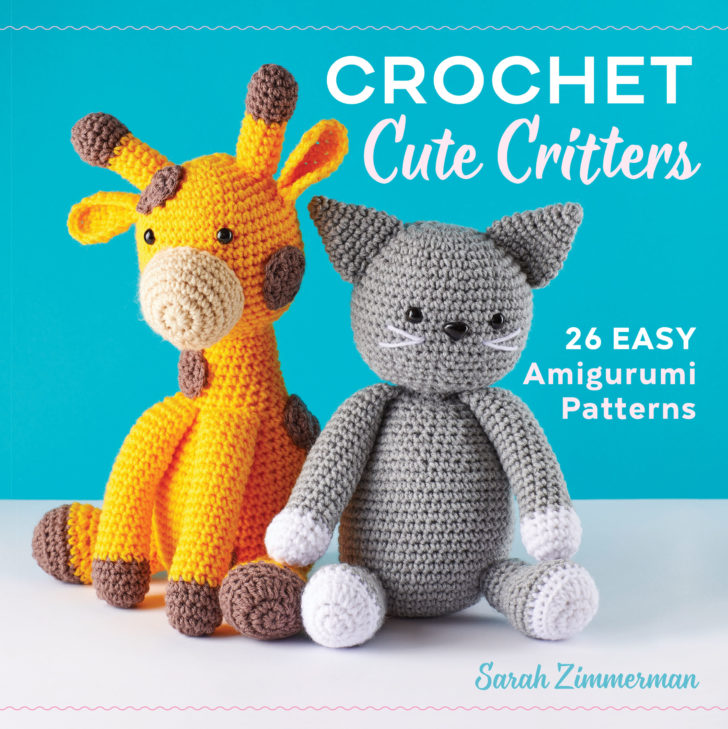
I wrote a Crochet Book! Crochet Cute Critters is now available for pre-order on Amazon.com! It would mean so much to me if you would consider purchasing a copy! Thank you for your continued support!!

 Starbucks Stitch Markers and Bottled Beverages
 Crochet Christmas Tree Pixel Square
 Crochet Santa Pixel Square
 Crochet Daisy Rug with Clover Amour Large Hooks and Giveaway!
The butterfly is so cute. Thank you.
This is absolutely adorable. I love it!!!! Than you so much for sharing once again a delightful pattern!!! 🙂
Adorable!
Sarah. Love love love this butterfly. Sooo adorable. Am I missing something in the pattern. Where do the antenna get created???
I love the pattern! I think there’s a mistake, though, at row 24 of head. I ended up increasing on that row and then SC for 10 rows. If you increase every other stitch for 11 rows as written, it doesn’t look right. Also, I don’t see the instructions for the antennae. I can probably wing them from the picture, so it’s not a huge deal. Thank you!
I agree Kathleen. I’m m at that point and realized that something isn’t quite right. I’m going to do what you did. I’m sure Sarah will notice and make the necessary corrections.
Happy Crocheting
I as well noticed this and made adjustments to the body to make it look right and winged the antennae. Love the pattern and know coreections will be coming soon!
Kathleen,
I don’t see Sarah replying to any of these comments. I have emailed her trying to get an answer regarding no instructions for the antenna.
As for your comment, I repeated Rounds 24-34 increasing each round and my butterfly looks ok. Just waiting to get an answer from Sarah.
Konnie
Thank you Kathleen! I thought I was nuts for a second. I’ve frogged this so many times my yarn is “hairy” (LOL). I bought her book “Crochet Cute Critters” and haven’t had a single issue. Fun patterns and easy t follow. Now I can finish my butterfly with confidence.
Adorable pattern! But, what about the antenna instructions? Please respond, need pattern for new baby coming soon. Thanks.
Good luck! I have been waiting for an answer as well.
What about the antenna instructions? Did I miss something? I sure hope they weren’t supposed to be attached before stuffing since I have the body finished and ready to attach the wings. UGH!!!
Thanks for your reply.
I am happy with your article,your website is pretty good. Many articles are very useful for everyone. I am sure your website will grow in the future.
Hey, I have read your blog. This is really great. I like your work. I am also a blogger.
i love butterfly. thank
I am not new to crocheting, but I am new to making a stuffed animal. I chose this little butterfly because it didn’t look too complicated. As I was reading through the pattern before buying yarn and fill and all that, I noticed there were no instructions for the antenna or for the body. Am I missing something? Am I not reading and understanding the pattern? Any help would be appreciated!
Thanks
Aw, what a sweet stuffed toy! I adore your work.
Can someone please help me with this pattern. I’m trying to crochet the body part of the butterfly but when crocheting rows 24-34 it doesn’t look right.
Only increase in row 24, and not in the rows 25-34.
Hi, I am making this too and for rows 24-34 I did the increases as suggested in row 24 and just did 9 rows of 30 after that. I also am looking for the antennae portion . I did not see it in the pattern.
I forgot to mention, I cannot tell if the large wings are ‘lightly stuffed or not? The small ones are but nothing is mentions regarding the larger ones. Does anyone have any idea?
The information in the article you mentioned is very valuable to me.
I made antennas myself.
Round 1: 6sc in a MR
Round 2: increase in every stitch (12sc)
Round 3: increase in every 4th stitch (15sc)
Round 4: 15sc
Round 5: (3sc, decrease) x3 (12sc)
Round 6: (2sc, decrease) x3 (9sc)
Round 7: 9sc
Round 8: (sc, decrease) x3 (6sc). Fasten off and stuff.
Thank you very much.
Thankyou so much Wilma, I thought I had missed something and kept looking and looking. Kind regards
Any pics of the back to share? I would like to see how to attach the wings.
this is why I love your blog. there are so many adorable things that I can see all day long without feeling bored
I am intrigued as to why Sarah would not only send out an incorrect and incomplete patter but also not update it nor respond to comments. Thank-you to all the commenters who have given directions, corrections and finishes for this pattern. You’ve been integral to helping through this project.
Butterfly hook is very beautiful and lovely. I really like this product.
Your share is the great knowledge I have gathered, you are an important person I admire, thank you
I love this so much , I’m in the process of making on but I don’t see the pattern for the antenna in the pattern , did I over look it? If so were would it be.
People have been asking for the anntena instructions since June 29, 2019, a day after this was released and they have nor any one else has received a reply to their requests. Lynda look above in comments and for Wilma Septemer 2019, she left a pattern she made up anntennas from. hope this helps
IT IS PRETTY BAD WHEN PERSON AFTER PERSON SENDS REQUEST FOR MISSING INSTURCTIONS FOR THE ANNTENAS BUT GET ABSOLUTELY NO RESPONSE FROM THE DESIGNER. I THINK THIS IS BAD BUSINESS
I do not know what to say really what you share very well and useful to the community, I feel that it makes our community much more developed, thanks
To find out how to connect Canon Printer to the computer, close down your Canon printer and attach the USB cord to the printer’s connection panel. Then connect the other end of the USB cable to a USB port on your laptop, following the instructions for where the USB ports are placed. Next, open a web browser on your computer. Next, go to the official Canon printer website to download the printer driver according to your printer model and the operating system you desire to connect your printer. After that, access the Control Panel by going to the Start menu, located which is at the bottom left corner of the screen. And then you should click on it. Then choose the Devices and Printers menu item under Hardware and Sound from the drop-down list. Choose a printer port for your connection from the list of ports and click on the Canon printer from the available options and then select your printer model and now select whether you wish to share your printer with other devices or not and then click on Next then select if you want to keep the Canon printer as the default printer and then click on the Finish tab to complete the process.
Are rounds 24-34 in the body correct!? Mine is starting to look like a flower. Please help!
Very impressive blog post, I subscribed your blog for your future post.
I am needing the pattern to the antennas on the butterfly you have posted. Thank you. I have to have a pattern for everything.
Great crochet butterfly!! Thanks. The Local Observer ( https://www.localobserverdaily.com ) will help you find the best and worst places to live, raise a family or retire in United States.
Your crochet butterfly pattern is absolutely delightful! It’s wonderful to see such a charming and detailed project. If you’re looking to share this amazing pattern with a wider audience, I’d recommend posting it on Belgium Do-Follow Social Bookmarking Website. A2Bookmarks Belgium is a fantastic platform that can help boost your visibility and connect with crochet enthusiasts across the globe. It’s an excellent way to showcase your creative work and attract more readers to your blog.
Thank you for sharing your beautiful pattern with the world. I’m sure many will appreciate and enjoy making their own butterflies. Keep up the great work!
ClearHolidays is an outstanding platform for travelers seeking well-rounded and informative content about various destinations across India. The site offers extensive travel guides, carefully selected tour packages, and useful travel tips that help visitors plan their trips effortlessly. Whether you’re looking for popular tourist spots or hidden gems, ClearHolidays ensures that your travel experience is both enriching and memorable.
For those planning a trip to Uttarakhand, ClearHolidays provides excellent information on places to visit near Katarmal Sun Temple. The website not only highlights the cultural significance of this ancient temple but also suggests nearby attractions that are worth exploring. With ClearHolidays, you can create a travel itinerary that fully captures the beauty and history of the region.
If you have ever wanted to play on a high-quality site but did not know where, then you are exactly here – bookmakers-et.com , I love this site, I love making bets here, no matter what the bet, it triples or even higher, because the coefficient of this bookmaker’s site, so try it and you will play here online, it’s a fantastic cool site to play and have fun!