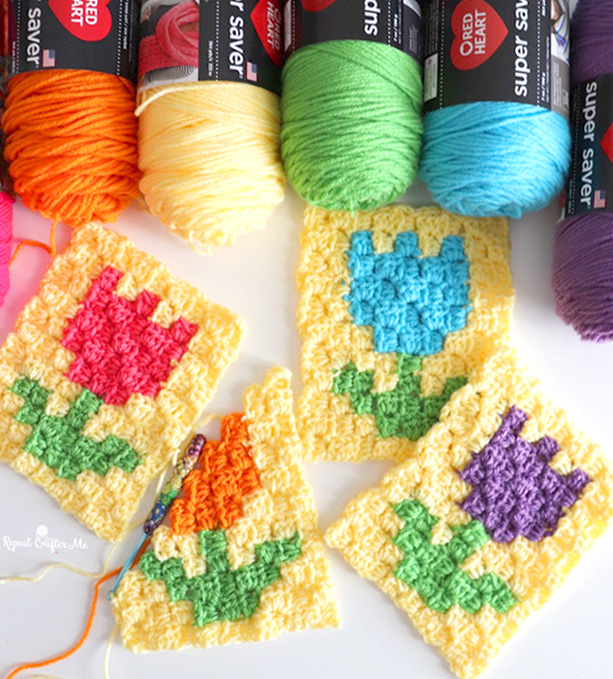
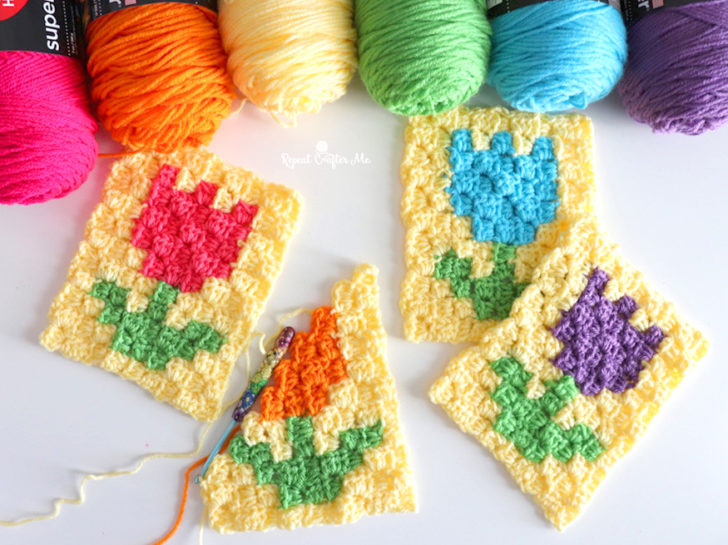
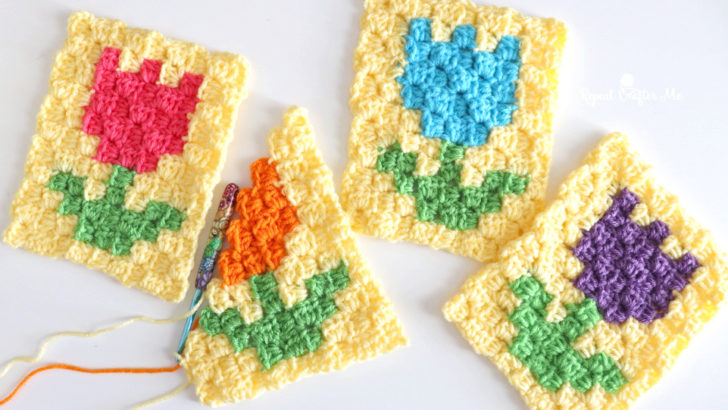
Are you new the concept of Corner-to-Corner Crochet (aka C2C)? Or need some help with the logistics of how to change colors and increase/decrease? Let me help you! I have filmed a long video tutorial because I am walking you through this Tulip C2C block from start to finish! I am using the Half Double Crochet stitch and Red Heart Super Saver Yarn in these beautiful bright Spring colors!
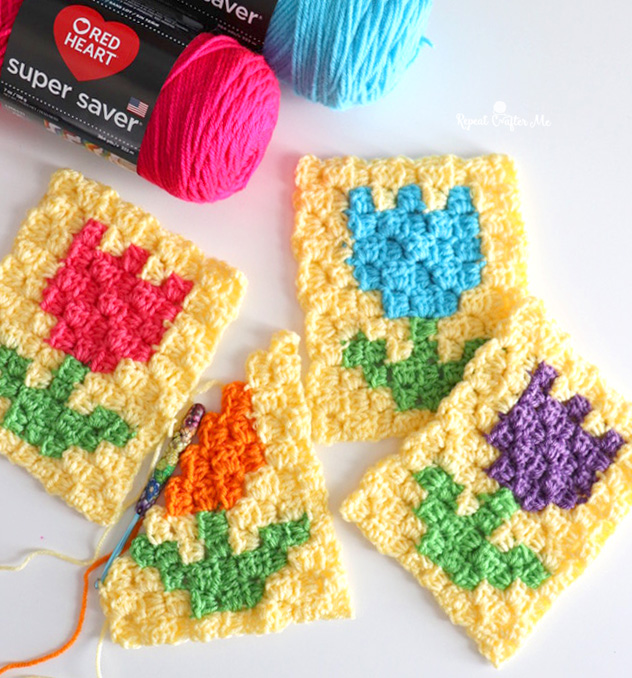
Grab the Yarn: Red Heart Super Saver in Lemon, Spring Green, Grenadine, Medium Purple, Turqua, and Pumpkin. Thank you to Red Heart Yarns for sending me these lovely shades of yarn to work with!
Make a whole bunch of these blocks and stitch them together for a blanket. Or maybe just crochet a couple and create a pouch or small tote bag. How about a table runner? So many ways to use these tiny tulips! I will be sure to have a follow-up post with directions on how to make a border and attach the blocks.
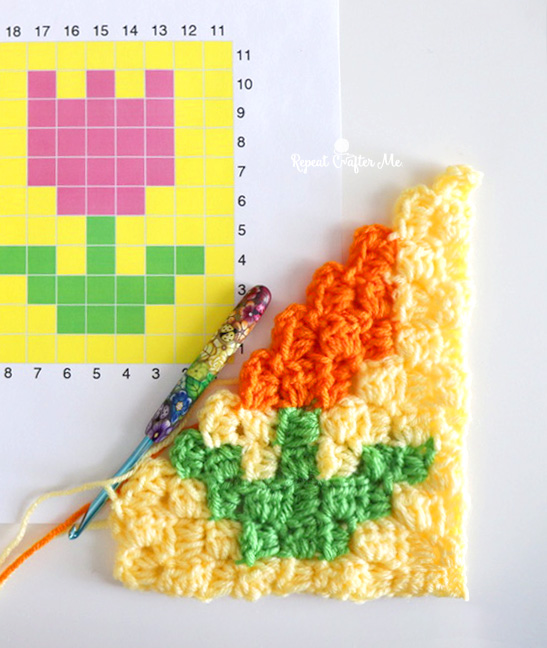
Corner-to-Corner Crochet lets you create a variety of images and pictures and designs using a pixel graph. These graphs are made up of squares. Each square is equal to a Chain 2 + 3 HDC stitches. You will start in the corner (I prefer the lower right hand corner) and you will work diagonally in rows until you get the upper left hand corner.
I will show you how to carry your yarn and increase/decrease on the edges. Increases start with a chain 5, when it’s time to decrease you will slip stitch along the edge to start your next square.
To prepare, I suggest creating 2-3 balls of the background color (Lemon Yellow) because you will need to have several strands attached at one time. With the other colors, you can pull for the center of the skien. It doesn’t use much yarn!
Materials:
– Red Heart Super Saver Yarn in Lemon, Spring Green, Grenadine, Medium Purple, Turqua, and Pumpkin
– Size H Crochet Hook
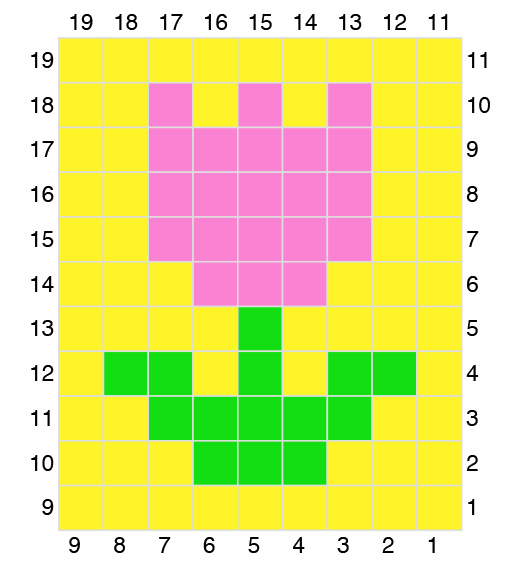
– Tulip Pixel Graph GET IT HERE
– Tapestry Needle
Finished Size: Approximately 6 x 7.5 inches
I hope you find this video helpful! There are many C2C Crochet Tutorials out there but sometimes it’s beneficial to watch a few different ones for new perspectives.
Thanks to my friend Jennifer Freeman from My Beautiful Disasters for providing the Tulip C2C written pattern!
Sometimes it’s easier to see the color changes written out on paper rather than look at the picture graph.
Tulip Written Pattern (color changes):
Row 1: Background x 1 (1 block)
Row 2: Background x 2 (2 blocks)
Row 3: Background x 3 (3 blocks)
Row 4: Background x 4 (4 blocks)
Row 5: Background x 1, Green x 3, Background x 1 (5 blocks)
Row 6: Background x 1, Green x 3, Background x 2 (6 blocks)
Row 7: Background x 4, Green x 2, Background x 1 (7 blocks)
Row 8: Background x 2, Green x 2, Background x 4 (8 blocks)
Row 9: Background x 2, Pink x 2, Green x 1, Background x 1, Green x 1, Background x 2 (9 blocks)
Corner
Row 10: Background x 2, Green x 1, Background x 1, Pink x 3, Background x 2 (9 blocks)
Row 11: Background x 2, Pink x 4, Background x 1, Green x 1, Background x 1 (9 blocks)
Corner
Row 12: Background x 3, Pink x 4, Background x 1 (8 blocks)
Row 13: Background x 2, Pink x 3, Background x 2 (7 blocks)
Row 14: Background x 2, Pink x 3, Background x 1 (6 blocks)
Row 15: Background x 2, Pink x 1, Background x 2 (5 blocks)
Row 16: Background x 2, Pink x 1, Background x 1 (4 blocks)
Row 17: Background x 3 (3 blocks)
Row 18: Background x 2 (2 blocks)
Row 19: Background x 1 (1 block)
Which colors will you crochet your Tulips in?!
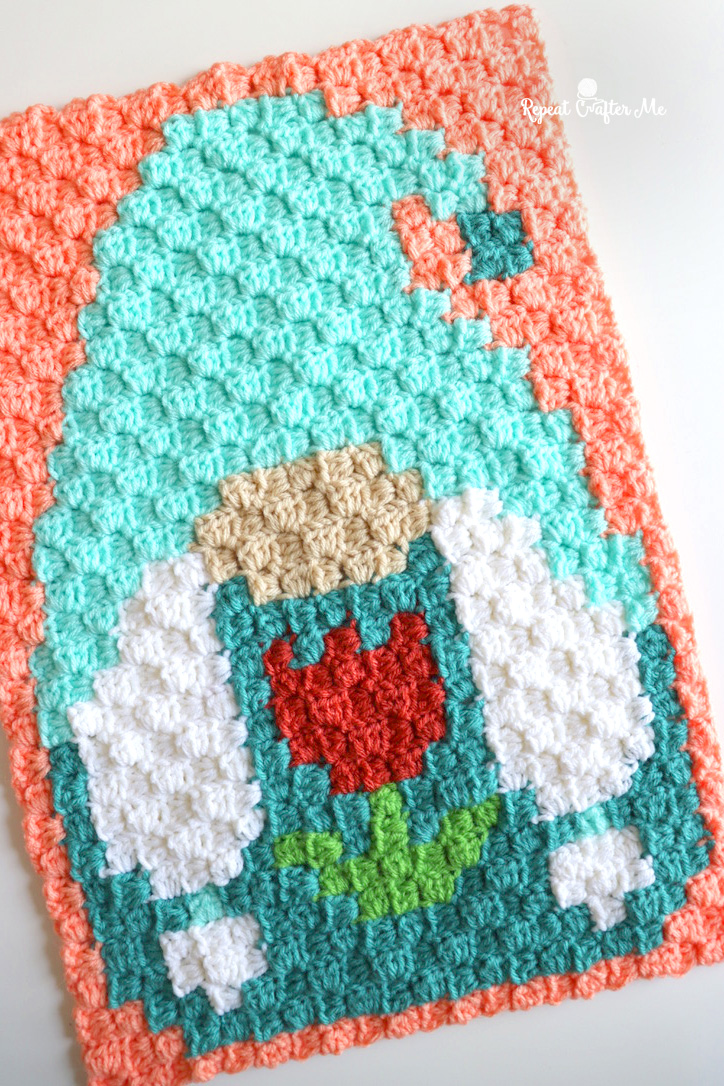
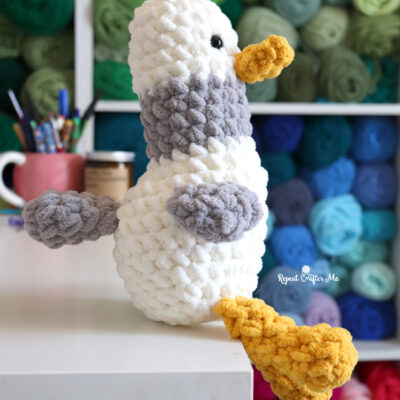
I should also mention that this pretty tulip is also a part of my May C2C Gnome! Check it out here.
Happy Mother’s Day weekend to all the moms! Hope it’s filled with a bit of fun and fiber!
FOLLOW ME for more FREE Crochet!
Repeat Crafter Me Facebook
Repeat Crafter Me Instagram
Repeat Crafter Me Pinterest
Repeat Crafter Me YOUTUBE

 Starbucks Stitch Markers and Bottled Beverages
 Crochet Christmas Tree Pixel Square
 Crochet Santa Pixel Square
 Crochet Daisy Rug with Clover Amour Large Hooks and Giveaway!
Thanks for your good content
Thanks for the good information you published
It looks like easy one
I apricate your effort, thanks a lot.
Very useful blog actually I love designs whether it is related to dresses designs or logo designs I really like designs and patterns
great post
Thank you for this fantastic tips.
very nice
I really like your article. Thank you for your good content
Thank you, Sarah. This is beautiful!
Thank you so much for the advice. Great read
Excellent ! I personally like your blog and waiting for more articles like this
Great article thanks for sharing this information
interesting topic for an article
Irrigation dams
A very useful blog actually I love designs whether it is related to dress designs or logo designs I really like designs and patterns.
Thanks for the great idea.
thanks for great article
Thanks for your best article
This is a great inspiring article.I am pretty much pleased with your good work.You put really very helpful information…
ShopECS is providing latest casual shoes for girls. Buy women shoes online from ShopECS.
I really love it, you have written a great article on this topic
thanks for your great post
Excellent ! I personally like your blog and waiting for more articles like this
I visited the Chinyere and found bags for girls and hand bag variety they are best and cost-effective visit and shop now
Buy women apparels from chinyere, which is best clothing brands for women providing wide variety of women apparels in Pakistan
Thanks for sharing this information
Like this tulip good design hope ya make so!e more pixel.squares hope their square as the triangular ones are a bit harder but did do this tulip swish you had video in left handed thanks Sara for your tips etc
You write interesting articles, and your blog is cool.
Great Efforts! Thanks for posting this useful information with us.
Un blog muy útil claramente me encantan los diseños, ya sea que estén relacionados con diseños de ropa o diseños de marcas, simplemente me gustan los escorts maduras Avellaneda diseños y patrones.
Excellent ! I personally like your blog and waiting for more articles like this
fnf mods is a fascinating website devoted to Friday Night Funkin’ game series. In this series of games, players are challenged with loads of wonderful music, rhythms and sounds that keep players engaged without getting bored.