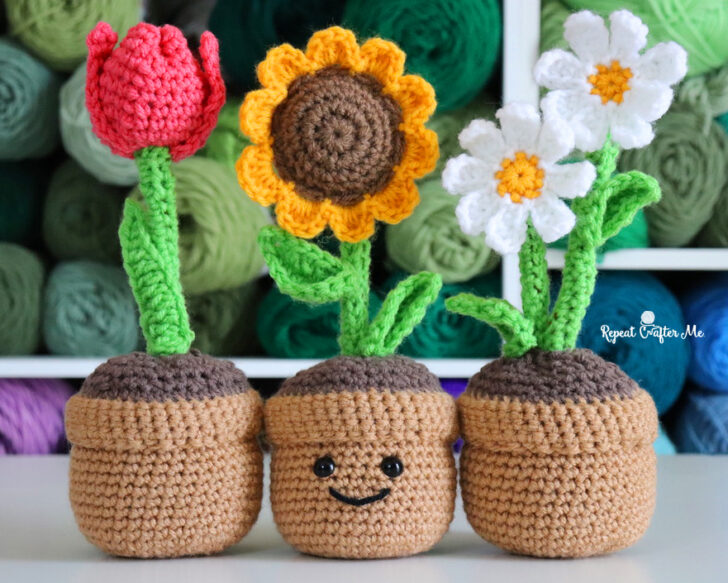
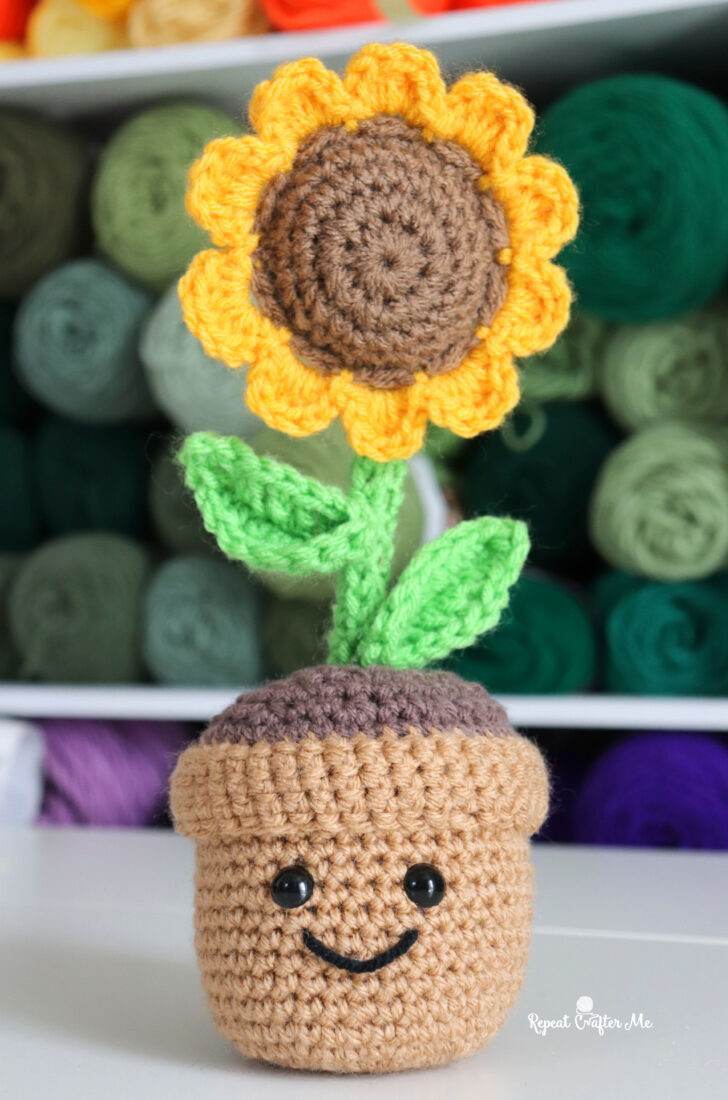
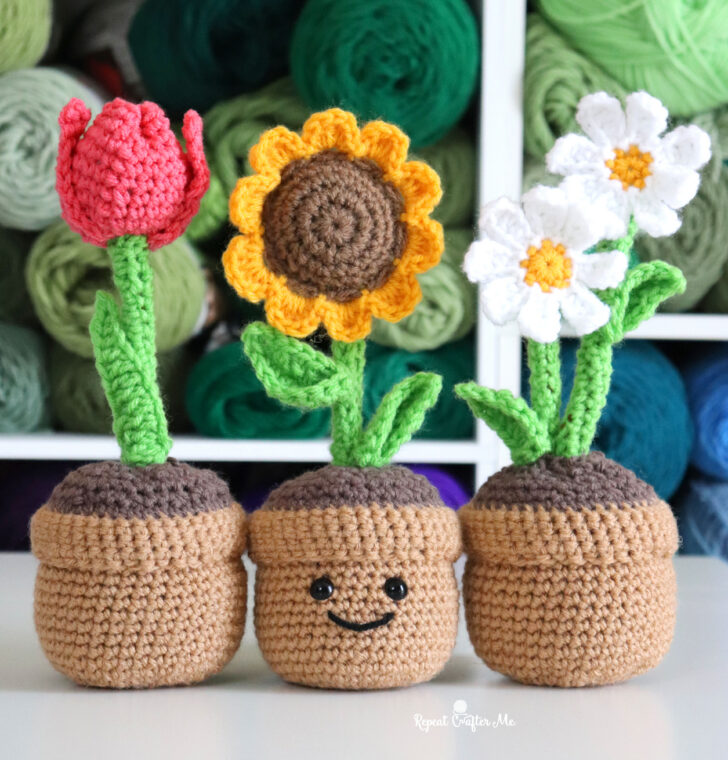
There’s something extra special about a handmade plant that never wilts. Whether you’re celebrating Earth Day, Mother’s Day, or just want a sweet little handmade gift “just because,” these crochet potted plants are the perfect project. They brighten up any space and make an adorable, everlasting bouquet!
I designed this little pot to hold my crochet flowers from a previous project and I can’t get over how cute they turned out all together! You can mix and match your favorite blooms and create your own custom arrangement.
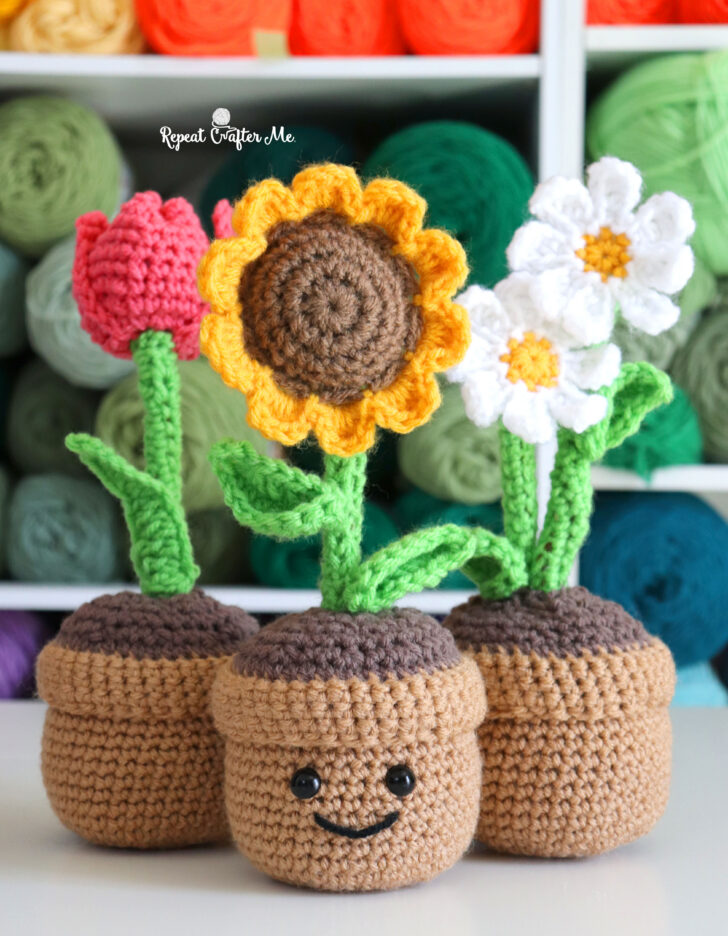
Crochet Flower Patterns
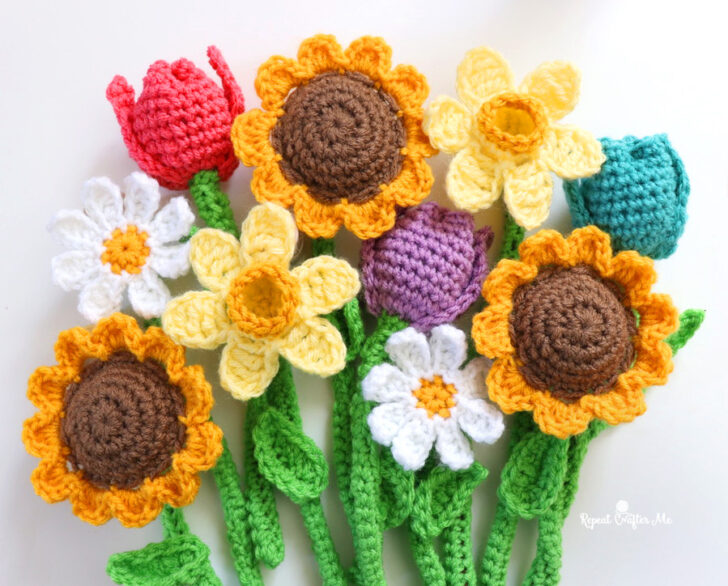
The flowers are from my Crochet Bouquet collection—perfect for gifting on their own or adding into this potted planter!
- Get the Sunflower Pattern HERE
- Get the Daisy Pattern HERE
- Get the Tulip Pattern HERE
- Get the Daffodil Pattern HERE
Important Note:
For this project, you’ll want to use a dowel rod inside the stem instead of (or in addition to) a pipe cleaner so the flowers stand nice and sturdy in the pot.
Honestly, I used my original bouquet flowers and simply inserted a dowel rod alongside the pipe cleaner and it worked perfectly!
Materials for Pot
- Worsted weight yarn in:
- Light brown (or terracotta!) for the pot
- Dark brown for the “dirt” top
(I used Bernat Super Value in Topaz and Taupe, but Red Heart Super Saver works great too!)
- Size H Crochet Hook
- 15mm black safety eyes and strand of black yarn if you want to add eyes and smile.
- Polyfil Fiber Stuffing
- Tapestry Needle
- Dowel Rod (6–12 inches long, about ¼ inch thick)
- These can easily be trimmed to your desired height
>>> You can purchase Dowel Rods HERE on Amazon (affiliate) <<<
- These can easily be trimmed to your desired height
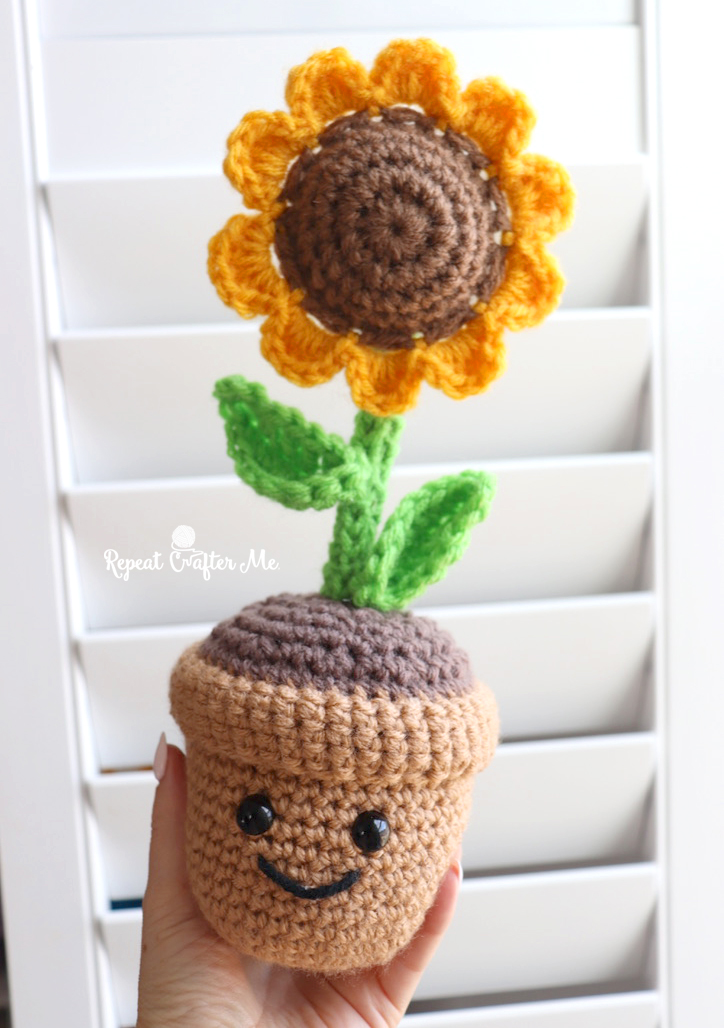
Finished Size
- Pot: approximately 4 x 4 inches
- With flower: about 10–12 inches tall
Crochet Potted Plant Pattern
(Worked from the bottom up)
With light brown yarn (pot)
Magic Ring, chain 1, make 10 SC in ring, join, chain 1
Round 2: 2 SC in each stitch around, join, chain 1 (20 SC)
Round 3: SC in each stitch around, join, chain 1 (20 SC)
Round 4: 2 SC in first, SC in next, repeat around, join, chain 1 (30 SC)
Round 5: 2 SC in first, SC in next 2, repeat around, join, chain 1 (40 SC)
Rounds 6–18: SC in each stitch around, join, chain 1 (40 SC)
Pause here to add safety eyes and a smile (optional) between rounds 12–13.
Round 19: In front loops only, SC in each stitch around, join, chain 1 (40 SC)
Rounds 20–22: SC in each stitch around, join, chain 1 (40 SC)
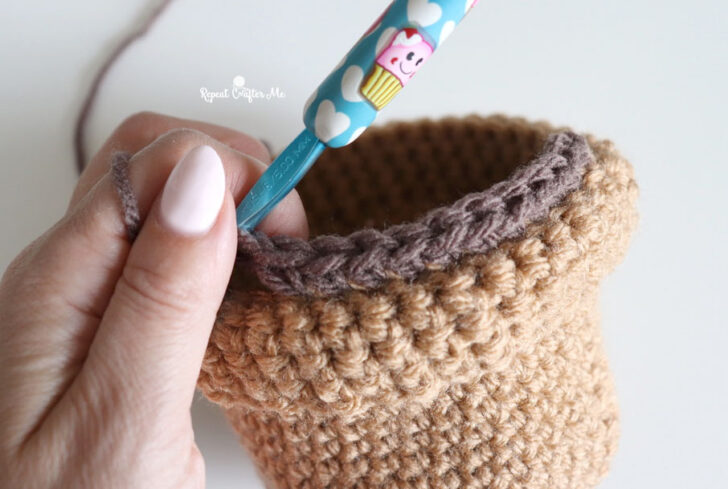
Fasten off, leaving a long tail.
Flip the edge down and stitch onto the pot between rounds 15 and 16 to create the lip.
Now let’s add the Dirt Top:
Round 23: Join dark brown yarn in the back loops of Round 19. SC in each stitch around, join, chain 1 (40 SC)
Round 24: SC decrease, SC in next 2, repeat around, join, chain 1
Round 25: SC in each stitch around, join, chain 1 (30 SC)
Round 26: SC decrease, SC in next, repeat around, join, chain 1
Begin stuffing with polyfil, filling mostly to the top.
Round 27: SC decrease all the way around, join, chain 1
Fasten off, leaving a long tail.
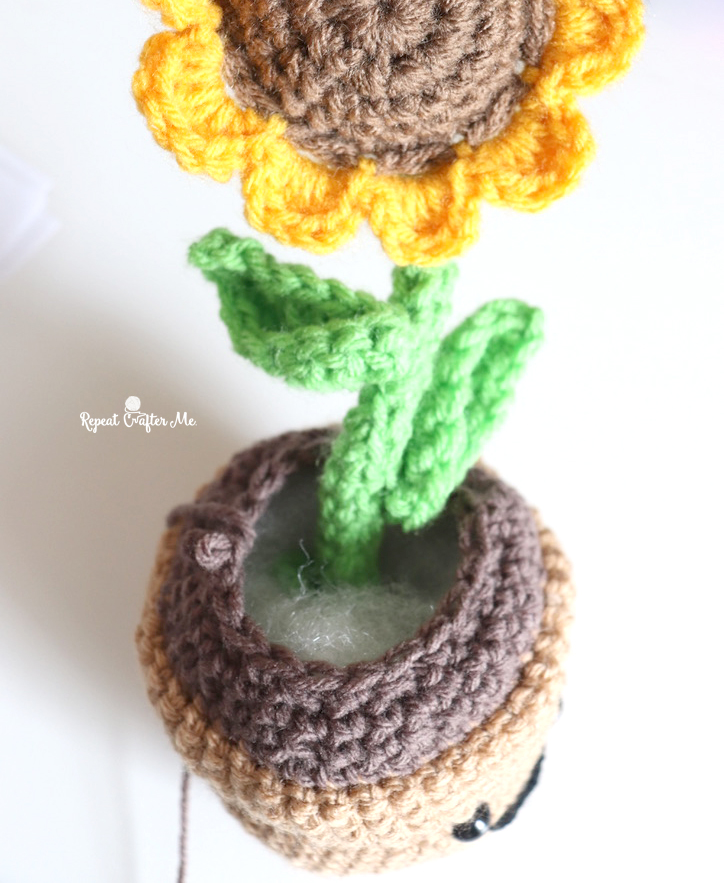
Insert your flower (with dowel rod inside the stem) into the center of the pot. Adjust the polyfil as needed to keep it centered and secure.
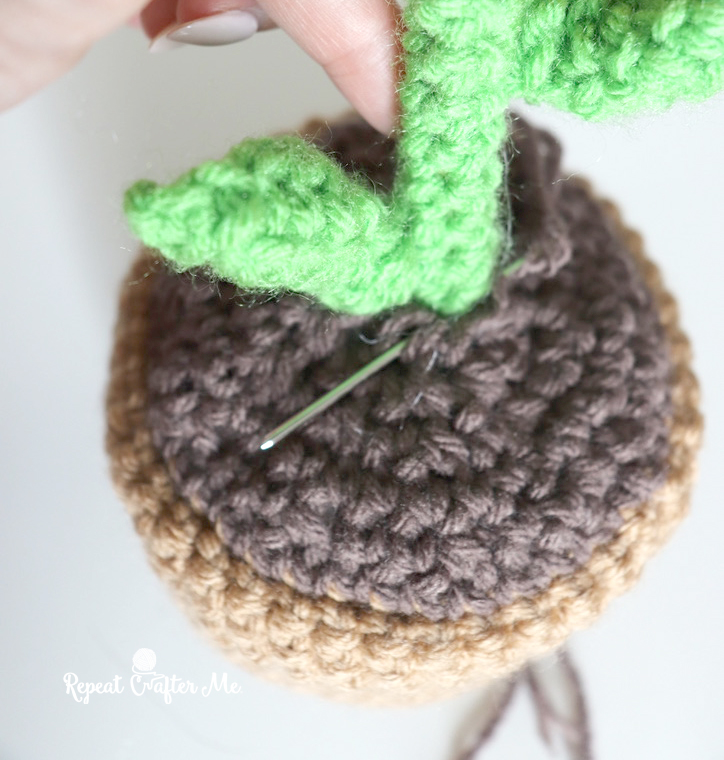
Round 28 (closing):
Using a tapestry needle, weave under the top front stitches to cinch the hole closed snugly around the stem. Stitch into the stem a few times to secure.

Optional: Add Weight for Stability
If you’d like your pot to sit firmly (and feel a bit more “premium”), you can add weight to the bottom!
How to do it:
- Fill a small nylon stocking or fabric pouch with weighted material
- Tie securely
- Place inside the base before stuffing
- Add polyfil around it to keep everything centered
Great options for weighting:
- Poly pellets (washable and lightweight)
- Glass beads (heavier, great for smaller projects)
- Aquarium gravel or gems
- Metal washers or nuts (for extra weight)
These little potted flower plants make such a fun and meaningful project. I love that you can customize each one with different flowers, colors, and even little faces for personality!
They’re perfect for gifting, decorating your craft space, or making a whole collection that blooms all year long. No watering required!
If you make one, I’d LOVE to see it! Tag me so I can share your creations!

 Starbucks Stitch Markers and Bottled Beverages
 Crochet Christmas Tree Pixel Square
 Crochet Santa Pixel Square
 Crochet Daisy Rug with Clover Amour Large Hooks and Giveaway!
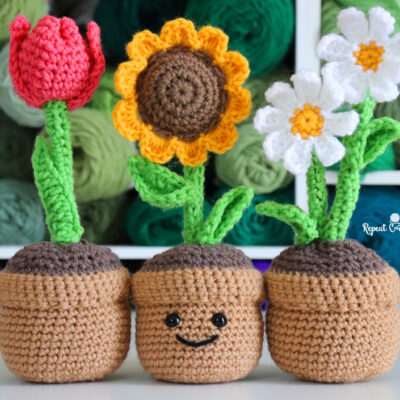
Leave a Reply