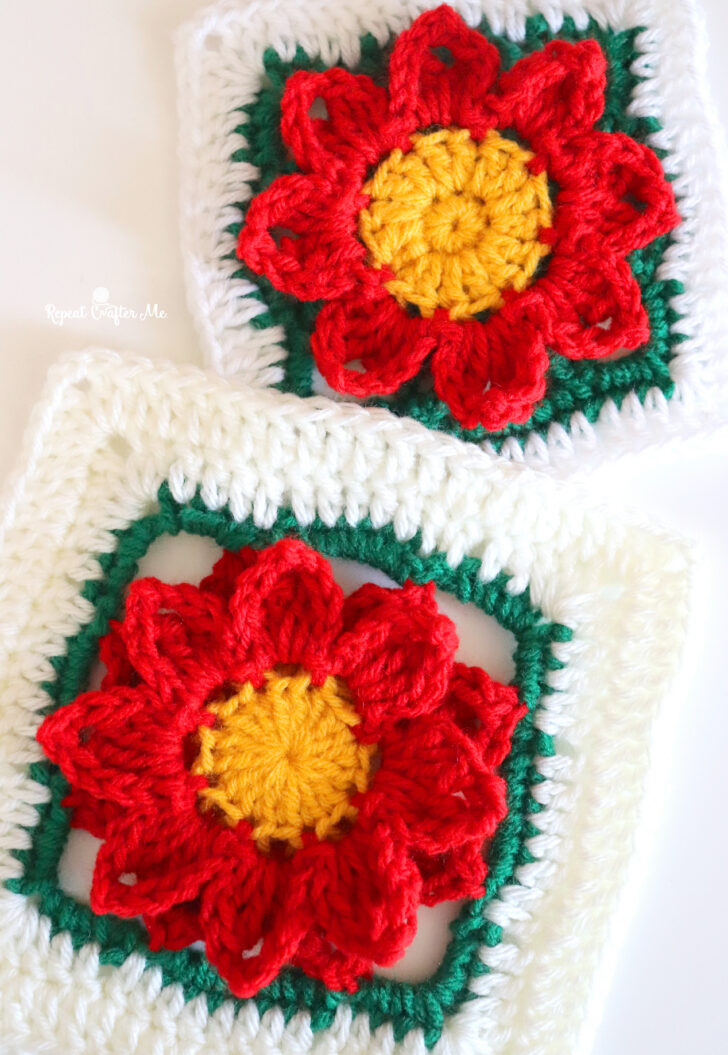
Poinsettias are one of my favorite Christmas flowering plants, and now we can crochet them into granny squares!
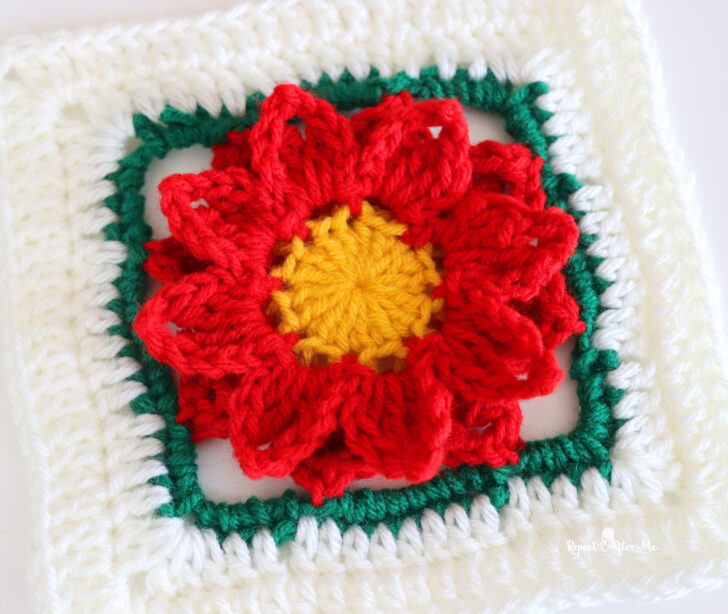
These Crochet Poinsettia Granny Squares feature beautiful dimensional red petals, a golden yellow center, and a festive green and white border. They are perfect for adding a little handmade holiday cheer to your crochet projects!
And because I couldn’t stop at just one, I’m giving you two different sizes: an 8 x 8 inch square and a smaller 6 x 6 inch square!
The larger square features two layers of red petals for a fuller poinsettia, while the smaller square has one layer of red petals with green leaves peeking out from behind.
I’ve included a step-by-step photo tutorial for the larger square. Once you get the hang of making the petals and working behind them, the smaller version should be easy to follow!
These squares would be beautiful joined together into a Christmas blanket, made into holiday pillows, or even used individually as festive decorations. You could also mix and match the two sizes for different projects!
A Little Poinsettia Fun Fact!
Did you know that the bright red “flowers” on a poinsettia aren’t actually flower petals?
They’re technically called bracts, which are modified leaves! The actual flowers are the tiny yellow clusters found in the center of the plant.
Poinsettias are native to Mexico and have become one of the most recognizable symbols of the Christmas season. Their association with Christmas dates back to Mexican holiday traditions, and today you’ll find them decorating homes, churches, and holiday displays everywhere.
For the sake of keeping this crochet pattern easy to follow, I’m going to refer to the red bracts as petals and the green sections as leaves. It’s just a little easier to explain that way!
Now let’s get crocheting!
Crochet Poinsettia Granny Square Pattern
Materials
- Red Heart Super Saver Yarn in:
- Gold or Saffron (yellow center)
- Cherry Red (poinsettia petals)
- Paddy Green (leaves and inner border)
- White or Off White (outer border)
- Size H/5.0 mm crochet hook
- Tapestry needle
- Scissors
Feel free to use whatever shades of red, green, yellow, and white you already have in your yarn stash!
Finished Sizes
Large Poinsettia Square: Approximately 8 x 8 inches
Small Poinsettia Square: Approximately 6 x 6 inches
Finished measurements may vary depending on yarn, tension, and hook size.
Crochet Abbreviations (US Terms)
- CH – Chain
- SC – Single Crochet
- DC – Double Crochet
- TC – Treble (Triple) Crochet
- SL ST – Slip Stitch
Large Crochet Poinsettia Square (8 x 8 Inches)
Starting with Gold or Saffron yellow yarn:
Round 1: Make a magic ring. Chain 2 and work 16 DC into the ring. Join to the first DC with a slip stitch. Fasten off yellow yarn.
Join Cherry Red yarn.
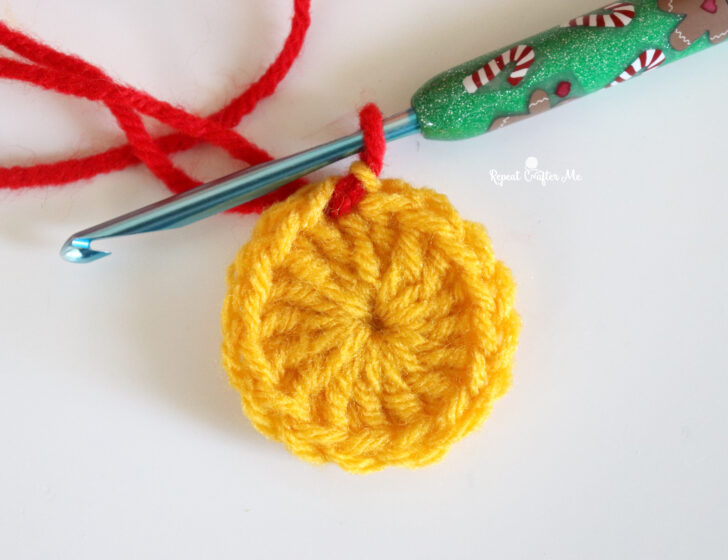
Round 2: Chain 3, skip the next stitch and slip stitch into the following stitch. Repeat around until you have 8 chain-3 spaces. Join.
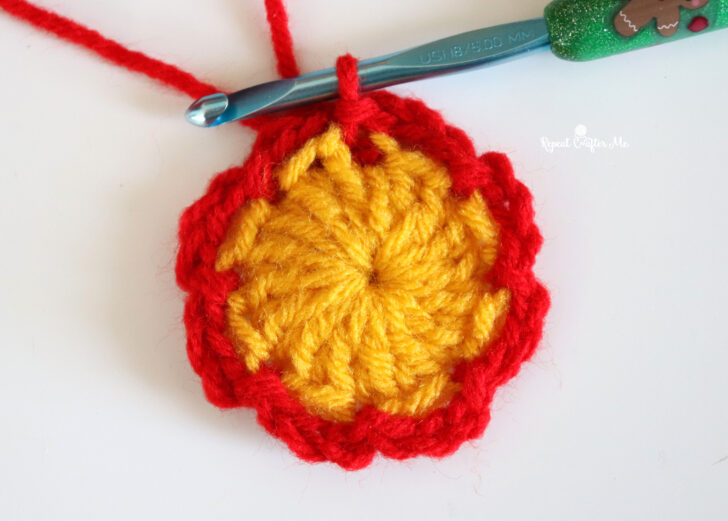
Round 3: Slip stitch into the first chain-3 space. Chain 2, DC, TC, chain 2, then SC into the second chain from your hook to create the pointed tip of the petal. TC, DC, chain 2, and slip stitch into the same chain-3 space.
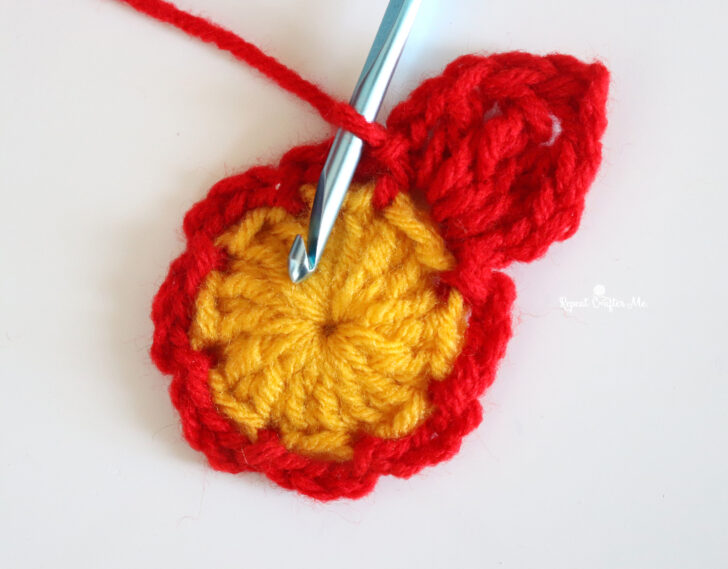
Repeat this petal sequence in each chain-3 space around until you have 8 red petals.
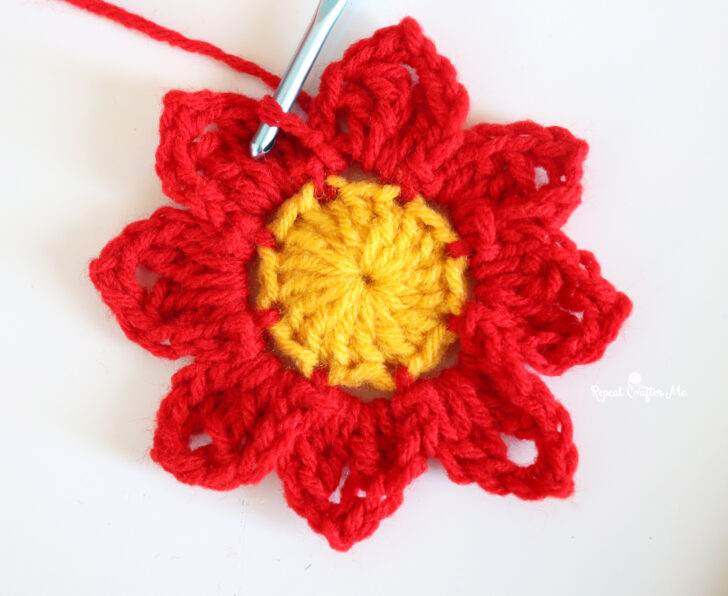
Round 4: Now we’re going to work behind the first layer of petals!
Flip your flower over and locate the skipped stitches from Round 2. Slip stitch into the first skipped stitch behind the petal closest to your hook.
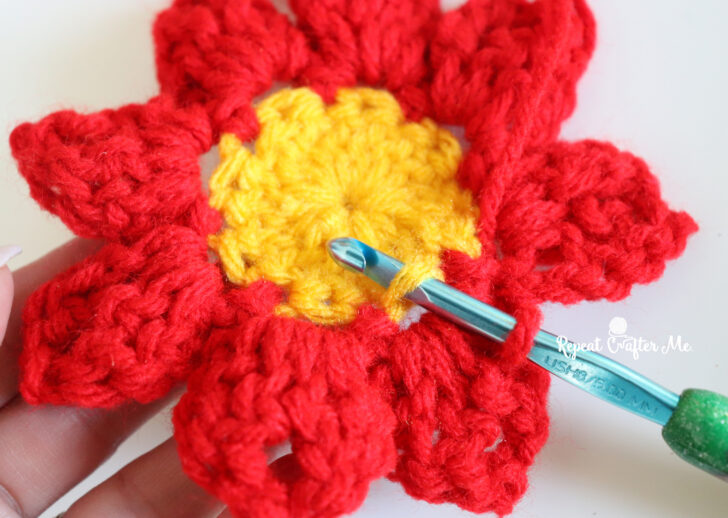
Chain 3 and slip stitch into the next skipped stitch behind the following petal. Continue around until you have 8 chain-3 spaces behind your first layer of petals. Join.
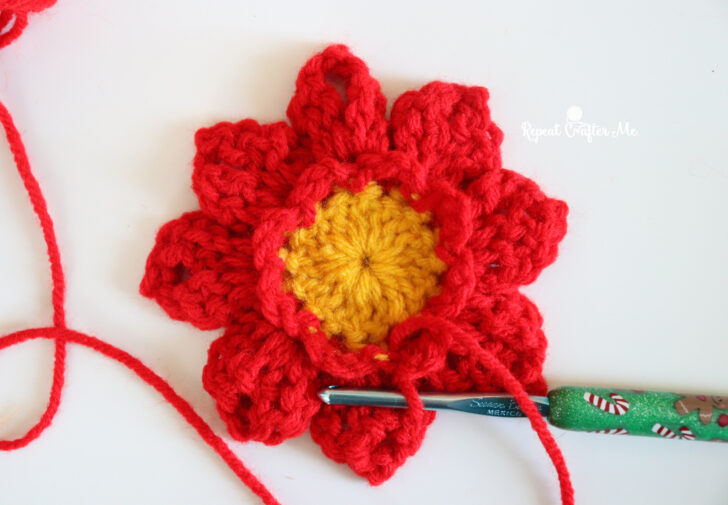
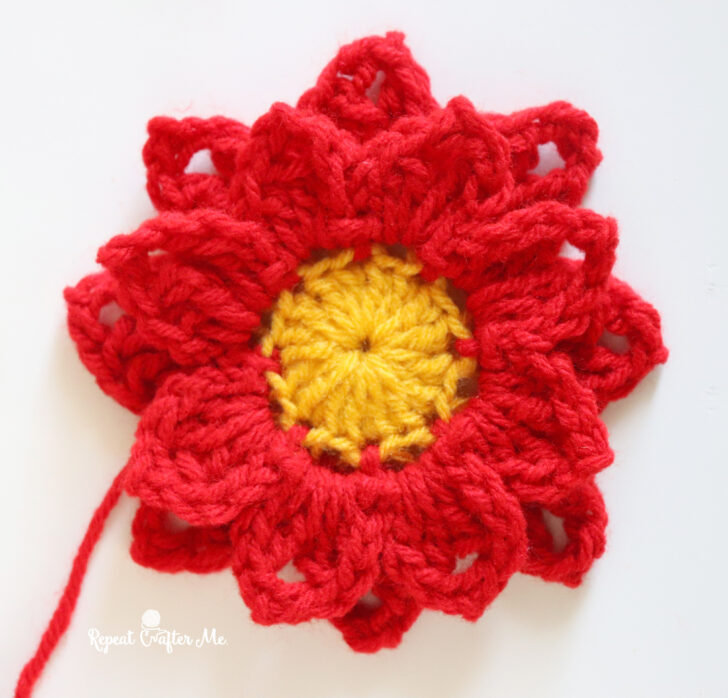
Round 5: Slip stitch into the first chain-3 space and repeat the petal instructions from Round 3, creating a second layer of 8 red petals behind the first.
Fasten off red yarn and weave in the ends.
Isn’t this such a fun little flower all on its own?! You could stop here and use it as a poinsettia appliqué for all sorts of holiday projects!
Adding the Green Border
Round 6: Join Green yarn to the tip of one of the back layer petals.
Chain 6 and slip stitch into the tip of the next petal. Repeat around until you have 8 chain-6 spaces. Join to the first petal tip.
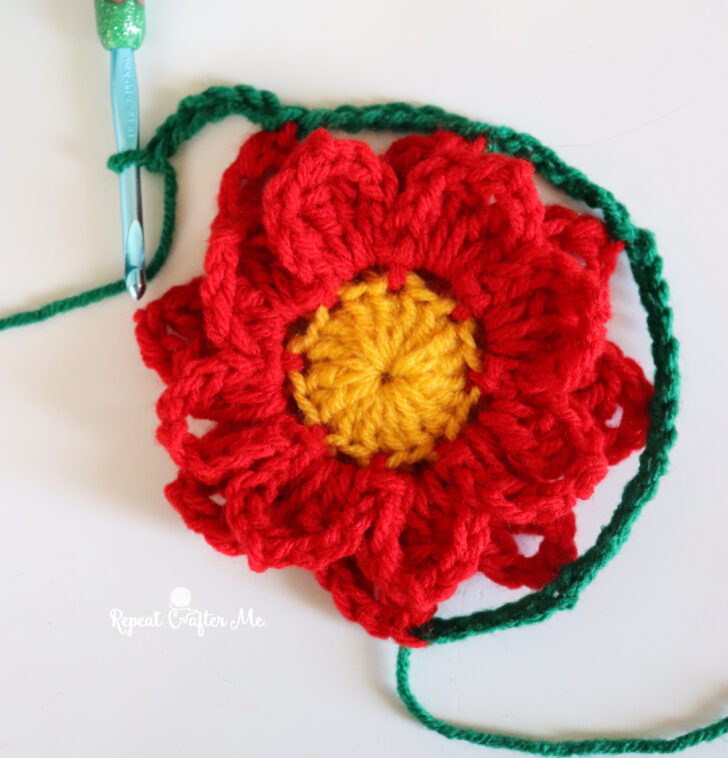
Round 7: Slip stitch into the first chain-6 space.
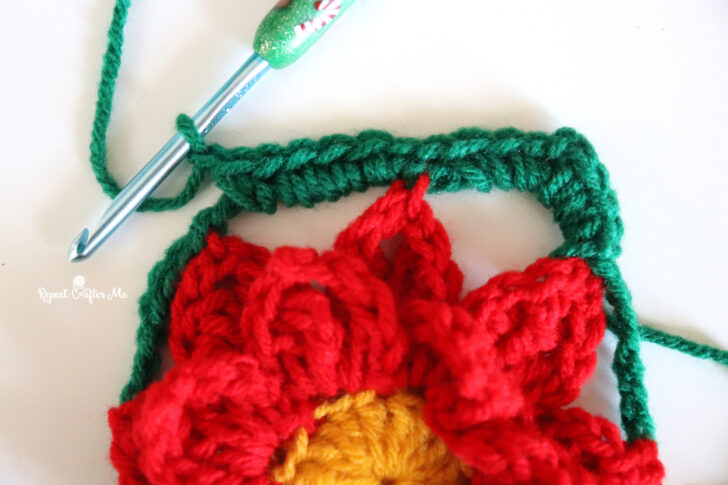
Chain 1 and work (3 SC, chain 2, 3 SC) into the first chain-6 space. This creates your first corner.
Chain 1, work 6 SC into the next chain-6 space, chain 1, then work (3 SC, chain 2, 3 SC) into the following chain-6 space.
Repeat from * around until you have 4 corners and 4 straight sections of 6 SC between the corners.
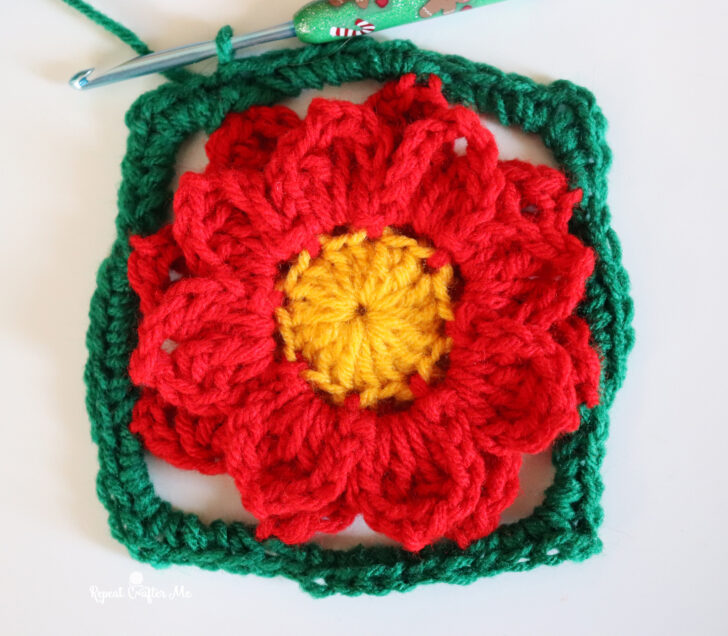
Join and fasten off green yarn.
Adding the White Border
Join White or Off White yarn.
Round 8: Chain 2 and work DC stitches around the square, making 1 DC in each stitch and chain-1 space. In each corner chain-2 space, work (2 DC, chain 2, 2 DC). Join.
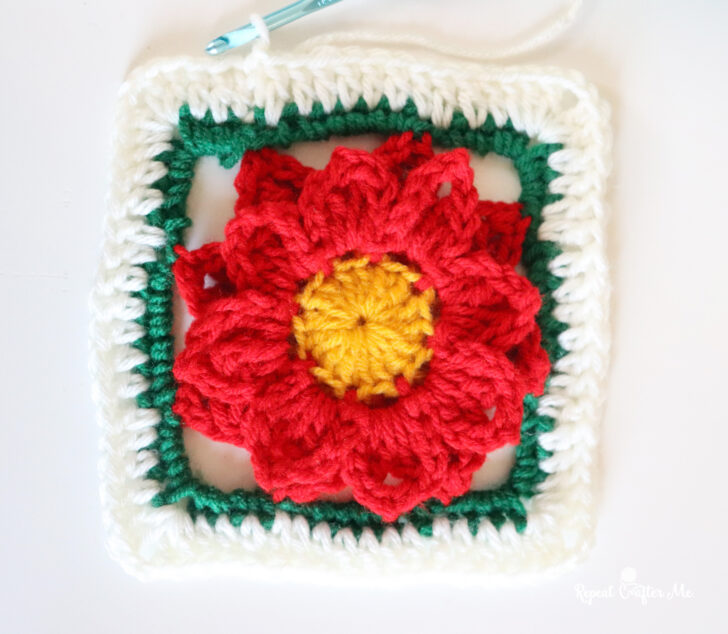
Round 9: Continue working DC stitches around the square, making 1 DC in each stitch and (2 DC, chain 2, 2 DC) in each corner chain-2 space. Join.
Fasten off and weave in ends.
Your finished square should measure approximately 8 x 8 inches!
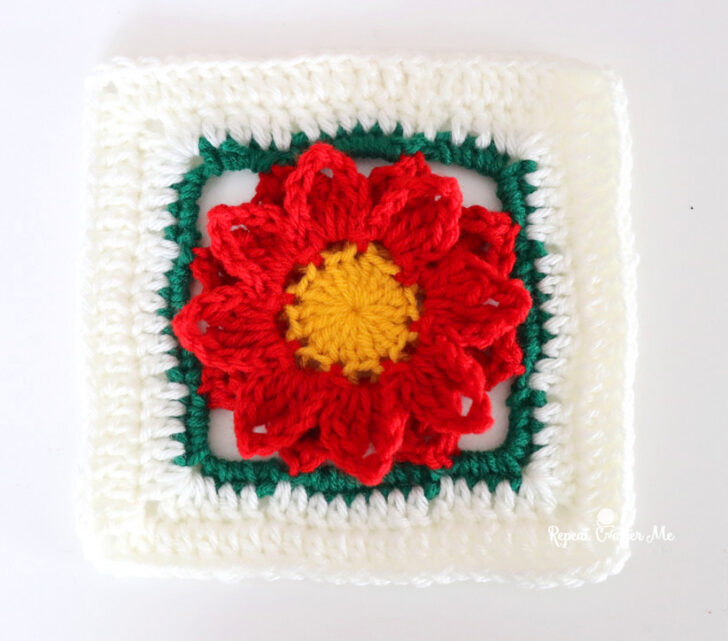
Want a larger square? Simply continue repeating the white border rounds until you reach your desired size.
Small Crochet Poinsettia Square (6 x 6 Inches)
This smaller version follows a similar construction but has one layer of red petals and a layer of green leaves.
If you’ve already made the larger square, you’ll recognize many of the same steps!
Starting with Gold or Saffron yellow yarn:
Round 1: Make a magic ring. Chain 1 and work 8 SC into the ring. Join with a slip stitch.
Round 2: Chain 2 and work 2 DC into each stitch around. Join. (16 DC)
Fasten off yellow yarn and join Cherry Red.
Round 3: Chain 3, skip the next stitch and slip stitch into the following stitch. Repeat around until you have 8 chain-3 spaces. Join.
Round 4: Slip stitch into the first chain-3 space.
Chain 2, DC, TC, chain 2, then SC into the second chain from your hook to create the petal point. TC, DC, chain 2, and slip stitch into the same chain-3 space.
Repeat around until you have 8 red petals.
Fasten off red yarn and weave in ends.
Adding the Green Leaves
Round 5: Join Green yarn to one of the skipped stitches from Round 2, behind a red petal.
Chain 3 and slip stitch into the next skipped stitch behind the following petal. Continue around until you have 8 chain-3 spaces. Join.
Round 6: Slip stitch into the first chain-3 space.
Chain 2, DC, chain 3, DC, chain 2, and slip stitch into the same chain-3 space. This creates your first green leaf.
Slip stitch into the next chain-3 space and repeat until you have 8 green leaves.
Fasten off green yarn.
Creating the Square
Round 7: Rejoin Green yarn to the chain 3 tip of the first green leaf.
Chain 6 and slip stitch into the tip of the next leaf. Repeat around until you have 8 chain-6 spaces. Join to the first leaf tip.
Round 8: Slip stitch into the first chain-6 space.
Chain 1 and work (3 SC, chain 2, 3 SC) into the first chain-6 space to create your first corner.
Chain 1, work 6 SC into the next chain-6 space, chain 1, then work (3 SC, chain 2, 3 SC) into the following chain-6 space.
Repeat from * around until you have 4 corners and 4 straight sections of 6 SC between corners.
Join and fasten off green yarn.
White Border
Round 9: Join White or Off White yarn.
Chain 2 and work DC stitches around the square, making 1 DC in each stitch and chain-1 space. In each corner chain-2 space, work (2 DC, chain 2, 2 DC).
Join, fasten off, and weave in ends.
Your smaller poinsettia square should measure approximately 6 x 6 inches!
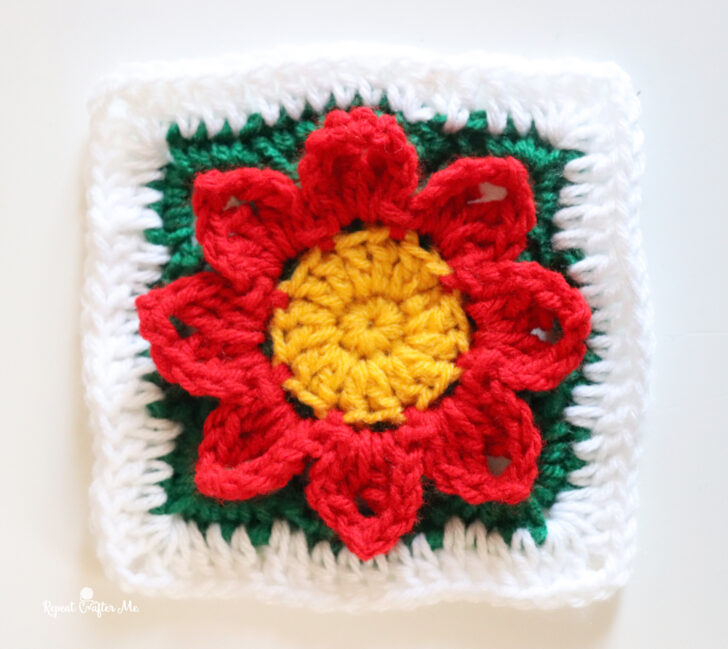
I love how these turned out! The layered petals really give the poinsettias some dimension, and the classic Christmas colors make them perfect for holiday crocheting.
I’m already imagining these squares joined into a beautiful Christmas blanket, but they would also make festive pillow covers, table runners, or even individual decorations.
And don’t feel limited to traditional red poinsettias! White, pink, or even a mix of colors would be beautiful, too.
I hope you enjoy making these as much as I enjoyed designing them!
Happy Holiday Crocheting!
Let’s stay connected!
Subscribe to my NEWSLETTER for free patterns straight to your inbox!
Repeat Crafter Me Facebook
Repeat Crafter Me Instagram
Repeat Crafter Me Pinterest
Repeat Crafter Me YOUTUBE

 Starbucks Stitch Markers and Bottled Beverages
 Crochet Christmas Tree Pixel Square
 Crochet Santa Pixel Square
 Crochet Daisy Rug with Clover Amour Large Hooks and Giveaway!

Having both an 8-inch and a 6-inch poinsettia granny square is exactly the kind of practical holiday pattern note I like. Side note from a warehouse desk: a GTIN-14 barcode tool has been handy for ITF-14 case labels, with check-digit checks and browser-only SVG or PDF export.