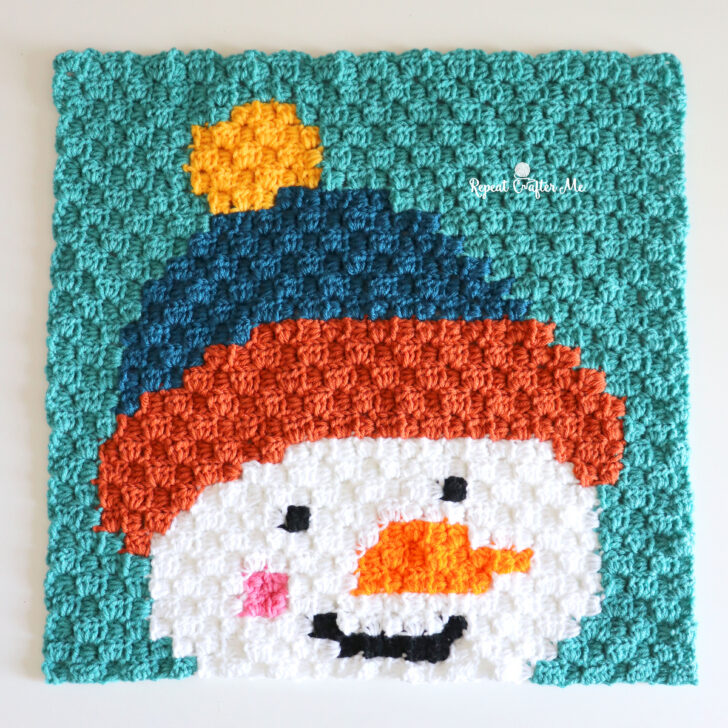
There’s snow place like Christmas… even in July!
The second square in my Christmas in July Corner-to-Corner Crochet Series has arrived, and this cheerful snowman is bundled up in a cozy beanie with the sweetest little carrot nose.
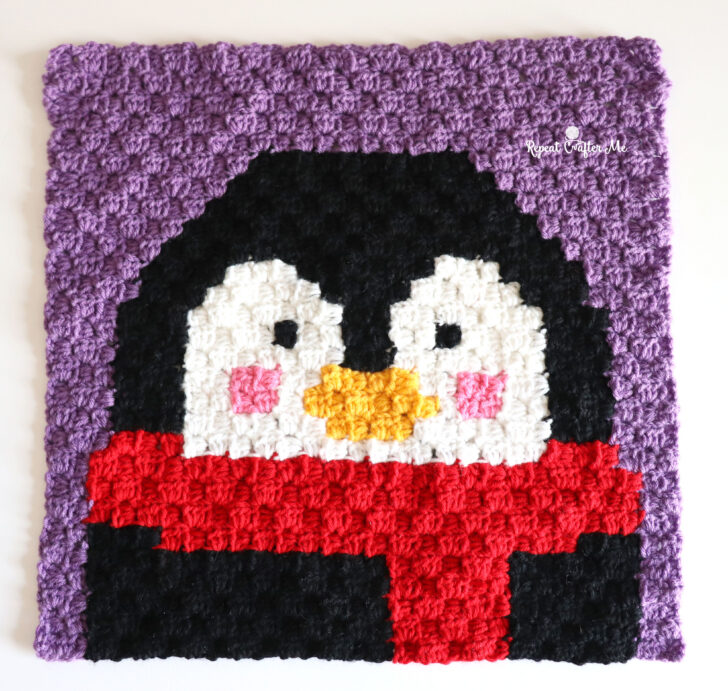
If you stitched the penguin, you’re already on your way to creating a festive collection of Christmas characters! Each square is designed to stand beautifully on its own as a pillow panel, wall hanging, or blanket square, but together they’ll eventually become one playful holiday blanket. I think you’ll love how everything comes together in the end!
What is Corner-to-Corner Crochet?
If you’re new to Corner-to-Corner (C2C) crochet, it’s a fun and highly addictive technique that turns pixel-style graphs into beautiful textured crochet pieces. You’ll start in one corner of the design (typically the lower right) and work diagonally in rows toward the opposite corner. Each pixel square represents one block made up of a chain 2 + 3 half double crochets (HDC). I prefer using HDC instead of double crochet for a slightly tighter, neater stitch. C2C is a great way to bring character designs, icons, and seasonal motifs to life!
Before you get started, below is a Corner-to-Corner Video Tutorial if you need some help with the technique:
Fun Fact!
One of my favorite things about C2C crochet is that it’s completely reversible! The back of your project becomes a mirror image of the front, making either side perfectly usable depending on your project.

Three Ways to Follow the Pattern
Everyone has their favorite way to crochet, so I’ve included several options.
- >>> Snowman Color Block Chart <<<
- >>> Snowman Written Color Change Instructions <<<
- >>> Snowman Pixel Graph <<<
The links above are the free instructions to make your c2c square. Follow the pixel graph, the written instructions, or the color blocks.


Finished Size
This square measures approximately 18 x 18 inches, making it the same size as the Penguin C2C Square and ready to join with the rest of the series.
Materials
I used Red Heart Super Saver in:
- Jade (background)
- Teal (hat)
- Carrot Orange (hat brim)
- Saffron (pom)
- White (snowman)
- Black (eyes and smile)
- Perfect Pink (rosy cheek)
- Pumpkin (nose)
Size H Crochet Hook
Tapestry Needle
Yes… I know! Somehow Pumpkin makes the best carrot color, while Carrot Orange looks just right for the cozy hat brim. Yarn color names don’t always make sense!
>>> Shop colors HERE on Yarnspirations.com <<<

Helpful Finishing Tip
Don’t rush to trim your yarn tails!

As you’re weaving in the ends, take a close look at your design. If you notice two same-colored C2C blocks that should touch at the corners but don’t quite connect, use that matching yarn tail to tack the corners together as you weave.
I did exactly that on the snowman’s smile, and it really helped smooth out the curve and make the finished design look even cleaner.
It’s a tiny finishing detail that makes a big difference!
Coming Soon…
Our Christmas crew is growing!

The penguin now has a snowman friend, with two more festive characters still on the way. Once all four squares are finished, I’ll reveal how they come together into one whimsical Christmas blanket.
>>> Penguin Christmas in July C2C Crochet Square <<<
Let’s stay connected!
Subscribe to my NEWSLETTER for free patterns straight to your inbox!
Repeat Crafter Me Facebook
Repeat Crafter Me Instagram
Repeat Crafter Me Pinterest
Repeat Crafter Me YOUTUBE
 Starbucks Stitch Markers and Bottled Beverages
 Crochet Christmas Tree Pixel Square
 Crochet Santa Pixel Square
 Crochet Daisy Rug with Clover Amour Large Hooks and Giveaway!
Absolutely adorable! ⛄ The snowman design is beautiful, and your tutorial is so easy to follow. Thanks for sharing! ❤️
Using half double crochet instead of double crochet for each C2C block seems like a smart way to keep the pixel design tighter and the snowman’s features cleaner. I also appreciate offering the chart, written color changes, and pixel graph, since people process these patterns very differently. The finishing tip about using an existing yarn tail to tack same-colored corners together is excellent; applying it to the smile would make that curve read much more smoothly. Keeping every square at 18 by 18 inches should make assembly easier later. Are you planning to add a shared border around all four characters before joining the final blanket?
This crochet penguin is so cute and beautifully crafted. It adds a cozy touch to any room. Highly recommended!
Very neat blog post.Really looking forward to read more. Awesome.
This crochet penguin is absolutely adorable and nicely made, bringing a warm, cozy charm to any space. I’d definitely recommend it.
Thank you for sharing your expertise on this topic. Your post was insightful and well-researched, and it provided valuable information for readers. I look forward to reading more of your content. If you’re interested in learning more, you may also find our article on Algo Trading Software Development Cost helpful, as it explores the key factors that influence pricing, features, and business planning.
Your Christmas Snowman C2C Crochet Square looks wonderful! The design is festive and would make such a thoughtful handmade gift or cozy holiday decoration. I also came across some useful information while browsing Martin Court Portal and it’s always nice finding helpful resources alongside creative inspiration like this. Thanks for sharing your beautiful crochet work, and I hope to see more of your holiday patterns soon.
This is such a creative and easy-to-follow tutorial! I really appreciate the clear step-by-step instructions and beautiful photos. They make the whole project much easier to understand, even for beginners. I enjoy exploring helpful websites that share quality content in different niches. I also run a website called APKPCG , where I publish informative guides about Android gaming apps. Thanks again for sharing your creativity and inspiring your readers. Looking forward to more amazing tutorials!
This snowman is just too cute! ☃️ That little carrot nose and rosy cheek are giving me all the cozy winter feels – even in July! I love how you’re building this Christmas character collection one square at a time. The teal beanie with the saffron pom is such a fun color choice too, really makes him pop against that jade background.
And thank you for the tip about tacking same-color corners together while weaving in ends – that’s GENIUS! I’ve definitely had moments where my C2C curves looked a little “off,” and that trick will save so much frustration. Also, I totally agree about yarn color names being misleading… Pumpkin for the carrot and Carrot Orange for the hat brim? Classic!
For anyone diving into C2C for the first time, don’t be intimidated – it’s way more forgiving than it looks, and the textured result is SO satisfying. If you’re tracking your progress or measuring your finished squares for a blanket, and need to convert inches to centimeters or miles to kilometers (because sometimes patterns come from all over the world!), check out – super handy and free to use!
Can’t wait to see which Christmas friend shows up next in this series! Keep those hooks flying!
very nice
if you want to download instagram reels or videos and save stories ho visit iwebtv!
Seeing that snowman bundled in its tiny beanie and carrot nose reminds me how a simple C2C graph can evoke the warmth of winter even when the sun is blazing. Building on the penguin square, each stitch becomes a pixel of anticipation, turning a summer afternoon into a quiet rehearsal for holiday storytelling. Beyond the festive charm, this approach showcases how modular
Great to see the second square in your Christmas in July C2C series! The snowman’s beanie and carrot nose sound adorable, and I like that each square can be a standalone pillow panel or wall hanging before joining into a blanket. Your note about starting with the penguin to build the collection makes me want to try both squares.
The beanie and the carrot nose are why this July snowman reads as a character and not a white circle. One square photo hides the carrot. I split the shot into a numbered grid so the hat stays its own tile. I run that split in ImageSplit — browser only, no upload.