Repeat Crafter Me

Crafts, DIY projects, FREE crochet patterns, crock pot recipes and more!

  • Home
  • About Me
  • Crafting
  • Crocheting
  • Crockpotting
  • Contact
  • Books

Search Results for: burlap wreath

Burlap Fall Wreath

September 25, 2012

I know a lot of you are fans of my Crocheted Fall Wreath, but something about it was rubbing me the wrong way. I think it was the turquoise yarn. I was trying to convince myself that I liked it, but it just didn’t mesh well. So I have been thinking about making a new wreath and became inspired by my Yarn Wrapped Letters for Fall. I decided to make a coordinating piece for the front door!

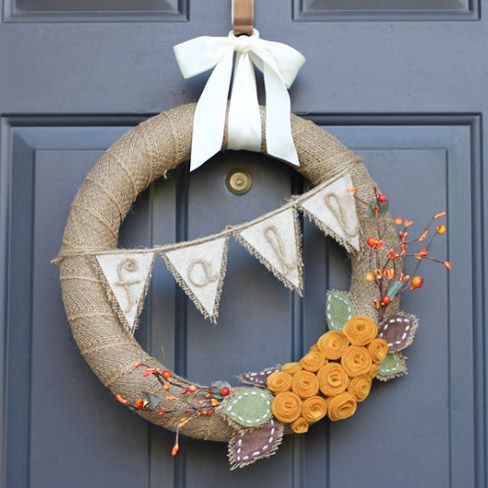
This was actually pretty easy to put together. Here are the materials:

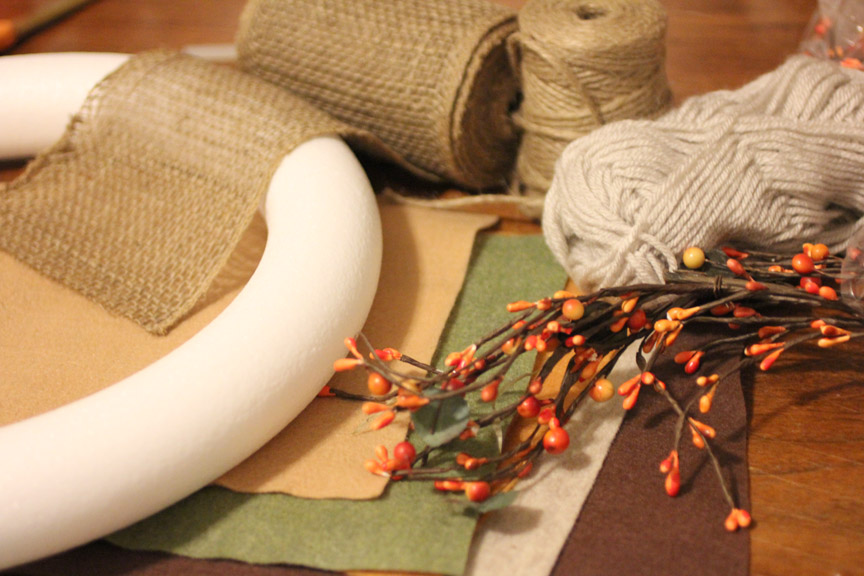
-16″ Styrofoam wreath
– Roll of Burlap Banner (purchased at Michaels)
– Hemp Twine
– Berry Garland (also purchased at Michaels)
– Yarn
– Felt in fall colors

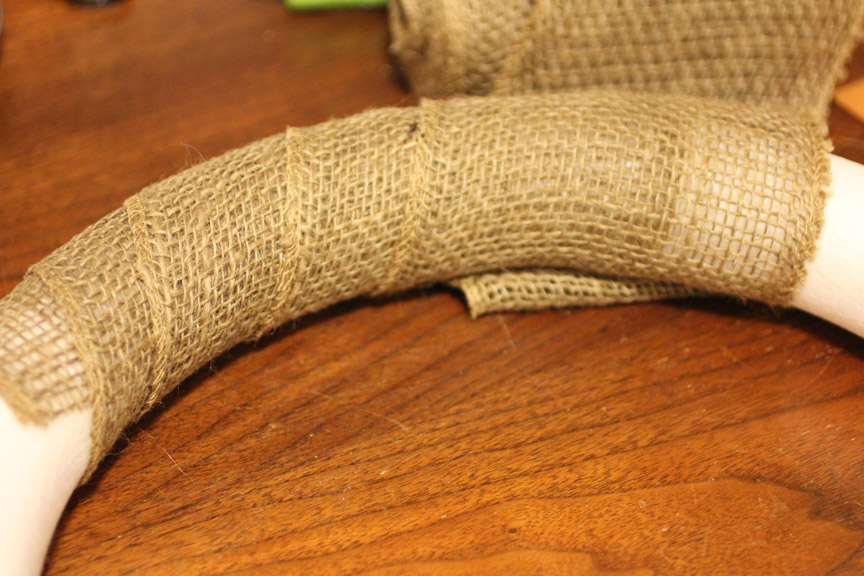
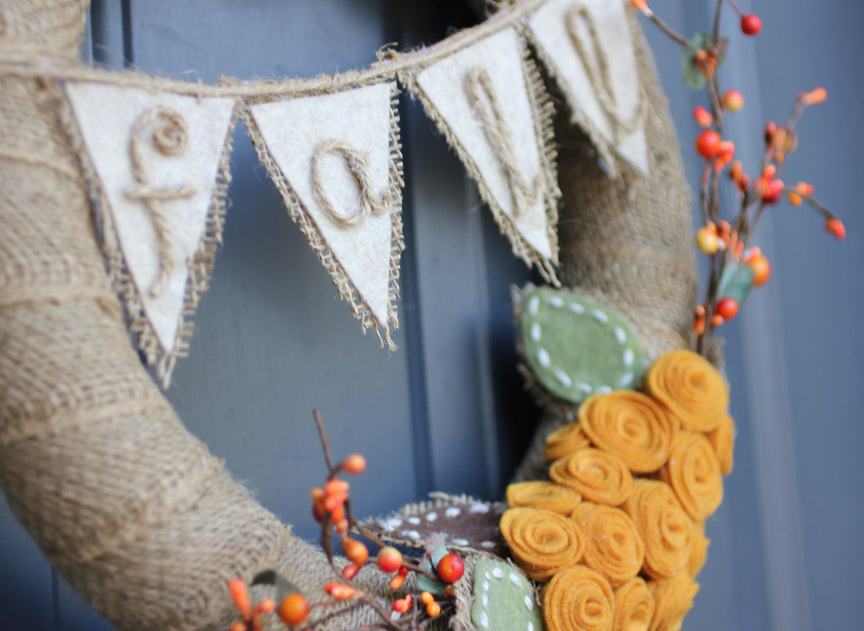
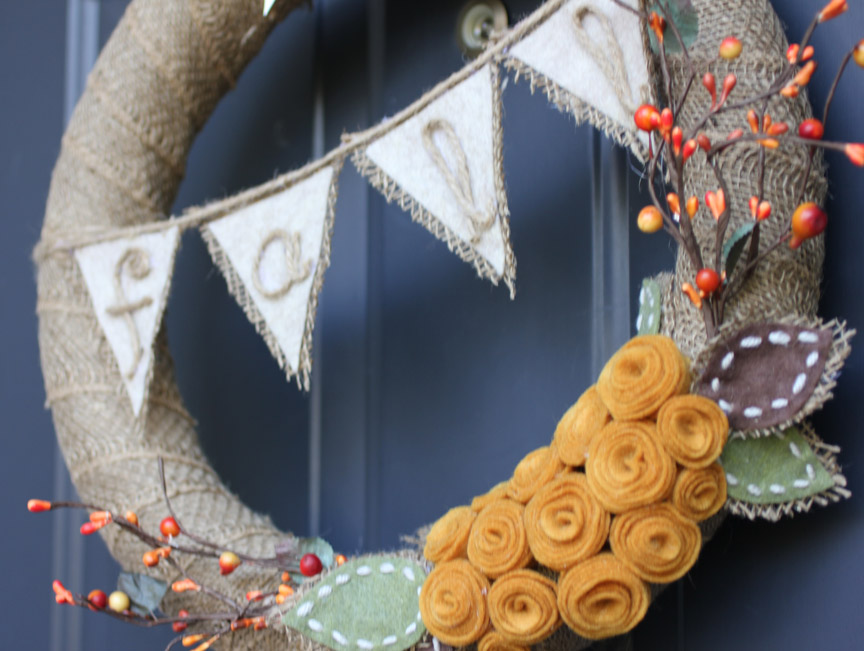
First I wrapped the styrofoam wreath with the roll of burlap. I added a dab of hot glue to seal down the first piece and then was able to tightly wrap the burlap around the rest of the wreath with very little glue.

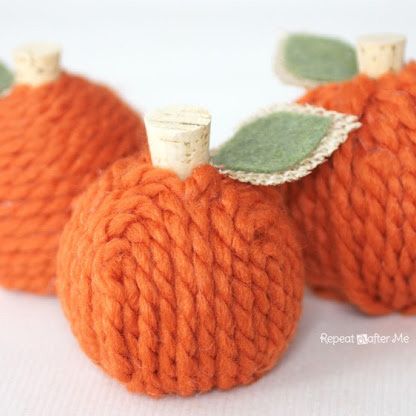
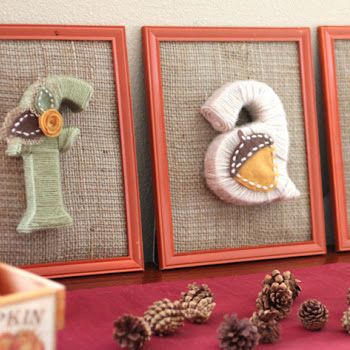
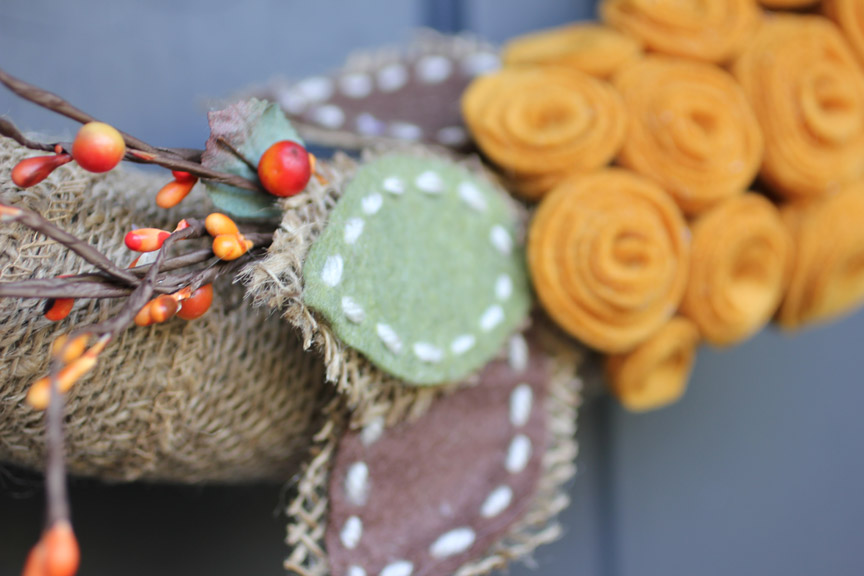
Then I started on the rosettes and leaves. I provide a tutorial for both of those over at my post for my Yarn Wrapped Letters for Fall.

When I had everything laid out and positioned the way I liked it, I started to hot glue the pieces onto the wreath. The berry garland was made up of bendable wire which made it easy to just poke right through the burlap and styrofoam.

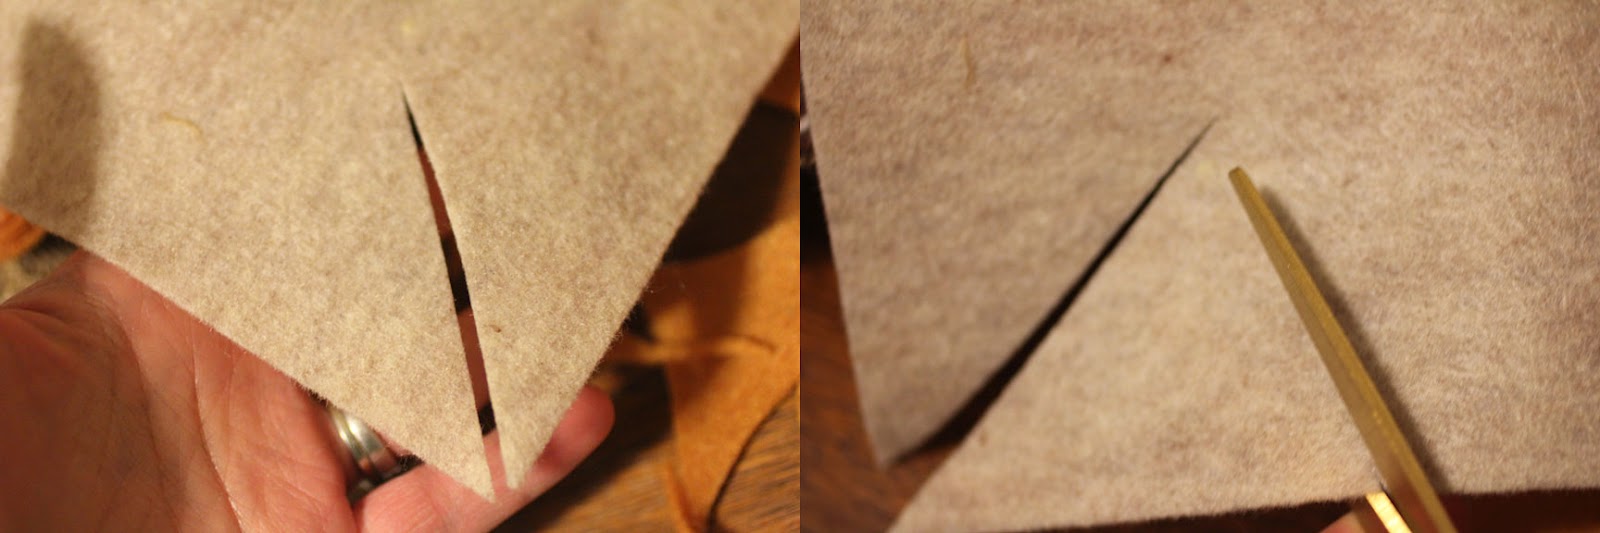
Next I made the pennant banner. An easy way to make nice pennant triangles from felt is to just cut a straight line down the corner of the felt sheet, then cut the top at a slight angle.

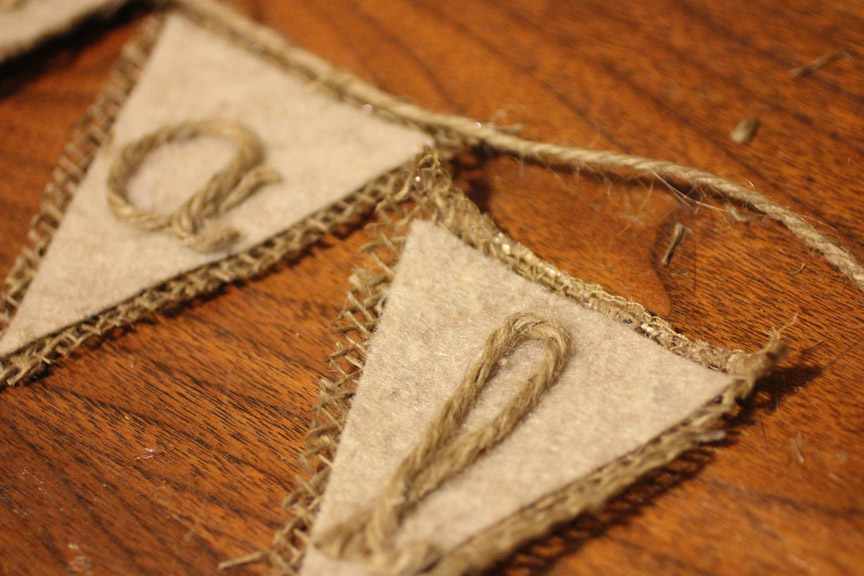
I hot glued the the hemp twine in the shape of “fall” letters and then glued each felt pennant onto a piece of burlap. Then glued it to a long strand of twine.

Now it was ready to hang!

Do you love it as much as I do?! Stay tuned to for more fall decor on the blog this week!

Filed Under: Crafting, Uncategorized 15 Comments

Crochet Acorn Pine Cones

November 4, 2014

On our walk home from school yesterday the kids and I found a ton of big beautiful pine cones. I quickly had them help me collect a bunch of them because I had a craft project in mind 🙂  I was inspired by a Fall wreath I saw in Country Living Magazine. It had knitted pine cone acorns (hmmm upon closer look I think those are burlap) hanging from the center and I thought I could easily come up with a crochet version. These are the perfect decor for Fall and would be especially nice for a Thanksgiving centerpiece. I am sure you could find many ways to use and display these!

Materials:
– Worsted Weight Yarn. I used Lion Brand Vanna’s Choice in Beige, Honey, and Rust.
– Size G Crochet Hook
– Tapestry needle
– Pine cones of any size. It helps if the top is flared out a little.
– Poly-fil stuffing (if needed)
Abbreviations:
Magic Ring Tutorial
SC = Single Crochet
DC = Double Crochet
Essentially you are going to make a crochet cozy to cover the bottom part of your pine cone. You will tuck and tighten the rim of the crochet cozy under the pine cone pieces that flare out at the top. You can stuff it lightly with poly-fil stuffing to help shape the bottom if needed.
This pattern is customizable. The pattern below fit my large pine cones which were about 5 inches long. The smaller pine cone (rust colored) was about 3 inches long. For that one I stopped increasing after round 3 and continued to crochet in only 7 more rounds. Add more or less rows depending on the size of your pine cone!

Pine Cone Cozy Pattern:
Magic Ring, make 10 SC in ring, pull tight and continue to crochet in rounds
Round 2: 2 SC in first, SC in next, repeat around (15 SC)
Round 3: 2 SC in first, SC in next two, repeat around (20 SC)
Round 4: 2 SC in first, SC in next 3, repeat around (25 SC)
Round 5-14: SC in each stitch around (25 SC)
Round 15: DC in each stitch around.
Fasten off weave in ends

Weave a strand of yarn in and out of the double crochets.

Wrap around pinecone and stuff lightly with polyfil if needed to give it more of a rounder shape.
Tuck double crocheted edge under the pinecone needles. Pull tight with your strands and tie tight.

Filed Under: Crocheting, Uncategorized 22 Comments

Crafting

Kids Crafts, DIY Projects & More:


Neck Tie Lacing Card

Box Airplane

Button Daisies

Watermelon Buttons

Spoon Garden Markers

Rock Art

Faux Succulents

Paisley Rocks

Pony Bead Butterfly

Pizza Party

Weight Watchers Success

Felt Pizza Bunting

Alphabet Trail Mix

Sock Snowmen

Project Life

Felt Snow Friends

Safety Pin Skates

Peppermint Magnets

Penguin Button Art

Craft Stick Ornament

Felt Play Pizza

Travel Boxes

Paper Roll Gnomes

Girl Nursery Ideas

Felt Princess Crown

Pinecone Owl

Alphabet Art

Gumball Matching

Animal Clothespins

Button Candy Corn

Pooh Nesting Dolls

Monster Mugs

Hair Bow Holder

Shark Finger Puppet

Flower Pens

Teacher Printable

Story Stones

Felt Flowers

Finger Paints

Wood Buttons

Maternity Photos

Canvas Art

ABC Art

Pom-Pom Flowers

Pallet Herb Garden

Gender Reveal

Bottle Cap Stamps

Countdown Calendar

Stick Garden Markers

Sockasaurus

TP Roll Cars

Announcement

Timeline Ticket

Barn Card

Felt Fishing

LadyBug Valentine

2013 Glasses

26 Heart Snowflake

Owl Hand Warmers

Red Light Green Light

Winter Felt Friends

Airplane Games

Snowman Playdoh

Fire Truck Wagon

Felt Forest Friends

Countdown Frame

Angry Birds Pumpkins

Milk Bottle Penguins

Pumpkin Topiaries

Half Birthday

Fall Wreath

Apple Containers

Cardboard Elevator

Gender Reveal Party

Balloon painting

Piggy Toe Socks

DIY play mitt

Craft Room Printable

Sea Shell Crafts

Noodle Telescope

Stenciled Adirondack

Noodle Tic Tac Toe

Disney Nesting Dolls

Gift Wrap Station

Recycled Rocket

Shelf Fire Station

No-Sew Flag Shirt

Jewelry Tree

Potty Tips

Mom Shortcuts

DIY instruments

Pumpkin Starters

Race Track

Garden Rock Signs

Earth Felt Book

Window Bird House

Pantry Organization

Restaurant Games

Paper Flowers

DIY Parachute

Monster Party

Monster Piñata

Monster Goodie Bags

Emotion Stress Balls

No-Sew Number Shirts

Monster Party Hats

Putting Green

Monster Invites

Duct Tape Tie

Super Why Mask

Thing 1 & 2 Gloves

Cardboard Car

Elmo Card

Train T-shirt

Year of Dates

Airplane Target

Monkey Counting

Rock Dominoes

Craft Stick Puzzles

Sesame Nesting Dolls

Perfect Pair Game

Love Bugs

Superhero Brothers

Fishtail Braid

Felt Finger Puppets

Drilled Pumpkins

Magnetic Robots

Crafting in the Kitchen:


Pot O Gold

Thing 1,2,3 straws

Pizza Cookies

Football Skinny Cow

Robot Valentine

Rolo Rings

Hedgehog Cookies

Halloween Pizzas

Stamped Shortbread

Best Carrot Bars

Krackel Gift

Banana Oat Bites

Sheep Cupcakes

Chick & Bunny Eggs

Rainbow Treat

The Lorax Snack

Easy PB Oat Bars

Candy Bar Card

Love Potion #9

Bugs and Kisses

Moon Cookies

DiEggo Waffle

Monster Push Pop

Clock Cookies

Snowman Truffles

Mummy Sandwich

Fishy Bento Box

Candy Bar Wrapper

Owl Rice Cakes

Mini Cakes

Reese’s Candy Notes

Monster Cupcakes

April Fools Pancakes

Nutella Heart Pancake

Rainbow Fruit

Fun Fruit Ideas

Yarn Crafts:


Yarn Ball Cupcake

Princess Leia Wig

Yarn Feeder

Finger Weaving

Crochet Words Mug

Yarn Storage

Yarn Ball Markers

Yarn Valentine

Owl stitch Markers

Yarn Pumpkins

Nursery Yarn Letters

Kool-Aid Yarn Dye

Pumpkin Pom-Poms

Fall Letters

Yarn Words

Let’s Connect!

  • Email
  • Facebook
  • Instagram
  • Pinterest
  • Twitter
Hi and thanks for stopping by! I'm Sarah, the crafter, crocheter and occasional crockpotter behind this blog. As a wife and mom of 3 my days are busy but I always find time to pick up my crochet hook or indulge in something crafty. I have a passion for crafting and crocheting and offer my patterns and tutorials for free! I hope you enjoy everything you find here and please feel free to repeat after me!

NEW BOOK PRE-ORDER!
Crochet Cute Critters on Sale!

Privacy

Follow by Email

© 2023 · Repeat Crafter Me · Site by High Note Designs