Way before I started blogging about my crafts, I was dying to make a gift wrap station. But I always felt a little intimidated by this project. When I found out this weeks material was wood in the One Crafty Contest, I knew it was time to step it up and take this project off the back burner. And let me tell you, if I can make this, you can do it too!
This gift wrap station is the ultimate space-saving solution made on a budget! I am able to keep all my essential items in one place and with the never-ending birthdays, baby showers, and holidays, gift preparation is easy now that everything is at arms reach. This station holds 5 rolls of wrapping/craft paper, has a rack for tissue paper, 5 hooks to hang bags and bows, 3 ribbon stackers made from dowel rods and styrofoam circles, boxes for cards and mason jars for confetti and other decorations. Finally gift giving is less stressful now that all my supplies are organized and located in one place!
Here is what I used:
– Try Ply Underlayment wood- 48″x47 3/4″
– 1″x2″ piece of douglas fir wood – 96″ long
– 5 Dowel rods – 5/16″x48″
– 10 cup hooks
– 5 Adhesive plastic hooks
– Two D Ring Hooks (enough to hold 50 – 100lbs)
– Behr white paint
– 4 metal brackets
The wood, including dowel rods, D hooks, and brackets only cost me $19.58! I had the cup hooks and plastic hooks at home. I did have to buy the paint, but am now thinking I could have probably used paint we already had at home but for some reason I was set on making it white. Most store bought wall organizers cost upwards of $80-$150 for the basic models, so this project is definitely budget friendly!
Now before I go on, just let me mention that I do wish I had purchased thicker wood other than the underlayment (especially for the shelves). But I will leave that up to you.
I purchased my supplies from Home Depot and they cut all my wood to the size I needed (for FREE)! Half the work was done for me by the time I got home!
First, The Underlayment was cut to 35″ x 48″ which left the perfect amount for two 32″ long x 6.5″wide shelves to be cut from the leftovers.
Then, the 1×2 was cut in half to make two 48″ long frame edges.
I nailed the 1×2’s onto the sides of the underlayment then got to painting all my pieces.
You will want to attached your D ring hooks to the back side before screwing in the cup hooks. This is how you will hang it on your wall.
Then go ahead and screw in your cup hooks. I placed them approx. 5″ apart starting from the bottom. You will need to drill a small hole to get started and then twist the cup hooks in place.
At this point I hung it on my wall and then decided to put up the shelves. It was a good thing we did it this way because the brackets had to be screwed through the underlayment and into the wall. This is why I mentioned earlier that you may want a bigger piece of wood. The underlayment is just a little too thin to screw into. My hubby helped me with this part :o)
Now cut your dowel rods so they rest along the cup hooks (about 37″ long). Do not discard the leftover dowel rod, this will be your ribbon stacker!
Stick the leftover dowel rod into a styrofoam circle and viola! You have a ribbon stacker! It really can’t get any easier than that :o)
Lastly, stick your adhesive hooks along the bottom to create a place to hold gift bags and bows! Even though they had adhesive backs, I ended up hot gluing them on for a better hold.
Now you are ready to organize your gift wrap. I used mason jars to hold things like buttons and confetti, boxes to hold cards and tags, and a pencil holder for my scissors.
This lovely gift wrap station sits in our laundry room/craft room on the left hand side of the wall by the door. It is out of sight for those who are just walking by, but conveniently located for me when I am at my craft table.
Want to see more DIY projects? Follow along on my Repeat Crafter Me Facebook page to see sneak peeks of what I am working on!


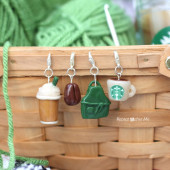
 Starbucks Stitch Markers and Bottled Beverages
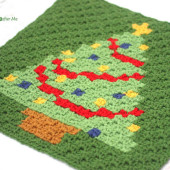
 Crochet Christmas Tree Pixel Square
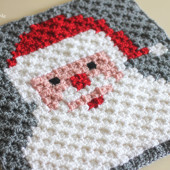
 Crochet Santa Pixel Square
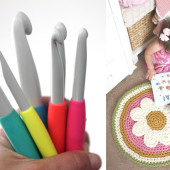
 Crochet Daisy Rug with Clover Amour Large Hooks and Giveaway!


Love this Sarah! I have some very similar paper from Costco 😉 Pinning this one!
Thanks Trish! I bought that paper at the Dollar Tree! Good to know that Costco carries similar. I bet their rolls are bigger :o)
Amazing little space that holds SO MUCH GOODNESS GIRL!!! I love this! Totally need to steal your idea- thank you very much for the tutorial!! Great job!
Jen
Yay! I voted for your project on One Artsy Mama. Congrats on being the top contestant 🙂
Love it! I have always wanted one of these. I need to find some wallspace so I can do it 🙂 Thanks for the helpful post.
Love it Sarah!!! Gosh I wish I could have a wrap station!! I have all my wrapping stuff in bins. But they are identified hehe
Thanks for sharing at The DIY Dreamer.. From Dream To Reality!
Oh, very nice. This is a project I think I will have to to tackle this summer. You make it look so easy, too. I thought they would cut the wood at hone depot but every time I ask my husband if w can just have the wood cut before we take it home, he always says they don't do that. Hmm, I think there may be a little male pride there. Thanks for sharing.
Thats a great "shelf" for you to keep your wrapping stuff on 🙂
/Sewe
Wow, looks great and soooo organized! And so much simpler than I thought it would be. If you're ever looking for another place to share your crafty ideas, join us over at Etcetorize. Party starts later tonight, would love to see you there!
Oh I want an area like this!!!!
This is such a great space! I love the tips and the finished product. Thanks for sharing@
This looks so organized & attractive. Great job.
Warmly, Michelle
This is awesome. so much better than the big box where all our supplies currently live. I would love it if you would share on Tout It Tuesday. http://www.claimingourspace.com/2012/06/tout-it-tuesday-11.html
Thanks so much for sharing on Tout It Tuesday! Hope to see you next week.
CONGRATS!!!! You've been featured at The DIY Dreamer… From Dream To Reality!! Come grab your featured button 🙂
http://thediydreamer.blogspot.ca/2012/06/from-dream-to-reality-linky-party-21.html
It looks amazing! Such a great idea 🙂
This looks so nice!! We need to do something like this! We appreciate you linking up to our "Strut Your Stuff Saturday". Hope you'll come back soon! -The Sisters
Love that you have all your bits and pieces for giftwrapping in the same spot. Clever girl!
Hey Sarah! The post is up this morning at http://www.happyhourprojects.com/2012/07/gift-wrap-station-by-guest-blogger.html. Thanks so much for sharing!
you are incredible! fantastic work, Sarah– so happy that you've been recognized for the fantastic artist you are. 🙂
Love all of these – the color palette is dreamy!
Customer recommendations for Website Design Indianapolis Service
bmwのコレクションのためのボールのハイライトの1つ(非常に優秀な腕時計デザイナーのマガリmetraillerによって設計されていることを除いて)bmwブランドはダイヤルの上にむしろ微妙であるということです。その時計はボールによってbmwの商標がない」あなたの顔であることを意味します。」小さなと上品なbmwのロゴは、小柄な形で3時の時間インジケータの隣に存在しています。ロゴは、それが着用者のことを思い出したい場合にはないが、誰が着用者の手首に腕時計を見る人には容易に明らかであった。 http://www.eevance.com/tokei/hermes
ものhalios腕時計でのハードと高速走行しているが、最近いじめのデザインは2013年にリリースされる3つの今後のモデルのための。新しいモデルの小さな部分と呼ばれるダイバースパンのブロンズ製の箱入りの兄弟と、デルフィンというより大きくてより深刻なダイバー。 http://www.wtobrand.com/prada-bag1.html
「小さいころから芸術の薫陶を受け、訓練のグロリア-イップ、近年、芸術界やデザイン界作全方位の発展、創作範囲が広く、中には陶芸、絵画、製品設計、包装設計などの異なる領域。地元の芸術としてのデザイン界の活躍の分子、及び香港粘土の芸術学院の創始者の一つで、さまざまなアイデアの開会グロリア-イップも教授芸術コース、及び、多く本芸術や手芸の教育の本。グロリア-イップの創作広く認めて、かつて獲得し多くの芸術賞を主催20度を超える作品展展開を十分に発揮する彼女の芸術と設計の情熱と素質。カルティエコピー時計最近では、有名な腕時計ブランドを務めるグロリア-イップ招かれスイスティソ開催、「旅」をテーマにした「160週年环宇漫遊」設計試合切手の審判で、一方、グロリア-イップも招かれてはイベントデザイン1項の切手。スイスティソ表の厚情に誘われて、令愛する旅行の彼女がいるととても興奮。 http://www.brandiwc.com/brand-super-11-copy-0.html
Que se passe-t-il, bonne page Web que vous avez présentement
There are three levels of Roblox Builders Club, there is basic, turbo,
and outrageous.
This is like a super power for those that like to make gifts 🙂
Hello, everything is going perfectly here and ofcourse every one is sharing data, that’s in fact good, keep up writing.
Very good idea. Thank you very much for the tutorial!! Great job!