
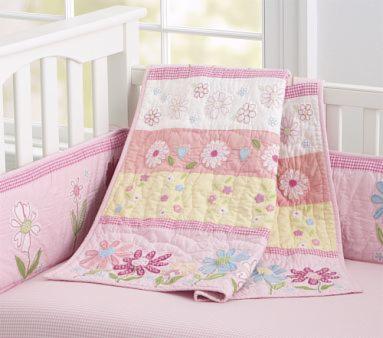
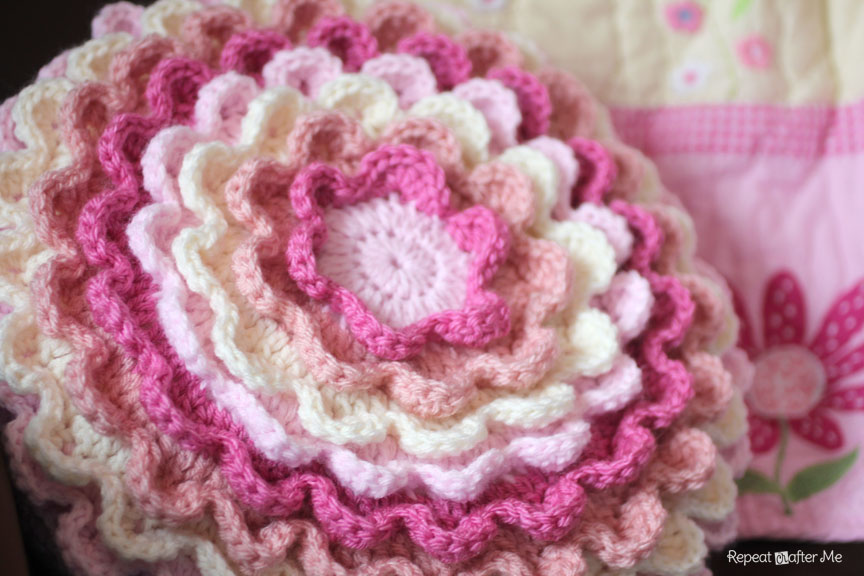
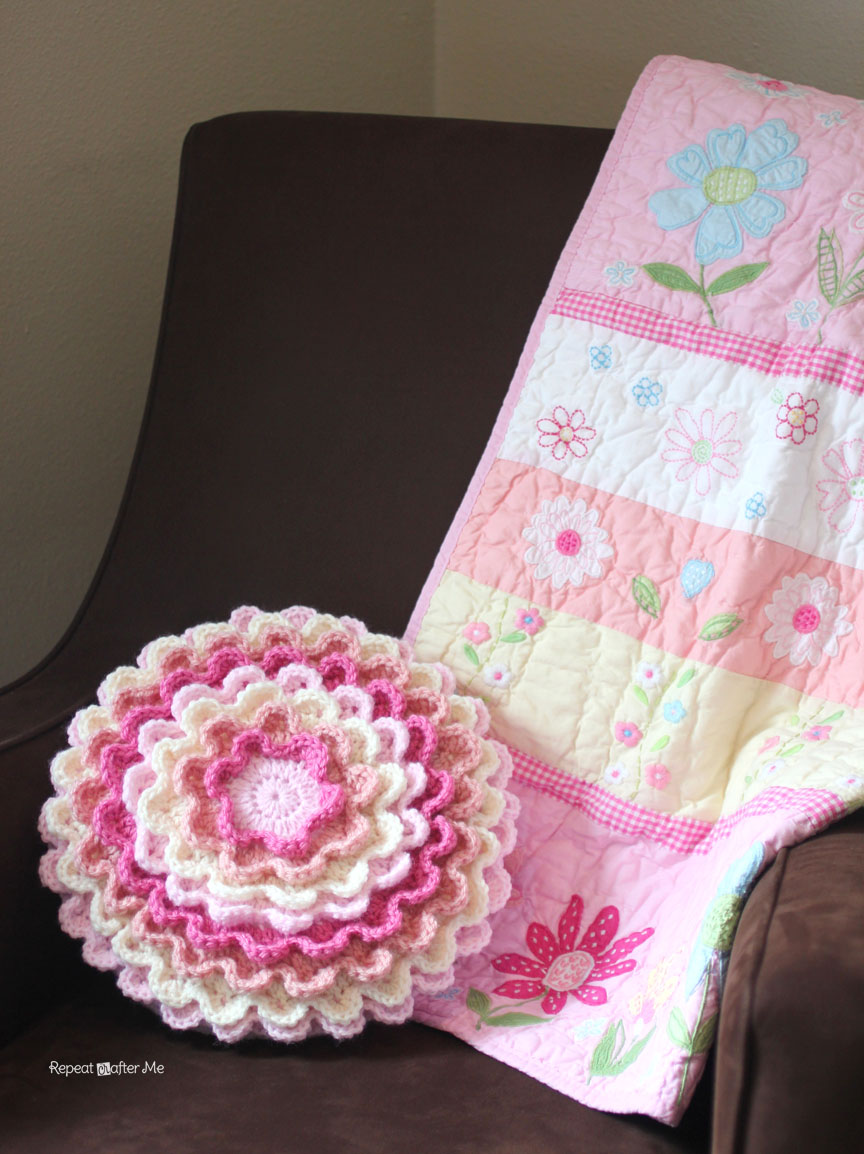
Last week I saw the most adorable Blooming Flower Pot Holder made by Days of Yarning and featured on Hookin on Hump Day. I knew immediately I needed to make this into a pillow for my baby girl (I’m 23 weeks pregnant this week). I had just purchased the Daisy Garden Nursery Bedding from Pottery Barn Kids and this blooming flower would go perfectly with my theme!
The pattern for the pot holder is almost the exact same pattern as the Blooming Flower Cushion made by Attic 24 (another favorite pattern of mine!). The directions and photos of the cushion really helped and gave me an idea of how I wanted to make the back of my pillow. Although you can always follow her directions on how she made the back of her cushion 🙂 Best part is, both of these patterns are free!!
Here is the yarn I used:
– Lion Brand Pound of Love Pink (this is the light pink color and an exact match to the light pink in the Pottery Barn bedding!)
– Lion Brand Vanna’s Choice in Pink Poodle (this is the darker pink color)
– Lion Brand Vanna’s Choice 101 Pink (this is the more peachy looking color)
– Loops & Threads Impeccable in Aran (this matches the soft yellow perfectly!!)
I made a total of 8 rounds of flower ruffles with a size H crochet hook. The finished top piece measured a little over 12 inches. HERE is the free tutorial I followed.

I wanted the back of the pillow to be worked in continuous rounds. I didn’t want any kind of seam to show and I wanted to use HDC’s (instead of DC’s) to make the stitches smaller and tighter. So I began with a magic ring of 10 HDC’s and kept increasing my rounds until I had the same number of stitches as the last round of the top piece. You MUST have the same number of stitches on the last round of both of your pieces so they will match up when you sew them together at the end.
Here is how I increased my rounds:
Magic Ring, 10 HDC in ring, continue to crochet in rounds,
Round 2: 2 HDC in each stitch around (20 HDC)
Round 3: 2 HDC in first stitch, HDC in next, repeat round (30 HDC)
Round 4: 2 HDC in first stitch, HDC in next 2, repeat around (40 HDC)
Round 5: 2 HDC in first stitch, HDC in next 3, repeat around (50 HDC)
Round 6: 2 HDC in first stitch, HDC in next 4, repeat around (60 HDC)
See the pattern of increases? Keep going until you get the same amount of stitches (or very close to the same amount of stitches) as your top piece.
When you are done increasing, continue to HDC in each stitch around until your pillow back is at the desired length. It will start to curve in, like a big hat. This is ok because you will either be stuffing it with poly-fil OR you could buy a pillow insert like I did.
I purchased this 12 inch pillow insert from Amazon.com:
Here is what the back of the pillow looked like when I was done making my rounds. Do not fasten off because next you will crochet the front and back pieces together. 
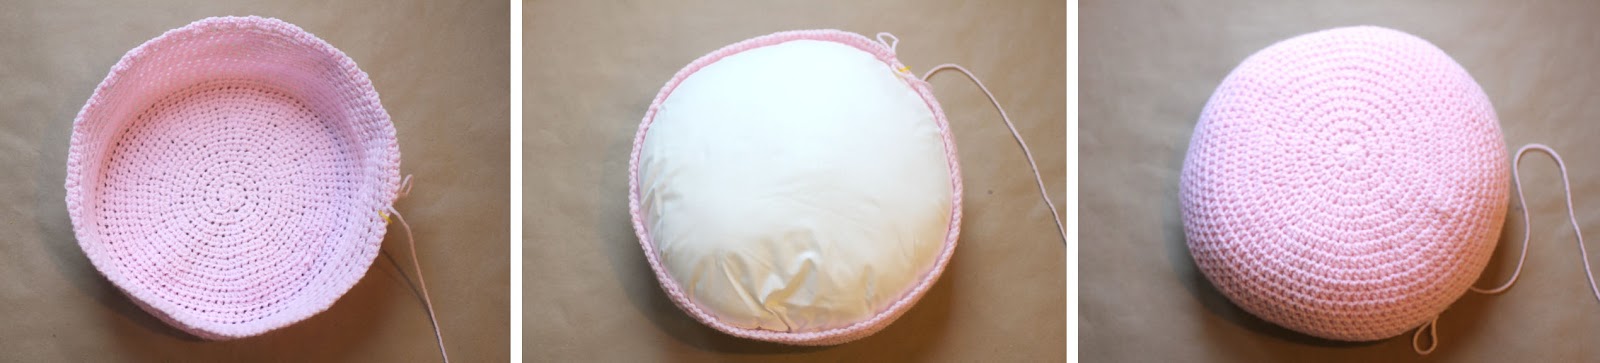
I put the back piece over the pillow insert and laid the top piece over. I crocheted the last round of both pieces together using a SC stitch. You will want to work in both loops of the back piece and the the remaining front loop in the last row of your top piece. 
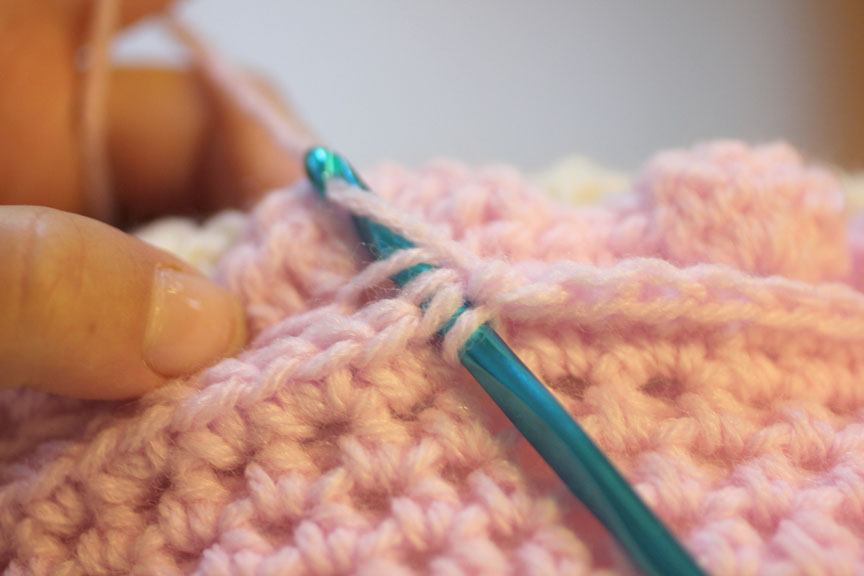
I like the ridge it made right under the top ruffles. I thought it made a nice finished edge on the pillow. 


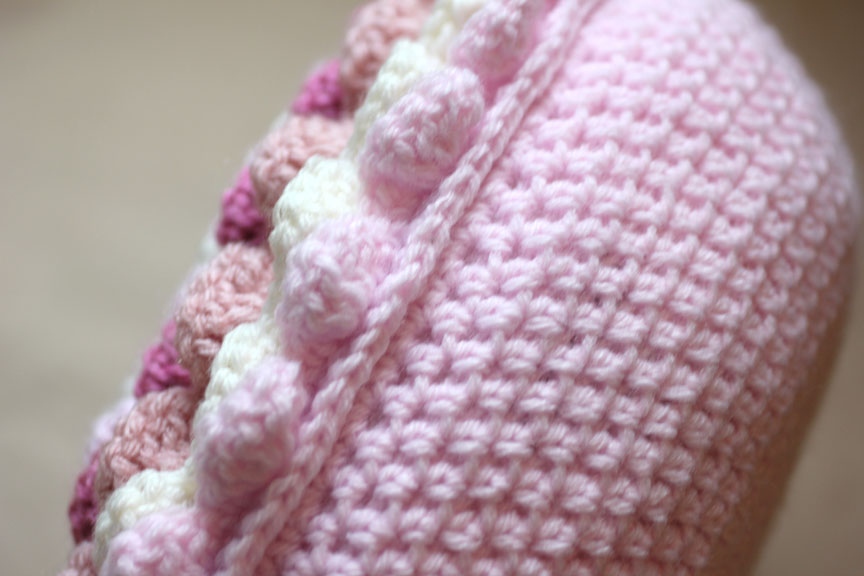
Here is a look at the back of the pillow. Notice there is no ugly seam! Just a beautiful continuous spiral.

You can make your pillow as large or small as you want by increasing or decreasing the rounds. And keep in mind that yarn stretches easily so it may look smaller when you are crocheting it, but larger after you stuff it.

 Starbucks Stitch Markers and Bottled Beverages
 Crochet Christmas Tree Pixel Square
 Crochet Santa Pixel Square
 Crochet Daisy Rug with Clover Amour Large Hooks and Giveaway!


So pretty! I'll definitely make this one if I have a baby girl some day 🙂
It looked complicated from your fb post but the pics you have here look super easy! I love it! You are very creative. Everything you make is adorable/pretty 🙂 Your patterns are the best 🙂
Love the colours you have used and the idea of the back , will try one of these Thankyou
Your pillow is gorgeous! I love your idea for the back, it looks perfect!
absolutely adorable and your so inspiring
Qué bonita! Seguro que además de ser adorable es muy cómoda.
Un beso!
Thanks for posting this. I have two unfinished Blooming Cushions in my pile of WIP's. I like how you finished the back. Now maybe I can finish mine!
The pillow is beautiful and it makes a perfect set. You obviously have a good eye for color and design. I shared you picture on facebook and have received inquiries about a custom order of the pillow. I referred them to your facebook page. I did not know if you do work for sale and did not want to take business from a fellow crafter.
So pretty it's beautiful! 🙂
Great post as always, Sarah.You are so talented…love this flower…Gorgeous colours too.
Beautiful pillow!!! I'm also at a 23 week and will also have a girl, but unfortunately don't know how to crochet big things, only tiny doilies ;))))
Your works are great!
Good luck with the rest of the pregnancy period 😉
Hugs,
Alexandra.
I don’t normally do “fancy things” just basic blankets but found this really easy to follow I used slightly different colours (wool I already had) to make one for my daughter as a gift from her new brother to be and I’m doing another in shades of blue for my other daughter (she loves the frozen movie:-) )
If you can do doillies I’m sure you’ll be able to do this too
I love it! What a lucky little girl to have a mom as crafty as you 🙂
LOVE this, Sarah!
Absolutely gorgeous pillow! May I Pin this to my crochet board?? Thanks 🙂
All things coeiednrsd, this is a first class post
Beautiful!
Sooooooooo Incredibly Cute! What a darling way to decorate your baby's room!! LOVE IT!
Wow. That is just gorgeous! My mother loves bright colors, flowers, and throw pillows for her couch…… thanks so much for the wonderful pattern!
I'm almost finished with the Attic 24 blossom pillow (all in green), but have been blowing it off for other projects. I might have to try your back pattern (if I ever finish the front).
I've seen a lot of these pillows and yours is my favorite!
I have a Link-Up & Share feature on my site and I would LOVE to have you join 🙂
http://crochethappy.com/wp/?p=2076
Superbe !
Anna
Love it, I have a one month old granddaughter but I like it so much I think I want to have a matching set for her and I. Beautiful job!
It's beautiful
bravo
Isabelle http://captainecrochet.wordpress.com
OMG this pillow is so precious and I'm jealous. I'm a new crocheter and I'm not sure I can handle this project but I will be pinning it for when I do get better skilled! Thanks for sharing on Happy Hour Projects! Jill @ Mama Ging
This is gorgeous. Thanks so much for the tut. Rosie
Wow . . it looks great!
so beautiful…i am going to make this in my next project
Hi, I love your craft, is beauty, I love a colors, I follow your blog, hugs from Brazil.
Visit my blog – Tita Carré – free patterns crochet
That Blooming Pillow looks EXACTLY like Lucy's Pillow over Attic 24!
I saw another site credit you with this design, too.
Lucy designed and posted a LONG time ago. She is such a dear person, I don't want to see someone else taking credit for HER designs (and she has a LONG, detailed photo-tutorial as well.
I don't know where your tutorial link leads, because my security blocked it (and I KNOW it does not block Lucy – I was just a her site today.
(for the record, I do NOT know Lucy personally – I live in USA and have NEVER been to England) But if someone does all that work, they really ought to get credit!
That was one of the first things I crocheted 3 years ago!
hello! I really love this & may I know how many skein of yarns for each colour did u use? I was worried if I buy too little
If you would like to improve your familiarity just keep visiting this website and be updated with the most up-to-date news posted here.|
That Blooming Flower Pillow is so pretty! but I believe the original design came from Lucy over at Attic 24 – LONG before I saw it anywhere else.
I’ve seen several “designers” since Lucy released this pattern and her own tutorial who copy this and claim it as their own.
I’m no attorney, but it does bother me greatly when someone claims credit for a pattern that has already been released by someone else. And I see it quite frequently.
I’d also vigorously defend YOUR patterns – or anyone else’s – IF I see them copied and claimed by someone else! It’s just not right.
I know that Lucy is rather easy going and won’t “go after” anyone who copies her patterns….and several people have done so – but I will defend her – or anyone else when I see this happen.
Piece of wrіting wrіting is also a excitement, if
you Ƅe acquainted with afterward you can write or else it is compⅼex to write.
cialis buy paypal blak cialis cialis samples free
Quisiera poder tener acceso a estos tutoriales, trate de registrarme pero no pude. Todo lo que veo es hermoso
thanks for new knowledge It has filled my life with more openness. I will follow news from you.