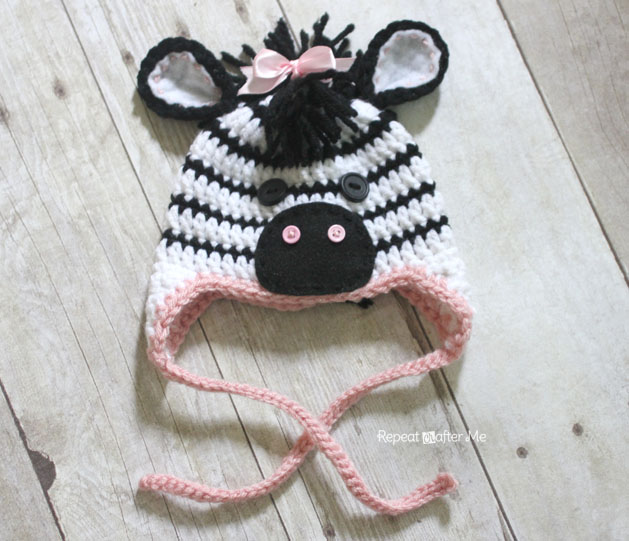

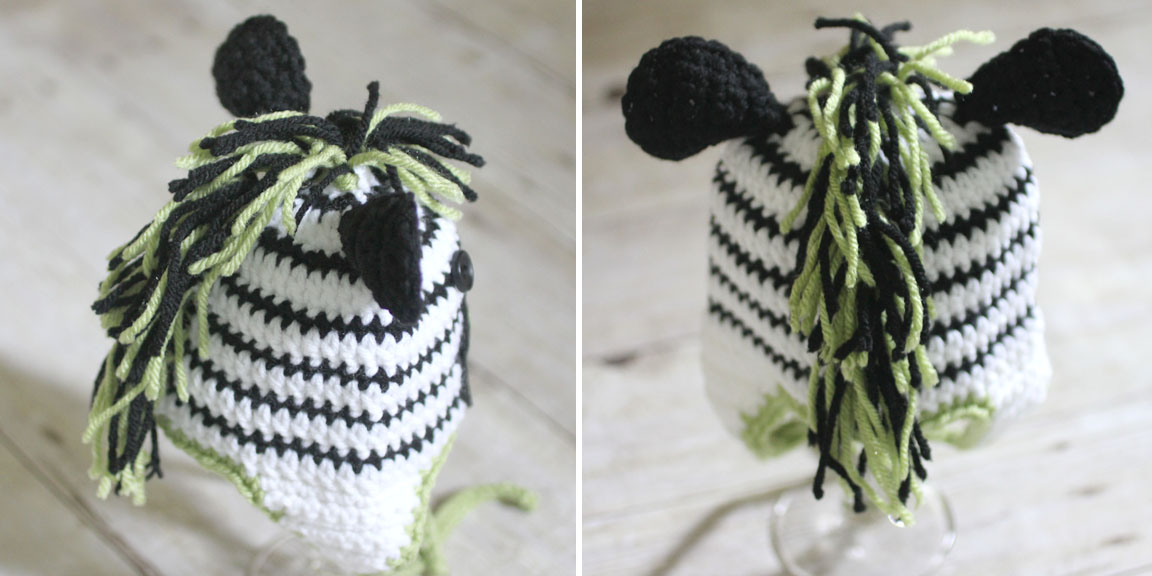
I would like to introduce you to Zoe the Zebra and her friend Zack the Zebra! This is my latest animal hat pattern and I’m pretty excited about how it turned out. I hope you enjoy this pattern. Keep in mind that although I chose to embellish with felt and buttons, you can always leave those parts off or crochet them if you are worried about choking hazards. The ones I made are more for photo props or supervised wear.
Before we begin let me remind you of some basic directions you should follow while crocheting my hats:
– Always start your rounds in the same stitch as your chain.
– Always join your rounds to the first DC, NOT the chain.
– Your last stitch should be in the stitch before your chain.
– Do NOT count the chain 2 (or chain 1) as a stitch.
(You can find pictures of how to start and join your rounds HERE)
Materials:
– Black worsted weight yarn (I used Red Heart with Love)
– White worsted weight yarn (I used Loops & Threads Impeccable)
– Worsted weight yarn in an accent color (I used Vanna’s Choice in Pink and Sweet Pea)
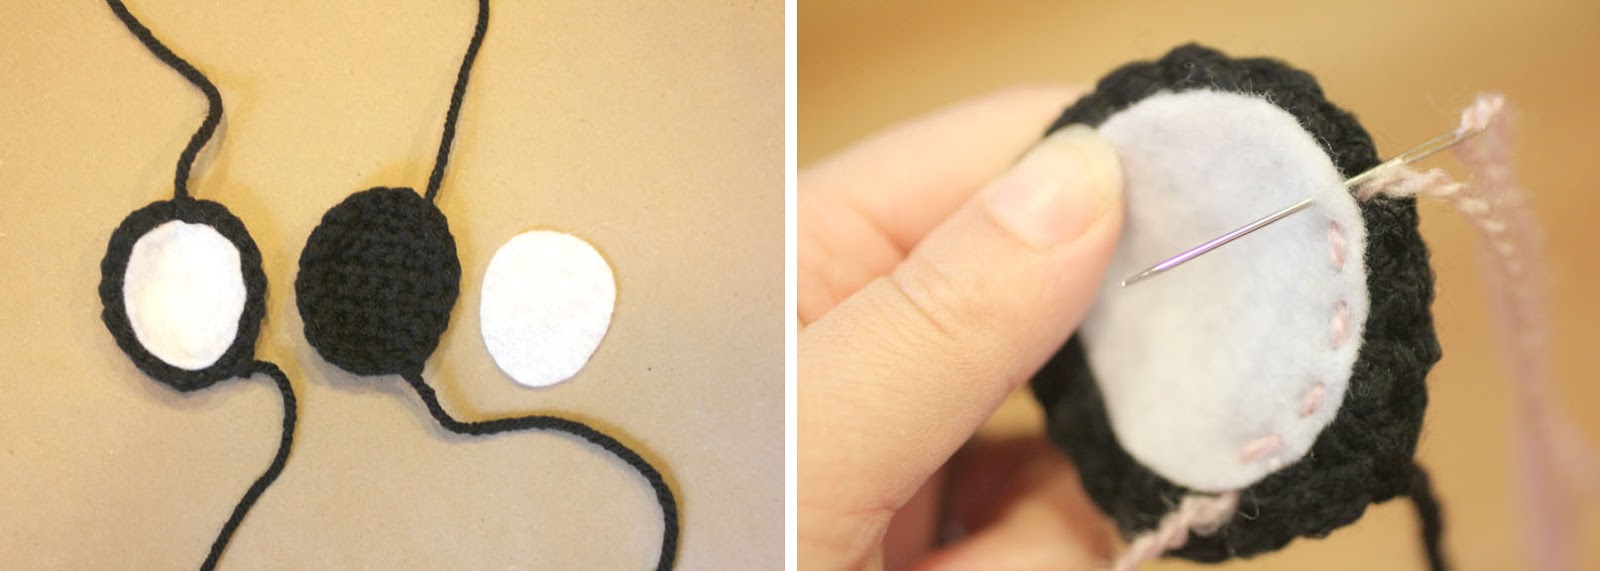
– Two .5″ black buttons for eyes
– Two .25″ buttons in accent color for nose
– Two sheets of felt – one in black and one in white. I used cheapie felt sold in 8.5×11 pieces from Michaels Craft Store.
– Crochet hook size H-8 (5.0 mm)
– Tapestry needle
Abbreviations:
sl st- slip stitch
SC – Single Crochet
DC – Double Crochet
Newborn size: Follow directions for 0-3 months using a smaller hook (G6/4.00MM). End with 11 rounds instead of 12.
Size: 0-3 Months
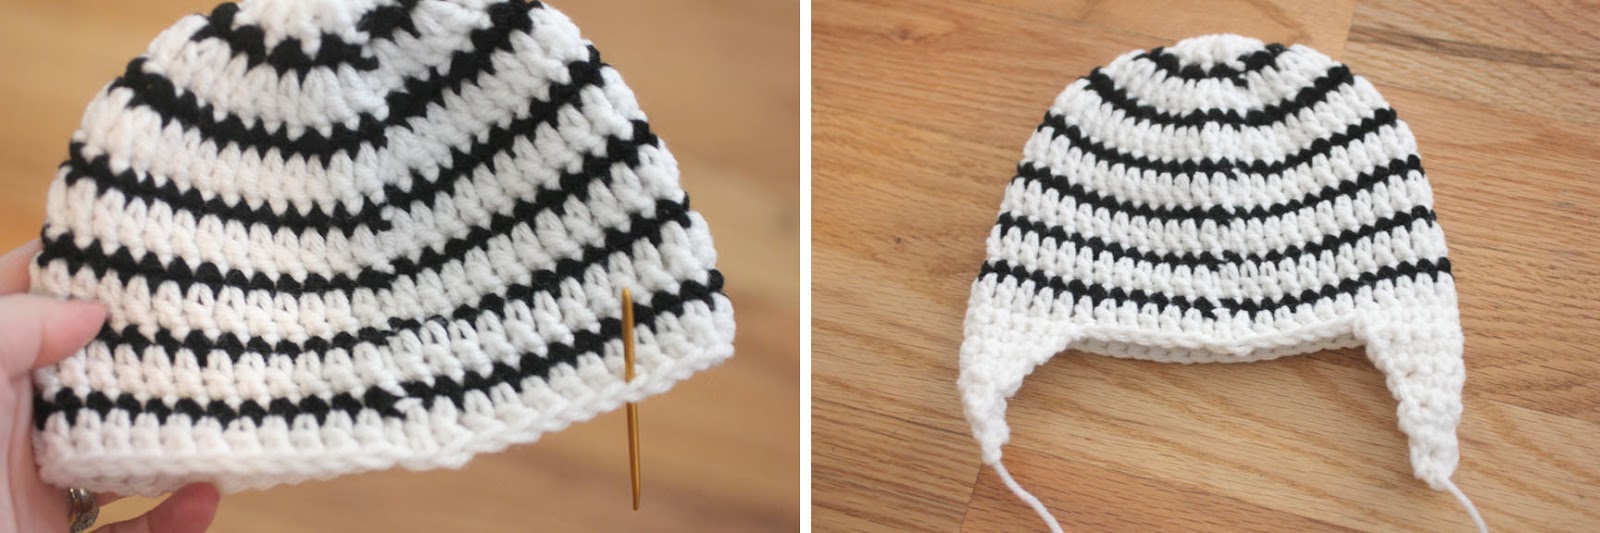
Starting with white yarn
Round 2: 2 SC in each around, join (22 SC)
Round 3: 2 DC in first, DC in next, repeat around, join (33 DC)
Round 4: 2 SC in first, SC in next 2, repeat around, join (44 SC)
change to white yarn, chain 2
Round 5: DC in each around, join (44 DC)
change to black yarn, chain 1
Round 6: SC in each around, join (44 SC)
change to white yarn, chain 2
Round 7-12: Repeat what you did in rounds 5 and 6 for the remaining rows. Use white for the double crochet rounds and black yarn for the singe crochet rows. (44 DC or SC)
change to black yarn, chain 1
change to white yarn, chain 2
change to black yarn, chain 1
change to white yarn, chain 2
change to black yarn, chain 1
Starting with white yarn
change to white yarn, chain 2
Attach yarn and Chain 1, SC in next 8, chain 1, turn
Row 2: SC decrease, SC in next 4, SC decrease, chain 1, turn
Row 3: SC across (6 SC)
Row 4: SC decrease, SC in next 2, SC decrease, chain 1, turn
Row 5: SC across (4 SC)
Row 6: Make 2 SC decreases, chain 1, turn
Attach yarn and Chain 1, SC in next 10, chain 1, turn
Row 2: SC decrease, SC in next 6, SC decrease, chain 1, turn
Row 3: SC across (8 SC)
Row 4: SC decrease, SC in next 4, SC decrease, chain 1, turn
Row 5: SC across ( 6 SC)
Row 6: SC decrease, SC in next 2, SC decrease, chain 1, turn
Row 7: SC across (4 SC)
Row 8: Make 2 SC decreases, chain 1, turn
Row 9: SC decrease, fasten off, weave in ends
Attach yarn and Chain 1, SC in next 12, chain 1, turn
Row 2: SC decrease, SC in next 8, SC decrease, chain 1, turn
Row 3: SC across (10 SC)
Row 4: SC decrease, SC in next 6, SC decrease, chain 1, turn
Row 5: SC across ( 8 SC)
Row 6: SC decrease, SC in next 4, SC decrease, chain 1, turn
Row 7: SC across ( 6 SC)
Row 8: SC decrease, SC in next 2, SC decrease, chain 1, turn
Row 9: SC across (4 SC)
Row 10: Make 2 SC decreases, chain 1, turn
Row 11: SC decrease, fasten off, weave in ends
Row 3-5: SC in each stitch across, ch 1, turn (6 SC)
Row 6: SC Decrease, SC in next two, SC decrease, ch 1, turn
Row 7: SC in each stitch across, ch 1, turn (4 SC)
Row 8: Make 2 SC decreases, continue to sc around entire ear. Fasten off leaving long tail to sew onto hat.


I thought the pink zebra hat would go perfect with this blanket! A perfect gift set 🙂
*** You may make and sell products from my patterns but if you do I ask that you link back to my post. Please do not copy and post this pattern and claim it as your own. Please do not re-publish photos as your own.***
Want more free patterns? Keep in touch on my Repeat Crafter Me Facebook Page for new pattern sneak peeks and when they will be available on my blog! And please feel free to post pictures of your finished hats on my Facebook wall for everyone to see! I also welcome crochet business pages to share and promote themselves on my page as well.

 Starbucks Stitch Markers and Bottled Beverages
 Crochet Christmas Tree Pixel Square
 Crochet Santa Pixel Square
 Crochet Daisy Rug with Clover Amour Large Hooks and Giveaway!


ADOREI!!!!!!!!!!!!!
MUITO LINDA!!!!!!!!!!!!!
PARABÉNS E OBRIGADO POR COMPARTILHAR CONOSCO
O PASSO A PASSO
http://SIMONEBOANERGESARTESANATO.BLOGSPOT.COM.BR
is there any way you can make this a PDF to download??
Click on the "print friendly" button. From there you can export into a pdf.
Very nice. Thank you very much. You are amazing.
Hugs.
Thank you for all or the work that you must of had to do.
wow. amazing 🙂
Adorable! I saw this the other day on facebook and knew that I wanted to make one for my little girl. Thanks so much for sharing your patterns.
That is so cute, thank you so much for sharing!
I like this way to increase. The form of the hat looks better.
I made one tonight.
Thank you.
Thank you once again for sharing another one of your adorable patterns. Can't wait to try this one. SOOOOO CUTE!!!
Adorable hat! Thank you! 🙂
Lee Ann H
Posted with Blackberry Z10!
Crochet…Gotta Love It! Blog
Super adorable!!!
HI, Thank you so much. This is perfect. I am due in 3 weeks and just made this zebra hat for my coming baby boy. I am going to try to make a matching diaper cover with your white DC and Black SC stripes. I am not good at making patterns so was wondering if you have a diaper cover pattern already made that could adapt to this easily. I want to take pics with your wonderful hat and a matching diaper cover. I have two little boys and am due soon, so I know how busy you are. So please don't think I expect it. As I said I am going to try on my own, but never made up a pattern before.
You are really awesome, and thank you for ALL YOU SHARE!!!
Heidi
She has a pattern for a minnie and mickey mouse diaper cover. You can probably use that pattern with alternating black and white. Good luck mama.
Oh this is so precious! Zoe and Zack are just adorable and a must have for all newborns. Thank you for this post. It was very informative and a wonderful project.
Professional Doctorate
thank u so much for the pattern!! luv it!! you have such amazing designs!!
thank u so much for the pattern!! luv it!! you have such amazing designs!!
Wonderful tutorial! I loved the outcome! So cute!
Great post!! I included it in my post Βόλτα στη Γειτονιά!!! …while sewing!! 🙂
Have a great weekend!!
Hi Sarah,
thank you again for sharing. You are the best.
I think this is a super cute pattern, thank you for sharing. I didn't want to use any felt when I did my hat so I hope you don't mind but I would like to share my changes: For the ears, I did 2 white ears(worked up the same)in addition to the black ones. I then sewed decorative yarn around the white pieces to make it look as it would when stitching the felt piece on. After doing that I attached (using black yarn) the black to the white by sc around the ears continue attaching to hat per listed pattern. Then for the snout I worked it up like this:
With black yarn:
Ch 13
2 sc in 2nd chain from hook, 10 sc, 2 sc in last chain, ch 1, turn
14 sc, ch 1, turn
14 sc, ch 1, turn
Sc decrease, sc in next 10, sc decrease, ch 1, turn
12 sc, ch 1, turn
12 sc, ch 1, turn
Sc decrease, sc in next 8, sc decrease, ch 1, turn
10 sc, ch 1, turn
Skip 1, sc in next stitch, dc in next 4, sc in next stitch, skip 1, sc in last stitch
Continue to sc around entire snout. Fasten off, leaving long tail to sew onto hat.
I hope this helps and that is is ok for me to share. =)
Once again, thank you for creating such lovely patterns and sharing them for free!
Love & Light
Wow, thank you! I was wondering if there was a way I can crochet the snout part. Thanks!
thanks I like the crochet snout also!
I love this pattern (and ALL your patterns!) but I'm having trouble getting the seam straight. It seems to be running crooked which will obviously be a problem when I come to add the mane on top of the seam. Do you have any suggestions as to what I might be doing wrong please. Thanks :-)!
What a cute pattern!! I love it. Thanks for sharing. Please stop by and check my out @thehookinphotographer.blogspot.com
Hi there l was wondering how you make a bow and where l could get hot pink or neon yarn as Andrea at you never know did one and l have a customer that want one like hers but can't seem to ask her her blog won't let me
Hat is simply amazing!! My granddaughter loves Zebras! I was more than excited to make this hat for her. I whipped it up in a couple of hours. Only changes I made were to crochet everything and not use felt. Also did the ear flaps in black. Thanks again for an amazing pattern!!
First of all, I love, love, love your blog! I normally go here to look for a pattern before going somewhere else. You have such cute patterns. And this one is just as adorable as everything else you make. Anyways, I have a question. I am making the 6-9 mo one. It said to go up to 14 rows. My 14th row is a black one. Is this ok? Or should I add another row so I end up with a white row? Just wondering.
Thank you so very much …and the variety of sizes are great.
Thank you so very much …and the variety of sizes are great.
Thank you so very much …and the variety of sizes are great.
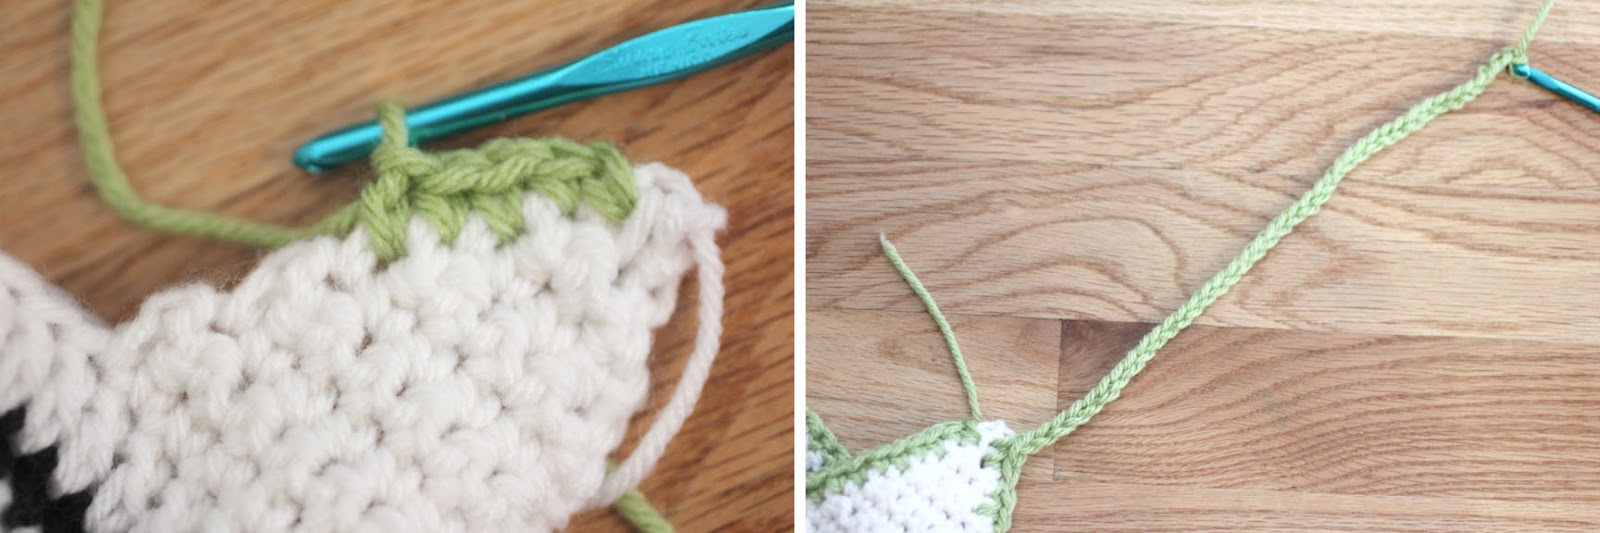
Hi Sarah, I love your patterns, they are the easiest by far of all patterns out there. I have made several of your hats for my granddaughter! I am in the process of doing the mane on the zebra. For the first time doing one of your patterns, I am stuck :/ For the mane it looks like you are doing the same thing along the seam as you do the braids (pulling the yarn through the loop). For some reason I can't get it right. I would appreciate any help you can give me as this zebra hat is for a baby shower gift that is next weekend! Thank you for all your wonderful patterns and my crochet filled nights!
YAY!!! I figured it out. It looks great!
OMG I just love them.
I was wondering if you cut the yarn after every round for the color change or do you carry it?
Fantastic pattern! Thanks for sharing! 🙂
What a great pattern! I have to admit I was disappointed when it wasn't the Zebra Appliques. I was looking forward to finishing out my blanket with these. Thanks for all the great patterns!
So very pretty, thank you for sharing these…
This is adorable – thanks so much!
I’m currently writting a blog post listing the links to all of the patterns (and pieces of patterns) I used to create my latest project.
I ended up using the ear portion of this pattern. I link back to this specific post because of the extra details you give in explaining the ear a little more.
I love your work!
One of the best pattern directions. Perfect fit. Thank You!
سئو برگرفته از عبارت Search Engine Optimization است که کلمات معادلی چون SEO یا بهینه سازی موتور جستجو دارد که همگی آنها به یک معنی می باشند و می توان آن را بصورت زیر تعریف نمود: سئو (بهينهسازي موتور جستجو) به معناي فريب و يا دستکاري موتورهاي جستجو با روشهاي غير اخلاقي نيست. آنها براي کمک کردن به بهبود رويت و ارتباط وب سايتها در نتايج جستجوي طبيعي با هدف رسيدن به رتبهبندي بالا، ايجاد شدهاند.سئو را ميتوان مجموعهاي از روشها براي تغيير استراتژيک وب سايتها دانست. اين فرآيند به بيان مهمترين عوامل مرتبط صفحه و افزايش اهميت آن در صفحه نتايج جستجو، ميپردازد.سئو فرآيند سادهاي نيست که به راحتي پيادهسازي شود زيرا نيازمند دانش زياد، علم پيش زمينهاي و صبر است. موتورهاي جستجو با تغيير مداوم الگوريتمهاي رتبهبندي خود غير قابل پيشبيني هستند؛ بنابراين وظيفه مهندسين سئو بروز نگه داشتن اطلاعات خود در اين زمينه است.سئو سایت یا بهینه سازی سایت یکی از فعالیت هایی است که توسط استخدام سئو کار انجام می شود.