Chain 26, HDC in second chain from hook and rest of way down chain, chain 1, turn (25 HDC)
Row 2: SC in first two, HDC in next 6, DC in next 9, HDC in next 6, SC in last two, chain 1, turn
Row 3: SC in first 3, HDC, DC + chain 2+ DC, HDC, SC in next 3, HDC, DC, TC, TC + chain 2 + TC, TC, DC, HDC, SC in next 3, HDC, DC + chain 2 + DC, HDC, SC in last 3.
Fasten off leaving long end to sew onto hat.
Tiara Pattern (LARGE -11 inches long)
Chain 38, HDC in second chain from hook and rest of way down chain, chain 1, turn (37 HDC)
Row 2: SC in first 8, HDC in next 6, DC in next 9, HDC in next 6, SC in last 8, chain 1, turn
Row 3: SC in first 3, HDC, DC + chain 2 + DC, HDC, SC in next 3, HDC, DC+chain 2+ DC, HDC, SC in next 3, HDC, DC, TC, TC+chain 2+TC, TC, DC, HDC, SC in next 3, HDC, DC+chain 2+DC, HDC, SC in next 3, HDC, DC + chain 2 + DC, HDC, SC in last 3.
Fasten off leaving long tail to sew onto hat.
When finished you could also sew the ends together to make a stand-alone crown.
To make even larger Tiara/Crown, add 12 chains to starting chain and make an additional crown hump to either side of the crown. A single crown hump pattern is as follows: SC in first 3, HDC, DC + chain 2 + DC, HDC. One crown hump is equal to 6 stitches… one hump on each side equals an additional 12 stitches.
Basic Hat Pattern:
Magic ring, 11 DC in magic ring, join to first DC, chain 2
Round 2: 2 DC in each around, join, chain 2 (22 DC)
Round 3: 2 DC in first, DC in next, repeat around, join, chain 2 (33 DC)
Round 4: 2 DC in first, DC in next 2, repeat around, join, chain 2 (44 DC)
Round 5-10: DC in each around, join, chain 2 (44 DC)
Round 2: 2 DC in each around, join, chain 2 (22 DC)
Round 3: 2 DC in first, DC in next, repeat around, join, chain 2 (33 DC)
Round 4: 2 DC in first, DC in next 2, repeat around, join, chain 2 (44 DC)
Magic ring, 11 DC in magic ring, join to first DC, chain 2
Round 5: 2 DC in first, DC in next 10, repeat around, join, chain 2 (48 DC)
Round 7-12: DC in each around, join, chain 2 (52 DC)
Size: 9-12 Months (Should fit up to about 16 months)
Round 5: 2 DC in first, DC in next 10, repeat around, join, chain 2 (48 DC)
Round 7: 2 DC in first, DC in next 12, join, chain 2 (56 DC)
Round 8-13: DC in each around, join, chain 2 (56 DC)
Magic ring, 11 DC in magic ring, join to first DC, chain 2
Round 2: 2 DC in each around, join, chain 2 (22 DC)
Round 3: 2 DC in first, DC in next, repeat around, join, chain 2 (33 DC)
Round 4: 2 DC in first, DC in next 2, repeat around, join, chain 2 (44 DC)
Round 6: 2 DC in first, DC in next 11, join, chain 2 (52 DC)
Round 8: 2 DC in first, DC in next 13, join, chain 2 (60 DC)
Round 9-14: DC in each around, join, chain 2 (60 DC)
Size: Child
Magic ring, 11 DC in magic ring, join to first DC, chain 2
Round 2: 2 DC in each around, join, chain 2 (22 DC)
Round 3: 2 DC in first, DC in next, repeat around, join, chain 2 (33 DC)
Round 4: 2 DC in first, DC in next 2, repeat around, join, chain 2 (44 DC)
Round 6: 2 DC in first, DC in next 11, join, chain 2 (52 DC)
Round 7: 2 DC in first, DC in next 12, join, chain 2 (56 DC)
Round 8: 2 DC in first, DC in next 13, join, chain 2 (60 DC)
Round 9: 2 DC in first, DC in next 14, join, chain 2 (64 DC)
Round 10-15: DC in each around, join, chain 2 (64 DC)
Size: Teen/Adult
Magic ring, 11 DC in magic ring, join to first DC, chain 2
Round 2: 2 DC in each around, join, chain 2 (22 DC)
Round 3: 2 DC in first, DC in next, repeat around, join, chain 2 (33 DC)
Round 4: 2 DC in first, DC in next 2, repeat around, join, chain 2 (44 DC)
Round 6: 2 DC in first, DC in next 11, join, chain 2 (52 DC)
Round 7: 2 DC in first, DC in next 12, join, chain 2 (56 DC)
Round 8: 2 DC in first, DC in next 13, join, chain 2 (60 DC)
Round 9: 2 DC in first, DC in next 14, join, chain 2 (64 DC)
Round 10: 2 DC in first, DC in next 15, join, chain 2 (68 DC)
Round 11-16: DC in each around, join, chain 2 (68 DC)


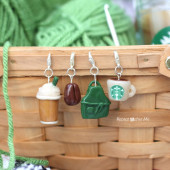
 Starbucks Stitch Markers and Bottled Beverages
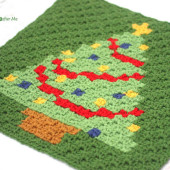
 Crochet Christmas Tree Pixel Square
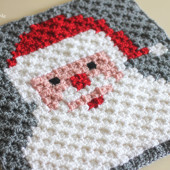
 Crochet Santa Pixel Square
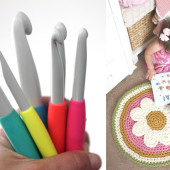
 Crochet Daisy Rug with Clover Amour Large Hooks and Giveaway!


Gorgeous!
Lovely! Très joli!
Bravo!
Lucie
great !
Greetings from Poland 🙂
Katarzyna
http://www.sajuki.blogspot.com
Greetings to Poland from USA! So happy to see you here. My grandfather immigrated here from Poland with his mother many years ago. i would love to visit Poland some day. God bless you.
What a beautiful Snow Queen! Thank you for the pattern.
this is so awesome!!! my daughter is going to love it! thanks for posting!
Wow Sarah…I thought I had to make a pattern like this…and there it is! You made it! Wonderful and pretty! I can only thank you for your kindness on sharing your patterns with us!!!! I made almost all your hats and they are all appreciated!
You rock! Can't wait to make this for my little sisters!
This is so pretty! I'm definitely going to make a few for my nieces! Aww and the baby is just so ridiculously cute! 🙂
Andrea / CocoDrizzle
oh love love love this crochet snow queen hat! and you are sharing the pattern that just makes it so much better! She is so adorable too 🙂 Thanks!
Hi , Sarah !!!!
What a lovely hat pattern !!!!!!!
Niki
Love the pattern. Do you happen to know your gauge? Thanks
Vc é show!!!!Amooooooooooooo suas criações!!!!Sou sua fã!!!!!Bjks
Love the pattern, but I can't make the tiara pattern work, it is a hot mess when I make it, and I never get to the last stitch on row 3, usually have 6 or more stitches left…..not sure what I am doing wrong
Row 3: SC in first 3, HDC, DC + chain 2+ DC, HDC, SC in next 3, HDC, DC, TC, TC + chain 2 + TC, TC, DC, HDC, SC in next 3, HDC, DC + chain 2 + DC, HDC, SC in last 3. – See more at: http://repeatcrafterm.wpengine.com/2014/09/crochet-snow-queen-hat-pattern.html#sthash.OY3Mp92z.dpuf
hey did u figure out what u were doing wrong? im having this trouble right now! thanks!!
Row 3: SC in first 3, HDC, *DC + chain 2+ DC* (same stitch all together), HDC, SC in next 3, HDC, DC, TC, *TC + chain 2 + TC* (same stitch all together), TC, DC, HDC, SC in next 3, HDC, *DC + chain 2 + DC* (same stitch all together) , HDC, SC in last 3. – See more at: http://repeatcrafterm.wpengine.com/2014/09/crochet-snow-queen-hat-pattern.html#sthash.OY3Mp92z.dpuf
Each comma is another stitch – so HDC in one, DC+chain2+DC in one, HDC in next, then SC over next 3 – So HDC, SC, SC, SC, HDC … makes sense?! 🙂
Thank you for this pattern.i am making it right now. Great instructions!
this is just gorgeous! my next project for sure. I do have a question though…do you know approx how many strands of yarn you used for the hair and correct me if I'm wrong but if I read this right you measure each strand at about 96 inches? thanks!
Love the hat! Saw it yesterday and had to make one for my Frozen lovin' niece. Just finished and will be mailing it off to her this week. Yours is way better, but thankfully my niece never notices any mistakes. I love all your patterns, maybe I'll try the animal alphabet next?!
Hi Sarah, thanks for this pattern so pretty. My girls would love this.
Hey Sarah- love you and your patterns and your generosity in sharing your patterns! As Gramma to 3 boys and one princess, you are my "go-to" source for inspiration and design- Thank you so much!! Keep up the wonderful work!
Thank you for such a great pattern. I love it! I can't wait to make some for the little girls on my Christmas list.
I think that the amount of "hair" you put on this hat is perfect for your daughter. It looks sweet and simple, not overdone. Working on my own "snow queen" hats as we speak. Thanks for sharing this tutorial and pattern with us.
Alexandra
EyeloveKnots.blogspot.com
Hi Sarah Just wondering what your gauge is?
"4" across = 14 double crochet stitches, 4" height = 8 rows of double crochets" is her gauge using a 5mm hook and Vanna's Choice Yarn – taken from her yarn owl post – http://repeatcrafterm.wpengine.com/2012/09/crochet-owl-hat-pattern-in-newborn.html
Alexandra
EyeLoveKnots.blogspot.com
Thanks – My Daughter, Princess Elsa 😉 will love it for her halloween costume (And likely many more occasions thereafter!). The lenght of the braid, following what I interpreted your length to be, ended up VERY long though. I will have to cut it down probably 12" from the finished ends – so I should have read it as 48" THEN fold in half, rather than 48" ONCE folded in half! Oh well – easier to trim than add 😉 Thanks for all your great patterns. My kids love when they see me find something new (always for them! haha).
Thank you so much for another easy wonderful pattern,your patterns are very easy to make the way u have written them .i always come back and make your patterns 100%reliable ,thank you soo much!
What an amazing and adorable hat!! I love it and thank you very much! 🙂
____
Lee Ann
http://crochetgottaloveit.blogspot.com
Super cute! I love the giant snowflake on the braid. Just lovely!
So pretty! I plan to make one for my Frozen fan granddaughter Fi! Thank you!
Thank you for this pattern. I made this for my daughter yesterday. She loves it. I made crochet snowflakes. And I used a yarn that I had . I used red heart white for the hat portion which worked up fast. And silky soft deep tourquoise for the tiara. And I used a sparkly white yarn that has like an aura borealis tinsel thread running through it for the hair and the snowflakes. My daughter absolutely loves this hat. Much better than what you find in the stores and for less money.
Does anyone know what the size should be for the width for a child? I have the guage right for the height but something doesn't look right for the width.
I used the ch26 for my toddler and the ch38 for a teen/small adult hat.
Thank you so much for this pattern. I've made the child size for my 5 year old today and she's thrilled. We're attending an outdoor screening of frozen tonight and it might be cold so a beanie will help to no end 🙂 I'm just whipping up some free standing lace snowflakes on my embroidery machine to adorn the plait.
This pattern is being sold by this shop https://www.etsy.com/shop/ButtonItTight?ref=l2-shop-info-name
Enjoyed the look of a lil snowflake queen…very cute.. thanks for sharing..
Thank you so much for this beautiful, yet simple to follow pattern. I’ve had no problems doing it for a little 5 yr old cancer patient who has lost all her hair. She’s going to love it! It’s adorable!!!
Thank you for this pattern! My granddaughter’s birthday is two weeks away, and I can easily have this done in time for her Frozen party. It’s so pretty, and I can adapt the colors. Also, she will be more likely to wear this hat outdoors, which we grandmas love. Great pattern!
Thank heavens for the pictures!!! The tiara pattern isn’t written properly. Made work the first time. Then looked closely at pictures. Its written to imply clusters of stitches…that’s not the case.
Thank you for this pattern…it is lovely