No need to worry about getting pinched this St. Patrick’s Day when wearing this festive Crochet Shamrock Earflap Hat! Simply constructed and fun for all ages! Start with a basic striped beanie pattern and then sew on a crochet shamrock onto either side of the hat. A chained tail (or braided tails) looks like the stem! The shamrock pattern is super easy as it’s made up of 3 crochet hearts. Add a fourth heart to make is a lucky 4 leaf clover! Let me walk you through the pattern and construction.
Materials:
– Bernat Super Value Yarn in Fern Green and White. Shop all shades of worsted weight green yarn on Yarnspirations.com!
– Size H Crochet Hook
– Tapestry Needle
Abbreviations:
Magic Ring Tutorial
SC= Single Crochet
DC = Double Crochet
Ch = Chain
Basic Striped Hat Pattern:
Start with green yarn and alternate between white and green between each row. You don’t need to fasten off yarn at the end of each row, just carry up from previous row. You will only be able to see where the yarn carries up on the inside of the hat.
Note: you can make either one or two rounds of SC stitches at the end of the hat. I chose to only make one round of SC stitches in the hat pictured.
Magic ring, 11 DC in magic ring, join to first DC, chain 2
Round 2: 2 DC in each around, join, chain 2 (22 DC)
Round 3: 2 DC in first, DC in next, repeat around, join, chain 2 (33 DC)
Round 4: 2 DC in first, DC in next 2, repeat around, join, chain 2 (44 DC)
Round 5-9: DC in each around, join, chain 2 (44 DC)
Round 2: 2 DC in each around, join, chain 2 (22 DC)
Round 3: 2 DC in first, DC in next, repeat around, join, chain 2 (33 DC)
Round 4: 2 DC in first, DC in next 2, repeat around, join, chain 2 (44 DC)
Round 5: 2 DC in first, DC in next 10, repeat around, join, chain 2 (48 DC)
Round 7-11: DC in each around, join, chain 2 (52 DC)
Round 12-14: SC in each around, join, fasten off, weave in ends (52 SC)
Size: 9-12 Months (Should fit up to about 16 months)
Magic ring, 11 DC in magic ring, join to first DC, chain 2
Round 5: 2 DC in first, DC in next 10, repeat around, join, chain 2 (48 DC)
Round 7: 2 DC in first, DC in next 12, join, chain 2 (56 DC)
Round 8-12: DC in each around, join, chain 2 (56 DC)
Magic ring, 11 DC in magic ring, join to first DC, chain 2
Round 2: 2 DC in each around, join, chain 2 (22 DC)
Round 3: 2 DC in first, DC in next, repeat around, join, chain 2 (33 DC)
Round 4: 2 DC in first, DC in next 2, repeat around, join, chain 2 (44 DC)
Round 6: 2 DC in first, DC in next 11, join, chain 2 (52 DC)
Round 8: 2 DC in first, DC in next 13, join, chain 2 (60 DC)
Round 9-13: DC in each around, join, chain 2 (60 DC)
Round 14-16: SC in each around, join, fasten off, weave in ends (60 SC)
Size: Child
Magic ring, 11 DC in magic ring, join to first DC, chain 2
Round 2: 2 DC in each around, join, chain 2 (22 DC)
Round 3: 2 DC in first, DC in next, repeat around, join, chain 2 (33 DC)
Round 4: 2 DC in first, DC in next 2, repeat around, join, chain 2 (44 DC)
Round 6: 2 DC in first, DC in next 11, join, chain 2 (52 DC)
Round 7: 2 DC in first, DC in next 12, join, chain 2 (56 DC)
Round 8: 2 DC in first, DC in next 13, join, chain 2 (60 DC)
Round 9: 2 DC in first, DC in next 14, join, chain 2 (64 DC)
Round 10-14: DC in each around, join, chain 2 (64 DC)
Round 15-17: SC in each around, join, fasten off, weave in ends (64 SC)
Magic ring, 11 DC in magic ring, join to first DC, chain 2
Round 2: 2 DC in each around, join, chain 2 (22 DC)
Round 3: 2 DC in first, DC in next, repeat around, join, chain 2 (33 DC)
Round 4: 2 DC in first, DC in next 2, repeat around, join, chain 2 (44 DC)
Round 5: 2 DC in first, DC in next 10, repeat around, join, chain 2 (48 DC)
Round 6: 2 DC in first, DC in next 11, join, chain 2 (52 DC)
Round 7: 2 DC in first, DC in next 12, join, chain 2 (56 DC)
Round 8: 2 DC in first, DC in next 13, join, chain 2 (60 DC)
Round 9: 2 DC in first, DC in next 14, join, chain 2 (64 DC)
Round 10: 2 DC in first, DC in next 15, join, chain 2 (68 DC)
Round 11-15: DC in each around, join, chain 2 (68 DC)
Round 16-18: SC in each around, join, fasten off, weave in ends (68 SC)
Crochet Shamrock:
They will stitch together to make two separate shamrocks.

I used the mattress stitch to sew the back loops of the heart edges together but you could also follow my CROCHET SHAMROCK TUTORIAL and stitch them together like that. You will NOT want to make the “stem” yet!

Line up the shamrock (there should still be no stem) so the middle join is even with the bottom edge of hat.

Insert hook in the middle join of shamrock and the bottom edge stitch of hat. Pull new strand of green yarn through and join with a slip stitch. Chain 41 (or more or less depending on how long you want your tail to be), slip stitch in second chain from hook and the rest of the way down chain until you get back to the middle join on your shamrock. Slip stitch to join again and fasten off leaving long tail (we are going to use the long tail in our next step).
Using tapestry needle and long tail, stitch on edges of shamrock to hat. Work your needle under the tops of the SC stitches.
Add tassels or pom poms or fringe to the bottom of your chain tail. Another option is to just add braided tails to act as stems.
Add your second shamrock earflap to the other side of the hat. A good way to estimate placement is to try and leave a bit more space on the front of the hat between earflaps than in the back.
*pattern inspiration from THIS HEART EARFLAP HAT by Classy Crochet.


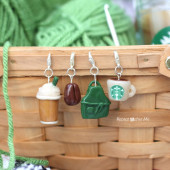
 Starbucks Stitch Markers and Bottled Beverages
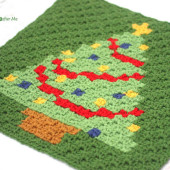
 Crochet Christmas Tree Pixel Square
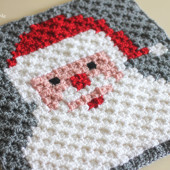
 Crochet Santa Pixel Square
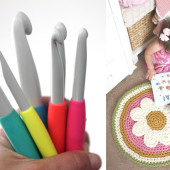
 Crochet Daisy Rug with Clover Amour Large Hooks and Giveaway!


So precious! I’d like to make one for everyone in the family! Thank you so much for sharing the pattern and your creativity with us!
Do you have this in a knitting pattern. Would love to make it for my granddaughter
Thanks
Yo7ru821#;&e shocked? Shows how out of it your thinking and your advice is. BTW, most minimum wage burger joint jobs are around $6 or $7 an hour not, $9 as in California. Anyway, this has been going on in the heart of the country for years, so get out of silicon valley once in a while and get your facts straight.
Welcome to Happy Wheels ! Then you have lover of bikes racing games you should be play once more time . because there are more stunts are inculaded in this games . we have love more time . because you have no need to download . you have play online the games.