 I had the most wonderful morning yesterday and I can’t wait to tell you all about it! Back in 2011 I started this little old blog which allowed me to establish a really great online community and meet some sweet and fun fellow blogging moms from across the country (and world!). One of those bloggers (who also crochets) is the fabulous Stephanie from All About Ami. Stephanie and I have talked and networked over social media for almost 6 years! And yesterday morning I got the chance to meet her!!! I moved to Southern California 2 years ago (we live about 25 minutes away from Disneyland) and when I found out she was on a family vacation to Disneyland, we were able to coordinate a time to meet up at the happiest place on earth! The time just flew by as we chatted, drank coffee, and talked about our favorite subject: crochet. Best part was, our little future crocheters got to meet too! My daughter is 3 and her daughters are 4 and 2 so they became instant friends!
It was so good to finally meet sweet Stephanie in person and it was a pleasure to meet her husband Ryan who is an incredibly nice guy and the talented photographer behind the All About Ami blog!
We didn’t purposely coordinate our outfits but Stephanie was dressed in Minnie Mouse attire and I showed up with crocheted Minnie Mouse ears so it was a great photo opportunity!
Here is the pattern for the ears:
Materials:
–Bernat Super Value in Peony Pink and Black. Shop all colors at Yarnspirations.com.
– Teeny bit of white yarn or embroidery floss to sew buttons on with.
– Size H Crochet Hook
– Black Headband
– Poly-fil Fiber Stuffing
– 6 small white buttons (about 1/2 inch)
– Hot Glue Gun
– Tapestry Needle
Ears (make 4)
With black yarn
Magic Ring, chain 2 and make 12 HDC in ring, join to first HDC, chain 2
Round 2: 2 HDC in each stitch around, join, chain 2 (24 HDC)
Round 3: 2 HDC in first, HDC in next, repeat around, join, chain 2 (36 HDC)
Round 4: 2 HDC in first, HDC in next 2, repeat around, join, fasten off and weave in ends (48 HDC)
Place two ears together and slip stitch the edges together working your hook under the tops of the HDC stitches from the last round.
Fasten off and weave in ends.
Bow pattern (make 2 pieces):
with pink yarn
Chain 21, SC in second chain from hook and the rest of the way down chain, chain 1, turn
Row 2-4: SC in each stitch across, chain 1, turn (20 SC)
Row 5: SC decrease across first two, SC in next 16, SC decrease over last two, chain 1, turn (18 SC)
Row 6: SC in each stitch across, chain 1, turn (18 SC)
Row 7: 2 SC in first stitch, SC in next 16, 2 SC in last stitch, chain 1, turn (20 SC)
Row 8-11: SC in each stitch across, chain 1, turn (20 SC)
at the end of row 11, don’t fast off. Continue to SC around the edges but make a slip stitch over the dip on either end that row Row 5 and 6 created.
Fasten off and weave in ends.
Sew buttons onto one of the bow pieces. Be sure to leave middle empty of buttons.

Place the bow pieces together and SC the edges together. Again. be sure to make a slip stitch in the indents on either end instead of a SC. Before closing, you will need to stuff with poly-fil stuffing. You only need to stuff the ends of the bows and leave the middle empty (or close to empty).
Wrap a strand of yarn tightly around the middle portion and sew in ends to secure. You will want to wrap about 20-30 times.
Now you have a pretty puffy bow!
No sewing skills needed for this next part! You are going to hot glue the ears and bow onto the headband 🙂 Be generous with the hot glue and try to get a large portion of the edge of the ear glued to your headband. The bow should be glue onto the ears and also onto the headband for ultimate support. I promise that mine did not flop over once!
The size of mine fit me perfectly but a child could wear them too! I would actually recommend going down a hook size for a child and getting a child size headband 🙂 You can see the size difference when I wear them versus when Zoe wears them 🙂
I may be able to post a few more photos of my Disney coffee date with Stephanie next week when they download them from their good camera 🙂 In the meantime, be sure to Follow Stephanie and her blog All About Ami (short for Amigurumi) on Facebook and Instagram for tons of crochet goodness!


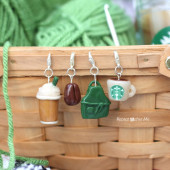
 Starbucks Stitch Markers and Bottled Beverages
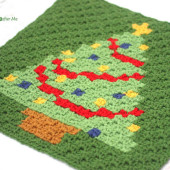
 Crochet Christmas Tree Pixel Square
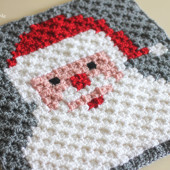
 Crochet Santa Pixel Square
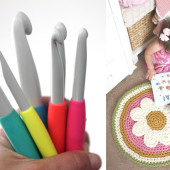
 Crochet Daisy Rug with Clover Amour Large Hooks and Giveaway!


Oh wow! I was just at Disneyland the week before last with a good portion of my family – my older daughter (and her husband, 3 kids, and his parents) and my younger daughter. I just *had* to buy the pink sequin Minnie ears, because – BLING! – but I wish I had seen your pattern in time to make it for our trip.I love it and I’ll be making it! Thanks so much for an adorable pattern.
sorry if I am OT but your daughter is really really cute with Minnie’s ears 😉 (and also without ears)
Bardzo ciekawy pomysł. Śliczne są te myszki. Pozdrawiam
These are so perfect and cute, you did an awesome job! I’ve been following you and Stephanie for a while now and it’s so cool to see you together!
i dont think that i can make it like this anyway in my lifetime 🙁 it is saddening but i will do try all my best. thank you for teaching.
Way cool! Some very valid points! I appreciate you writing thius post plus the rest of the ssite is extremelyy good.
Thanks for another informative web site. Where else could I get that type of info written in such an ideal way? I have a project that I’m just now working on, and I have been on the look out for such information.
I love these ears, but most of all I love that there’s a picture of you and Stephanie together you are my favorite crochet bloggers, you’ve taught me so much since I began crocheting in 2013! So awesome to see you guys together <3
Estan super bonitas! hechas totalmente a crochet! Gracias!!!
Respecting the time and exertion you put into your site and nitty gritty data you offer.
Beautiful – just beautiful – I’m speechless…
Did you know that you will discover many super-fast ELITE and SOCKS5 proxies at https://publicproxy.net/ – try them!
I have come across and believe me I have been searching out for this similar kind of post for past a week and hardly came across this. Thank you very much and will look for more postings from you.
Thanks for your post! I think there are many other people who are interested in them just like me! How long does it take to complete this article? I have read through other blogs, but they are cumbersome and confusing. I hope you continue to have such quality articles to share!
Your article is awesome! How long does it take to complete this article? I have read through other blogs, but they are cumbersome and confusing. I hope you continue to have such quality articles to share with everyone! I believe a lot of people will be surprised to read this article!
Fastest way to watch new movies online and free on 123Movies.in.net We have more than 65000 Movies Simply to enjoy any movies you want. 123Movies
I like handmade items. Thank you for teaching. Hope i will do it
Very awesome page.
a beautiful and lovely mane, thank you for sharing the post
Thank you for your pattern! I came across it this week and just in time for our 10 year anniversary trip to Disney! I wish it would let me post a picture to show you!!
I feel like mine didn’t turn out as large as yours…
So excited to make these for Disneyland! Would you recommend putting some cardboard in the ears to help them keep their shape or do you think the stitches are tight enough that they’ll stand up on their own?
If you are looking for picsart photo editing latest editing tutorial… all you wanted to see you will found here latest picsart editing tricks and tips now….
get free editing material..
.
check out-https://www.prabhatproduction.ooo/
Enjoyed studying this, very good stuff, thankyou . “Shared joys make a friend, not shared sufferings.” by Friedrich Wilhelm Nietzsche.
Precioso trabajo