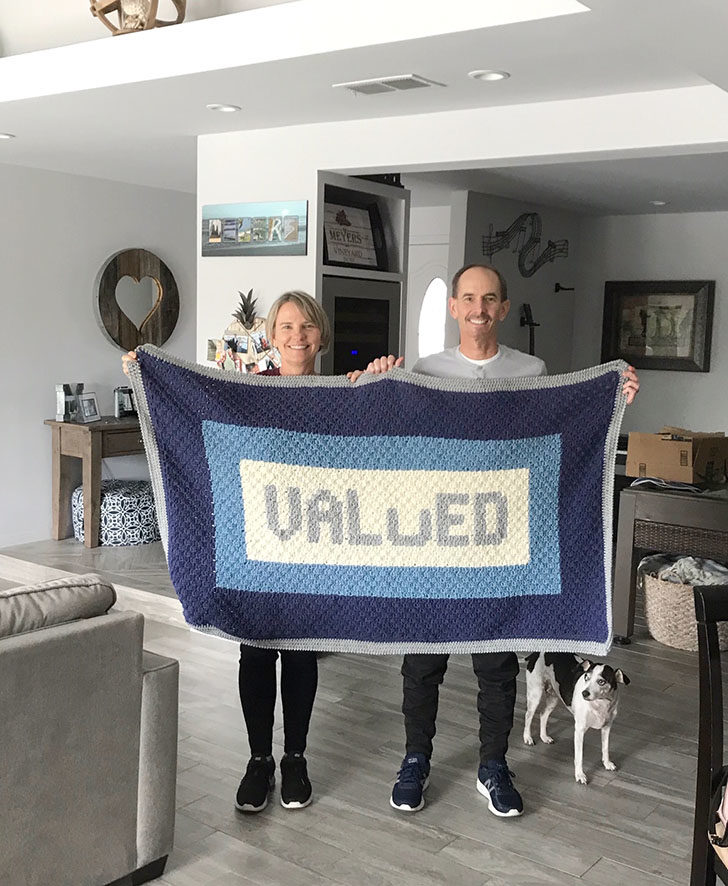
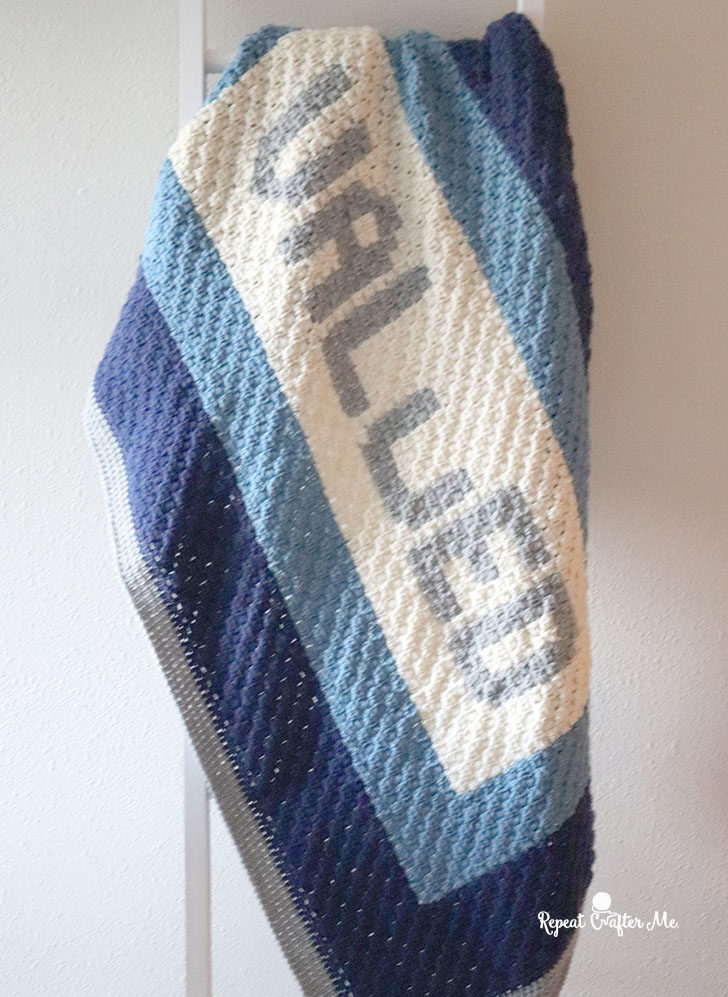
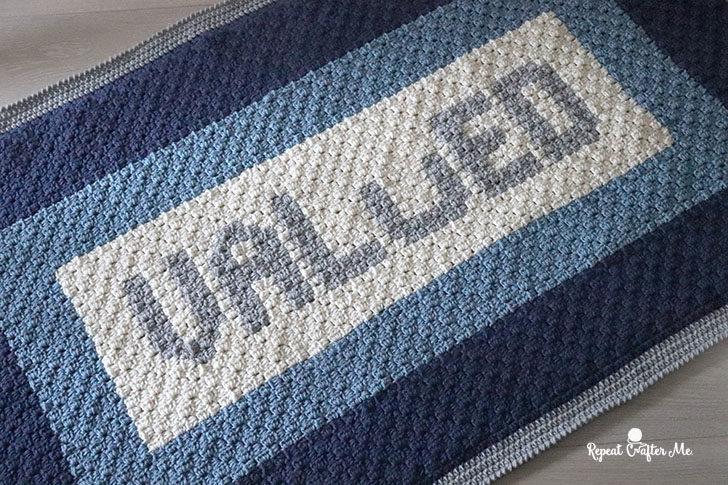
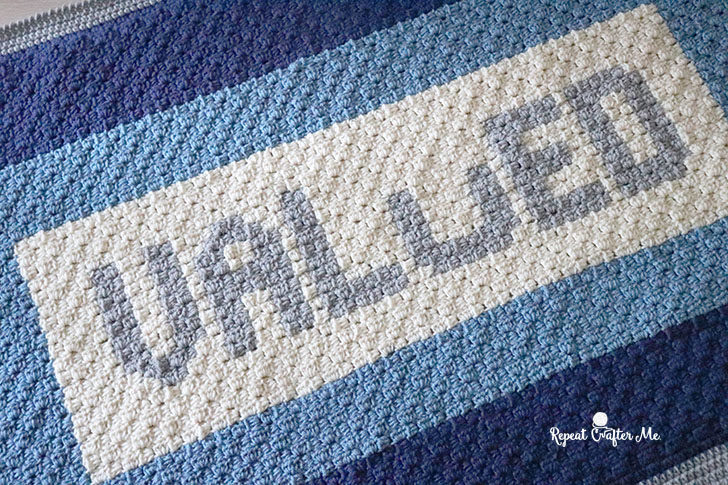
My sons wonderful 2nd grade teacher had a fun request! She asked if I could customize a crochet blanket with a specific word on it. It was my pleasure to get started on this special piece for her and her husband. Her name is Valerie (Val) and his name is Edward (Ed) and when you put the letter “u” in the middle, it spells “VALuED” !! Isn’t that the most adorable thing you’ve ever heard?! I knew that the C2C (corner-to-corner) method of crocheting would be the perfect way to personalize this piece!
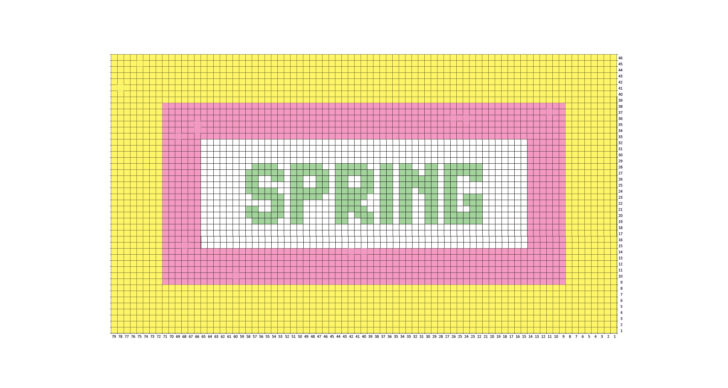
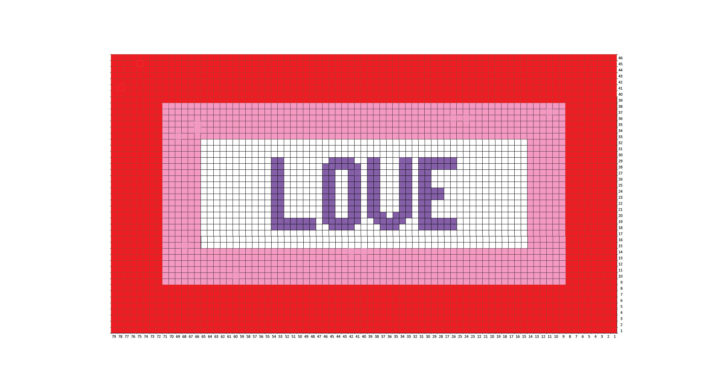
I know that this specific design wasn’t going to be useful to my Repeat Crafter Me readers, but I wanted to take this time to show you that you can easily customize your own C2C blanket using the blank pixel graph below!
You can download the Blanket C2C Graph HERE
Feel free to use any colors you wish! The turquoise and blue are just placeholders.
Use a pencil (or colored pencils) to sketch in pixel letters/words of your choice! I am providing one that says SPRING and LOVE below but wouldn’t it be sweet to make one for your kids with their name or initial in the middle?!
The size of the finished piece is about 60×35 without the border. I used a Size H crochet hook and Bernat Super Value worsted weight yarn. So many color options that you can shop RIGHT HERE.
If you aren’t familiar with the C2C technique, I have a video class available HERE for purchase that teaches you this technique! The Crochet Crowd also has a very helpful video tutorial for free that shows you the basic technique of corner-to-corner crochet. Check that out HERE.
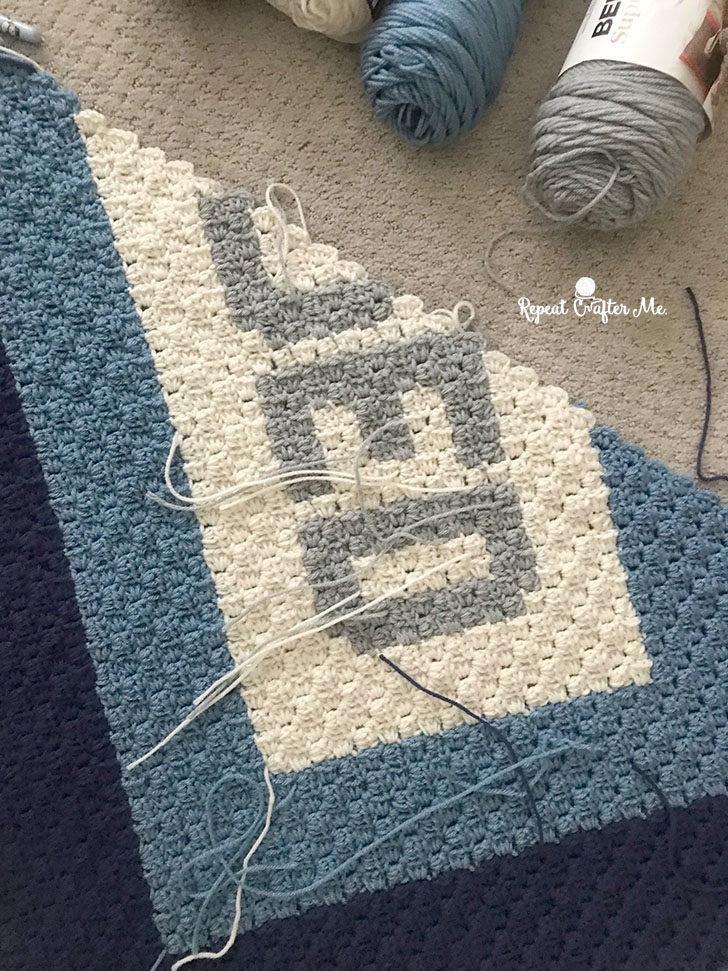
VERY IMPORTANT: Instead of the traditional C2C method of using DC’s and chain 3’s to make each pixel, I used HDC’s and only chained 2 (and chained 5 instead 6 on the increase stitches). This allowed me to have a smaller/tighter squares. You can absolutely use the traditional method and your blanket will be even larger!
There are many options for the border. I decided to use the same border as my Rudolph C2C blanket (but I added more rounds). You can find picture and written tutorials for the border HERE.
Let me know how you customize your Crochet C2C Blanket by tagging me on social media! Use #RepeatCrafterMe in your posts!

 Starbucks Stitch Markers and Bottled Beverages
 Crochet Christmas Tree Pixel Square
 Crochet Santa Pixel Square
 Crochet Daisy Rug with Clover Amour Large Hooks and Giveaway!
That is a beautiful throw. I am very interested and have been looking for a technique to crochet the girl scout promise on throws for several of my girl scouts that will be graduating next year. They started out in my Brownie troop. Do you think I can use this technique to do several rows of wording? Any help you can provide me would be very much appreciated.
that really is adorable!
when my husband and I were dating, our initials spelled EARS
Approximately how many skeins of each color would be needed? I’d likely do the double crochet rather than half double crochet method, but in either event, a starting point for how much yarn to use would be so appreciated! Thanks! I can’t wait to make these for my stepdaughters with their new married names!
Those is gonna be an informative information post to those people who wants to know about free imvu credits hacker invite your friends come my website and play this game and full enjoy.
Aww, this is so sweet! And thank you for the tutorial.
This is amazing! I want to give it a try and make one for my grandson with his name on it. How do I know when to start decreasing? I made your cute bear graphgan for my nephew with the written pattern. I’m just not sure when to start the decrease following the graph only. Thank you!
This looks so good! I love how customizable it is. Turning a simple pattern into something personal is such a cool idea. Makes it way more meaningful, especially as a gift.
It actually reminds me of when I was looking at custom gifts from Wander Prints. I even checked their wander prints phone number https://wander-prints.pissedconsumer.com/customer-service.html at one point to ask about an order. Same kind of vibe with making something unique.
Now I kinda want to try one of these myself