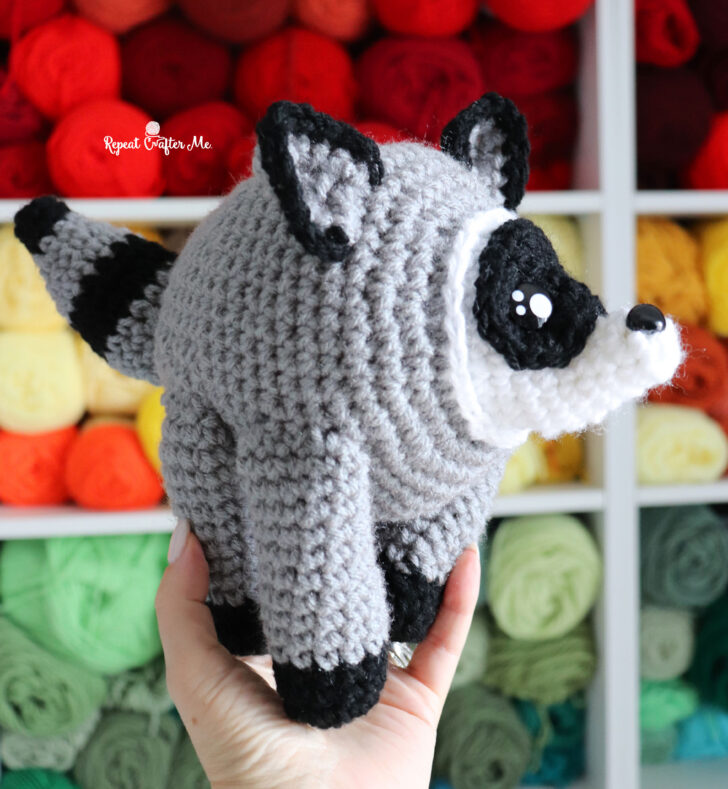
I was born and raised in Seattle and spent the first 30 years of my life there before we moved for my husband’s job. Seattle will always feel like home, so when Jimothy the Raccoon started popping up all over my social media feeds, I instantly fell in love.
Jimothy is Seattle’s newest hometown hero! This sweet little raccoon was born with a rare congenital condition called Short Spine Syndrome, but that certainly hasn’t slowed him down. Videos of him happily exploring the Ballard neighborhood have gone absolutely viral, and his joyful personality has captured hearts around the world.
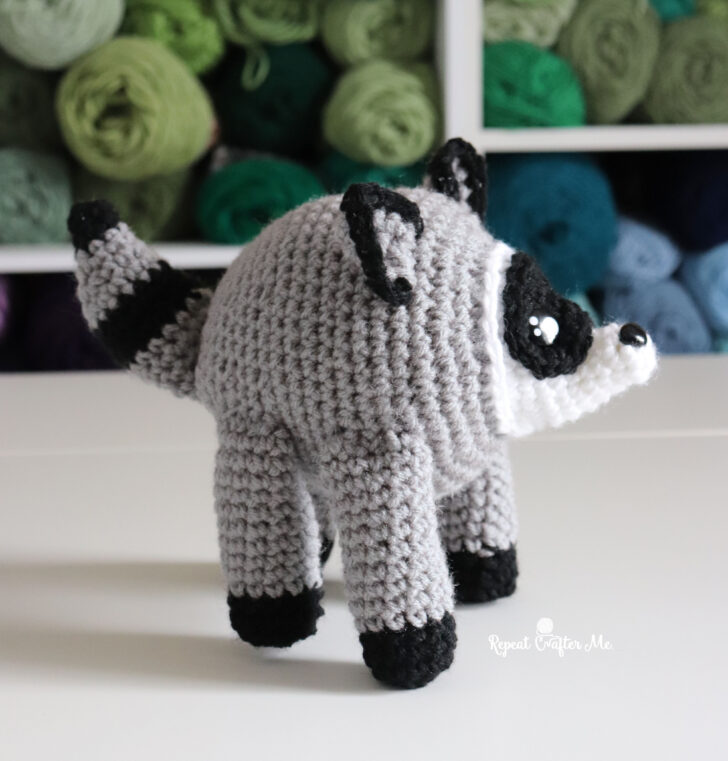
Of course, I knew we needed a crochet version!
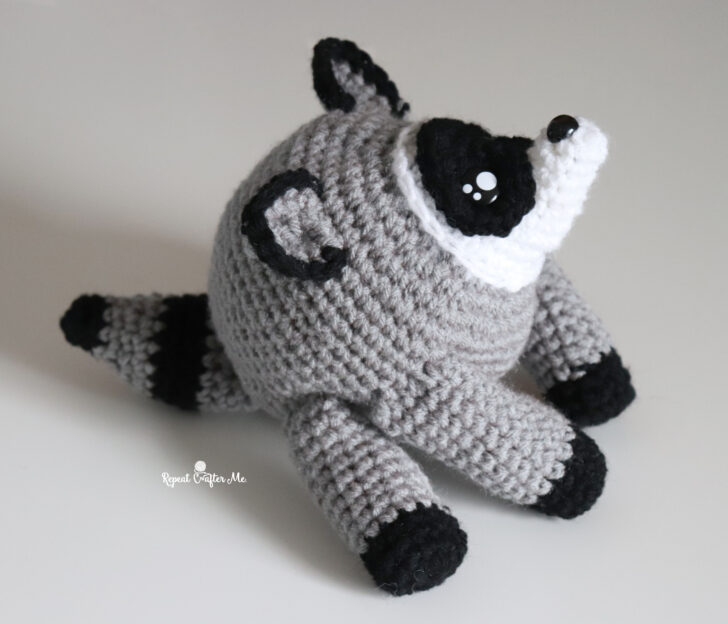
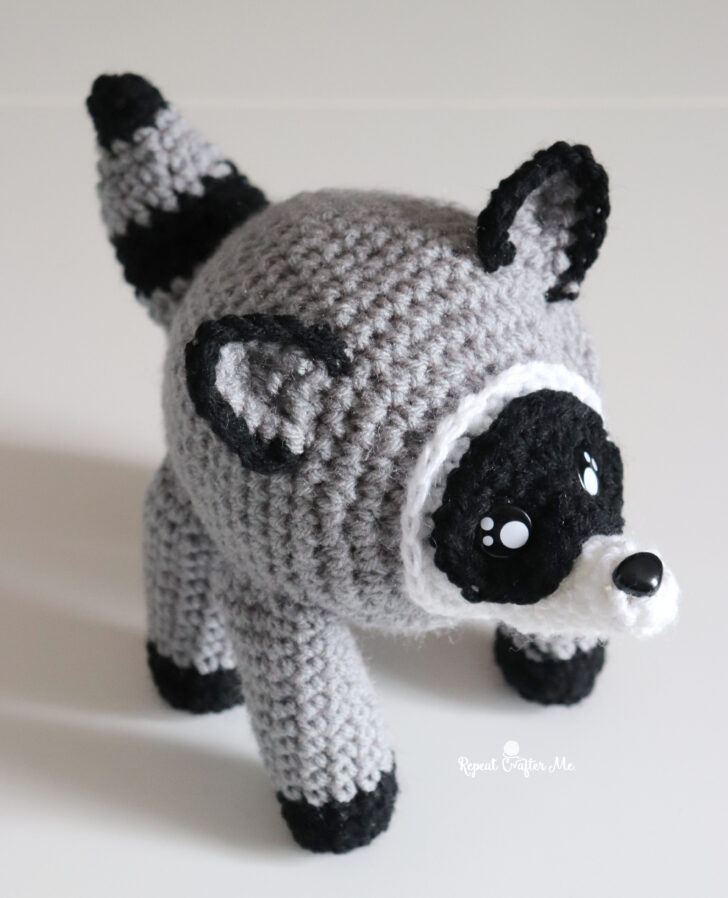
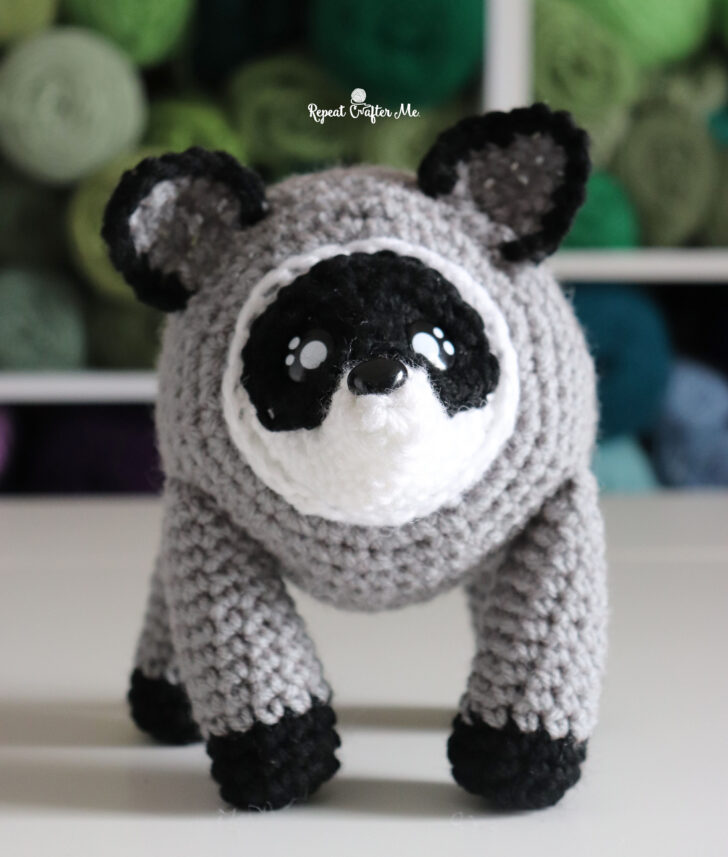
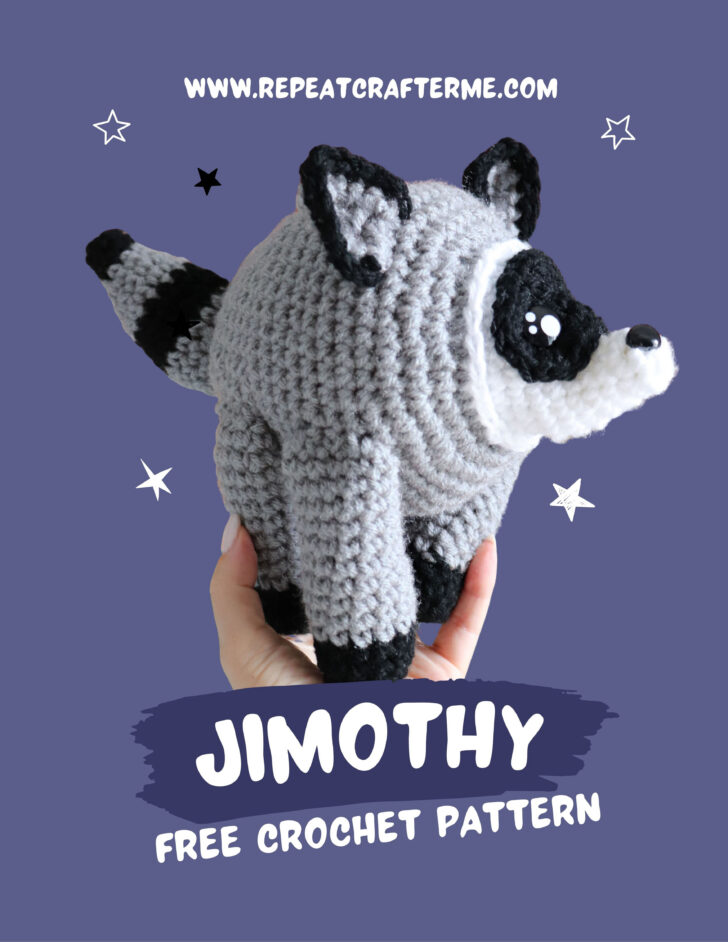
This little amigurumi is squishy, sturdy, and perfectly shaped to match Jimothy’s unique body. His signature mask, tiny ears, striped tail, and short little legs make him instantly recognizable.
Whether you’re a Seattle local, an animal lover, or just can’t resist a cute raccoon, I hope you enjoy making your own Jimothy.
If you haven’t met Jimothy yet, you’re in for a treat! Search “Jimothy the Raccoon” on Google, Instagram, Facebook, or TikTok and prepare to fall in love with this sweet little Seattle celebrity. His videos are absolutely adorable!
Materials
- Red Heart Super Saver Yarn >>> Shop colors HERE on Yarnspirations.com <<<
- Dusty Gray
- Black
- White
- Size H (5.0 mm) Crochet Hook
- Polyfil Fiberfill
- Tapestry Needle
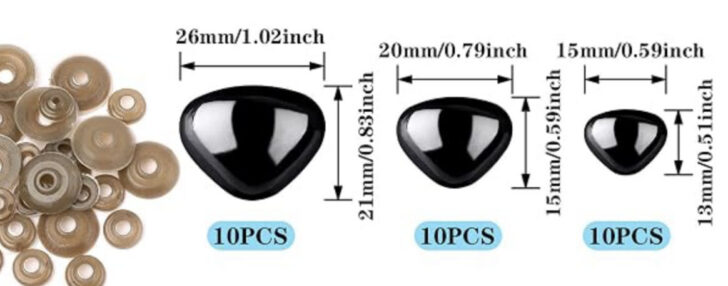
- Kawaii Safety Eyes >>> Shop Kawaii Safety Eyes HERE on Amazon (affiliate link) <<<
Or this pack of Safety eyes has more of an assortment of sizing:
>>> Kawaii Safety Eyes Multi-pack <<< - Black Safety Nose >>> Shop Safety Noses HERE on Amazon <<<
Finished Size: Approximately 10 inches wide (from tail to nose) x 7 inches tall (from ears to bottom of feet)
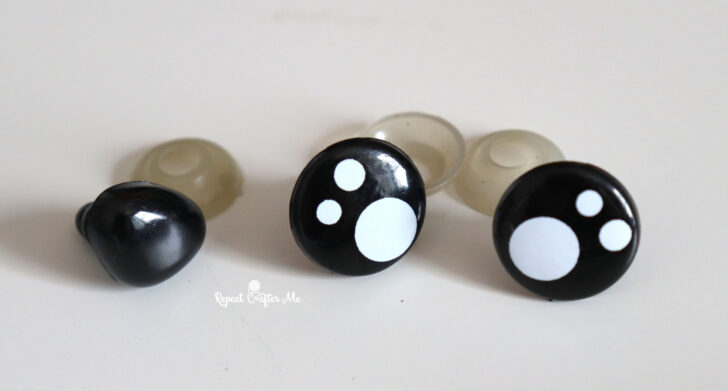
One of my favorite details is the kawaii safety eyes! Since Jimothy has black eye patches, the painted white highlights help his eyes stand out instead of blending into the black yarn. They add just the right amount of sparkle and make his sweet little face even more expressive.
Safety Eyes & Nose Sizing: I used approximately 14 mm kawaii safety eyes and a 15 mm safety nose. The kawaii safety eyes I purchased came in a variety pack that isn’t labeled by size, so I didn’t specify an exact measurement in the pattern. Instead, I recommend holding a few pairs up to the eye patch before attaching the backs and choosing the size you like best. Anything in the 12–16 mm range will look great. The 15 mm safety nose is labeled in the variety pack, and I found it to be just the right size for Jimothy’s sweet little face.
>>> Kawaii Safety Eyes Multi-pack <<<
>>> Safety Noses can be purchased HERE on Amazon <<<
Jimothy Crochet Pattern:
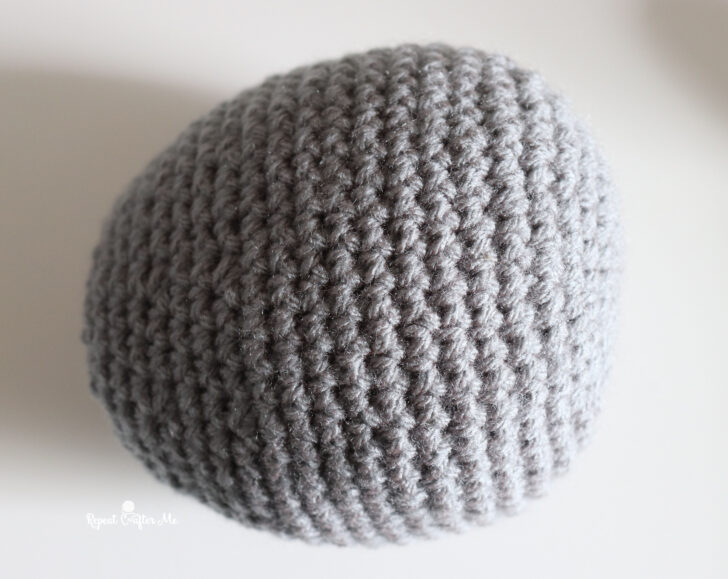
Body:
with gray yarn
Magic Ring, chain 1 and make 10 SC in ring, join, chain 1
Round 2: 2 SC in each stitch around, join, chain 1 (20 SC)
Round 3: 2 SC in first, SC in next, repeat around, join, chain 1 (30 SC)
Round 4: SC in each stitch around, join, chain 1 (30 SC)
Round 5: 2 SC in first, SC in next 2, repeat around, join, chain 1 (40 SC)
Round 6: 2 SC in first, SC in next 3, repeat around, join, chain 1 (50 SC)
Round 7-15: SC in each stitch around, join, chain 1 (50 SC)
Round 16: SC Decrease, SC in next 3, repeat around, join, chain 1 (40 SC)
Round 17-18: SC in each stitch around, join, chain 1 (40 SC)
Round 19: SC Decrease, SC in next 2, repeat around, join, chain 1 (30 SC)
Round 20-22: SC in each stitch around, join, chain 1 (30 SC)
start stuffing with polyfil and continue to stuff until closed.
Round 23: SC Decrease, SC in next, repeat around, join, chain 1 (20 SC)
Round 24: SC Decrease around. (10 SC)
Fasten off leaving a long tail. Thread the tail through the remaining 10 stitches and pull tight to close.
Set body aside until assembly.
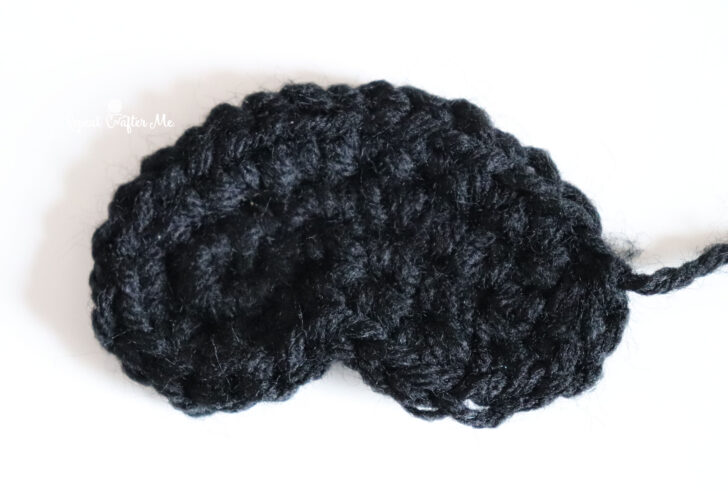
Eye Patch:
with black yarn
Chain 8. SC in 3rd chain from hook, SC in next 4 chains, 4 SC in last chain. Working on opposite side of foundation chain, SC in next 4 chains, 3 SC in last chain, join with slip stitch, chain 1. (16 SC)
Round 2: 2 SC in each stitch around, except make only 1 SC in each of the two stitches that form the inside curve. Join with slip stitch. (30 SC)
Fasten off leaving a long tail for sewing.
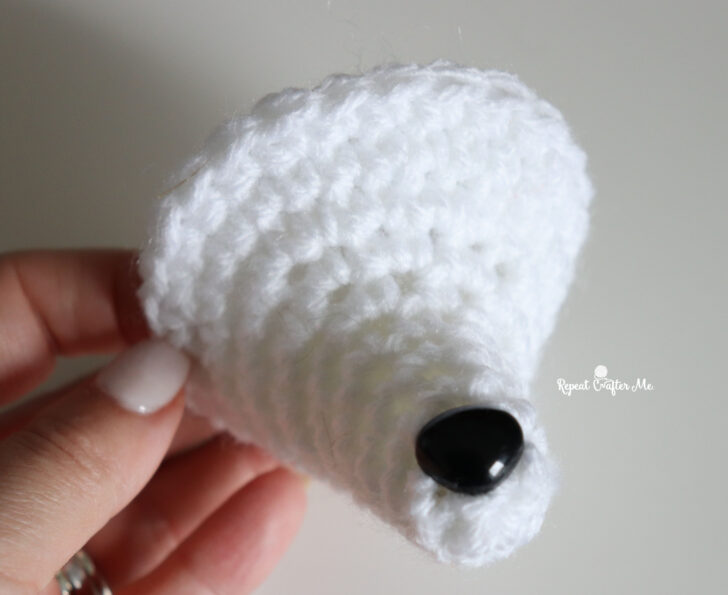
Snout:
with white yarn
Magic Ring, chain 1 and make 6 SC in ring, join, chain 1
Round 2: SC in each stitch around, join, chain 1 (6 SC)
Round 3: 2 SC in first, SC in next 2, repeat around, join, chain 1 (8 SC)
Round 4: SC in each stitch around, join, chain 1 (8 SC)
Round 5: 2 SC in first, SC in next 3, repeat around, join, chain 1 (10 SC)
Round 6: 2 SC in first, SC in next 4, repeat around, join, chain 1 (12 SC)
Round 7: SC in first 4, 2 SC in next 6, SC in last 2, join, chain 1 (18 SC)
Round 8: SC in first 6, 2 SC in next 6, SC in last 6, join, chain 1 (24 SC)
Round 9-10: SC in each stitch around, join, chain 1 (24 SC)
Fasten off leaving long tail.
Place Safety Nose at tip. Set aside until assembly.
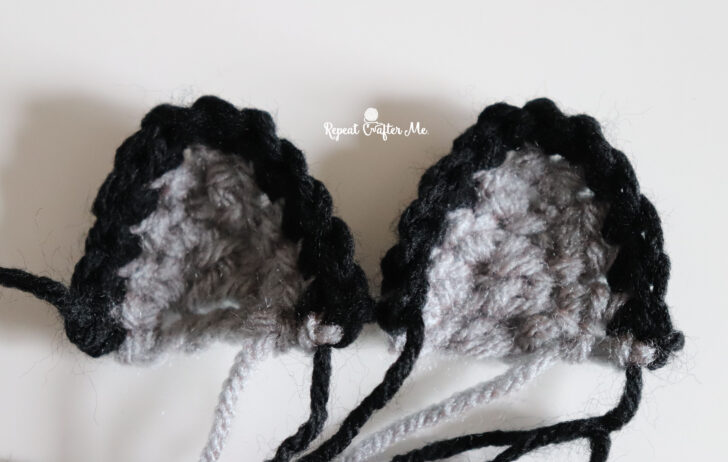
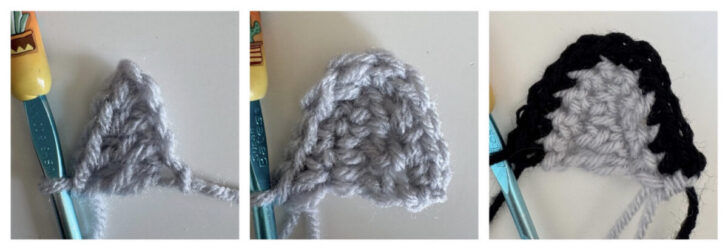
Ears (make 2):
with gray yarn
Chain 5, SC in second chain from hook, HDC in next, DC in last two, chain 1, turn
Row 2: 2 SC in first, SC in next 2, 2 SC in top stitch of ear, SC in next 2, 2 SC in last,
join in black yarn, chain 1, turn
Row 3: SC in each stitch, make 2 SC in the top 2 stitches of ear (12 SC)
Fasten off leaving long tails for sewing.
Tail:
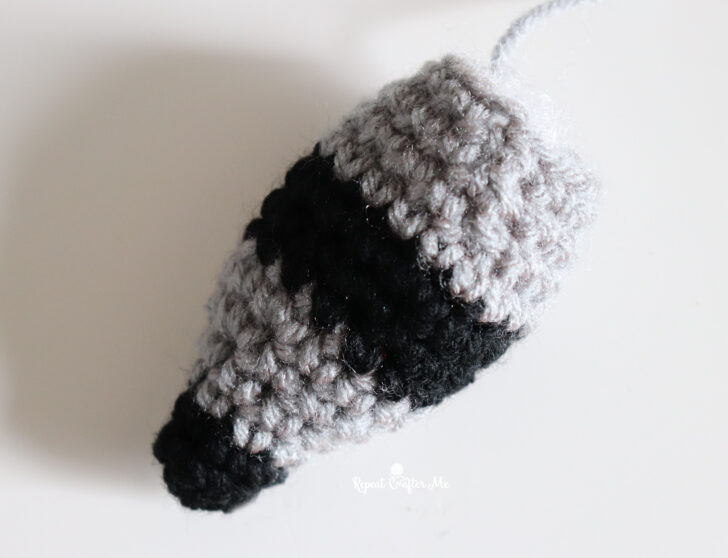
starting with black yarn
Magic Ring, chain 1 and make 6 SC in ring, join, chain 1
Round 2: 2 SC in first, SC in next 2, repeat around, (8 SC)
join in gray yarn, chain 1
Round 3: SC in each stitch around, join, chain 1 (8 SC)
Round 4: 2 SC in first, SC in next 3, repeat around, join, chain 1 (10 SC)
Round 5: 2 SC in first, SC in next 4, repeat around, join, chain 1 (12 SC)
Round 6: 2 SC in first, SC in next 5, repeat around, (14 SC)
join in black yarn, chain 1
Round 7: SC in each stitch around, join, chain 1 (14 SC)
Round 8: 2 SC in first, SC in next 6, repeat around, join, chain 1 (16 SC)
Round 9: 2 SC in first, SC in next 7, repeat around, (18 SC)
join in gray yarn, chain 1 (you can fasten off the black at this point)
Round 10: SC in each stitch around, join, chain 1 (18 SC)
Round 11: SC Decrease, SC in next 7, repeat around, join, chain 1 (16 SC)
Round 12: SC Decrease, SC in next 6, repeat around, join, chain 1 (14 SC)
Round 13: SC Decrease, SC in next 5, repeat around, join, fasten off (12 SC)
Fasten off leaving a long tail for sewing.
Legs (make 4):
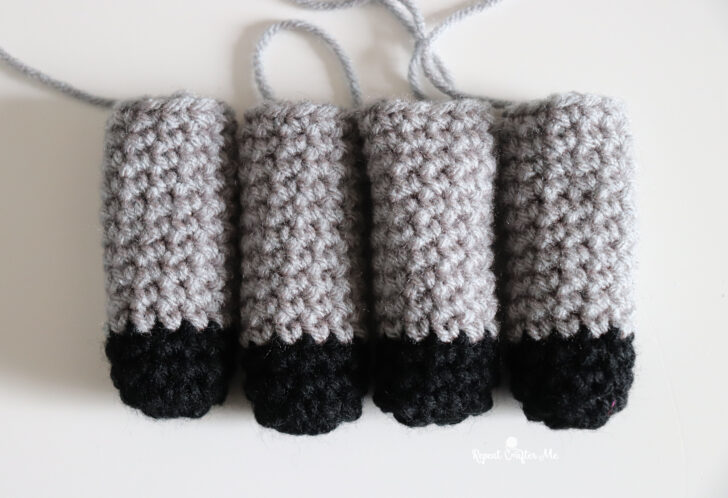
starting with black yarn
Magic Ring, chain 1 and make 10 SC in ring, join, chain 1
Round 2: 2 SC in first stitch, SC in next 4, repeat around, join, chain 1 (12 SC)
Round 3-4: SC in each stitch around join, chain 1 (12 SC)
after round 4, join in gray yarn (fasten off black), chain 1
Round 5-14: SC in each stitch around, join, chain 1 (12 SC)
Fasten off leaving a long tail for sewing.
Assembly
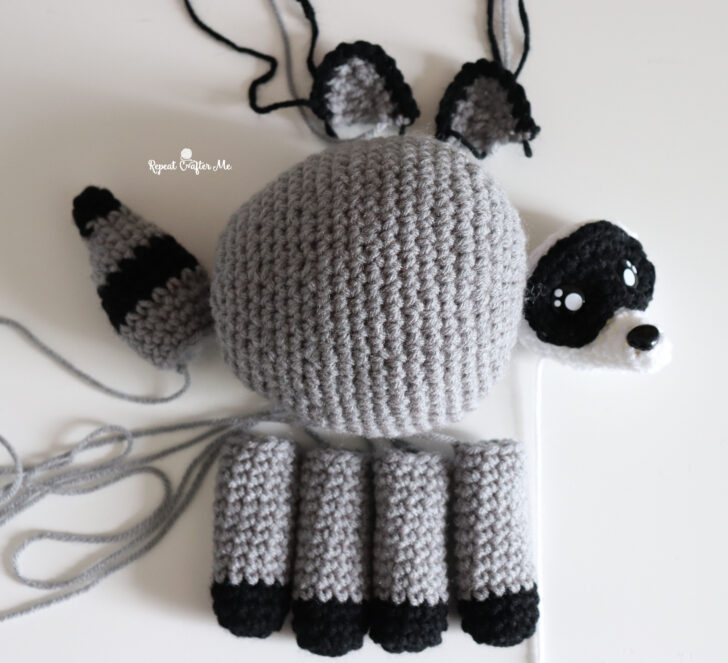
Step 1: Prepare the Face
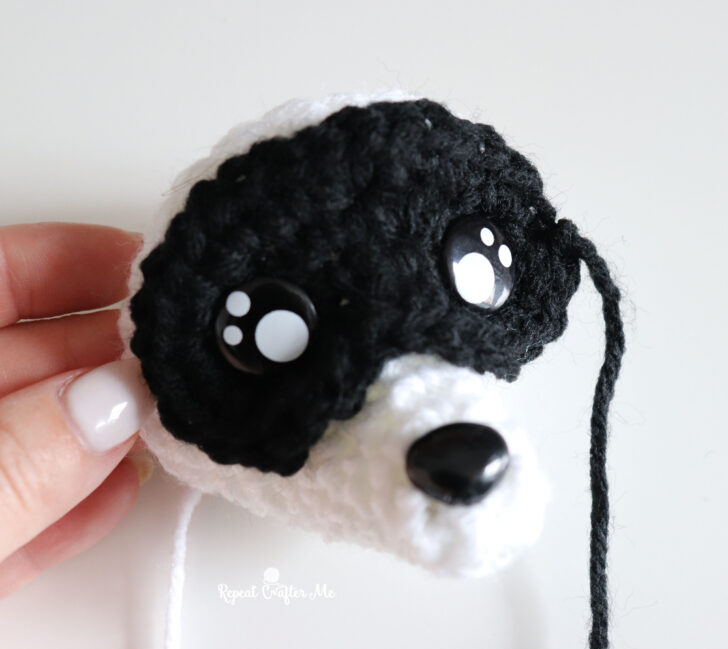
Insert the safety nose into the snout.
Place the black eye patch over the front of the snout, positioning it just above the nose.
Insert both safety eyes through the eye patch and the snout at the same time. This secures the eye patch in place before sewing.
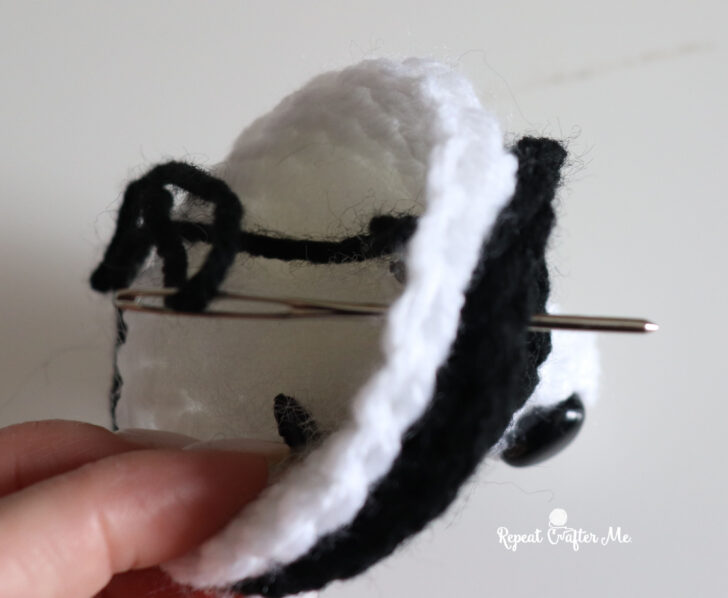
Now use the long black yarn tail to stitch around the outside edge of the eye patch so it lays nice and flat against the snout.
Lightly stuff the snout with Polyfil.
Tip: Installing the safety eyes through both crochet pieces first makes positioning the eye patch much easier and prevents it from shifting while you sew.
Step 2: Attach the Snout
Position the completed snout on the larger end of the body (the side where you began with the magic ring).
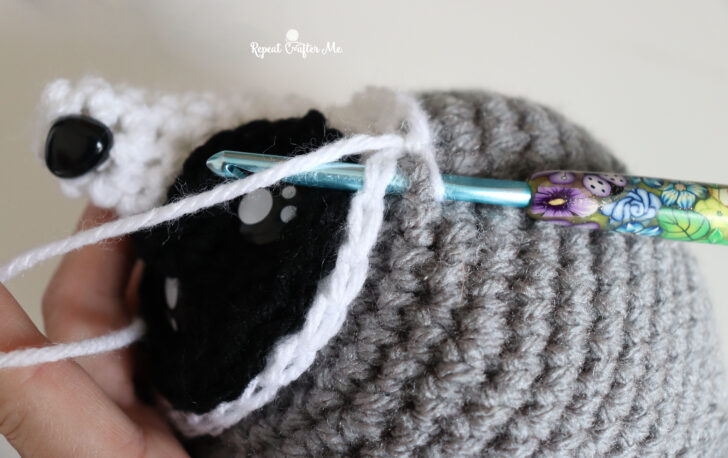
Instead of sewing, I found it easiest to single crochet the snout directly onto the body.
Working with white yarn, insert your hook through the outer edge of the snout and into approximately Round 4 of the body. Single crochet evenly around until the snout is securely attached.
Weave in the ends.
Step 3: Attach the Ears
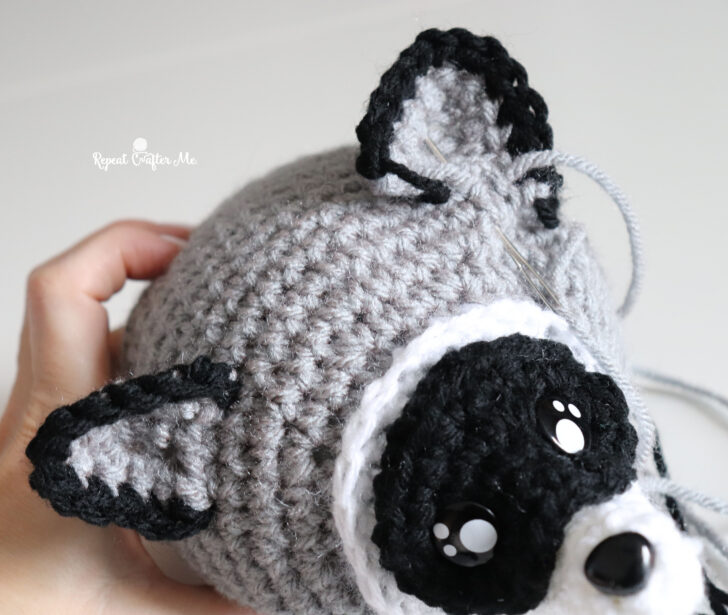
Position the ears approximately three rounds above the top of the face.
Pin them in place first before sewing so you can adjust their angle until they look even.
Using a tapestry needle and the long yarn tail, stitch the bottom edge of each ear to the head, leaving the rest of the ear unstitched so it stands up naturally.
Step 4: Attach the Tail
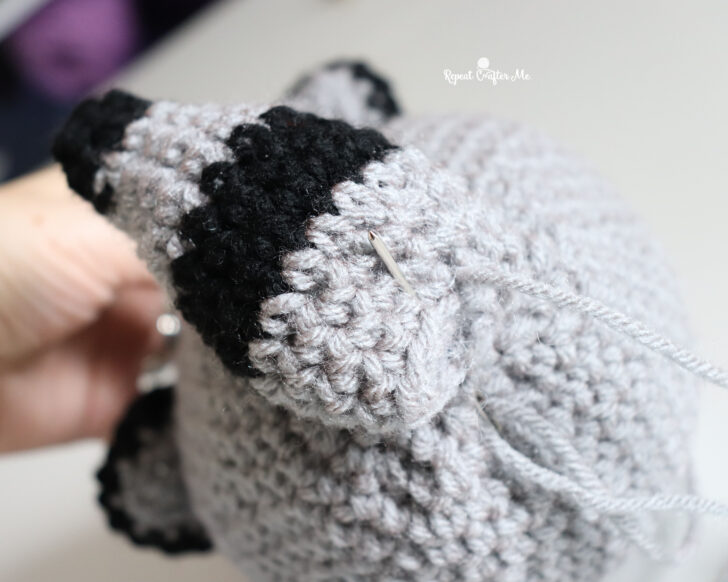
Stuff the tail with polyfil.
Pinch the opening flat and center it on the back of the body, with the tail pointing upward. Using a tapestry needle and the long yarn tail, sew the flattened opening securely to the body.
Step 5: Attach the Legs
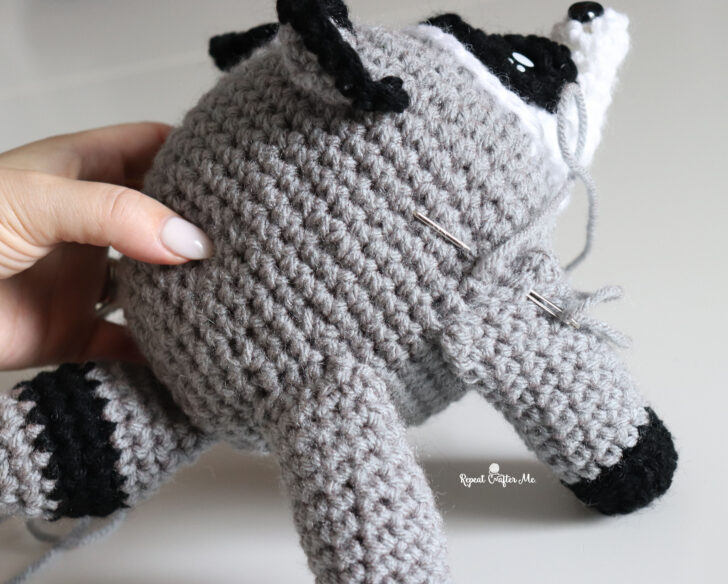
Stuff each leg with polyfil.
Pinch the tops flat.
Position two legs on each side of the body near the bottom.
Take your time adjusting their placement before sewing—the spacing is what allows Jimothy to stand upright.
Sew each leg securely to the body.
Finished!
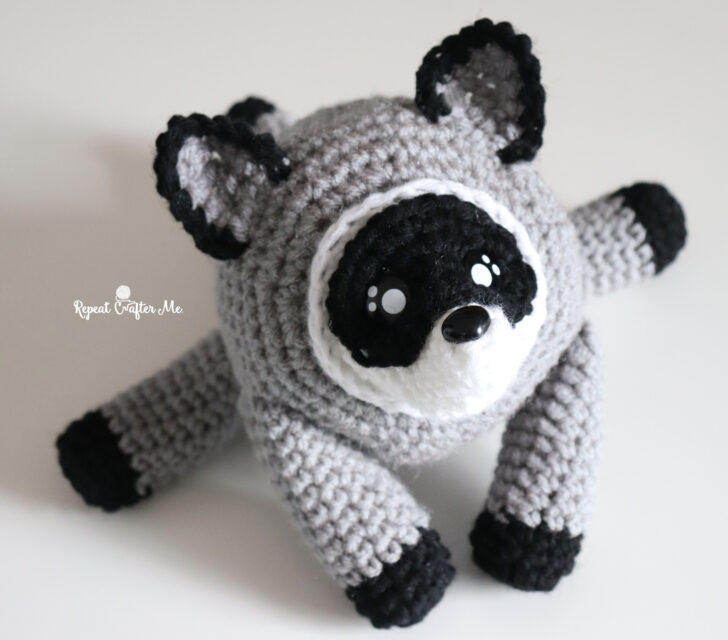
Jimothy can stand on all four legs or relax in his signature lounging pose.
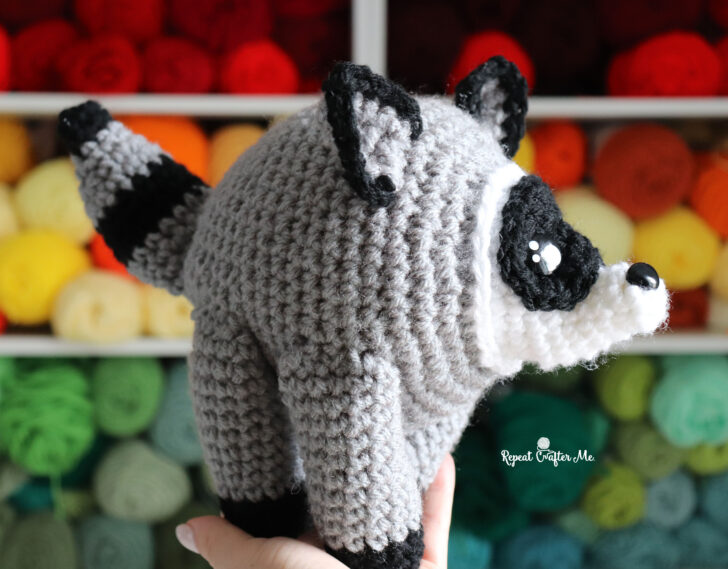
Jimothy’s unique shape comes from a rare condition called Short Spine Syndrome, but he doesn’t let that slow him down one bit. Watching him happily explore his neighborhood has brought smiles to millions of people, and I hope this crochet version brings a smile to your face too.
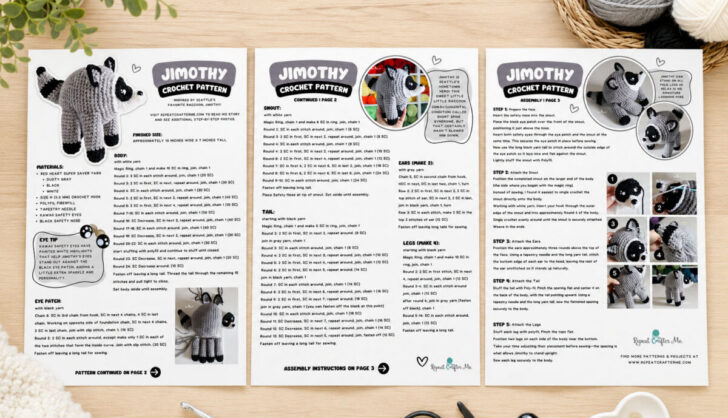
Prefer an ad-free printer friendly version? This pattern is also available as a beautifully formatted 3-page Quick Print PDF in my Etsy shop! It’s perfect for printing or viewing on a tablet while you crochet, with the same step-by-step instructions and assembly photos in an easy-to-follow layout.
>>> JIMOTHY AD-FREE QUICK PRINT PDF <<<
Love Raccoons?
If Jimothy has you wanting to crochet even more adorable raccoons, I’ve got you covered!
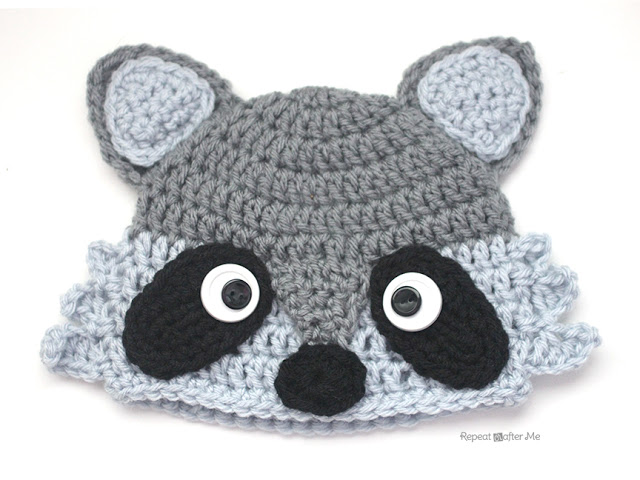
Crochet a Free Raccoon Hat in sizes Newborn through Adult with my free pattern here:
>>> Crochet Raccoon Hat Pattern <<<
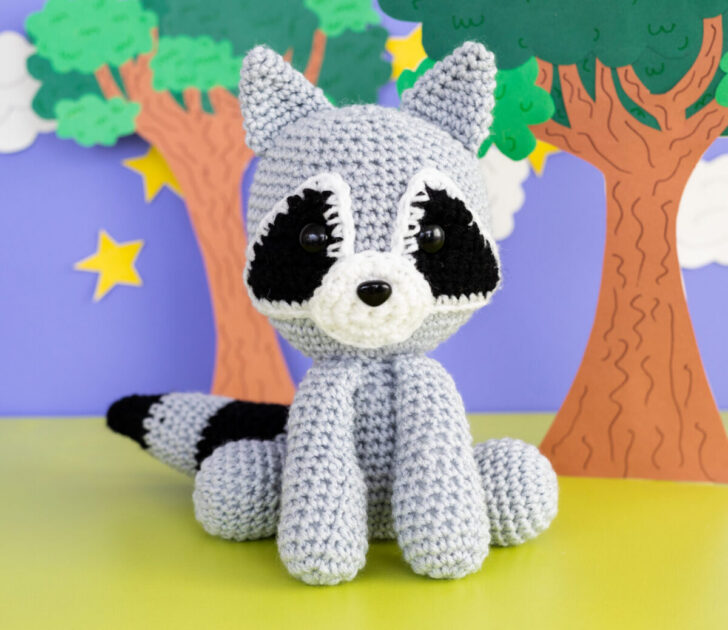
Looking for another woodland friend? You’ll find an irresistibly cute crochet raccoon on page 115 of my book Crochet Cute Forest Friends, available on Amazon:
>>> Crochet Cute Forest Friends <<<
Happy crocheting!
Let’s stay connected!
Subscribe to my NEWSLETTER for free patterns straight to your inbox!
Repeat Crafter Me Facebook
Repeat Crafter Me Instagram
Repeat Crafter Me Pinterest
Repeat Crafter Me YOUTUBE
Repeat Crafter Me ETSY Shop
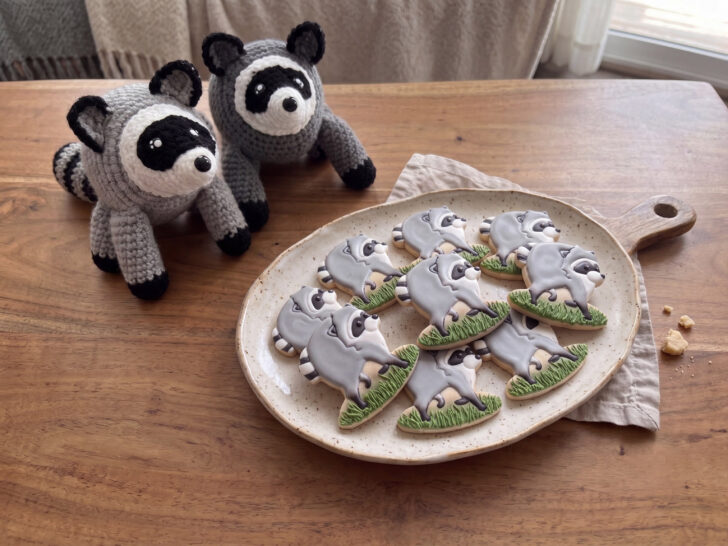
Thank you to Sweet Prints, Inc for sending me a Jimothy Cookie Cutter!
You can find this design and her other cookie cutters on Amazon >>> Jimothy Cookie Cutter <<<

 Starbucks Stitch Markers and Bottled Beverages
 Crochet Christmas Tree Pixel Square
 Crochet Santa Pixel Square
 Crochet Daisy Rug with Clover Amour Large Hooks and Giveaway!
I can’t wait to make him!!! Thank you so much for the pattern!
The way you translated Jimothy’s short, sturdy silhouette into the body shaping is really thoughtful. Holding at 50 stitches through rounds 7–15 and then tapering gradually should create that compact shape without losing the squishy look. The white-highlighted safety eyes are also a smart choice against the black eye patches, and the color changes in the striped tail are laid out clearly enough to follow. I appreciate having the finished 10-by-7-inch size for reference. Before sewing the snout, eye patches, ears, and legs in place, do you recommend pinning every feature at once to balance the expression?
Great pattern! Im just a little bit confused on the stitch count/increases on making the ears.
I am having the same problem with the ears, I am confused on the directions given.
I was confused as well. But I figured it out. you’re going to work on the opposite side of the foundation too.
Thanks for writing this. I’ve been stuck on the jimothy side of things for a while, and your take on raccoon gave me a clear path forward. Not often you find content that’s both detailed and practical.
The links to the eyes and nose are assorted sizes. What size did you use for this pattern? Thank you.
16mm eyes and 15 mm nose
Harika bir paylaşım, özellikle konunun önemli detayları oldukça net bir şekilde açıklanmış. İnsanları çeşitli karmaşık anahtar kelimelerle yormak yerine, okumaktan keyif alacağı içerikler her zaman daha iyidir. Kaliteli paylaşım adına teşekkür eder, paylaşımlarınızın devamını sabırsızlıkla beklerim.
Jimothy is absolutely adorable! It’s amazing how a little raccoon with Short Spine Syndrome has captured so many hearts. Stories like this are a great reminder that animals can be incredibly resilient, and it’s wonderful to see Jimothy living such a happy, curious life despite his condition. I can’t wait to see the crochet version—it looks like a fun pattern that many animal lovers will enjoy making.
What an adorable pattern! Jimothy’s unique story makes this project even more special, and your step-by-step instructions are so easy to follow. I really appreciate the attention to detail—it truly captures his charm. Thanks for sharing such a creative and generous free pattern with the crochet community!
I just finished making Jimothy and it was a such a fun make. The step by step photos were really helpful. One small suggestion I would make is that his tail in the pattern is a little longer than the real Jimothy’s which is quite stubby. But it’s so cute! Thank you,
I really enjoyed this collection of freezer meal ideas! Planning meals ahead of time is such a practical way to save both time and effort, especially during the warmer months when nobody wants to spend hours in the kitchen. The chicken fajitas and teriyaki chicken recipes immediately caught my attention because they look simple and perfect for busy weekdays. I also enjoy exploring easy dessert recipes to pair with homemade dinners, so posts like this are always inspiring. Thanks for putting together such a helpful and well-organized guide!
Thank you for the pattern. You really captured Jimothy. Mine turned out great! Everyone loves him. I might be making more!
This is absolutely wonderful! Thank you for creating this pattern. I grew up in Seattle and have been following Jimothy’s adventures, so this crochet version warms my heart. The detail you put into capturing his unique shape is incredible. I can’t wait to get started!
I’m confused on the ears. After row one there’s only four stitches so how are you supposed to put ten stitches in row two?
This is so cute! You captured Jimothy’s unique look perfectly. Can’t wait to make one—thanks for sharing the pattern!
Nice content thanks for it
Nice content thanks for it
I’m having a lot of trouble getting the eye mask to come out right. I keep ending up with lots of holes instead of the solid look in the photo. Any suggestions would be appreciated!
Love this Jimothy pattern—thank you for capturing his little ears and tail! I’m stuck on the ear section: after row 1 I only have 4 stitches, and I’m not sure how row 2 gets to the count you list. Could you clarify the increases on rows 2–3?
Hi! I am currently in the middle of making this cute Jimothy and I wanted to share some pro tips. If you are a more experienced crocheter you could totally make this in the round and use a stitch marker, and skip the join and ch 1. I am going to try this the next time I make him! I hope this helps. Happy crocheting!
I thought the same thing.
Hi I made two of jimothy for one of my old teachers because she commissioned him to gift to a friend she fell in love with it and didn’t want to let it go so she had me make another one he is so fun to make but I had trouble with the ears and mask but that’s because I’m still a sort of beginner crochet artist thank you for making the pattern I love it
This post about books and reading is so wonderful! The passion for reading that comes through in every word is contagious. Any list of top books is always so subjective but that is what makes these discussions so engaging. The fact that readers vote for their favorites makes it even more meaningful. Books have such an incredible ability to transport us to different worlds and expand our understanding. Whether fiction or non-fiction, there is always something new to discover. Thank you for celebrating the joy of reading with such enthusiasm!
I am currently working on Jimothy but he doesn’t seem to be very big in the body. What length is anyone else getting from start to finish on the body only. I’m using the proper yarns and hook. Is the picture the actual size of the project of enlarged? My body only is approximately 4.5 inches long.
This crochet pattern is a creative and enjoyable project for people who love making unique handmade pieces. The detailed instructions and design ideas make it easier for crafters to follow along and create something special. For those interested in organized public information resources, Benton County Courts provides useful details related to legal records and case information. Thanks for sharing such an inspiring pattern with the community.
This is really nice content. thanks for sharing it.
Just finished him for an upcoming auction. Love him! Wish I could pay his picture.
I love how this crochet pattern captures the charm and personality behind Jimothy’s story.
It’s amazing how a small handmade creation can bring people together and celebrate a unique animal. For anyone interested in exploring related local information, Flagler County Records provides access to helpful public record resources. Thanks for sharing such a fun and heartwarming project!
I love how you translated Jimothy’s unique body shape and story into this pattern. The way you shaped the body and tail really captures his short, sturdy silhouette, and the safety-eye and mask combo makes his face so expressive. It feels thoughtful and true to the real Jimothy, not just “another raccoon pattern.” Thanks for sharing such a detailed, well-written free pattern.
This pattern is absolutely adorable! I’ve been looking for a cute raccoon design to try out over the weekend, and Jimothy looks like such a fun and quick project to make. I always love finding detailed amigurumi guides that are easy to follow, and if you ever need to quickly check official records or details online, resources like the Sumter Court Directory can be super helpful to keep saved. Thanks so much for sharing this free pattern—I can’t wait to grab my crochet hook and start making one today!
What an adorable crochet pattern! Jimothy the Raccoon is absolutely charming, and those clear row-by-row instructions make tackling the striped tail look so manageable. It is always a pleasure to find patterns that are both well-designed and easy to follow for weekend crafting projects. Speaking of staying organized with official records, if you need a reliable way to check Martin Court Records for local documentation, having the right resources easily accessible saves so much time. Thanks a lot for sharing this wonderful pattern with the community—I can’t wait to grab my hook and start stitching my own Jimothy!
I really enjoyed this pattern—Jimothy has so much personality, and the instructions look easy to follow. While I was taking a break, I also came across Okaloosa Court Search for an unrelated project, and then got back to finishing the crochet details. Thanks for sharing such a creative design; I can’t wait to make one for a friend!
I’ve been following Jimothy on TikTok for months, I can’t believe someone made a free crochet pattern for him! This is going to be my next weekend project.
I’m having problems with the exact placement of the ears and legs. Can someone who has conquered this pattern please help me! How maybe stitches are you leaving between each ear? And the same question is needed to be answered for the legs.?
Jimothy’s Ballard videos — Short Spine Syndrome, the mask, striped tail, short legs — are why this amigurumi isn’t a generic raccoon. One toy shot just hides the silhouette that made Seattle share him. I take one photo and cut it into a numbered grid so the mask stays a tile. That’s why we built ImageSplit: one photo, numbered cells in the browser, nothing uploaded.
Jimothy the raccoon is too cute for words! The bandit mask and ringed tail are crocheted with such wonderful detail.
Just made Jimothy this weekend and he came out so cute! Attaching the safety eyes through both the eye patch and snout at the same time was a total game changer — no more shifting while I sewed. Thanks for capturing his little short-spine shape so well, and for making the pattern free!
Thank you so much for making this free! The tip about inserting the safety eyes through both the eye patch and the snout at the same time is genius — I always struggle with my masks shifting while I sew. And single crocheting the snout right onto the body instead of sewing it is such a smart shortcut. Can’t wait to try capturing Jimothy’s little short-spine shape myself!