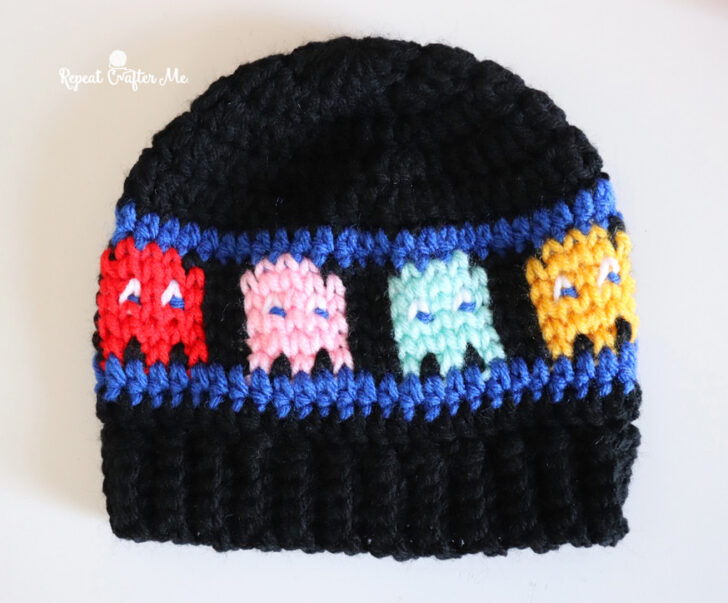
Blinky, Pinky, Inky and Clyde have joined the crochet party!
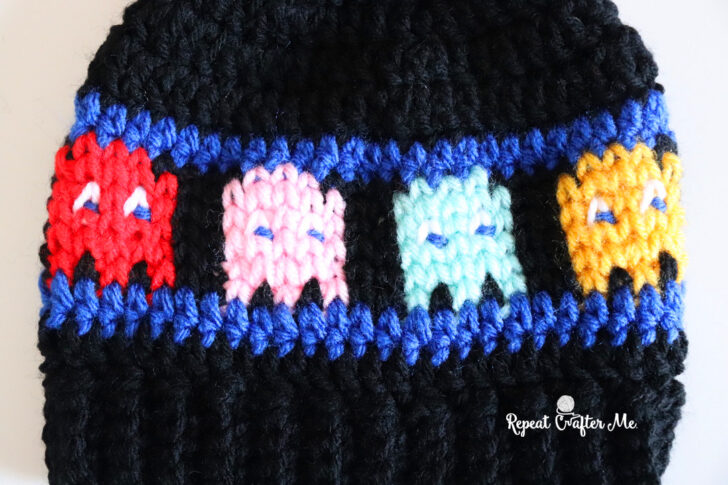
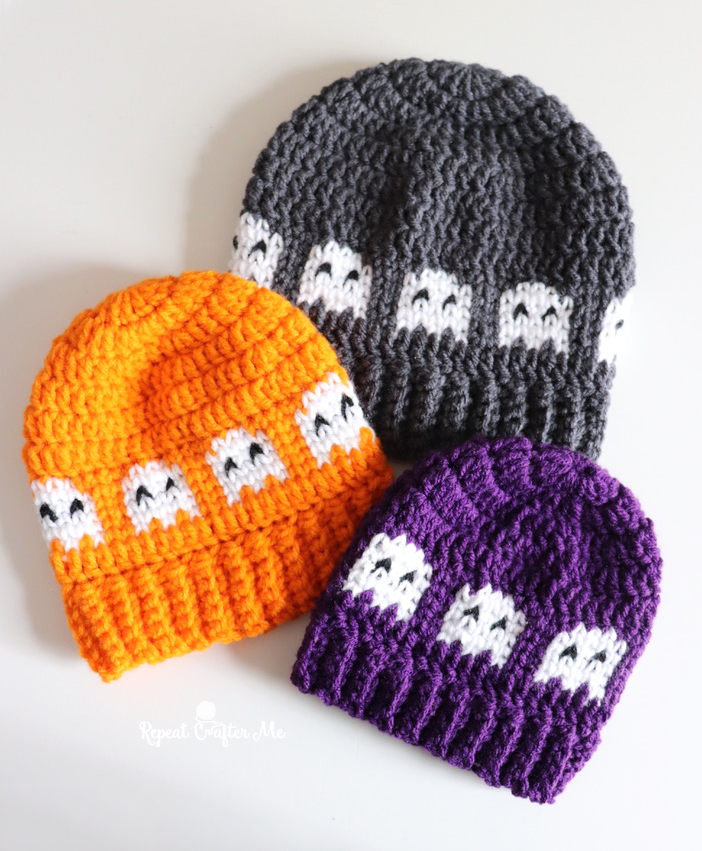
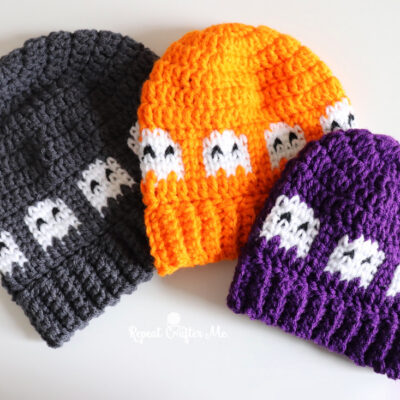
After finishing my Ghosts in a Row Crochet Hat, I couldn’t stop thinking about another version of those little pixel ghosts. With a few color changes, some blue maze-wall details and tiny embroidered pupils, they transformed into the colorful ghosts we all recognize from the classic arcade game!
For this version, I used the same basic top-down hat construction and waistcoat (knit-look) stitch as my original Ghosts in a Row Hat, but there are a few important differences.
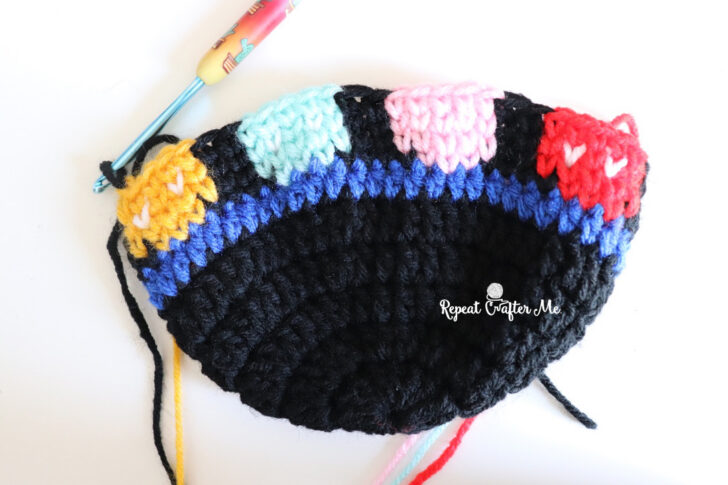
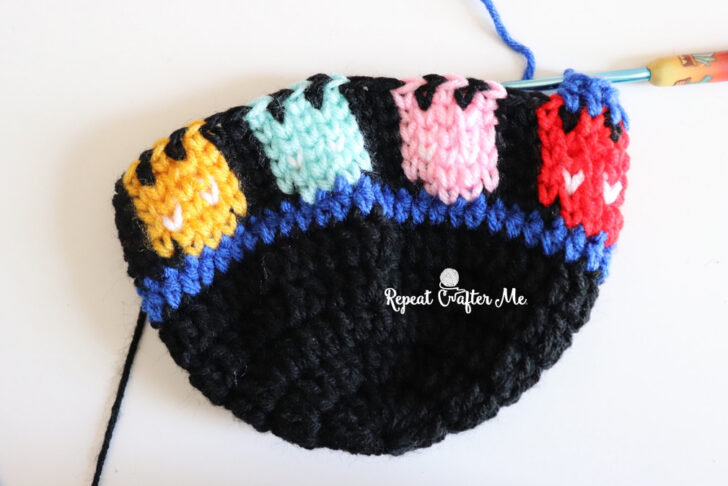
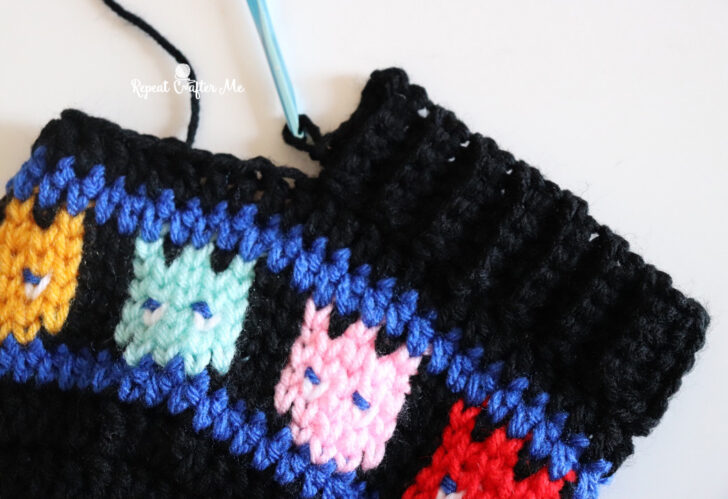
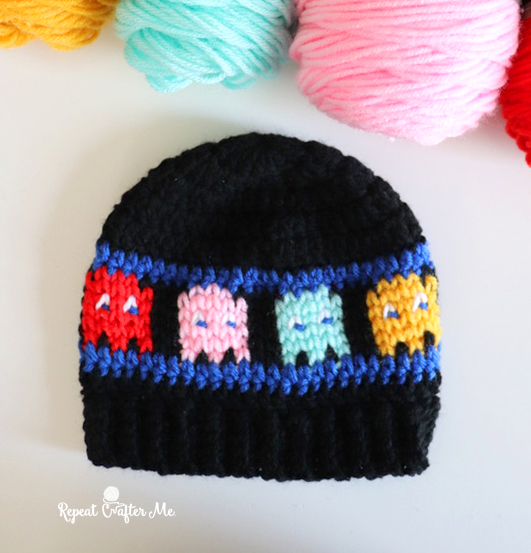
Instead of repeating the same ghost all the way around the hat, this design features four different colored ghosts centered across the front. I also added blue rounds above and below the ghosts to give the hat that classic Pac-Man maze look.
And those little eyes! The white eye stitches are crocheted directly into the graph, then a tiny bit of blue yarn is stitched over the white afterward to create the pupils.
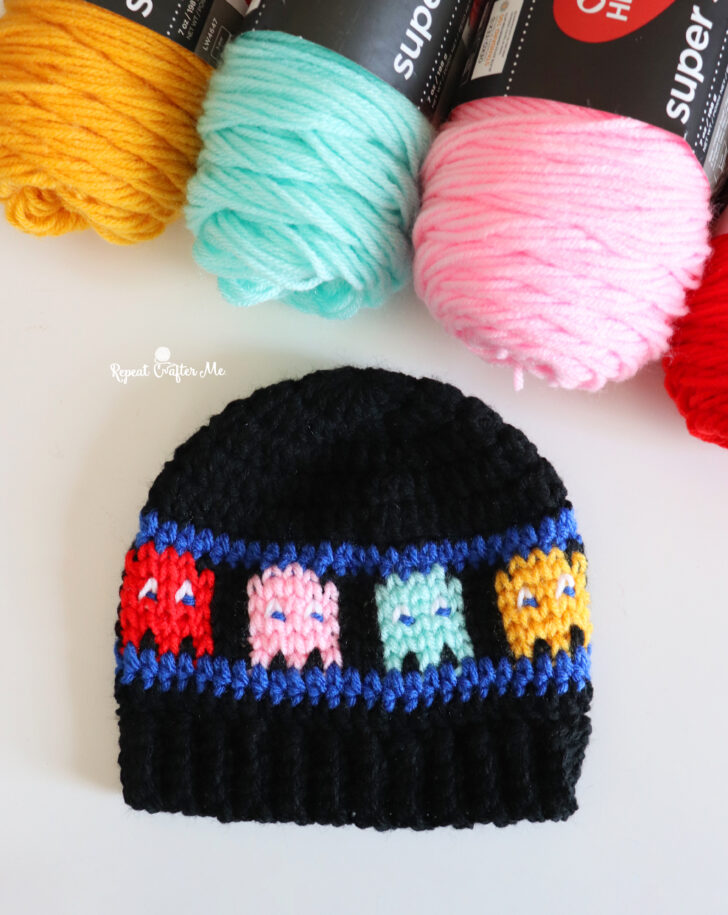
Materials
- Red Heart Super Saver worsted weight yarn
- Black – background
- Royal Blue – Pac-Man maze stripes and pupils
- Hot Red – Blinky
- Petal Pink – Pinky
- Minty – Inky
- Saffron – Clyde
- White – eyes
- >>> Shop colors HERE on Yarnspirations.com <<<
- Size H (5.0 mm) crochet hook
- Tapestry needle
- Scissors
Feel free to substitute your favorite worsted weight colors for the four ghosts!
Abbreviations
- CH = Chain
- DC = Double Crochet
- SC = Single Crochet
- WC SC = Waistcoat Single Crochet
- ST(S) = Stitch(es)
Waistcoat (Knit-Look) Stitch
This hat is worked from the top down. The main portion of the hat is crocheted in double crochet (DC or HDC) as specified in the pattern. The waistcoat stitch is used only for the 6 rounds of pixel colorwork.
If you can make a single crochet, you can make the waistcoat stitch! Instead of crocheting into the tops of the stitches, insert your hook into the center post of the stitch — right in the middle of the “V” you see on the front. Complete the stitch just like a regular single crochet.
This creates the smooth, knit-look texture that works so well for pixel-style colorwork.
Tip: Keep your tension a little loose. If your stitches are too tight, it can be difficult to insert your hook into the center of the V.
Hat Sizes
The hat uses the same 7-stitch sizing progression as my original Ghosts in a Row Hat:
- Baby: 42 stitches
- Toddler/Preschool: 49 stitches
- Child: 56 stitches
- Teen: 63 stitches
- Adult: 70 stitches
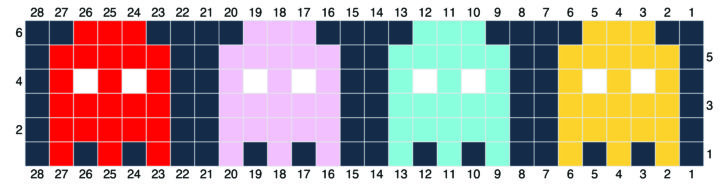
The Pac-Man ghost panel itself is always 28 stitches wide — 7 stitches for each of the four ghosts.
Instead of adding more ghosts for the larger sizes, you will add background stitches before and after the 28-stitch panel so Blinky, Pinky, Inky and Clyde stay grouped together across the front of the hat.
Centering the Ghost Panel
| Size | Total Stitches | Black Before Panel | Ghost Panel | Black After Panel |
|---|---|---|---|---|
| Baby | 42 | 7 | 28 | 7 |
| Toddler/Preschool | 49 | 10 | 28 | 11 |
| Child | 56 | 14 | 28 | 14 |
| Teen | 63 | 17 | 28 | 18 |
| Adult | 70 | 21 | 28 | 21 |
Important: Your beginning-of-round join should be positioned at the center back of the hat. This allows the background stitches at the beginning and end of each round to center the four ghosts across the front.
For the 49-stitch sample shown here, I worked 10 background stitches, the 28-stitch ghost panel, then 11 background stitches.
Crochet Hat Pattern
Crochet Hat Pattern
Baby — 42 stitches
Round 1: Magic Ring, chain 1 and make 14 DC in ring, join, chain 2. (14 DC)
Round 2: 2 DC in each stitch around, join, chain 2. (28 DC)
Round 3: 2 DC in first stitch, DC in next 3 stitches; repeat around, join, chain 2. (35 DC)
Round 4: 2 DC in first stitch, DC in next 4 stitches; repeat around, (42 DC)
join in blue yarn, chain 1
Round 5: HDC in each stitch around, join in black yarn, chain 1. (42 HDC)
Rounds 6–11: Using waistcoat stitch, WC SC in next 7 stitches with Black, work the corresponding row of the 28-stitch Ghost Graph, WC SC in next 7 stitches with Black, join. Continue working the graph from Row 6 down through Row 1.
join in blue yarn, chain 1
Round 12: HDC in each stitch around, join (42 HDC)
Work ribbing with black yarn.
Toddler/Preschool — 49 stitches
Round 1: Magic Ring, chain 1 and make 14 DC in ring, join, chain 2. (14 DC)
Round 2: 2 DC in each stitch around, join, chain 2. (28 DC)
Round 3: 2 DC in first stitch, DC in next 3 stitches; repeat around, join, chain 2. (35 DC)
Round 4: 2 DC in first stitch, DC in next 4 stitches; repeat around, join, chain 2. (42 DC)
Round 5: 2 DC in first stitch, DC in next 5 stitches; repeat around,(49 DC)
join in blue yarn, chain 1
Round 6: HDC in each stitch around, join in black yarn, chain 1. (49 HDC)
Rounds 7–12: Using waistcoat stitch, WC SC in next 10 stitches with Black, work the corresponding row of the 28-stitch Ghost Graph, WC SC in next 11 stitches with Black, join. Continue working the graph from Row 6 down through Row 1.
join in blue yarn, chain 1
Round 13: HDC in each stitch around, join in black yarn, chain 2 (49 HDC)
Round 14: DC in each stitch around (49 DC)
Work ribbing with black yarn.
Child — 56 stitches
Round 1: Magic Ring, chain 1 and make 14 DC in ring, join, chain 2. (14 DC)
Round 2: 2 DC in each stitch around, join, chain 2. (28 DC)
Round 3: 2 DC in first stitch, DC in next 3 stitches; repeat around, join, chain 2. (35 DC)
Round 4: 2 DC in first stitch, DC in next 4 stitches; repeat around, join, chain 2. (42 DC)
Round 5: 2 DC in first stitch, DC in next 5 stitches; repeat around, join, chain 2. (49 DC)
Round 6: 2 DC in first stitch, DC in next 6 stitches; repeat around, join, chain 2. (56 DC)
Round 7: DC in each stitch around, join, chain 1. (56 DC)
Join in blue yarn.
Round 8: HDC in each stitch around, join in black yarn, chain 1. (56 HDC)
Rounds 9–14: Using waistcoat stitch, WC SC in next 14 stitches with Black, work the corresponding row of the 28-stitch Ghost Graph, WC SC in next 14 stitches with Black, join. Continue working the graph from Row 6 down through Row 1.
Join in blue yarn, chain 1.
Round 15: HDC in each stitch around, join in black yarn, chain 2. (56 HDC)
Round 16: DC in each stitch around, join. (56 DC)
Work ribbing with black yarn.
Teen — 63 stitches
Round 1: Magic Ring, chain 1 and make 14 DC in ring, join, chain 2. (14 DC)
Round 2: 2 DC in each stitch around, join, chain 2. (28 DC)
Round 3: 2 DC in first stitch, DC in next 3 stitches; repeat around, join, chain 2. (35 DC)
Round 4: 2 DC in first stitch, DC in next 4 stitches; repeat around, join, chain 2. (42 DC)
Round 5: 2 DC in first stitch, DC in next 5 stitches; repeat around, join, chain 2. (49 DC)
Round 6: 2 DC in first stitch, DC in next 6 stitches; repeat around, join, chain 2. (56 DC)
Round 7: 2 DC in first stitch, DC in next 7 stitches; repeat around, join, chain 2. (63 DC)
Round 8: DC in each stitch around, join, chain 1. (63 DC)
Join in blue yarn.
Round 9: HDC in each stitch around, join in black yarn, chain 1. (63 HDC)
Rounds 10–15: Using waistcoat stitch, WC SC in next 17 stitches with Black, work the corresponding row of the 28-stitch Ghost Graph, WC SC in next 18 stitches with Black, join. Continue working the graph from Row 6 down through Row 1.
Join in blue yarn, chain 1.
Round 16: HDC in each stitch around, join in black yarn, chain 2. (63 HDC)
Round 17: DC in each stitch around, join. (63 DC)
Work ribbing with black yarn.
Adult — 70 stitches
Round 1: Magic Ring, chain 1 and make 14 DC in ring, join, chain 2. (14 DC)
Round 2: 2 DC in each stitch around, join, chain 2. (28 DC)
Round 3: 2 DC in first stitch, DC in next 3 stitches; repeat around, join, chain 2. (35 DC)
Round 4: 2 DC in first stitch, DC in next 4 stitches; repeat around, join, chain 2. (42 DC)
Round 5: 2 DC in first stitch, DC in next 5 stitches; repeat around, join, chain 2. (49 DC)
Round 6: 2 DC in first stitch, DC in next 6 stitches; repeat around, join, chain 2. (56 DC)
Round 7: 2 DC in first stitch, DC in next 7 stitches; repeat around, join, chain 2. (63 DC)
Round 8: 2 DC in first stitch, DC in next 8 stitches; repeat around, join, chain 2. (70 DC)
Rounds 9–10: DC in each stitch around, join, chain 2. (70 DC)
Join in blue yarn, chain 1.
Round 11: HDC in each stitch around, join in black yarn, chain 1. (70 HDC)
Rounds 12–17: Using waistcoat stitch, WC SC in next 21 stitches with Black, work the corresponding row of the 28-stitch Ghost Graph, WC SC in next 21 stitches with Black, join. Continue working the graph from Row 6 down through Row 1.
Join in blue yarn, chain 1.
Round 18: HDC in each stitch around, join in black yarn, chain 2. (70 HDC)
Round 19: DC in each stitch around, join. (70 DC)
Work ribbing with black yarn.
Finish the Hat with a Ribbed Border:
Please be sure and watch THIS TUTORIAL from my friend Daisy Farm Crafts on how to make a single crochet ribbed border. I love this technique because you don’t need to sew the ribbing on separately, it is crochet right onto the edge of the hat! It’s basically a chain 7 (or however long/short your want your ribbed border), SC in each chain until you get back to the hat edge, slip stitch in two stitches along the hat edge and then SC in the back loops of the ribbing and repeat. She has a VERY easy tutorial to follow and you can use this border on many different projects.
When you’ve finished the ribbed border along the edge of the hat you can slip stitch the seam together.
Fasten off and weave in all ends.
Blinky, Pinky, Inky & Clyde Colorwork
Ghost Round 1 / Graph Row 6:
A – A – B – B – B – A – A
Ghost Round 2 / Graph Row 5:
A – B – B – B – B – B – A
Ghost Round 3 / Graph Row 4 — Eyes:
A – B – W – B – W – B – A
Ghost Round 4 / Graph Row 3:
A – B – B – B – B – B – A
Ghost Round 5 / Graph Row 2:
A – B – B – B – B – B – A
Ghost Round 6 / Graph Row 1:
A – B – A – B – A – B – A
Where:
- A = Black background
- B = Ghost color
- W = White
Work the same shape four times across the front, changing the ghost color for each character:
- Blinky – Hot Red
- Pinky – Petal Pink
- Inky – Minty
- Clyde – Saffron Yellow/Gold
Adding the Blue Pupils
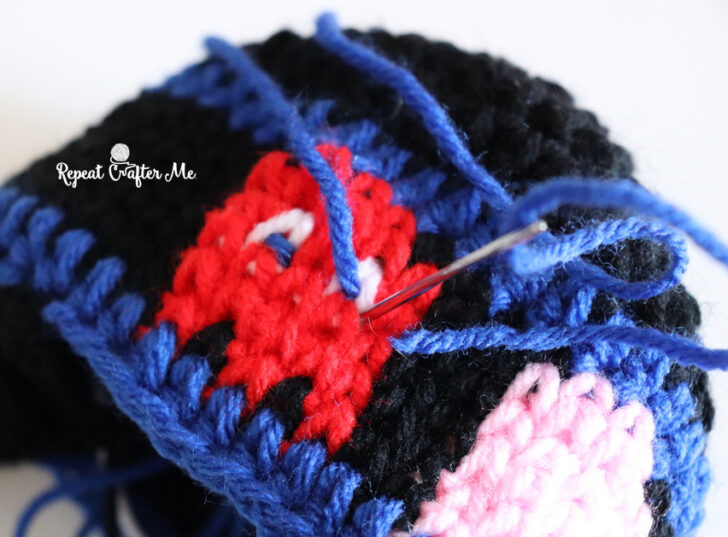
The eyes are crocheted in White as part of Graph Row 4/Ghost Round 3.
After completing the colorwork, thread a tapestry needle with a small amount of Royal Blue yarn. Stitch a small blue pupil over the center of each white eye.
You only need a tiny stitch of blue! This little finishing detail really brings Blinky, Pinky, Inky and Clyde to life.
Carrying Your Yarn
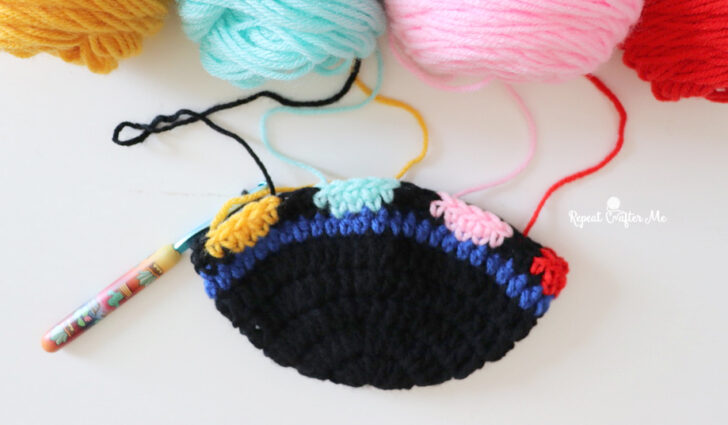
I recommend using a separate strand or small ball of yarn for each ghost rather than carrying all four colors around the hat.
I also chose not to carry the darker yarn through the lighter stitches. Instead, float the unused yarn loosely along the back of the work and pick it back up when needed.
Be careful not to pull your floats too tightly or the hat may pucker and lose some of its stretch.
Make It Your Own!
I love how easily the original Ghosts in a Row design transformed into a completely different hat just by changing the colors and placement!
The four colorful ghosts stay grouped together across the front, while the black background and bright blue stripes give this version its retro arcade look.
Blinky, Pinky, Inky and Clyde might just be my favorite little ghost crew yet!
And if you already made the original Ghosts in a Row Hat, this is such a fun way to use the same waistcoat-stitch technique again with a completely different look.
>>> Original Ghosts in a Row Hat <<<
 Starbucks Stitch Markers and Bottled Beverages
 Crochet Christmas Tree Pixel Square
 Crochet Santa Pixel Square
 Crochet Daisy Rug with Clover Amour Large Hooks and Giveaway!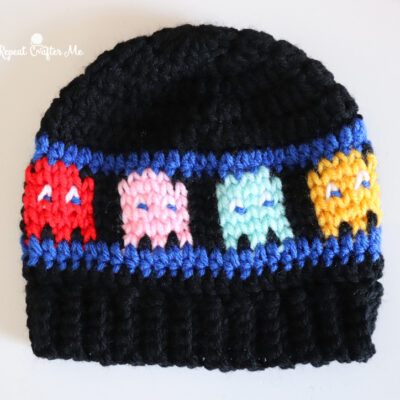
Leave a Reply