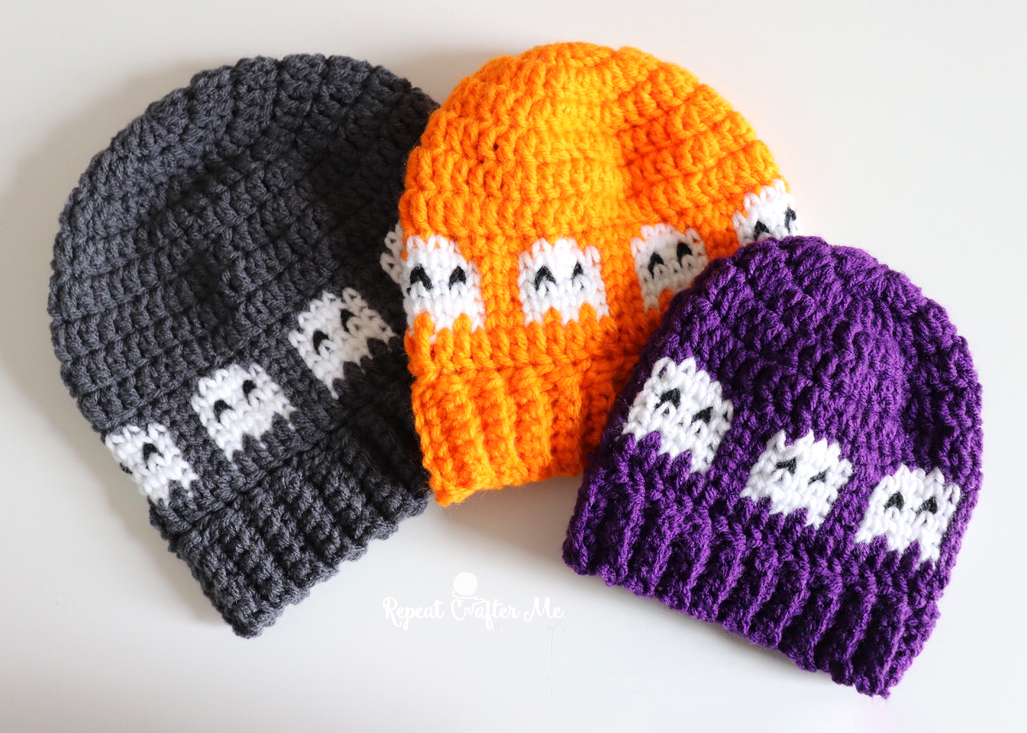
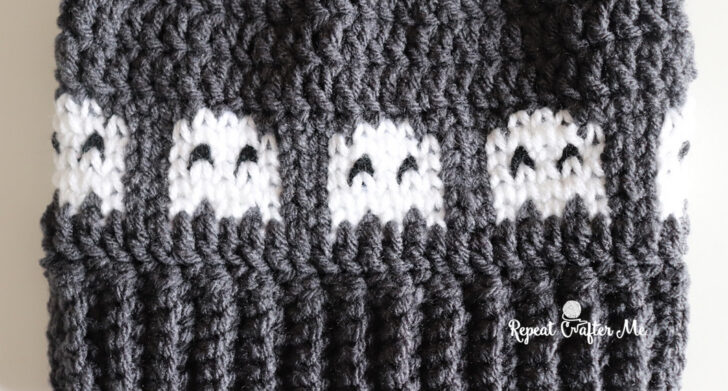
Halloween is officially on my hook! Meet the newest addition to my “In a Row” crochet hat collection: the Ghosts in a Row Crochet Hat!
Over the past few years I’ve created all kinds of “In a Row” hats including hearts, pumpkins, shamrocks, gingerbread men, Christmas trees and more. I love finding different ways to work a repeating design right into the rounds of a hat, and these little ghosts were such a fun one to figure out!
For this design, I decided to keep the entire hat one solid background color and let the white ghosts do all the talking. With the white bodies and little black eyes, there are already plenty of color changes happening in the ghost rounds. Plus, there is something about white ghosts floating across a solid purple, orange or charcoal hat that feels just right for Halloween!
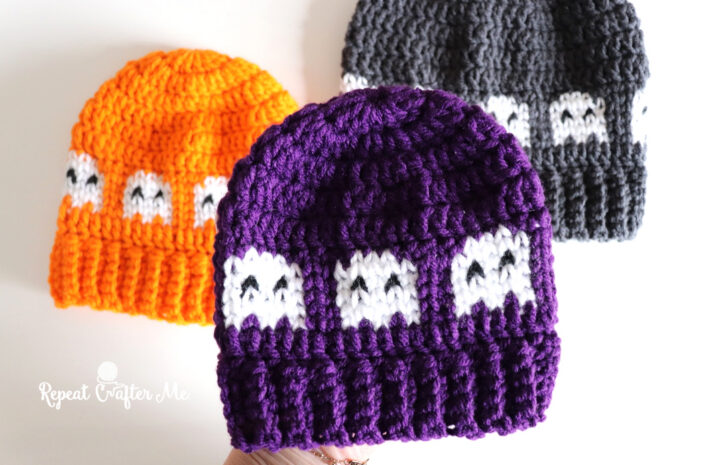
I made my samples with Red Heart Super Saver in Dark Orchid, Pumpkin and Charcoal. Pick your favorite Halloween shade for the background, or make a whole collection in different colors!
The ghost design is created using a simple 7-stitch repeat, which also helped me come up with a really easy sizing formula. Each larger hat simply adds another 7 stitches — and another ghost!
And yes… I already have another version in mind. Glow-in-the-dark ghosts! Stay tuned for that one!
I also love the person who suggested that this could become a Pac-Man hat as well!
>>> Shop Red Heart Super Glow Yarn HERE on Yarnspirations.com <<<
Waistcoat (Knit-Look) Stitch
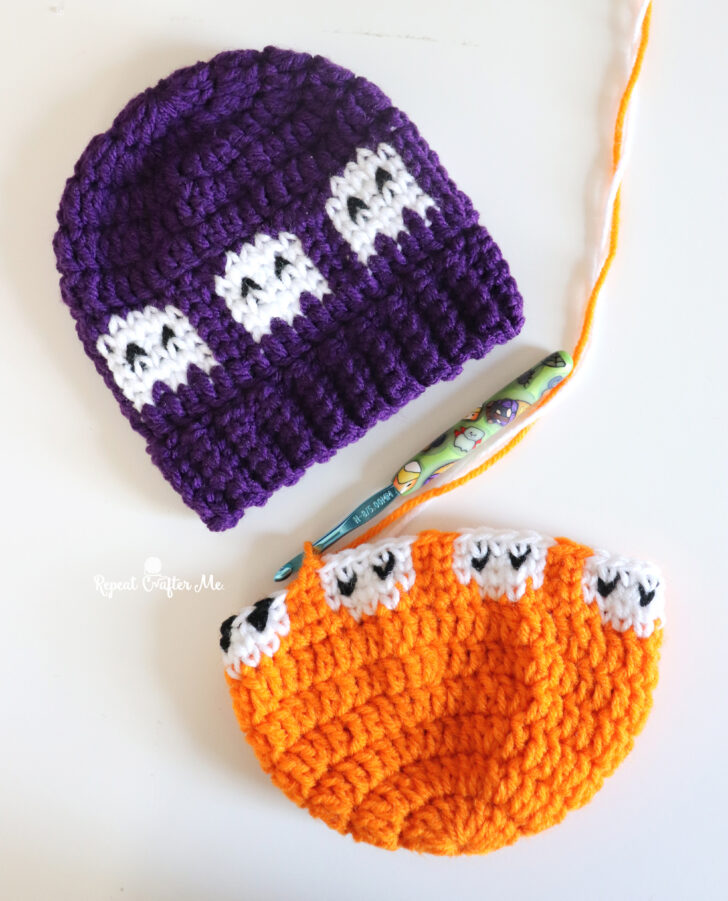
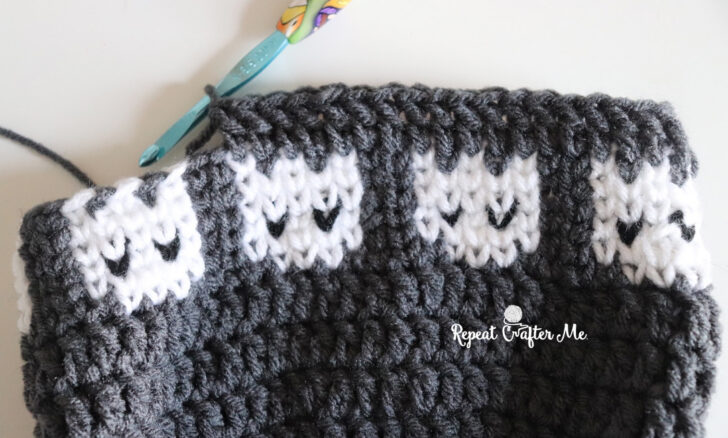
This hat is worked from the top down. The main portion of the hat is crocheted in double crochet (DC) as specified in the pattern below. The waistcoat stitch is used only for the 6 rounds of ghost colorwork.
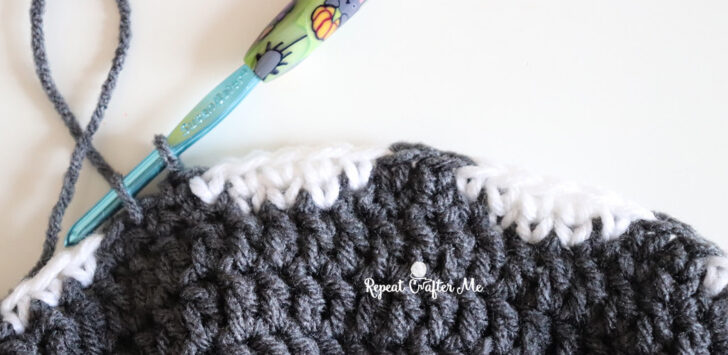
If you can make a single crochet, you can make the waistcoat stitch! The secret is all in where you insert your hook. Instead of crocheting into the tops of the stitches, insert your hook into the center post of the stitch — right in the middle of the “V” you see on the front. Complete the stitch just like a regular single crochet.
This creates a smooth, knit-look stitch that works especially well for the ghost graph because the stitches stack neatly on top of one another, making the little ghost shapes easy to see.
Tip: Keep your tension a little loose when working the waistcoat stitch. If your stitches are too tight, it can be difficult to insert your hook into the center of the V.
Materials
- Red Heart Super Saver worsted weight yarn >>> Shop colors HERE on Yarnspirations.com <<<
- Dark Orchid
- Pumpkin
- Charcoal
- White
- Small amount of Black for eyes
- Size H (5.0 mm) crochet hook, or hook needed to obtain desired size
- Tapestry needle
- Scissors
- Ghosts in a Row GRAPHS ALL SIZE
>>> Download a FREE Printable of all the graphs on one page <<<
or you can save the images directly from this blog post individualy.
Abbreviations
- CH = Chain
- DC = Double Crochet
- SC = Single Crochet
- WC SC = Waistcoat Single Crochet
- ST(S) = Stitch(es)
Hat Sizes and Stitch Counts
The ghost design has a 7-stitch repeat. Each size adds one additional 7-stitch repeat — which means one additional ghost!
- Baby: 42 stitches — 6 ghosts
- Toddler/Preschool: 49 stitches — 7 ghosts
- Child: 56 stitches — 8 ghosts
- Teen: 63 stitches — 9 ghosts
- Adult: 70 stitches — 10 ghosts
Crochet Hat Pattern
Baby — 42 stitches
Round 1: Magic Ring, chain 1 and make 14 DC in ring, join, chain 2. (14 DC)
Round 2: 2 DC in each stitch around, join, chain 2. (28 DC)
Round 3: 2 DC in first stitch, DC in next 3 stitches; repeat around, join, chain 2. (35 DC)
Round 4: 2 DC in first stitch, DC in next 4 stitches; repeat around, join, chain 2. (42 DC)
Round 5: DC in each stitch around, join, chain 1. (42 DC)
Round 6-11: Work 6 rounds of the Ghost Graph using waistcoat stitch.

Round 12: DC in each stitch around, join (42 DC)
Work ribbing.
Toddler/Preschool — 49 stitches
Round 1: Magic Ring, chain 1 and make 14 DC in ring, join, chain 2. (14 DC)
Round 2: 2 DC in each stitch around, join, chain 2. (28 DC)
Round 3: 2 DC in first stitch, DC in next 3 stitches; repeat around, join, chain 2. (35 DC)
Round 4: 2 DC in first stitch, DC in next 4 stitches; repeat around, join, chain 2. (42 DC)
Round 5: 2 DC in first stitch, DC in next 5 stitches; repeat around, join, chain 2. (49 DC)
Round 6: DC in each stitch around, join, chain 1. (49 DC)
Round 7-12: Work 6 rounds of the Ghost Graph using waistcoat stitch.

Round 13: DC in each stitch around, join (49 DC)
Work ribbing.
Child — 56 stitches
Round 1: Magic Ring, chain 1 and make 14 DC in ring, join, chain 2. (14 DC)
Round 2: 2 DC in each stitch around, join, chain 2. (28 DC)
Round 3: 2 DC in first stitch, DC in next 3 stitches; repeat around, join, chain 2. (35 DC)
Round 4: 2 DC in first stitch, DC in next 4 stitches; repeat around, join, chain 2. (42 DC)
Round 5: 2 DC in first stitch, DC in next 5 stitches; repeat around, join, chain 2. (49 DC)
Round 6: 2 DC in first stitch, DC in next 6 stitches; repeat around, join, chain 2. (56 DC)
Round 7-8: DC in each stitch around, join, chain 1. (56 DC)
Round 9-14: Work 6 rounds of the Ghost Graph using waistcoat stitch.

Round 15: DC in each stitch around, join (56 DC)
Work ribbing.
Teen — 63 stitches
Round 1: Magic Ring, chain 1 and make 14 DC in ring, join, chain 2. (14 DC)
Round 2: 2 DC in each stitch around, join, chain 2. (28 DC)
Round 3: 2 DC in first stitch, DC in next 3 stitches; repeat around, join, chain 2. (35 DC)
Round 4: 2 DC in first stitch, DC in next 4 stitches; repeat around, join, chain 2. (42 DC)
Round 5: 2 DC in first stitch, DC in next 5 stitches; repeat around, join, chain 2. (49 DC)
Round 6: 2 DC in first stitch, DC in next 6 stitches; repeat around, join, chain 2. (56 DC)
Round 7: 2 DC in first stitch, DC in next 7 stitches; repeat around, join, chain 2. (63 DC)
Round 8-9: DC in each stitch around, join, chain 1. (63 DC)
Round 10 -15: Work 6 rounds of the Ghost Graph using waistcoat stitch.

Round 16: DC in each stitch around, join, chain 1. (63 DC)
Work ribbing.
Adult — 70 stitches
Round 1: Magic Ring, chain 1 and make 14 DC in ring, join, chain 2. (14 DC)
Round 2: 2 DC in each stitch around, join, chain 2. (28 DC)
Round 3: 2 DC in first stitch, DC in next 3 stitches; repeat around, join, chain 2. (35 DC)
Round 4: 2 DC in first stitch, DC in next 4 stitches; repeat around, join, chain 2. (42 DC)
Round 5: 2 DC in first stitch, DC in next 5 stitches; repeat around, join, chain 2. (49 DC)
Round 6: 2 DC in first stitch, DC in next 6 stitches; repeat around, join, chain 2. (56 DC)
Round 7: 2 DC in first stitch, DC in next 7 stitches; repeat around, join, chain 2. (63 DC)
Round 8: 2 DC in first stitch, DC in next 8 stitches; repeat around, join, chain 2. (70 DC)
Round 9-11: DC in each stitch around, join, chain 1. (70 DC)
Round 12-17: Work 6 rounds of the Ghost Graph using waistcoat stitch.

Round 18: DC in each stitch around, join, chain 1. (70 DC)
Work ribbing.
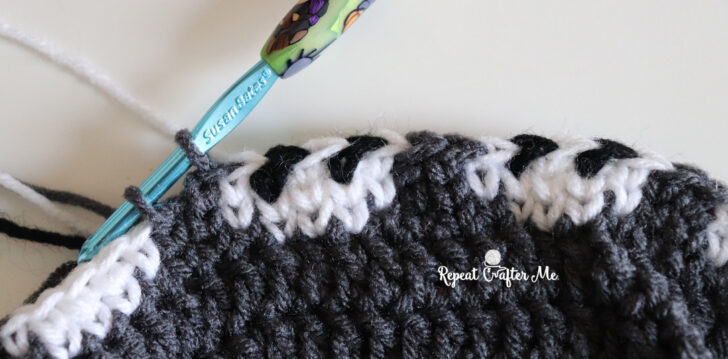
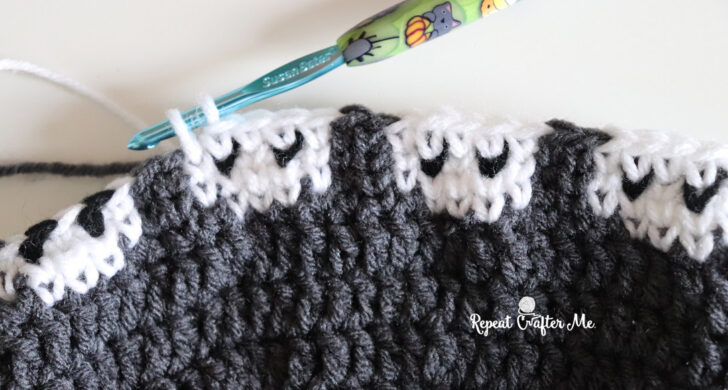
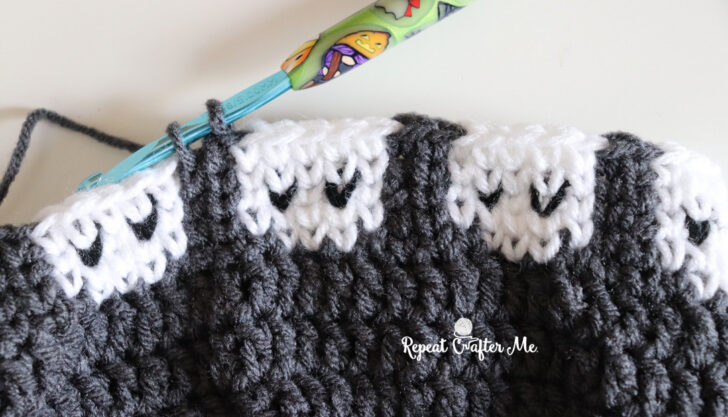
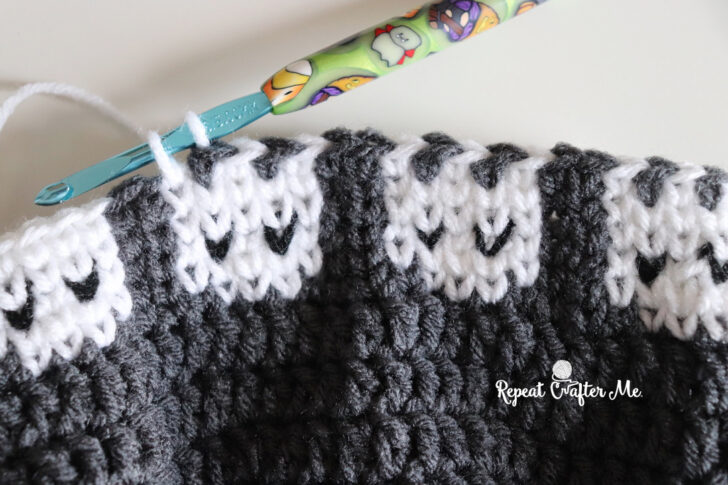
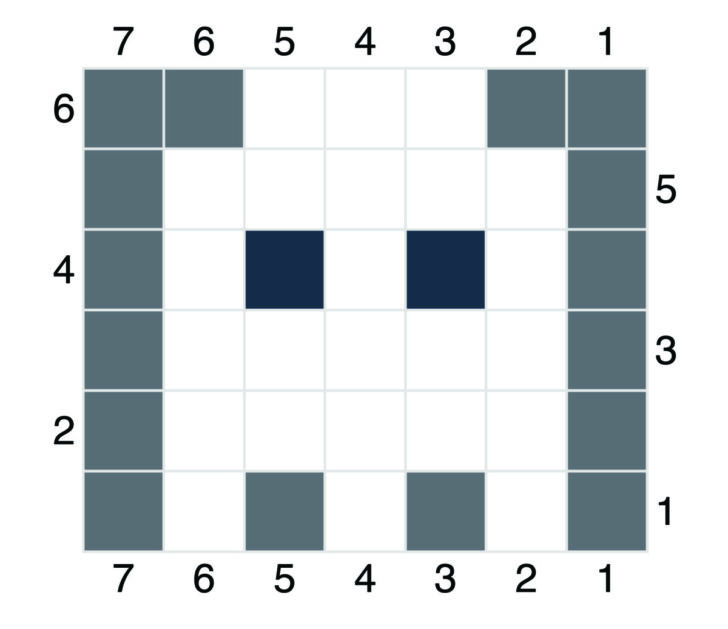
Ghosts in a Row Graph
The graph shown is for the Baby size with 42 stitches and 6 ghosts.
Each ghost is a 7-stitch repeat. For the larger sizes, simply continue repeating the same 7-stitch ghost pattern around:
- Baby: Repeat 6 times
- Toddler/Preschool: Repeat 7 times
- Child: Repeat 8 times
- Teen: Repeat 9 times
- Adult: Repeat 10 times
You can follow the graph or use the written instructions below.
Important: How to Read the Ghost Graph
Because this hat is crocheted from the top down, you will work the ghost graph from the top of the graph to the bottom.
Begin with Row 6 of the graph and work downward: Row 6 → Row 5 → Row 4 → Row 3 → Row 2 → Row 1
This creates the rounded top of the ghost first and finishes with the three little points along the bottom.
Ghost Colorwork — Crochet in This Order
- Color A: Hat/background color
- Color B: White
- Color C: Black
Each ghost is a 7-stitch repeat.
Ghost Round 1 — Graph Row 6
A – A – B – B – B – A – A
[WC SC 2 with Color A, WC SC 3 with Color B, WC SC 2 with Color A]; repeat around, join.
Ghost Round 2 — Graph Row 5
A – B – B – B – B – B – A
[WC SC 1 with Color A, WC SC 5 with Color B, WC SC 1 with Color A]; repeat around, join.
Ghost Round 3 — Graph Row 4
A – B – C – B – C – B – A
[WC SC 1 with Color A, WC SC 1 with Color B, WC SC 1 with Color C, WC SC 1 with Color B, WC SC 1 with Color C, WC SC 1 with Color B, WC SC 1 with Color A]; repeat around, join.
Ghost Round 4 — Graph Row 3
A – B – B – B – B – B – A
[WC SC 1 with Color A, WC SC 5 with Color B, WC SC 1 with Color A]; repeat around, join.
Ghost Round 5 — Graph Row 2
A – B – B – B – B – B – A
[WC SC 1 with Color A, WC SC 5 with Color B, WC SC 1 with Color A]; repeat around, join.
Ghost Round 6 — Graph Row 1
A – B – A – B – A – B – A
[WC SC 1 with Color A, WC SC 1 with Color B] 3 times, WC SC 1 with Color A; repeat around, join.
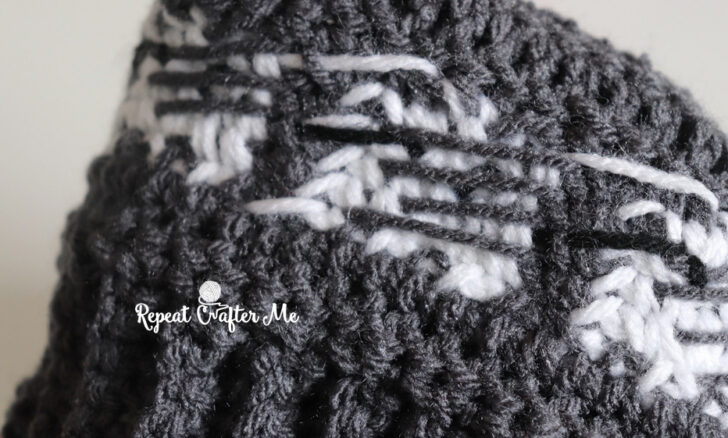
A Note About Carrying Your Yarn
When working the ghost graph, I chose not to carry the unused yarn through the stitches. Because the ghosts are white and the background colors are much darker or brighter, I found that carrying the background yarn inside the white stitches allowed some of that color to show through.
Instead, I carried (or “floated”) the unused yarn loosely along the back of the work, picking it back up when it was needed for the next color change.
Be careful not to pull your floats too tightly! You want them to lie loosely across the inside of the hat so they don’t cause the fabric to pucker or affect the stretch of the hat.
The inside won’t look quite as tidy as the outside and that’s okay! The floats stay hidden inside the finished hat while keeping the white ghosts looking crisp and bright on the outside.
Finish the Hat with a Ribbed Border:
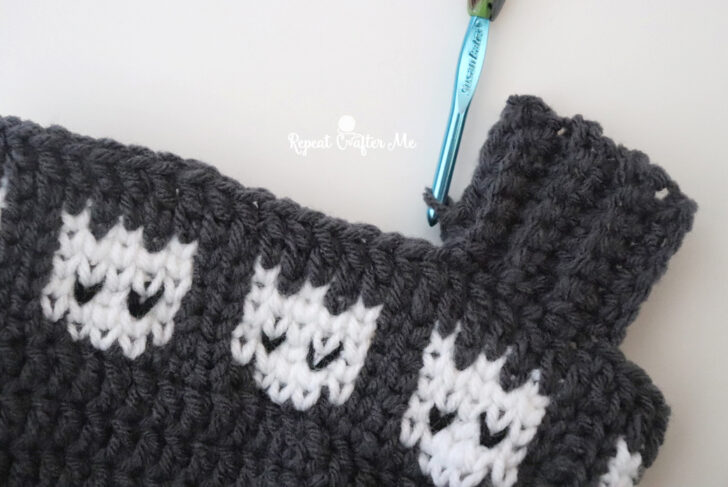
Please be sure and watch THIS TUTORIAL from my friend Daisy Farm Crafts on how to make a single crochet ribbed border. I love this technique because you don’t need to sew the ribbing on separately, it is crochet right onto the edge of the hat! It’s basically a chain 7 (or however long/short your want your ribbed border), SC in each chain until you get back to the hat edge, slip stitch in two stitches along the hat edge and then SC in the back loops of the ribbing and repeat. She has a VERY easy tutorial to follow and you can use this border on many different projects.
When you’ve finished the ribbed border along the edge of the hat you can slip stitch the seam together.
Fasten off and weave in all ends.
Color Ideas
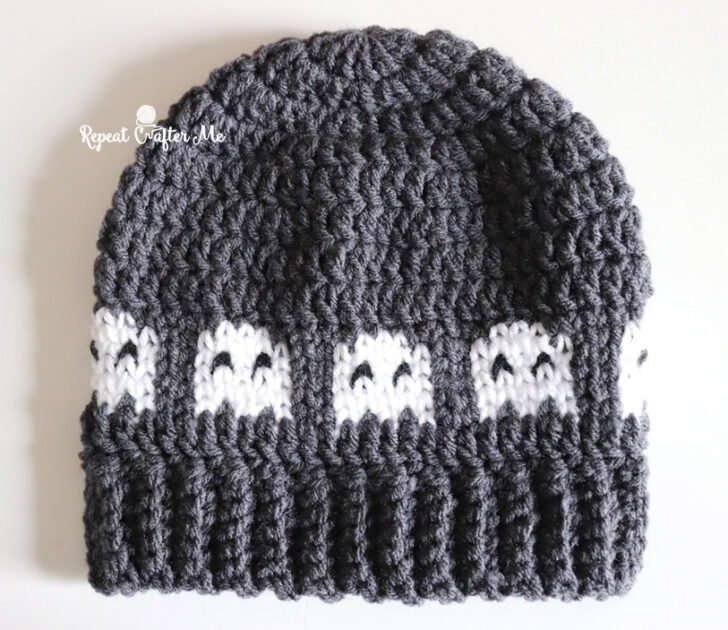
I love how different this hat looks just by changing the background color! Dark Orchid gives it that classic purple Halloween look, Pumpkin is bright and playful, and Charcoal gives you a more neutral spooky version.
You could also try black, lime green or any other Halloween color you have in your yarn stash. Keep the ghosts white with black eyes and they’ll pop against just about any darker or brighter background.
And if you really want your ghosts to stand out when the lights go out, try substituting a worsted weight glow-in-the-dark yarn for the white! I’ll be trying that next!
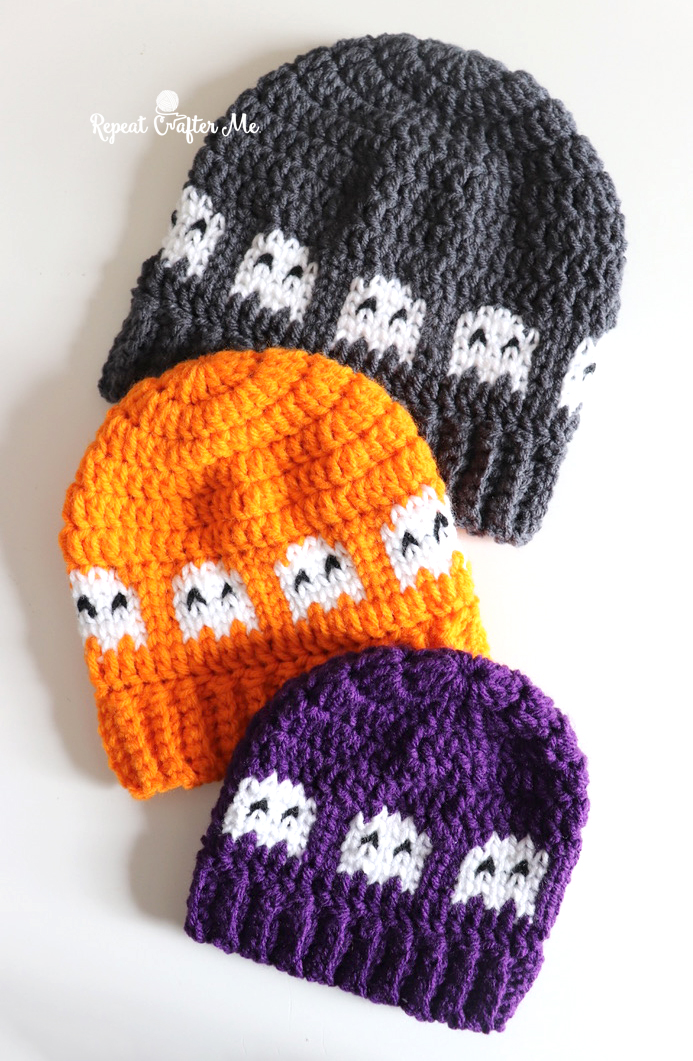
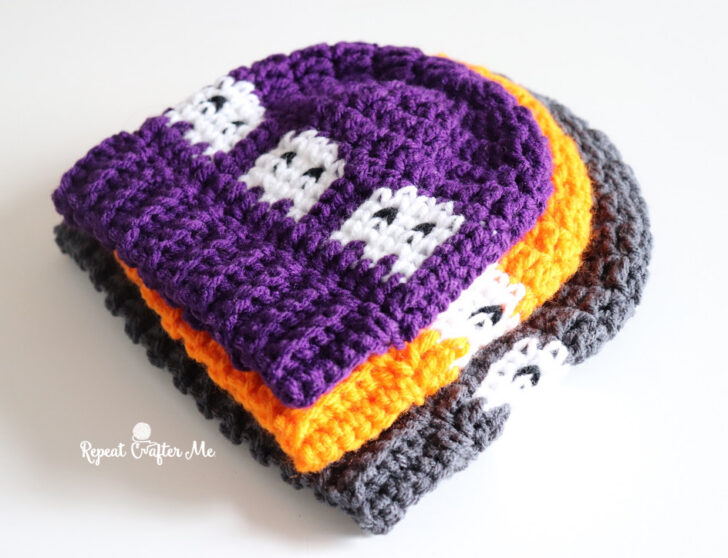
I’m so happy with how these little ghosts turned out! What started as a bit of graph-paper experimenting turned into a whole family of Halloween hats, from tiny baby size all the way up to adult.
Let’s stay connected!
Subscribe to my NEWSLETTER for free patterns straight to your inbox!
Repeat Crafter Me Facebook
Repeat Crafter Me Instagram
Repeat Crafter Me Pinterest
Repeat Crafter Me YOUTUBE
 Starbucks Stitch Markers and Bottled Beverages
 Crochet Christmas Tree Pixel Square
 Crochet Santa Pixel Square
 Crochet Daisy Rug with Clover Amour Large Hooks and Giveaway!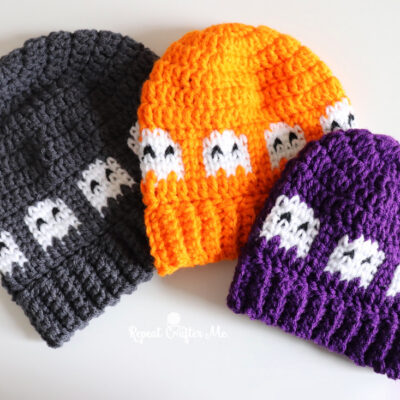

Leave a Reply