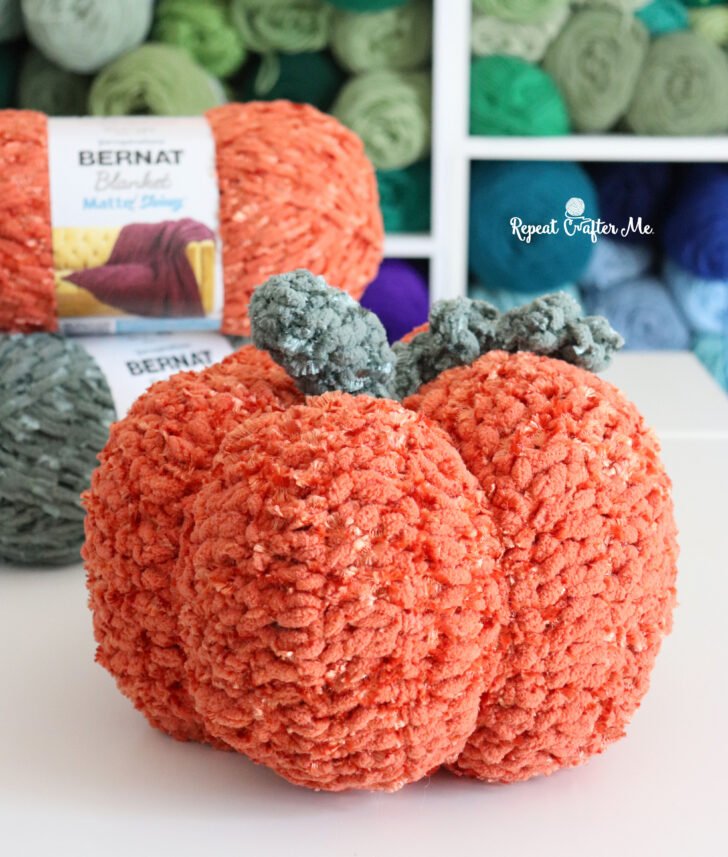
We have officially entered the “ber” months, which means I am more than ready for pumpkins and fall decorating! And apparently I’m on a mission to turn all the new Yarnspirations yarns into pumpkins.
After making my Bernat Cottage Crochet Pumpkin, I wanted to try the same general construction with another new yarn: Bernat Blanket Matte & Shiny. And THIS one just screams fall!
>>> Check out the Bernat Cottage Pumpkins HERE if you missed them <<<
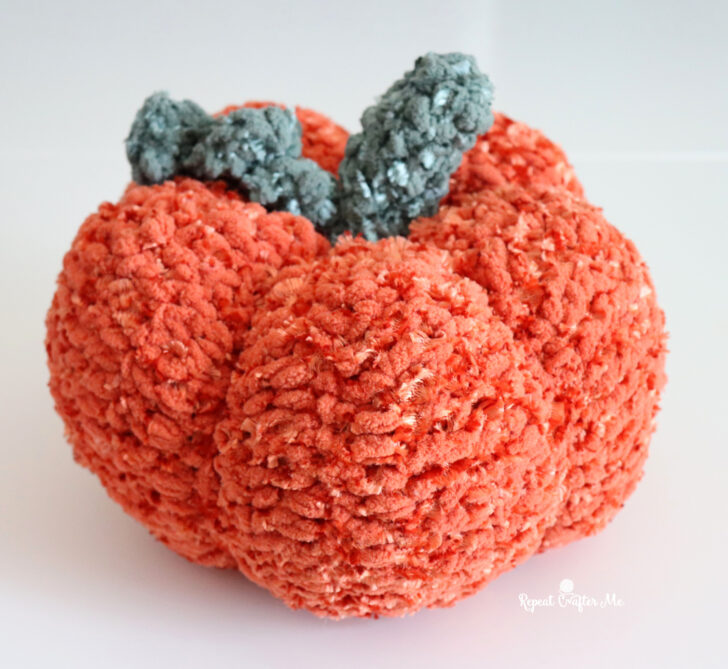
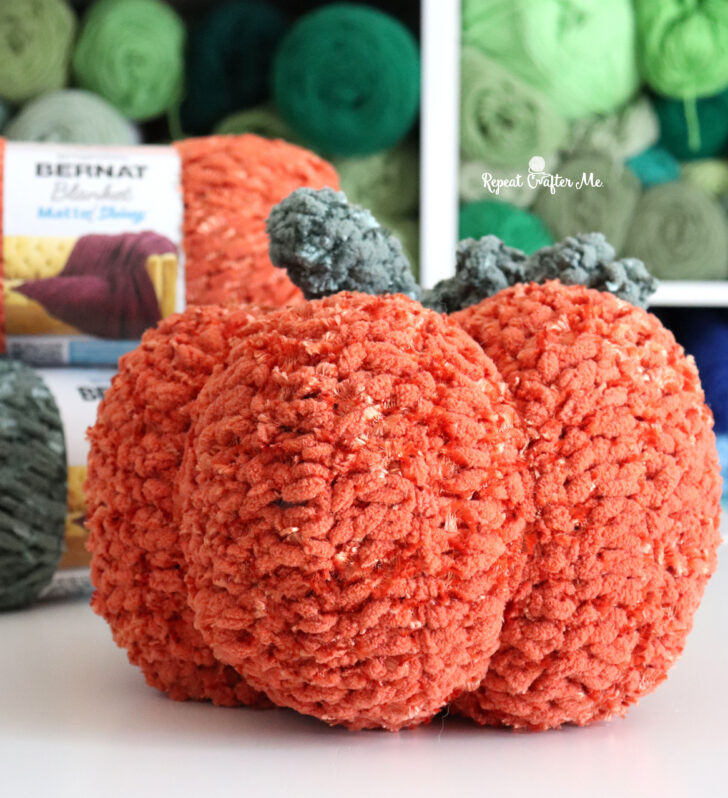
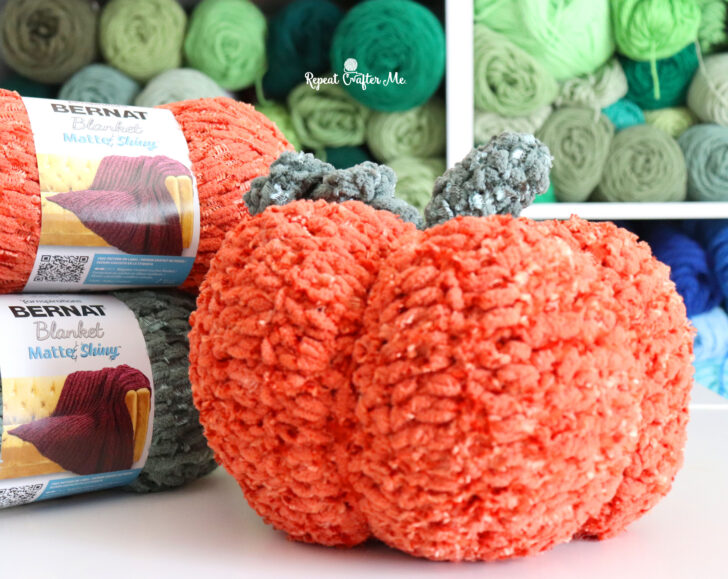
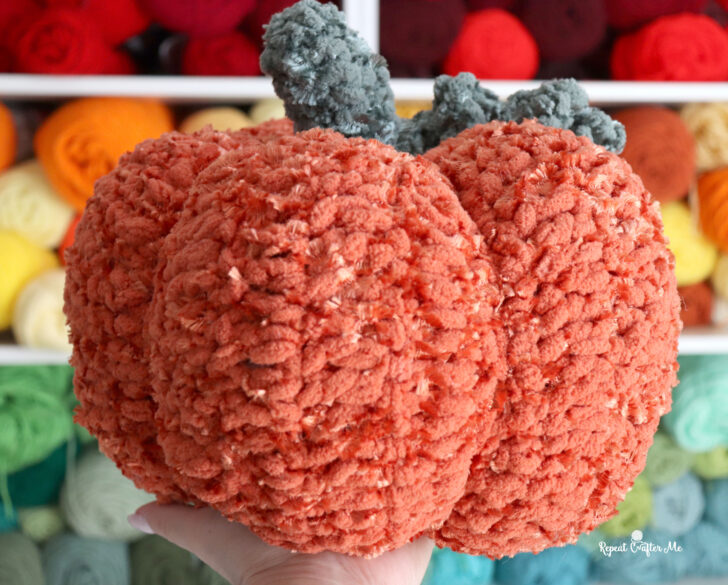
I used Orange Leaf Luster for the pumpkin and Smoky Green Luster for the stem and curly vine. The yarn has all the softness and squishiness you expect from Bernat Blanket, but mixed throughout are these shiny sections that catch the light. It gives the pumpkin just a little sparkle without being too much.
>>> Shop Bernat Blanket Matte & Shiny Yarn HERE <<<
Because it’s made with super bulky Bernat Blanket yarn, this pumpkin has such a soft, plush feel. At approximately 12 inches wide, it’s slightly larger than my Bernat Cottage Pumpkin and substantial enough that I think it could double as a fun fall accent pillow. Toss it on a couch, chair or bed for an extra pop of pumpkin season!
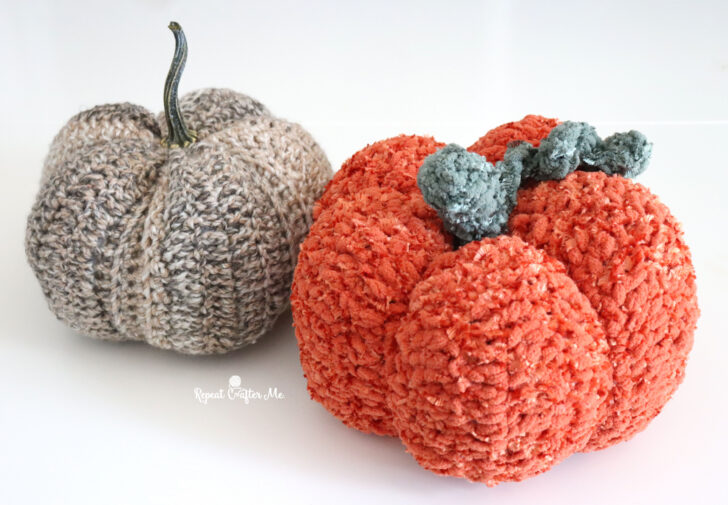
I especially love that even the stem and curly vine are soft and squishy. There are no hard pieces on this version, so the whole thing feels much more like a plush pumpkin than a traditional crochet decoration.
I originally planned to use the exact same pattern as my Bernat Cottage Pumpkin, but once I started crocheting, I realized the different textures in Matte & Shiny made the stitches a little harder to see.
So I made a few adjustments! I went up a hook size, skipped working in the back loops, and simplified the narrow single crochet sections from four rows down to just two. I also decided to sew the two ends of the strip together instead of slip stitching them, which gave me a flatter, less noticeable seam.
The basic idea is still the same: 20 SC → increase to 30 DC → decrease back to 20 SC. Those extra stitches in the double crochet sections are what create the five big, rounded pumpkin ridges.
And at the very end, I added one more little trick to really define those ridges. More on that below!
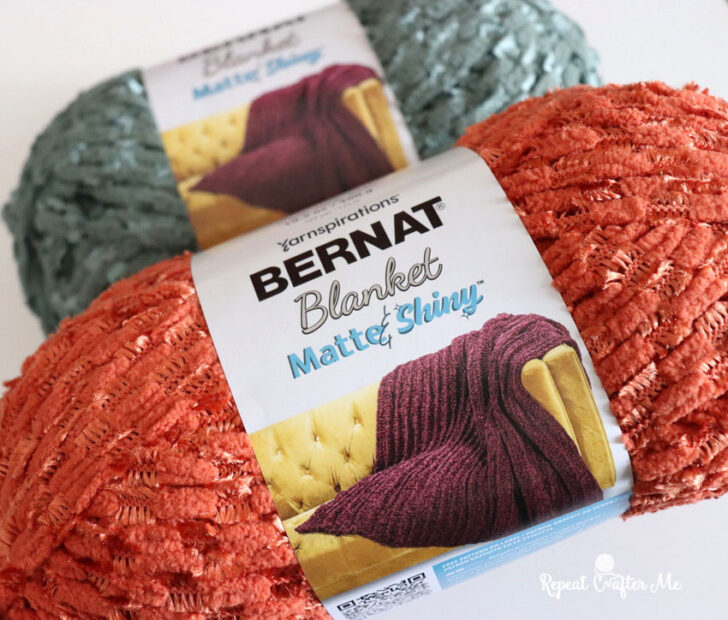
About Bernat Blanket Matte & Shiny
Bernat Blanket Matte & Shiny Yarn is a new #6 Super Bulky yarn that combines the familiar softness of Bernat Blanket with shiny sections woven throughout. The contrast between the matte chenille and lustrous fibers gives the yarn so much depth and texture.
>>> Shop Bernat Blanket Matte & Shiny Yarn HERE <<<
Each ball is 300 g / 10.5 oz, 173 meters / 189 yards, and is made from 100% polyester.
For my pumpkin I used:
Orange Leaf Luster – pumpkin
Smoky Green Luster – stem and coil
Both colors are part of the current Matte & Shiny color lineup.
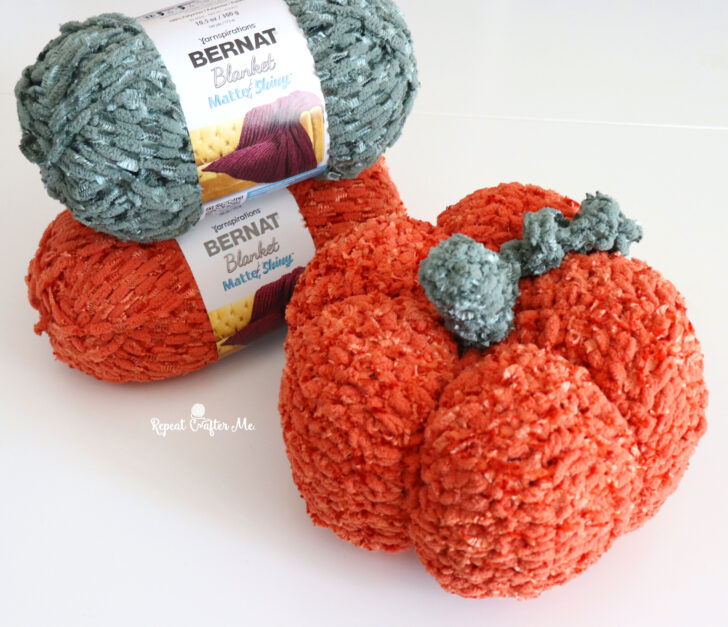
Materials
- Bernat Blanket Matte & Shiny in Orange Leaf Luster
- Small amount of Bernat Blanket Matte & Shiny in Smoky Green Luster
Yarn Amount: Approximately 223 g / 140 yards of Orange Leaf Luster (about ¾ of one 300 g ball), plus a small amount of Smoky Green Luster for the stem and vine.
>>> Shop Bernat Blanket Matte & Shiny Yarn HERE <<< - Size K-10.5 (6.5 mm) crochet hook
- Polyester fiberfill
- Tapestry needle
- Scissors
Finished Size
Approximately 10 inches tall × 12 inches wide
Approximately 32 inches around
Finished size may vary depending on tension and how firmly you stuff your pumpkin.
Crochet Pumpkin Pattern
With Orange Leaf Luster:
Chain 21, SC in second chain from hook and in each chain across. Ch 1, turn. (20 SC)
Row 2: SC in each stitch across. Ch 2, turn. (20 SC)
Row 3: *2 DC in next stitch, DC in next stitch; repeat from * across. Ch 2, turn. (30 DC)
Rows 4–6: DC in each stitch across. Ch 2, turn. (30 DC)
At the end of Row 6, ch 1 and turn.
Row 7: *SC Decrease over the next 2 stitches, SC in next stitch; repeat from * across. Ch 1, turn. (20 SC)
Row 8: SC in each stitch across. Ch 2, turn. (20 SC)
Continue Making Pumpkin Ridges
Repeat Rows 3–8 three more times.
You will now have four raised pumpkin sections.
For the fifth and final pumpkin section:
Rows 27–30: Repeat Rows 3–6. (30 DC)
Row 31: Repeat Row 7. (20 SC)
Fasten off, leaving a VERY long tail for assembly.
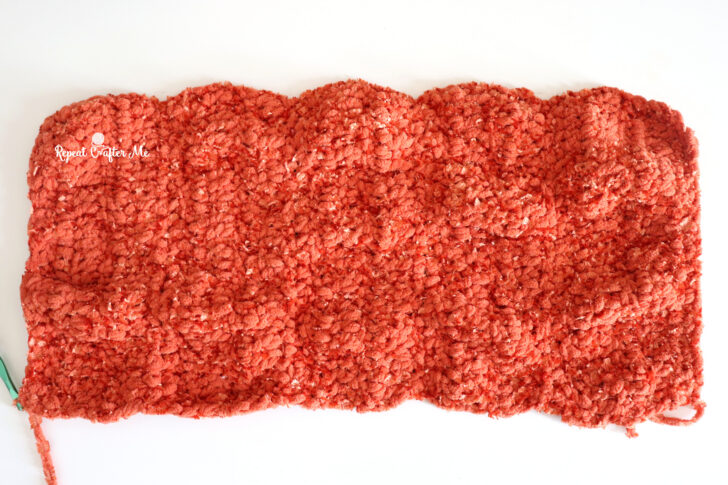
Your finished strip should have five large raised sections, with narrower single crochet sections between them.
Assembly
This time, instead of slip stitching the two short ends together, I chose to sew them together with my yarn tail and tapestry needle. I found that this created a flatter, less noticeable join with the thick Matte & Shiny yarn.
Thread your VERY long yarn tail onto your tapestry needle and stitch the two short ends together to form a tube.
Do not cut your yarn, we’re going to keep using that long strand!
Cinching the Bottom
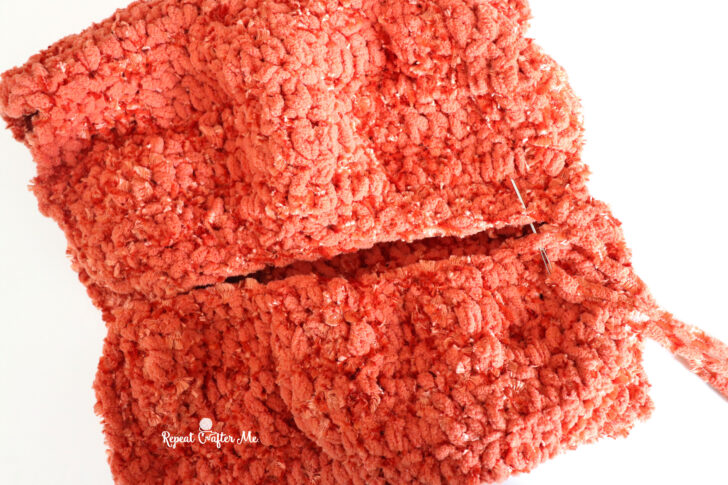
Just like my Cottage Pumpkin, I found it easiest to close the opening in two passes.
First, sew around the recessed single crochet sections, catching approximately two stitches from each section as you work around the opening. Pull firmly to begin bringing the center together.
Go around once more, this time catching the edges of the five raised pumpkin sections. Pull tightly until the bottom opening is completely closed.
Secure your yarn, but keep that long strand attached.
Stuff the pumpkin generously with fiberfill, making sure to push stuffing into each of the five raised sections.
Bring your long strand of yarn straight up through the center of the pumpkin and out through the top.
Repeat the same two-step process to cinch the top closed.
Defining the Pumpkin Ridges
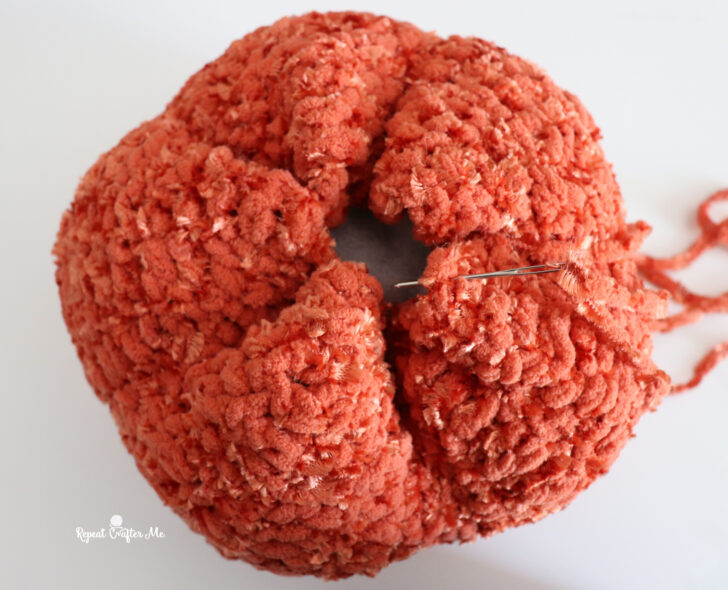
I could have stopped here… but I wanted those five pumpkin ridges to stand out just a little bit more!
Using the same long strand of yarn, bring it from the center top of the pumpkin down over one of the recessed SC sections around the outside of the pumpkin. Bring the yarn back up through the center of the pumpkin and pull tightly. This pulls that indentation inward and gives the neighboring pumpkin sections even more definition.
Repeat around the pumpkin, running the yarn along each of the five SC indentations and pulling snugly each time.
Once you’re happy with the shape, secure your yarn and weave in the end.
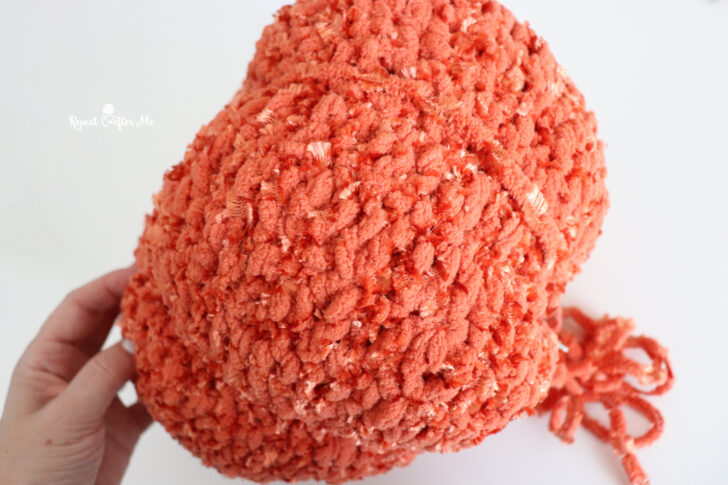
TIP: This is another reason that VERY long yarn tail comes in handy! If you run out at any point, though, you can simply attach another long strand in the same color.
Crochet Pumpkin Stem
With Smoky Green Luster:
Magic ring. Ch 1 and work 6 SC into ring. Join to first SC, ch 1. (6 SC)
You can also work continuously in rounds if you prefer.
Rounds 2–5: SC in each stitch around. Join, ch 1. (6 SC)
Round 6: *2 SC in next stitch, SC in each of next 2 stitches; repeat from * around. Join, ch 1. (8 SC)
Round 7: SC in each stitch around. (8 SC)
Fasten off, leaving a tail for sewing.
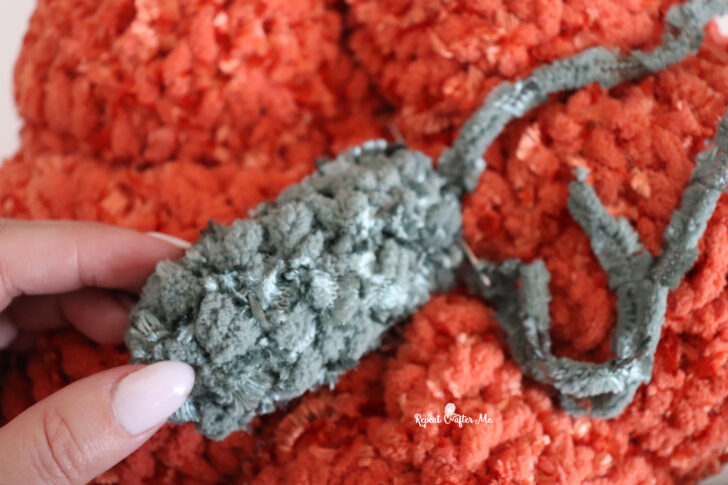
Lightly stuff the stem with fiberfill and stitch it securely to the center top of the pumpkin.
Crochet Curly Vine
With Smoky Green Luster:
Chain 13, Work 2 SC in second chain from hook and in each chain across. (24 SC)
The piece will naturally curl into a little coil as you crochet.
Fasten off, leaving a tail for sewing. Stitch one end to the base of the pumpkin stem and position the curl so it falls over one of the recessed pumpkin sections.
I can’t think of a better project to kick off September! The “ber” months are officially here, there’s a giant squishy pumpkin in my craft room, and I’m ready to decorate for fall.
And speaking of pumpkins… my own little pumpkin isn’t so little anymore! Zoe turned 13 this week, so the baby of the family is a teenager. I’m hoping she’ll still humor me and hold my crochet for photos… even if calling her my “little pumpkin” is officially embarrassing now 🙂
Balloons shown below are from Michaels Stores! >>> Matte Pink Balloons <<<
Happy September and happy pumpkin making!
Let’s stay connected!
Subscribe to my NEWSLETTER for free patterns straight to your inbox!
Repeat Crafter Me Facebook
Repeat Crafter Me Instagram
Repeat Crafter Me Pinterest
Repeat Crafter Me YOUTUBE
 Starbucks Stitch Markers and Bottled Beverages
 Crochet Christmas Tree Pixel Square
 Crochet Santa Pixel Square
 Crochet Daisy Rug with Clover Amour Large Hooks and Giveaway!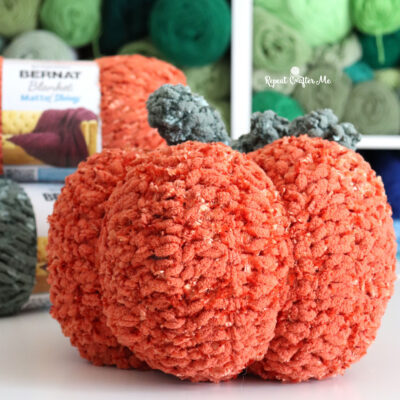
Leave a Reply