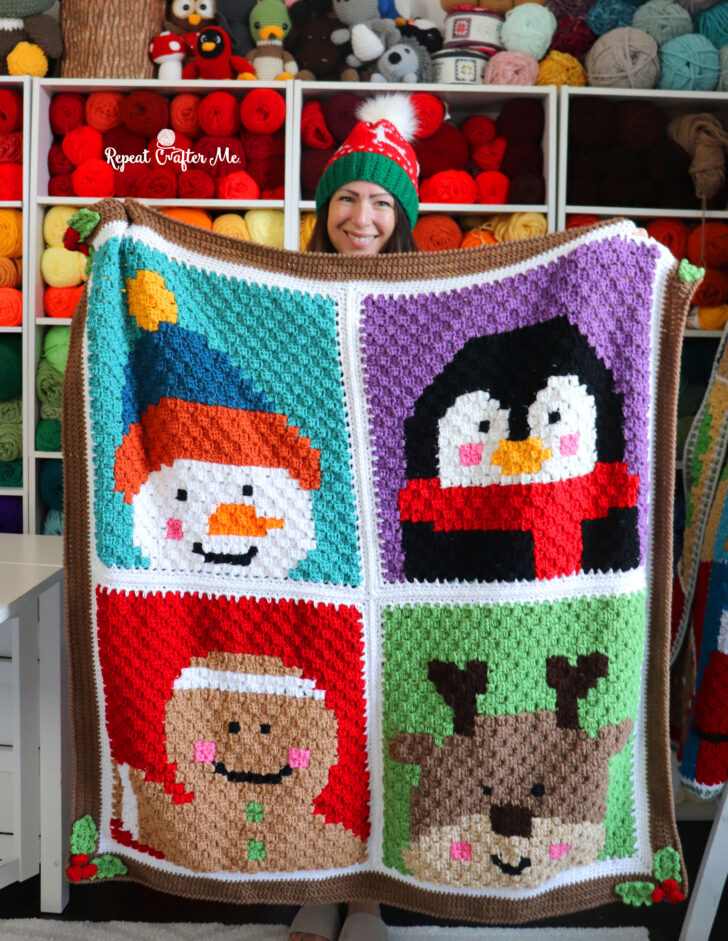
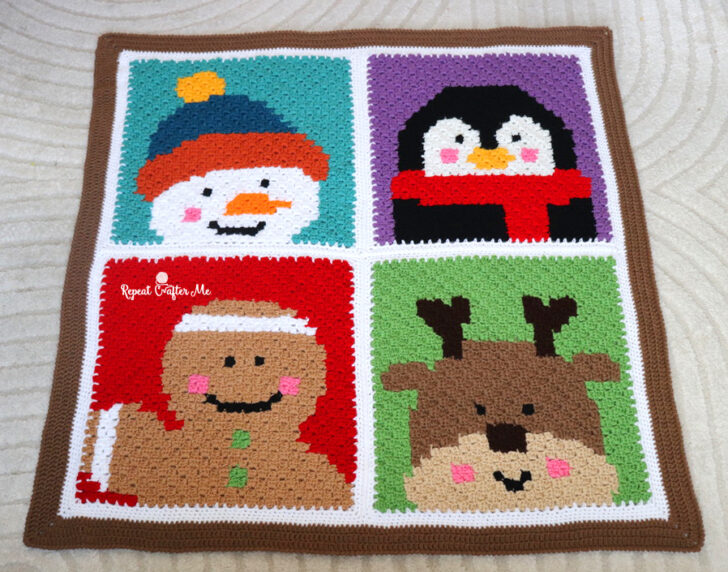
It’s finished! Our Christmas in July C2C series has officially come together in one big Christmas Friends C2C Window Blanket!
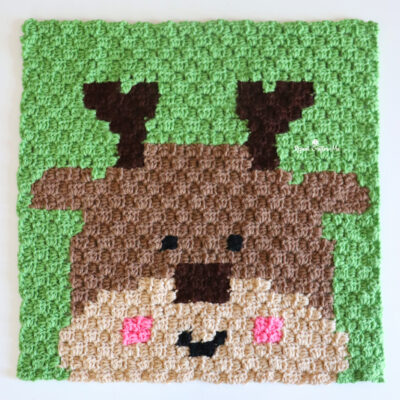
What started as four individual corner-to-corner character squares (a snowman, penguin, gingerbread man, and reindeer) turned into an adorable Christmas blanket. I love how each little friend has their own colorful “window,” and can we please talk about those rosy pink cheeks?! That tiny detail ties all four characters together and gives them so much personality.
This project started as a fun Christmas-in-July crochet-along with one idea in mind: four Christmas friends peeking through a window! What I didn’t know was exactly how I wanted those four friends arranged. Should some be turned sideways, looking in from different directions? Should they all be upright? And which colors looked best next to each other?
So I asked all of you to help me decide! After sharing several different arrangements, Layout #3 was the clear winner with more than 45% of the votes: all four friends upright with the background colors nicely separated. I think you made the right choice!
Once the layout was decided, it was time to really bring that window idea to life. I used white yarn to create the window panes and then added a wider brown border to look like a wooden window frame. And because our Christmas window needed just a little decorating, I finished it off with crochet holly leaves and berries in all four corners.
And now that we’ve wrapped this project up in August, there is still plenty of time to get started on one for the holiday season.
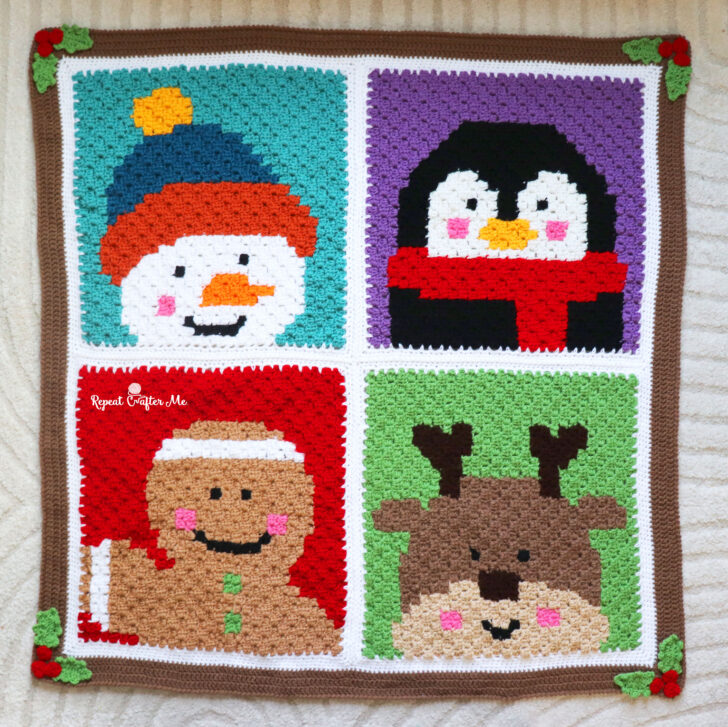
The Four Christmas Friends
This blanket is made from four individual C2C character squares:
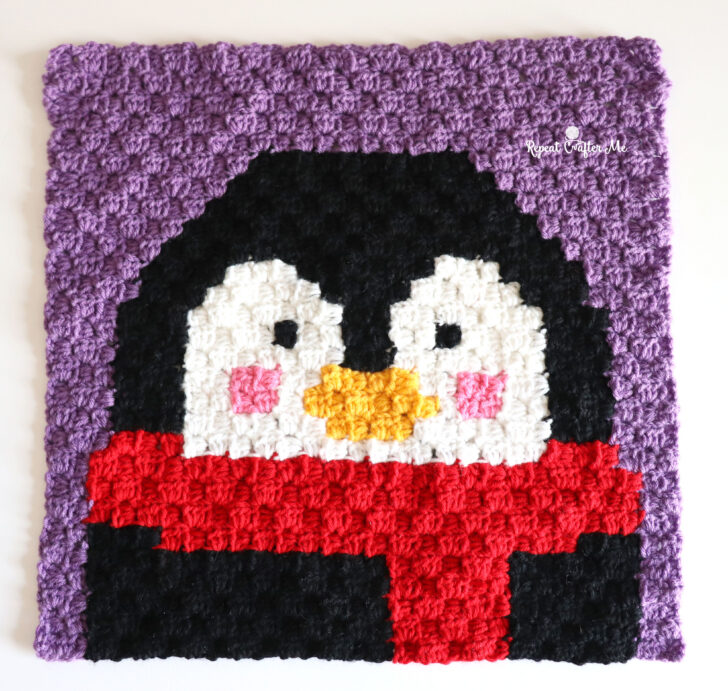
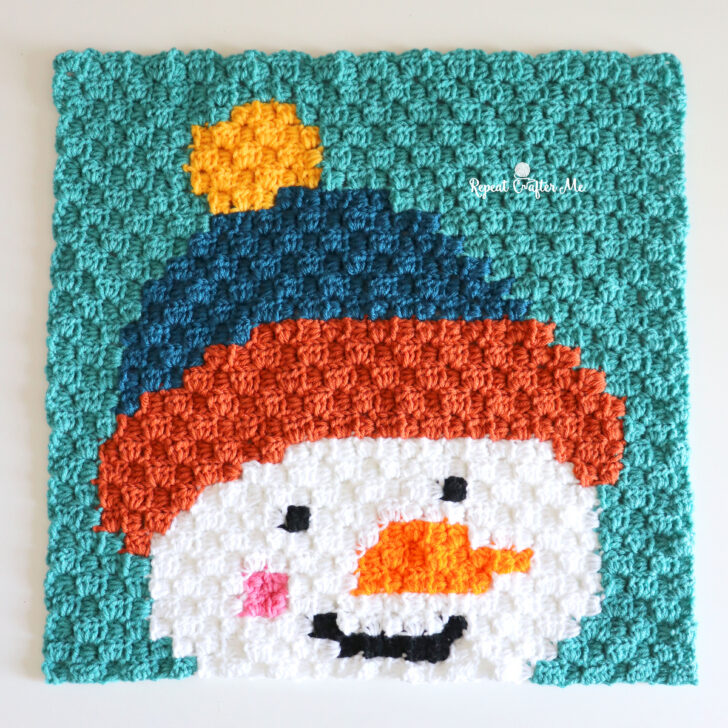
>>> Gingerbread Man C2C Square <<<

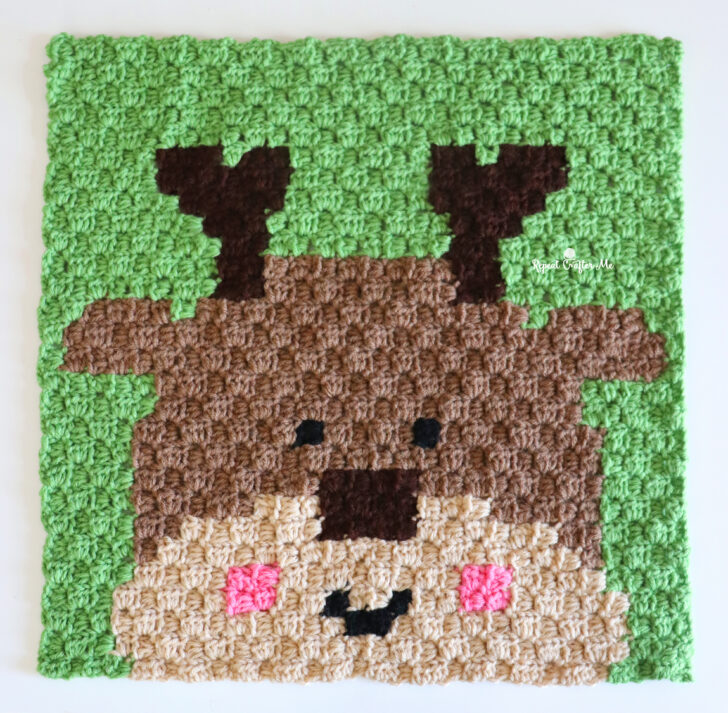
Each square is crocheted using Red Heart Super Saver yarn (except for our gingerbread man using Bernat Super Value in Topaz) and the corner-to-corner technique with half double crochet (HDC) stitches. You can find the exact yarn colors and instructions in each individual pattern post.
A quick C2C note: I use HDC for my corner-to-corner squares, which makes the pixels a little more compact. If you prefer traditional C2C using double crochet stitches, you can absolutely use the same graphs! Just keep in mind that your squares (and therefore your finished blanket) will be larger than mine.
Joining the C2C Squares

Before joining the four character squares, I added a simple white border around each individual square.
Start anywhere along the edge of your individual square.
Join white yarn and SC between the first C2C pixel block, chain 2, then SC in the next space between pixel blocks.
Repeat this SC, ch 2, SC sequence around the entire square.
In each corner: SC + ch 2 + SC in the corner space.
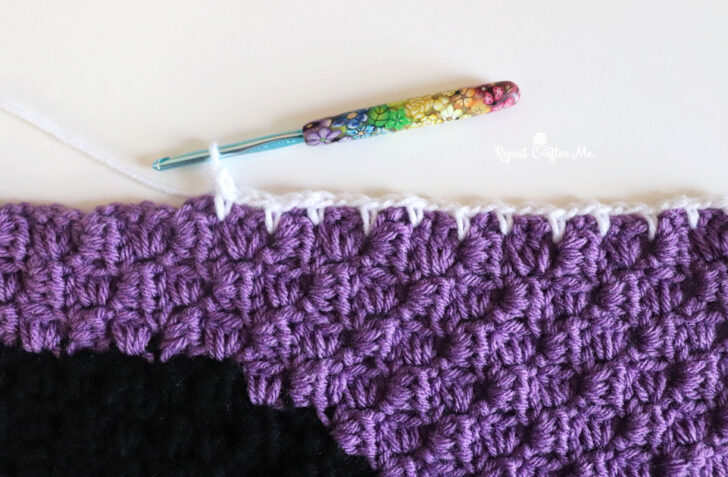
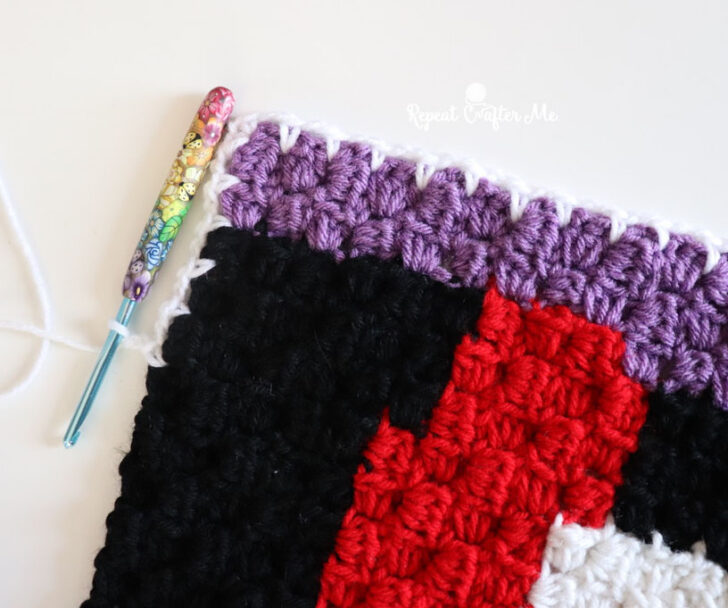
For the next round you will make 2 SC in each chain-2 space around the blanket.
In each corner chain space: SC + chain 2 + SC.
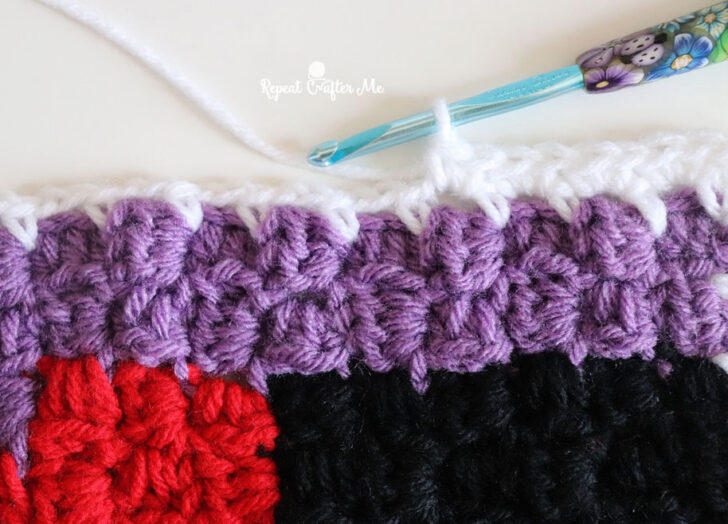
And the final border round for your individual square, you will SC in each stitch around making a SC + chain 2 + SC in each corner.
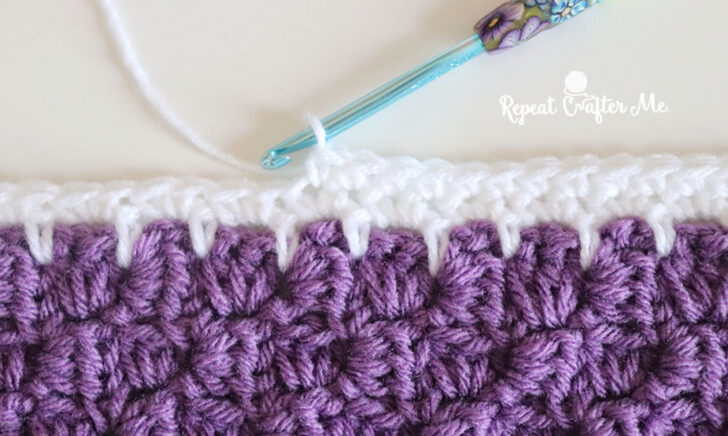
Once all four squares were bordered, I arranged them in the final layout and joined them together using my favorite slip stitch joining technique.
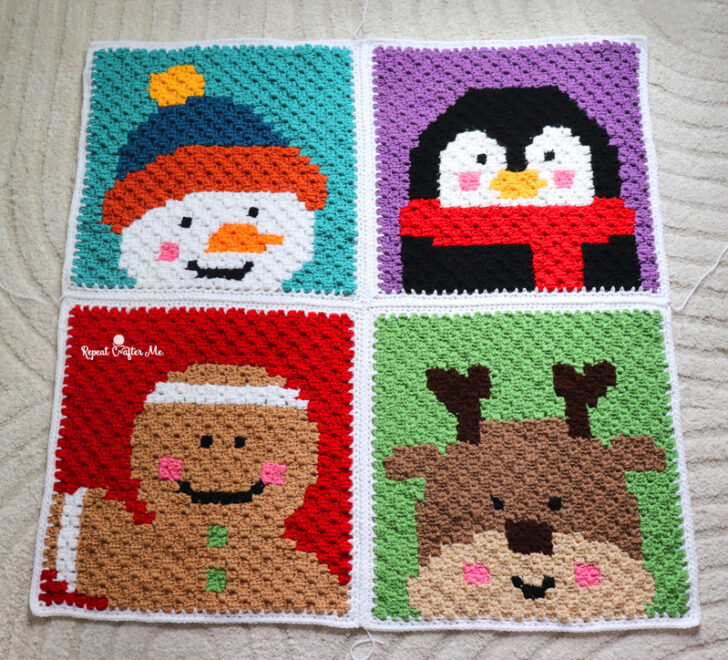
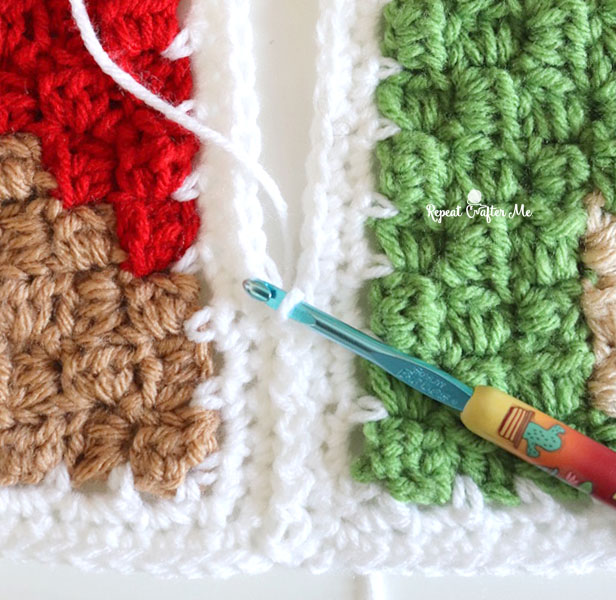
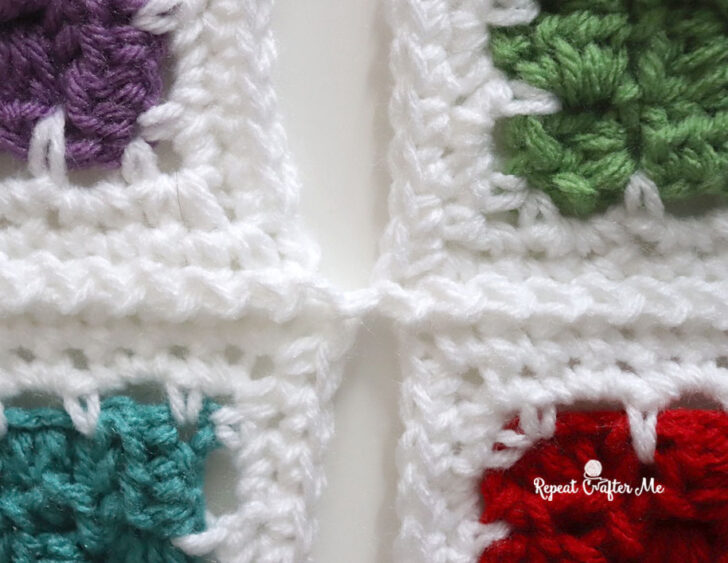
The slip stitch join creates a flat zig zag seam. Slip stitch on the edges of both sides. And it’s easy to connect where the four corners meet.
After all four squares were joined together, I continued working in white around the entire outside edge of the blanket.
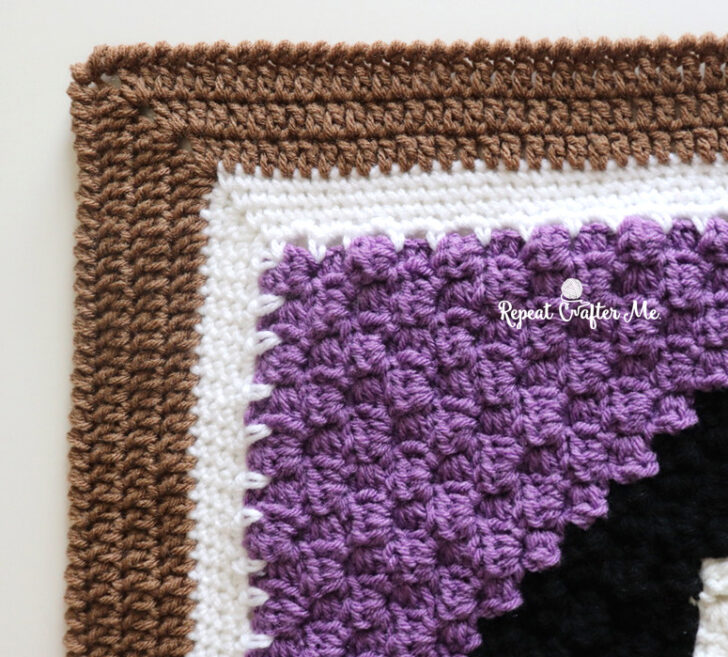
I added two rounds of single crochet around the entire outside edge in white. Making a SC + chain 2 + SC in each corner.
This wider white border on the outside connects visually with the white borders and joining stitches between the squares, creating the look of four separate window panes.
At this point, I could really see the window taking shape!
Now for the part that pulled the whole concept together: the brown window frame.
Switch to brown yarn and work:
Rounds 1–3: Double Crochet evenly around the blanket making 2 DC + chain 2 + 2 DC in each corner.
Round 4: Reverse single crochet around the entire blanket making 3 reverse SC in each corner.
The three rounds of DC stitches in brown give the border enough width to look like a substantial wooden frame, while that final round of reverse single crochet adds a beautiful finished edge and just a little extra texture.
Between the white “panes” and brown “wood,” our four Christmas friends officially look like they’re peeking through a window!
Add the Holly Berry Corners
I almost stopped there… but it needed one more little Christmas touch!
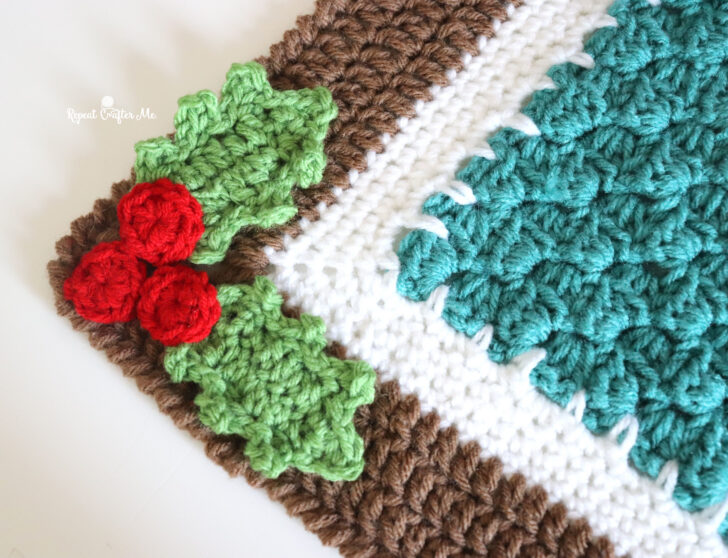
I made four sets of my Crochet Holly Leaves and Berries and stitched one onto each corner of the brown frame.
Each little cluster has two green holly leaves and three red berries. I love that they decorate the frame without taking attention away from the C2C characters.
>>> You can find the free Crochet Holly Leaf & Berry Appliqué Pattern HERE <<<

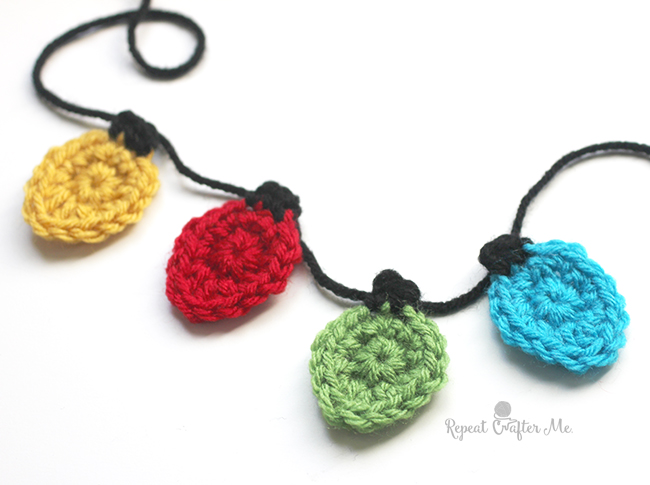
You could also leave the frame plain or decorate it in your own way. A crochet string of Christmas lights would be adorable around the frame too!
>>> Crochet Christmas String Lights FREE PATTERN <<<
Finished Size
My finished Christmas Friends C2C Window Blanket measures approximately: 45 x 45 inches
This actually turned into such a great size! It’s big enough to use as a lap blanket but still compact enough to work beautifully as Christmas decor. Drape it over the back or arm of a couch, fold it into a basket with your other Christmas blankets, or drape it over the edge of a bed for a fun holiday accent. And of course, it’s just right for curling up underneath during the Christmas season too!
Snowman, penguin, gingerbread man and reindeer are together at last!
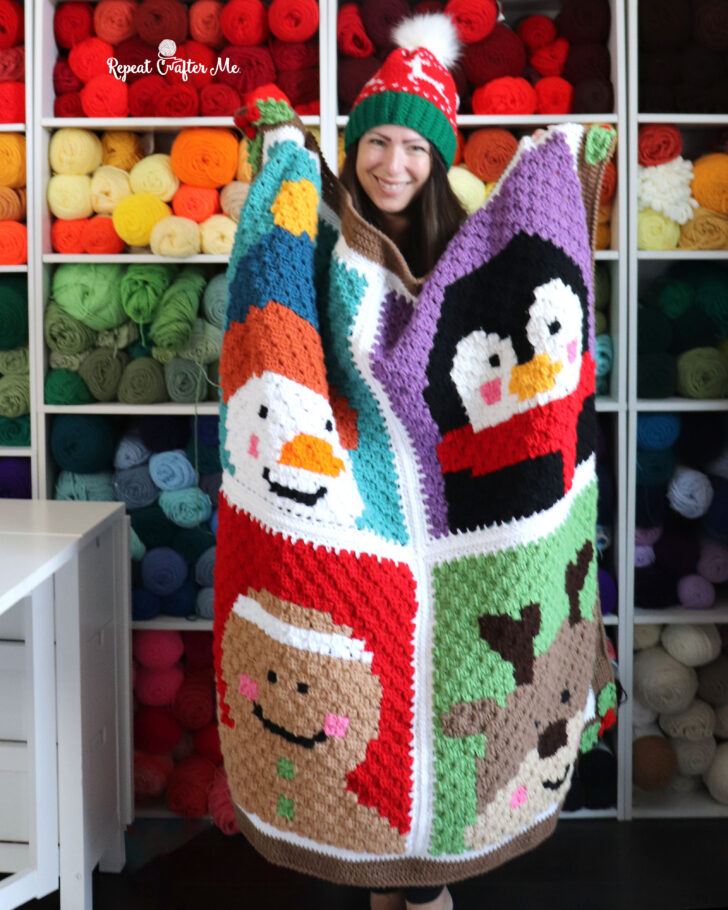
I had so much fun watching this blanket evolve as we went. Even the final layout was chosen with your help, and I think we landed on the right one. The colorful backgrounds keep every square distinct, while the white panes, brown frame and little holly clusters bring everything together into one finished Christmas scene.
Whether you make the entire blanket or pick a favorite Christmas friend to turn into a pillow, wall hanging, or smaller project, I hope these patterns give you a head start on some fun holiday crocheting.
Christmas may still be a few months away… but we crocheters know it’s never too early to start!
One more thing I want to mention about this blanket… it’s reversible! The back is essentially a mirror image of the front, so all four of our Christmas friends are still peeking through their windows from the other side.
Because the squares, joining, and border all look great from both sides, there really isn’t a “wrong” side to this blanket. The only detail I’ve added to just one side (so far!) is the holly in the corners. If you want your blanket to be completely finished on both sides, simply crochet another set of holly leaves and berries and sew them to the corresponding corners on the back.
I haven’t done that… yet! But it would be such a cute finishing touch, especially if you plan to use the blanket as a couch throw where both sides will be seen.
Let’s stay connected!
Subscribe to my NEWSLETTER for free patterns straight to your inbox!
Repeat Crafter Me Facebook
Repeat Crafter Me Instagram
Repeat Crafter Me Pinterest
Repeat Crafter Me YOUTUBE

 Starbucks Stitch Markers and Bottled Beverages
 Crochet Christmas Tree Pixel Square
 Crochet Santa Pixel Square
 Crochet Daisy Rug with Clover Amour Large Hooks and Giveaway!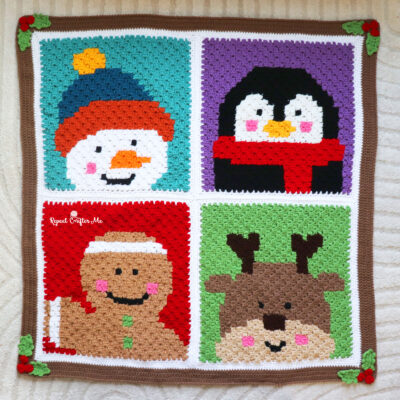

Leave a Reply