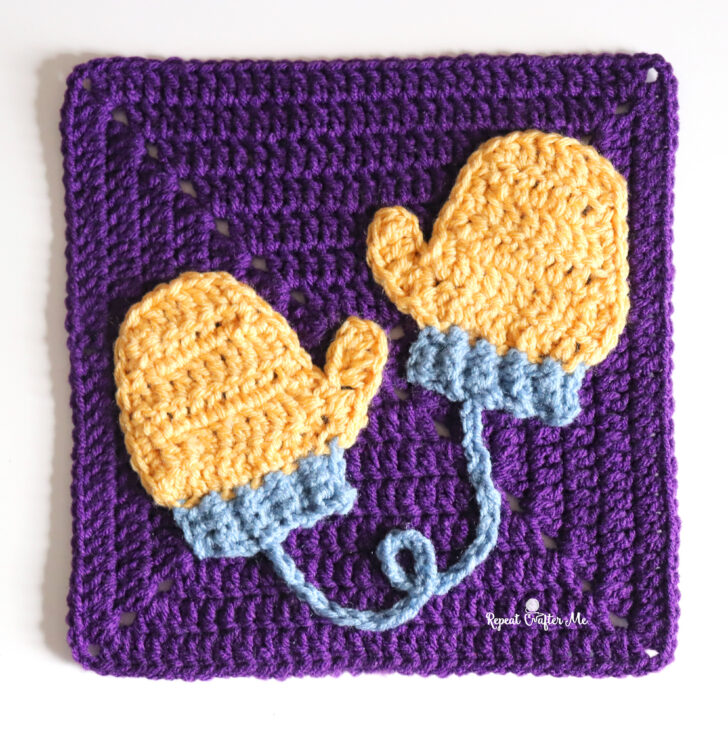
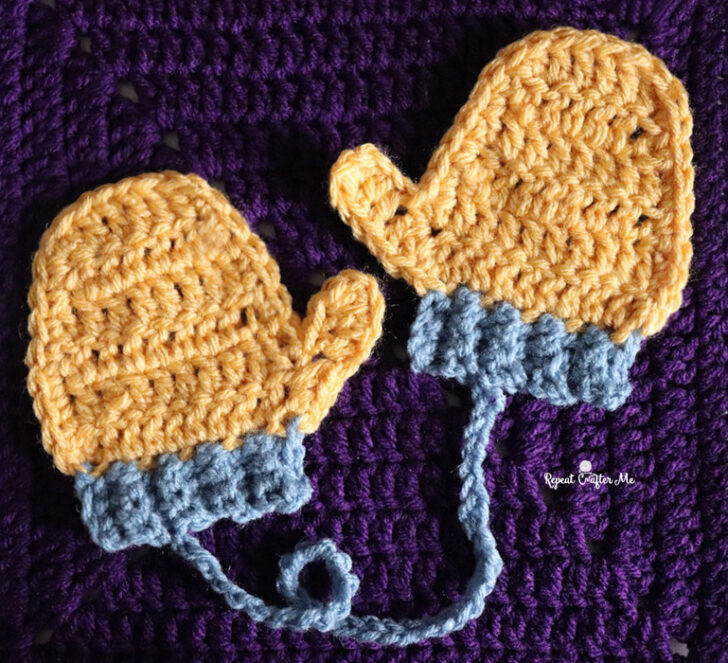
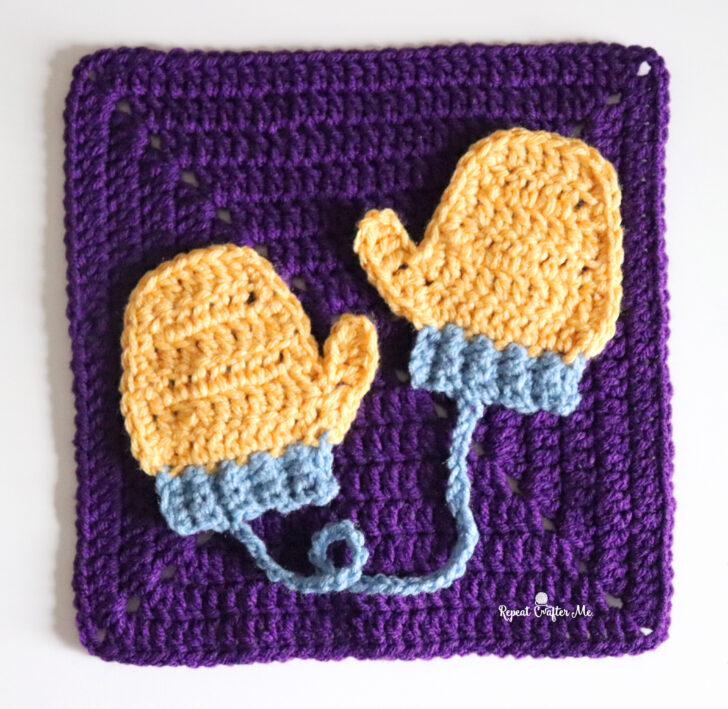
We’re already up to Square #9 in our Winter Activities Crochet-Along, and this month we’re adding an adorable pair of mittens!
Of course, mittens aren’t exactly a winter activity, but they’re definitely an essential part of enjoying all those cold-weather adventures! As we get further into our CAL, I thought it would be fun to mix in a few of the things that make winter activities extra special like bundling up in warm mittens, sipping hot cocoa afterward (hint, hint for our next square!), and all those little details that make the season feel complete.
>>> Winter Activities CAL Landing Page <<<
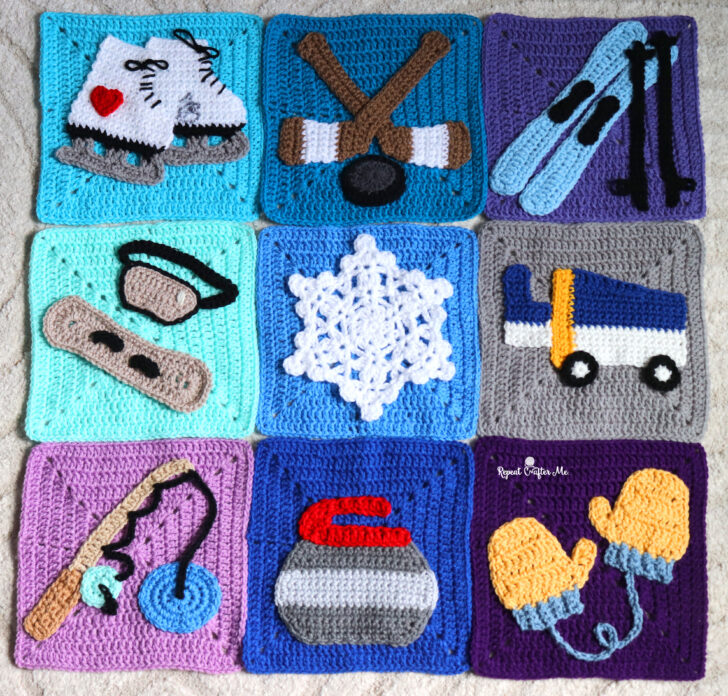
Our Winter Activities Crochet-Along is a 12-month project filled with cozy winter themes, ice sports, and snowy fun. Each appliqué can stand on its own or be turned into a full blanket as we go.
So far we’ve stitched up:
Square 1: Ice Skates
Square 2: Hockey Sticks and Puck
Square 3: Skis and Ski Poles
Square 4: Snowboard & Goggles
Square 5: Snowflake
Square 6: Zamboni
Square 7: Ice Fishing
Square 8: Curling Stone
I love how this square takes us right into the fall season and will carry us all the way through winter. Plus, these little mittens could be used for so many projects beyond our blanket. I’m already envisioning them on a cute winter tote used for holiday market shopping!
There are also so many possibilities for color combinations. Make them match, mix up the cuff colors, or use your favorite winter shades.
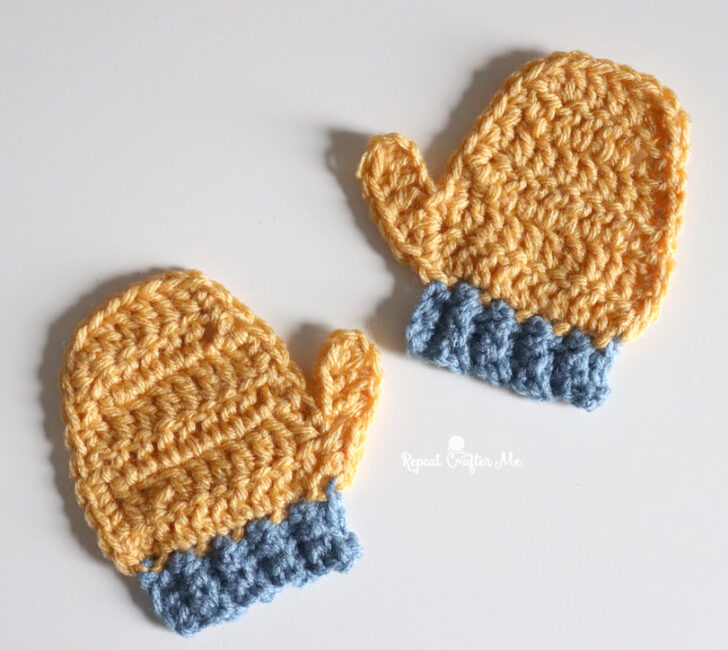
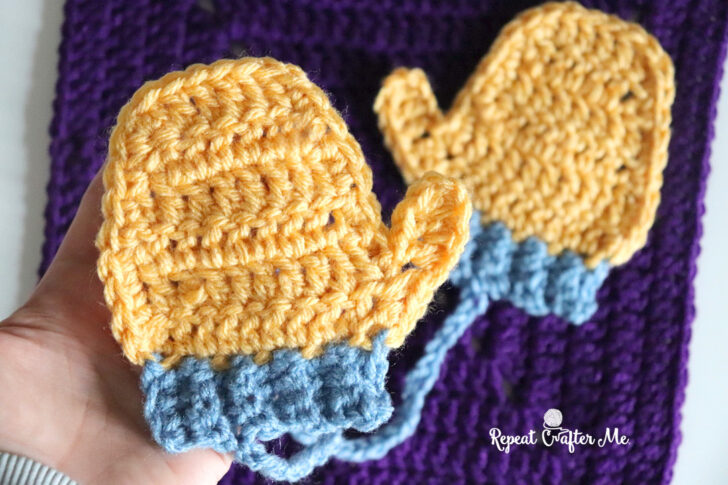
The right and left mittens are made similarly, but the thumbs are placed on opposite sides so they look like a proper pair. I’ve broken the instructions down below to hopefully make the construction a little easier to follow.
Materials:
– Red Heart Super Saver Yarn in Cornmeal or Red Heart with Love in Cornsilk (any color you’d like would be great for the mittens!)
– Red Heart Super Saver in Country Blue for the cuff.
>>> Shop all yarn at Yarnspirations.com <<<
– Size H Crochet Hook
– Tapestry Needle
Finished Size: Each mitten is approx 5 x 5 inches
Crochet Mitten Appliqué
Right Hand Mitten
with yellow yarn
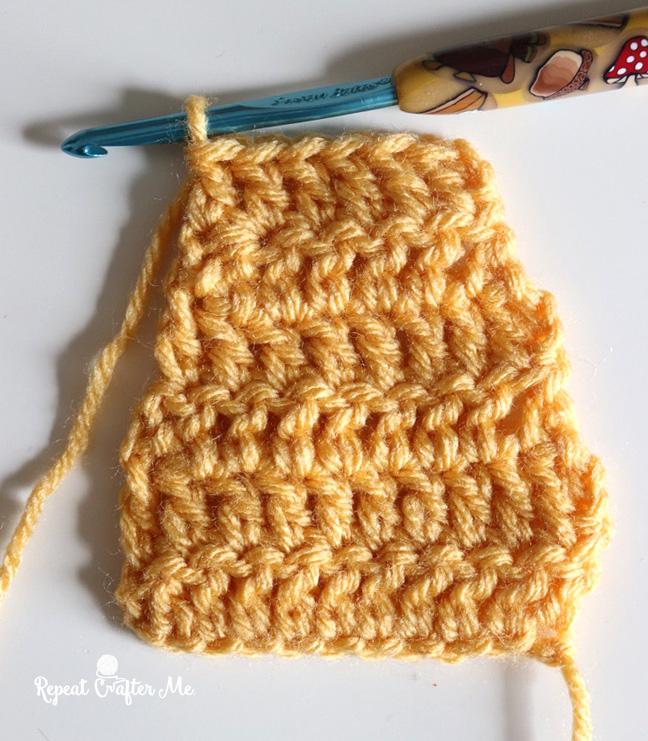
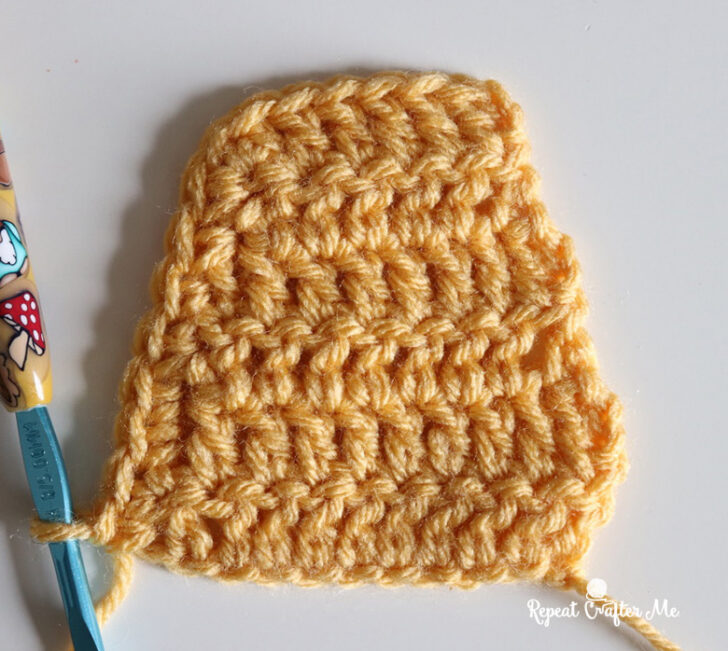
Chain 12, DC in 3rd chain from hook and in each chain across. Chain 2, turn. (10 DC)
Row 2: DC in each stitch across. Chain 2, turn. (10 DC)
Row 3: DC decrease over first 2 stitches, DC in next 6 stitches, DC decrease over last 2 stitches. Chain 2, turn. (8 DC)
Row 4: DC in each stitch across. Chain 2, turn. (8 DC)
Row 5: DC decrease over first 2 stitches, DC in next 4 stitches, DC decrease over last 2 stitches. Chain 2, turn. (6 DC)
Row 6: DC in each stitch across. Do not turn. (6 DC)
Edging + Right Thumb
Continuing with the same yarn, SC evenly down the first side of the mitten, working approximately 8 SC along the edge. Now lets pause and make the thumb.
Thumb: Chain 5. DC in 3rd chain from hook and DC in each of the next 2 chains. Work 2 DC into the same space along the mitten edge where the thumb chain began.
Continue with 1 SC in the remaining space along the edge of the mitten. Fasten off.
Ribbed Cuff
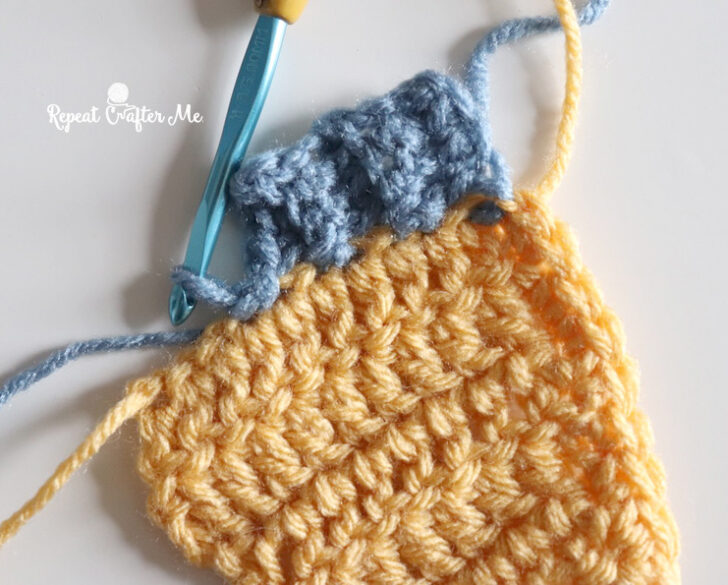
Join blue yarn to one corner along the bottom edge of the mitten.
Chain 4, SC in 2nd chain from hook and in next 2 chains. Slip stitch into the next 2 spaces along the bottom edge of the mitten. Turn.
Row 2: SC in the back loops only of the 3 SC from the previous row. Chain 1, turn.
Row 3: SC BLO in each of the 3 stitches. Slip stitch into the next 2 spaces along the bottom of the mitten. Turn.
Repeat Rows 2–3 across the entire bottom edge of the mitten, creating a short ribbed cuff.
Fasten off blue yarn.
Join yellow yarn at the bottom of the remaining unfinished side of the mitten.
SC evenly up the side and join to the first stitch along the top edge. Fasten off, leaving a long tail for sewing the mitten onto the square.
Left Hand Mitten
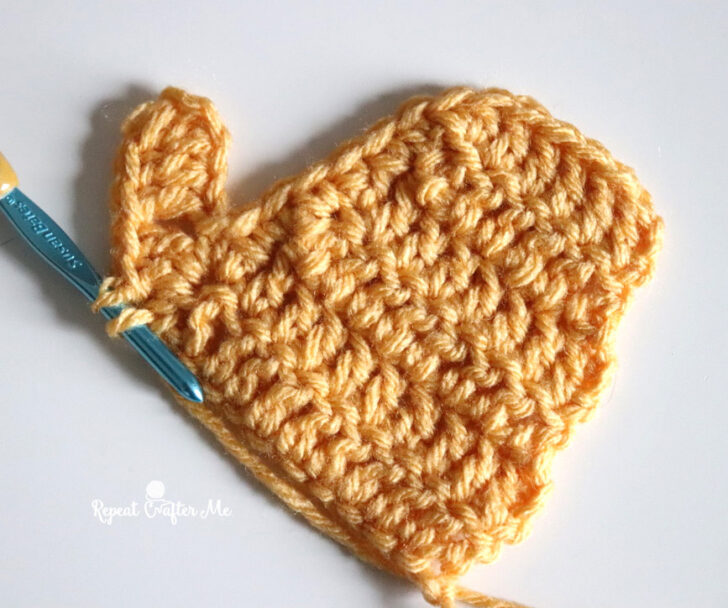
Make the mitten body exactly the same as the Right Hand Mitten through Row 6.
SC evenly down the first side of the mitten. Do not make the thumb on this side.
Work the ribbed cuff along the bottom edge following the same instructions above.
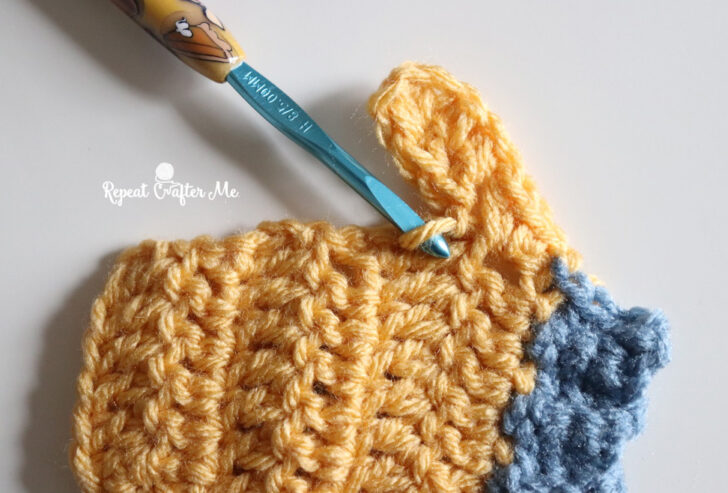
Join yellow yarn at the bottom of the second side of the mitten. This time, we will add the thumb as we work our way up the edge.
Left Thumb:
Work 2 SC + 1 HDC into the first space along the side of the mitten.
Chain 6, DC in 3rd chain from hook. DC in next chain. DC decrease over the final 2 chains.
Slip stitch back to the side of the mitten to secure the thumb.
Continue SC evenly along the remaining edge of the mitten and join to the first stitch along the top.
Fasten off, leaving a long tail for sewing.
Assembly
Arrange the two mittens on your crochet square with the thumbs facing toward one another. I positioned mine at slightly different angles to give them a more playful, natural look.
Use the long yarn tails to stitch each mitten securely to the square.
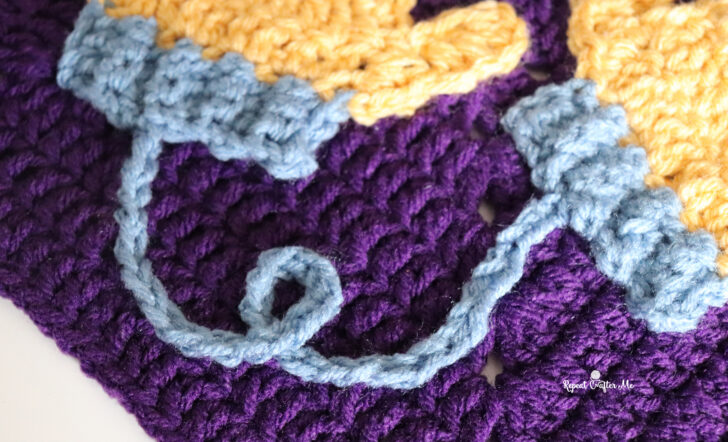
For an extra cute detail, use your cuff-colored yarn to crochet a simple chain (about 36 chains) extending from the bottom of each mitten. Arrange the chains in a loose curve between the mittens and stitch them to the square in a few places to create the look of a classic mitten string.
And that’s it! Another Winter Activities square complete!
I especially love this one because the mitten appliqué can easily stand on its own outside of the blanket. Add one mitten to a hat, make a pair for a tote bag, use them on a pillow, or turn them into winter wall décor. There are lots of ways to use these little mitts long after our CAL is finished.
Share your makes and progress using
#WinterActivitiesCAL
>>> Winter Activities CAL Landing Page <<<
Let’s stay connected!
Subscribe to my NEWSLETTER for free patterns straight to your inbox!
Repeat Crafter Me Facebook
Repeat Crafter Me Instagram
Repeat Crafter Me Pinterest
Repeat Crafter Me YOUTUBE

 Starbucks Stitch Markers and Bottled Beverages
 Crochet Christmas Tree Pixel Square
 Crochet Santa Pixel Square
 Crochet Daisy Rug with Clover Amour Large Hooks and Giveaway!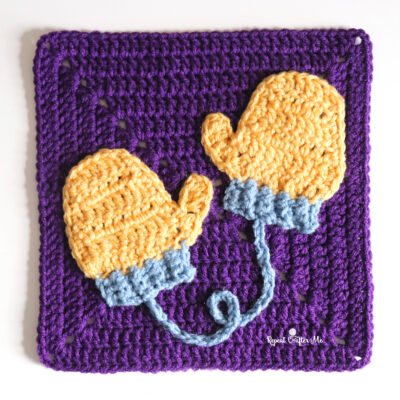
Leave a Reply