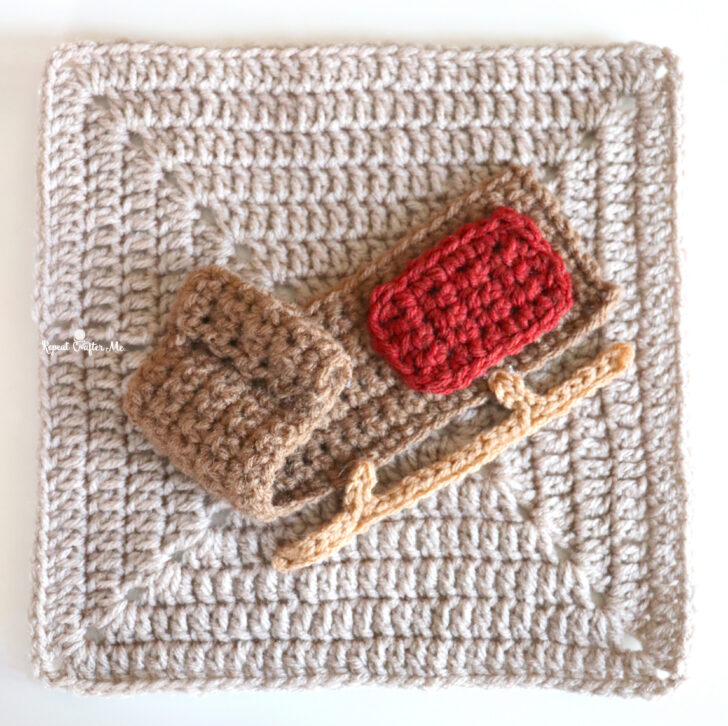
Come on, it’s lovely weather for a sleigh ride together with you!
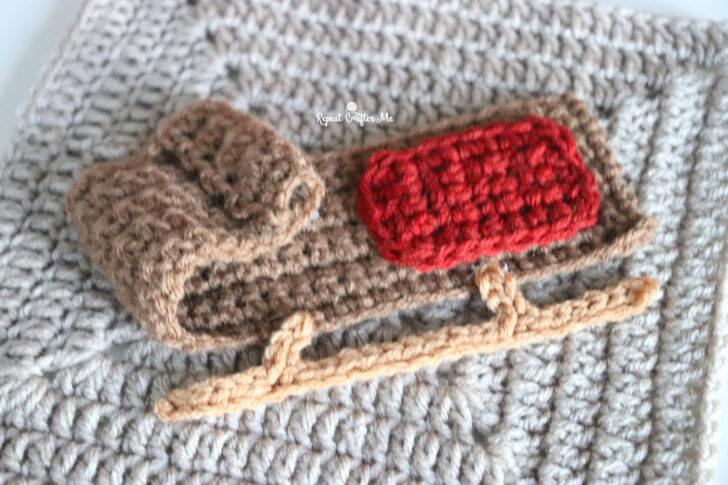
We are officially on the second-to-last square of our Winter Activities Crochet Along! Square #11 is a crochet sled, and att first glance, it looks like a dimensional little wooden sled with a red cushion and curved runners. But here’s the fun part: the entire body of the sled is crocheted in one long, flat strip!
With a few carefully placed folds, that simple rectangle transforms into what looks like a three-dimensional sled. It’s almost like a little crochet optical illusion!
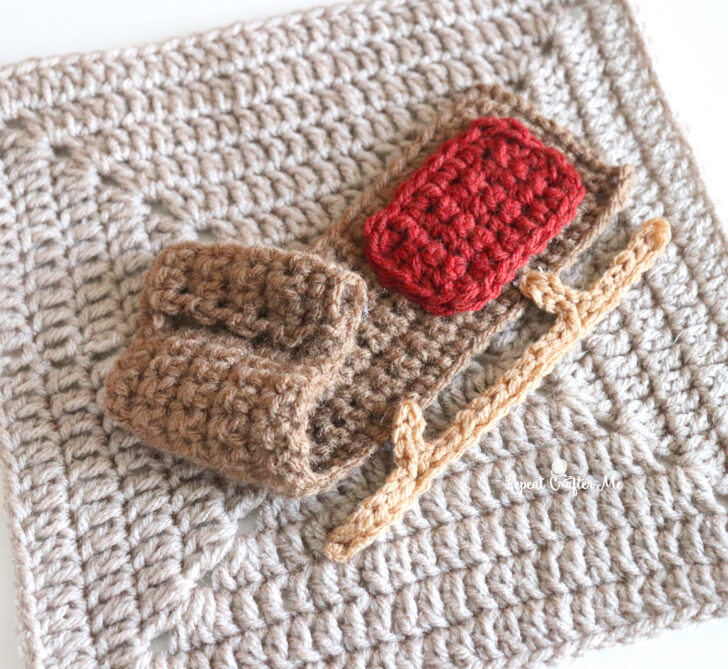
I love how something so simple can turn into something that looks much more complicated than it actually is! And with just ONE square left to go, our Winter Activities Blanket is almost complete!
>>> Winter Activities CAL Landing Page <<<
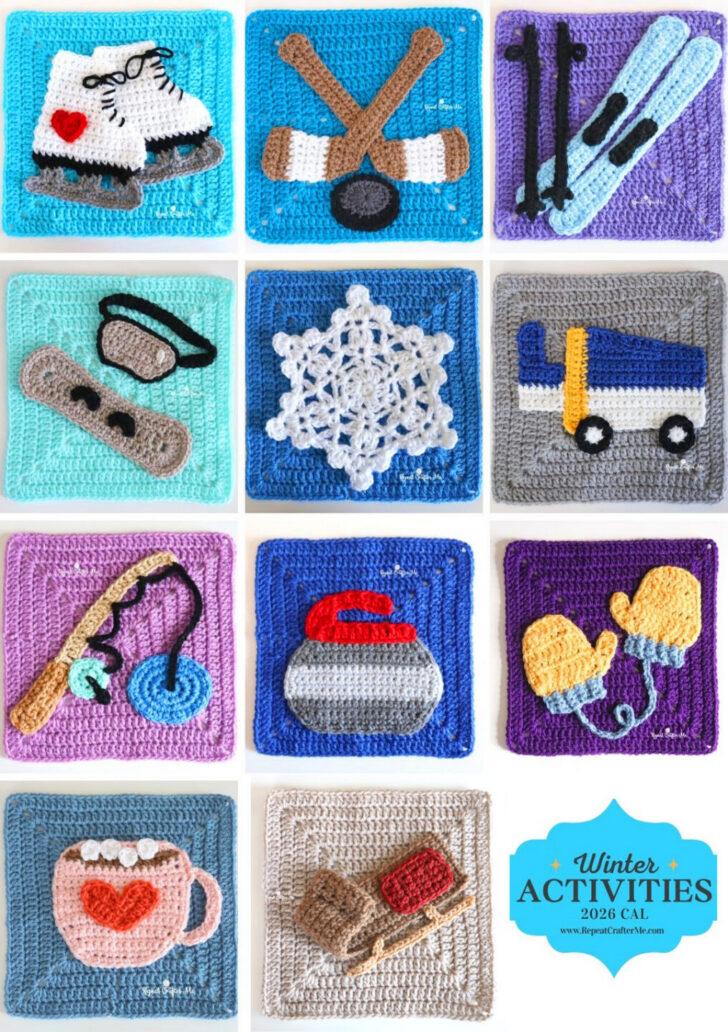
Our Winter Activities Crochet-Along is a 12-month project filled with cozy winter themes, ice sports, and snowy fun. Each appliqué can stand on its own or be turned into a full blanket as we go.
So far we’ve stitched up:
Square 1: Ice Skates
Square 2: Hockey Sticks and Puck
Square 3: Skis and Ski Poles
Square 4: Snowboard & Goggles
Square 5: Snowflake
Square 6: Zamboni
Square 7: Ice Fishing
Square 8: Curling Stone
Square 9: Mittens
Square 10: Mug
Materials
- Red Heart Super Saver yarn in Café Latte – main sled
- Bernat Super Value yarn in Redwood Heather – red seat cushion
- Bernat Super Value yarn in Topaz – sled runners and supports
- Size H/8 (5.0 mm) crochet hook
- Tapestry needle
- Scissors
- Optional: Hot glue gun for securing small pieces
Crochet Sled Appliqué Pattern
Main Sled
With Café Latte yarn.
Row 1: Chain 36, SC in second chain from hook and in each chain across. chain 1, turn. (35 SC)
Rows 2–9: SC in each stitch across. chain 1, turn. (35 SC)
After Row 9, fasten off, leaving a long tail for sewing.
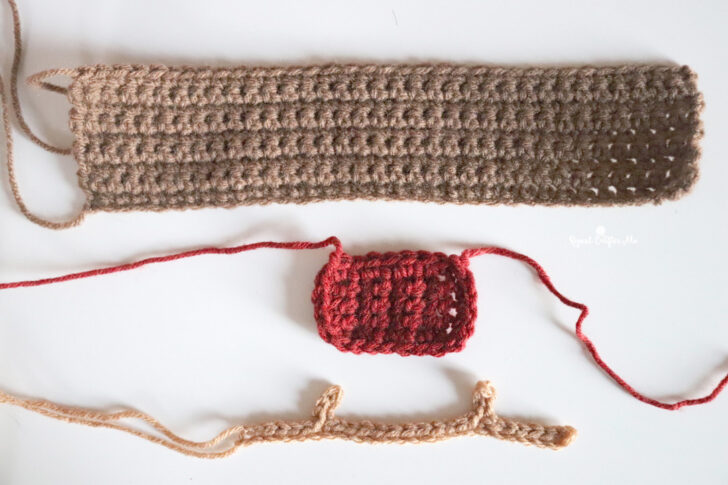
You should now have one long rectangular strip. This is the entire body of your sled!
Red Seat Cushion
With Redwood Heather yarn.
Row 1: Chain 5, SC in second chain from hook and in each chain across. chain 1, turn. (4 SC)
Rows 2–6: SC in each stitch across. chain 1, turn. (4 SC)
Row 7: SC in first stitch, HDC in next 2 stitches, SC in last stitch.
Do not fasten off yet! Continue working SC stitches evenly around all four edges of your cushion until you return to the beginning of Row 7.
Fasten off, leaving a long tail for sewing.
Sled Runner and Supports
With Topaz yarn.
Step 1: Chain 26.
Step 2: Slip Stitch in second chain from hook and in next 6 chains.
Step 3: Chain 4. Working back down this new chain, Slip stitch in each chain to return to the main runner.
Step 4: Continue slip stitching along the original foundation chain for another 10 stitches.
Step 5: Chain 4 again. Slip stitch back down this chain to create the second support.
Step 6: Continue slip stitching in the remaining chains of the main runner.
Fasten off, leaving a long tail for sewing.
You should now have one long runner with two small supports extending from it. These supports will connect the runner to the underside of your sled.
This is where the magic happens!
Assembling Your Crochet Sled
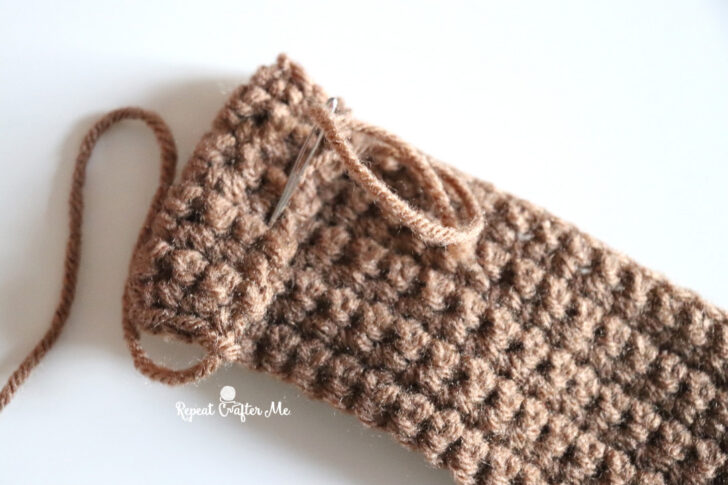
Step 1: Create the decorative top curl.
Take one end of your long crocheted strip and fold a small section over to create a decorative curved edge, similar to the curled details you might see on a traditional wooden sleigh. Stitch this fold in place.
Step 2: Shape the front of the sled.
Now carefully fold the remaining strip to create the sled’s curved front. This is the part that would curve upward in front of your feet as the sled glides through the snow.
Adjust the folds until the sled takes shape. The middle section should remain relatively flat to form the seat.
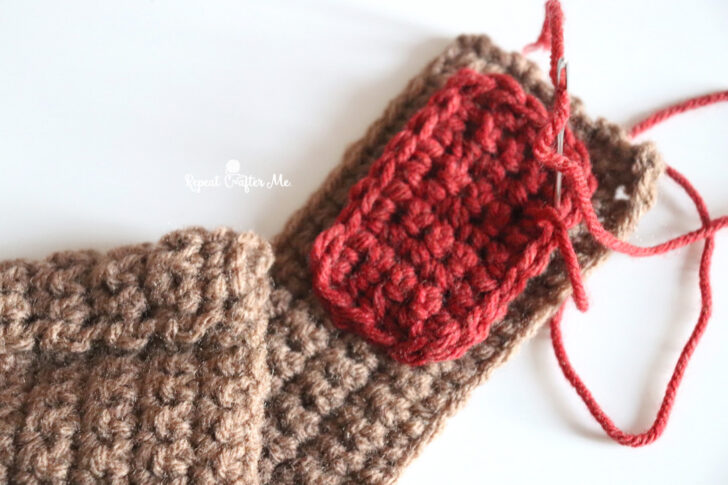
Step 3: Attach the red cushion.
Position the red cushion on the flat seating area, toward the back of the sled. Sew it in place.
Step 4: Attach to your blanket square.
Arrange your sled diagonally on your 10″ x 10″ crochet square before sewing it down. with your blade runner underneath. Leave some of the curved areas slightly raised to maintain the three-dimensional effect.
Tip: A little hot glue can help secure those hard-to-reach folds without having to sew every little section.
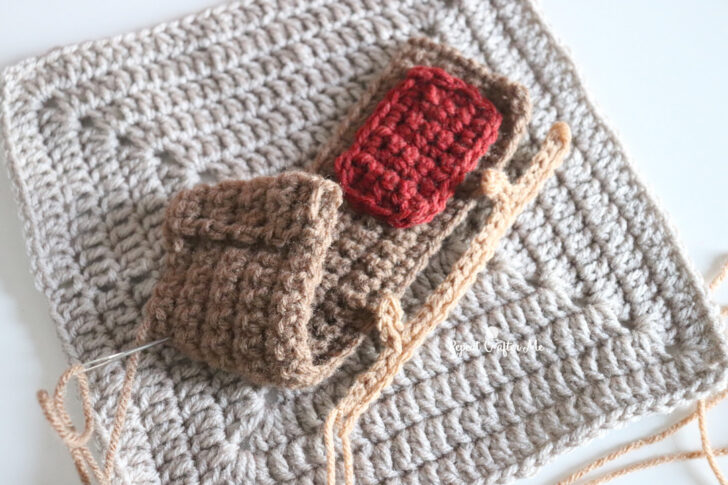
Step 6: Sew the appliqué in place.
Stitch the sled securely to your square, but don’t feel like you need to sew every edge completely flat.
Leaving a little space underneath the curved portions helps maintain that three-dimensional appearance.
Helpful Hack: A small dab of hot glue can be useful for securing those tricky little areas that are difficult to reach with your tapestry needle. Just be careful not to flatten the folds!
A Little Crochet Optical Illusion!
One of my favorite things about this design is how different it looks once it’s assembled.
When you see the original crocheted pieces laid flat, it’s hard to imagine that one long rectangle could become an entire sled! But once you fold it into position, your eye starts to see a curved wooden sled with a backrest and seat.
It’s a fun example of how a little shaping and clever placement can completely transform a simple crochet piece.
One More Square to Go!
Can you believe we are almost finished with our Winter Activities Crochet Along?!
We’ve spent the year crocheting our way through all kinds of winter fun, and this little sled is the perfect addition to our collection.
Only one more appliqué remains before we can start thinking about assembling our finished blankets!
Thank you for continuing to crochet along with me. I can’t wait to see all these winter activities come together in one finished blanket!
>>> Winter Activities CAL Landing Page <<<
Let’s stay connected!
Subscribe to my NEWSLETTER for free patterns straight to your inbox!
Repeat Crafter Me Facebook
Repeat Crafter Me Instagram
Repeat Crafter Me Pinterest
Repeat Crafter Me YOUTUBE
 Starbucks Stitch Markers and Bottled Beverages
 Crochet Christmas Tree Pixel Square
 Crochet Santa Pixel Square
 Crochet Daisy Rug with Clover Amour Large Hooks and Giveaway!

Leave a Reply