Repeat Crafter Me

Crafts, DIY projects, FREE crochet patterns, crock pot recipes and more!

  • Home
  • About Me
  • Crafting
  • Crocheting
  • Crockpotting
  • Contact
  • Books

Search Results for: corner to corner

Crochet Corner to Corner (C2C) Baby Sheep Graphgan

July 31, 2015

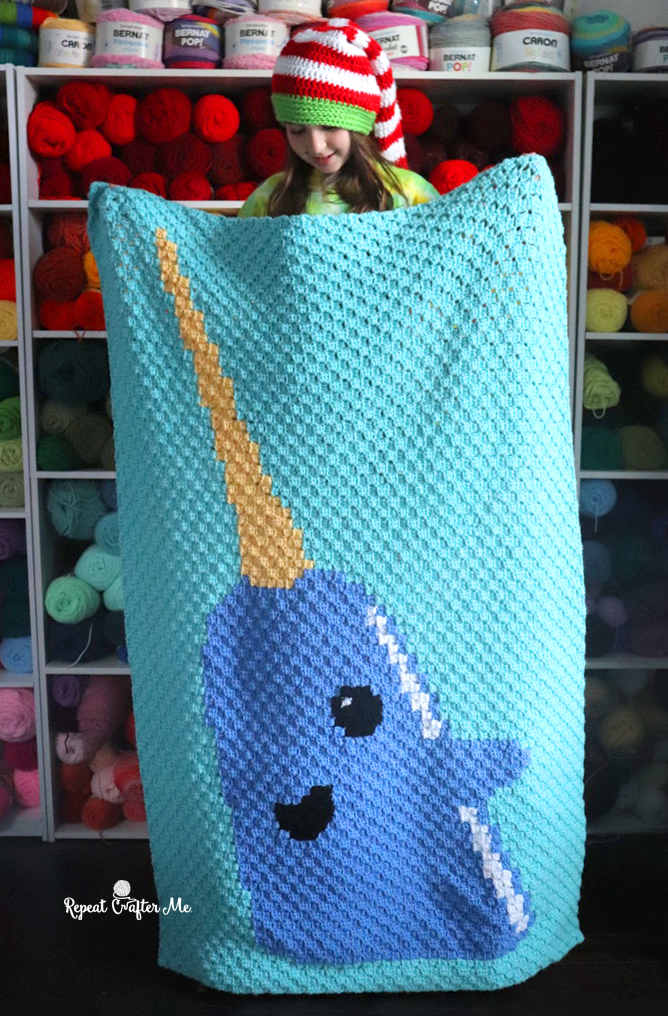
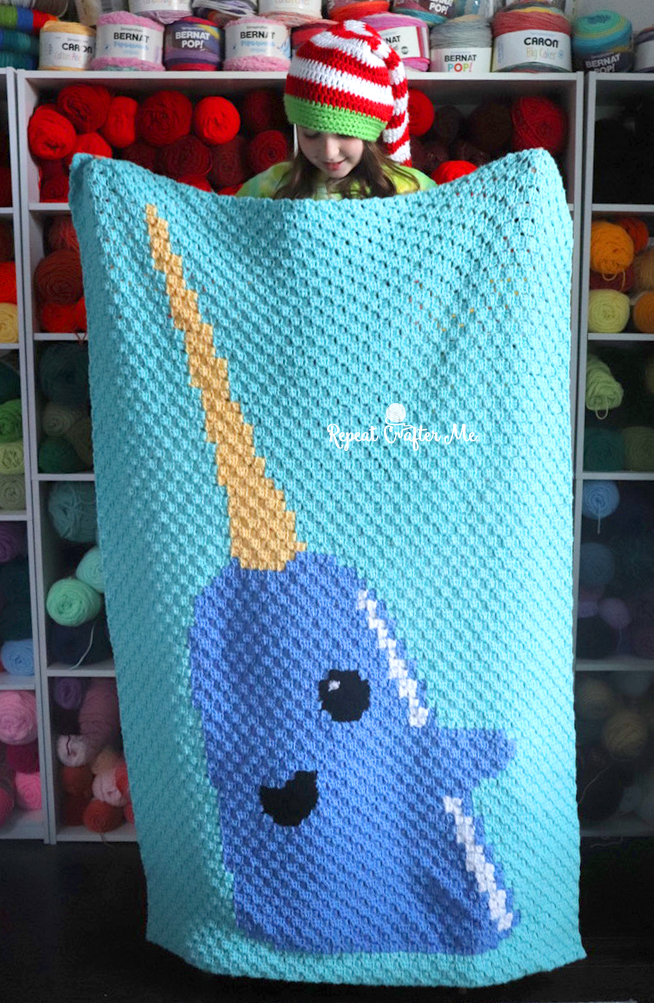
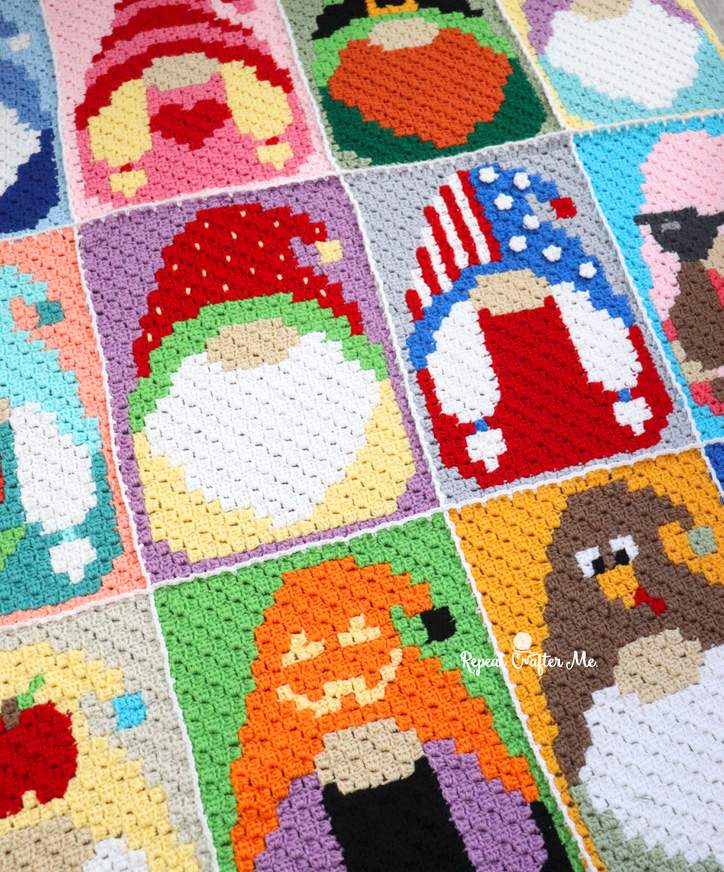
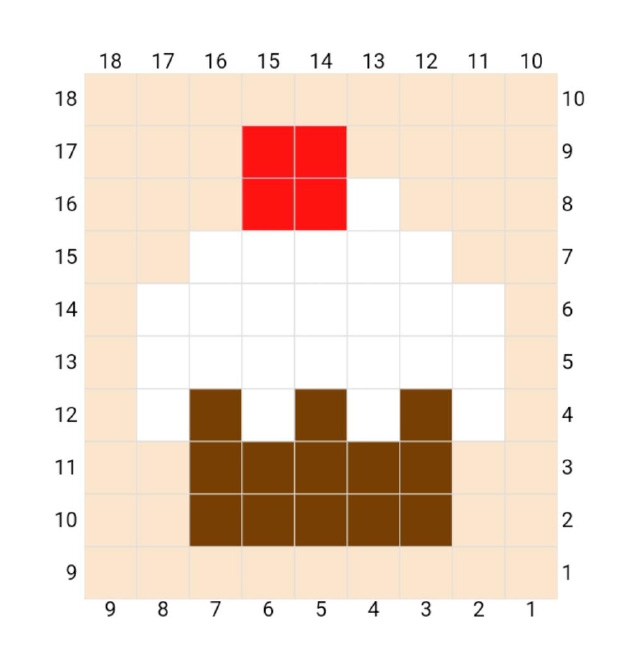
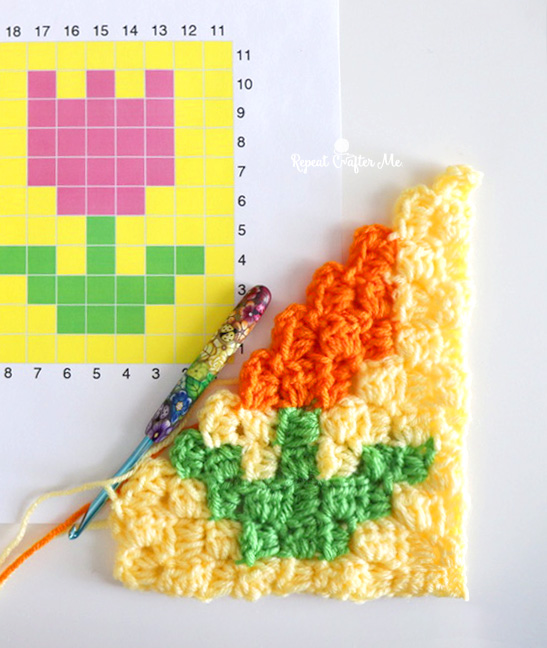
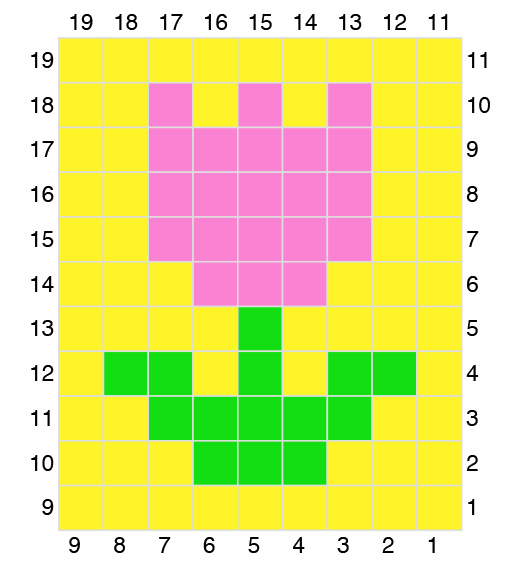
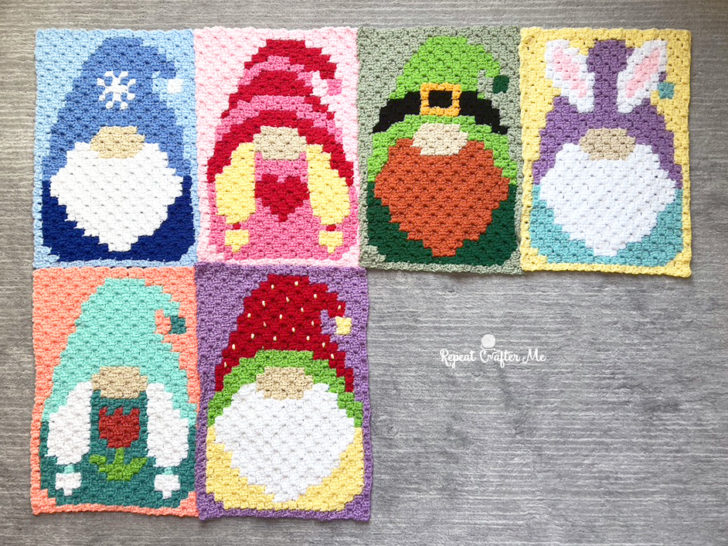
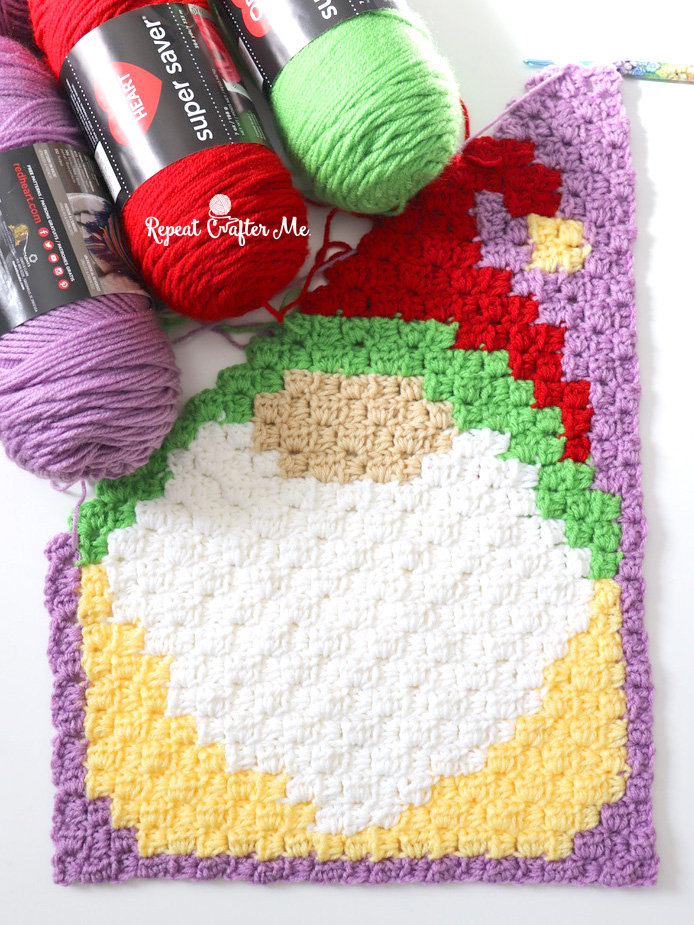
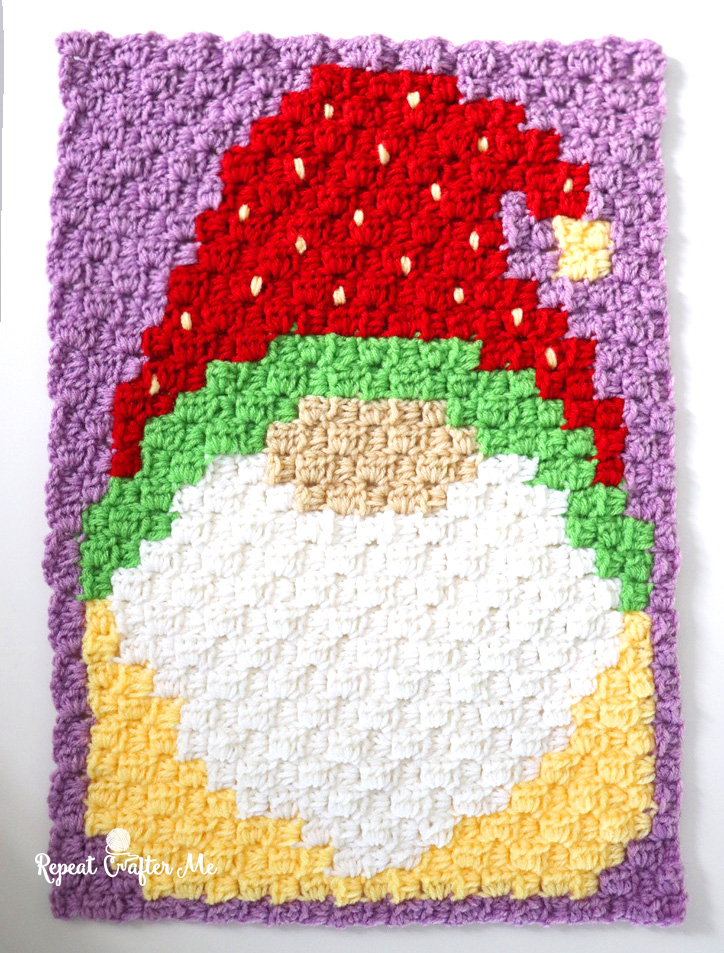
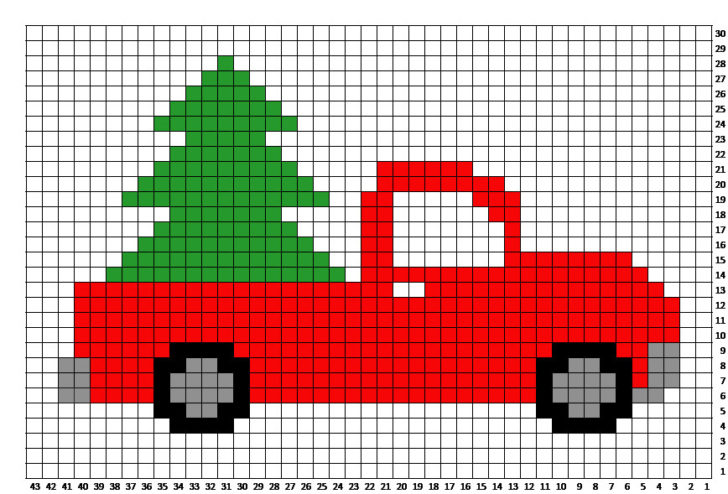
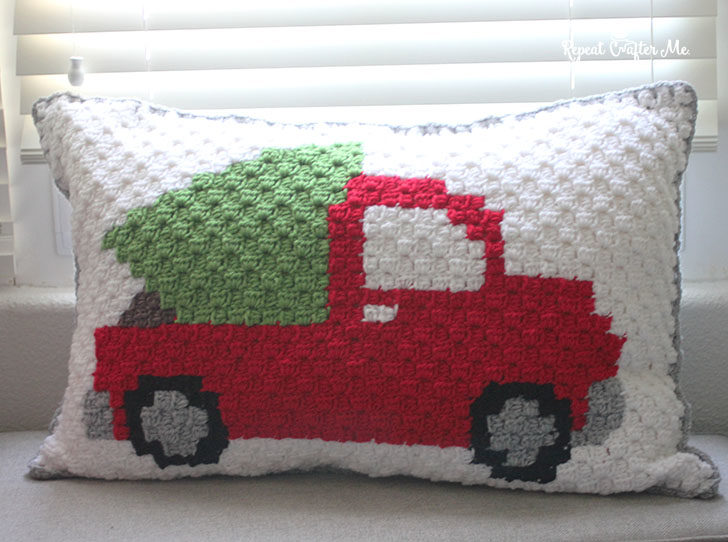
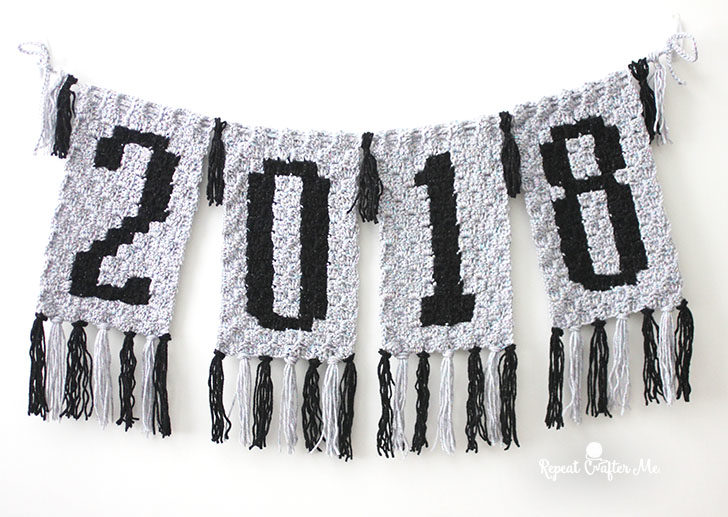
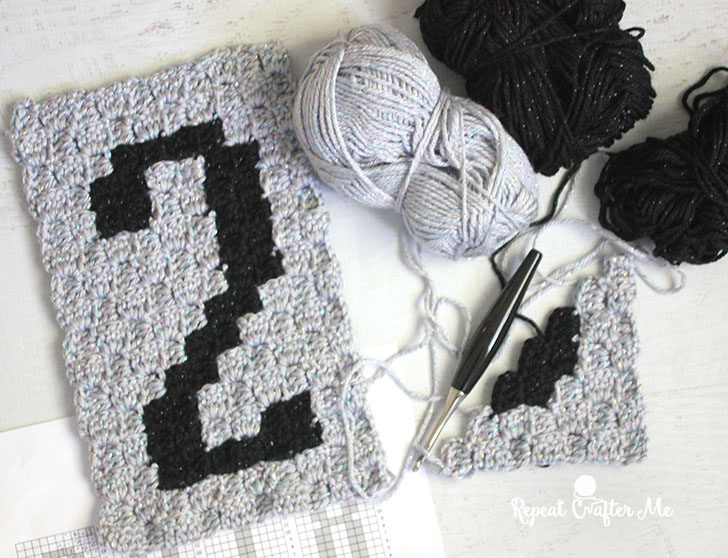
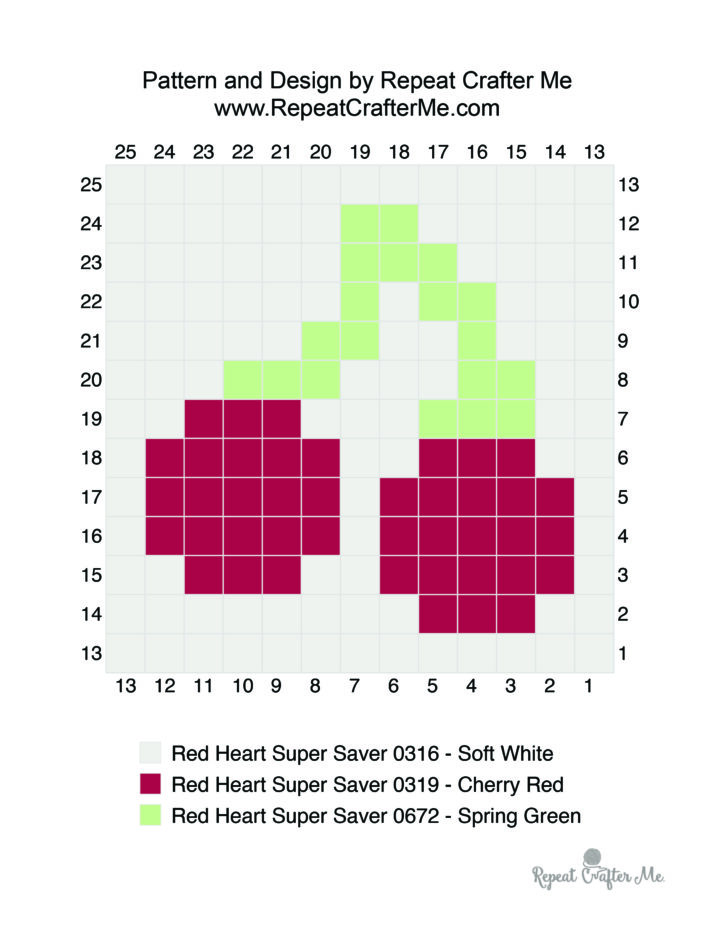
I successfully finished my first Corner to Corner (C2C) Graphgan! The C2C works up much quicker than the pixel square blanket and the bobble stitch blanket so it’s a great option for those of you who want to give pixel crochet a try. In this post I am going to give you the basics about creating a C2C blanket. There is no specific pattern to follow, you create these afghans by following a pixel graph, working from the bottom right hand corner, row by row, until you get the top left hand corner!

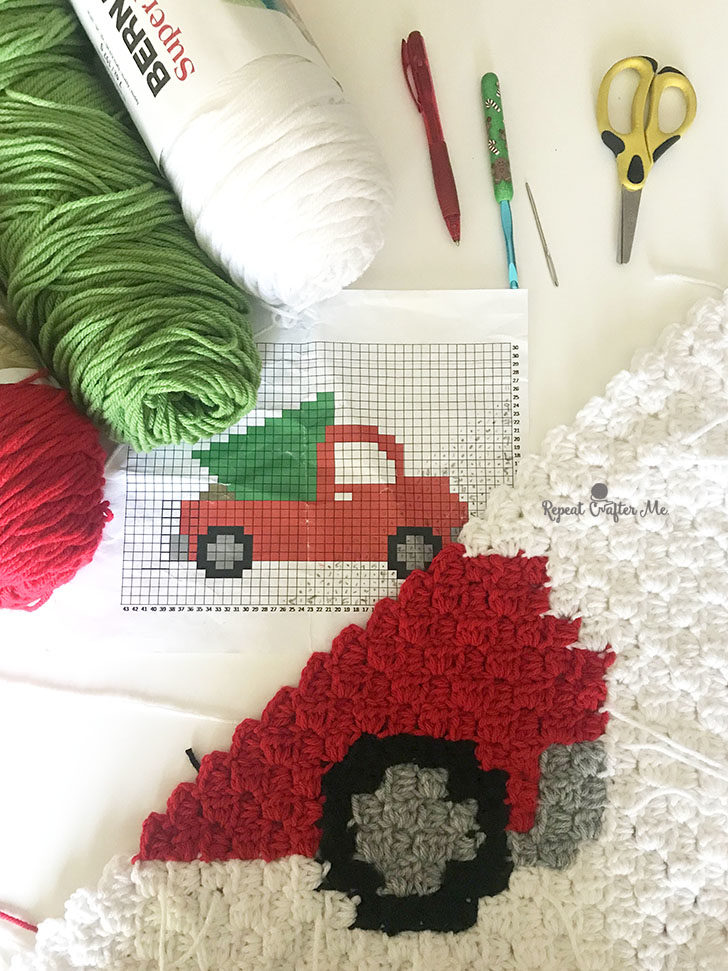
What you need to re-create the Baby Sheep C2C Graphgan:
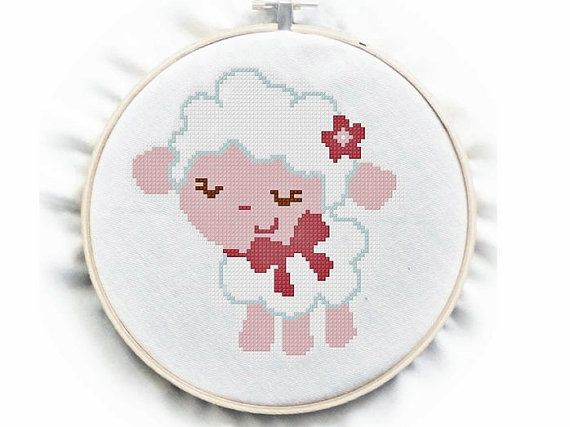
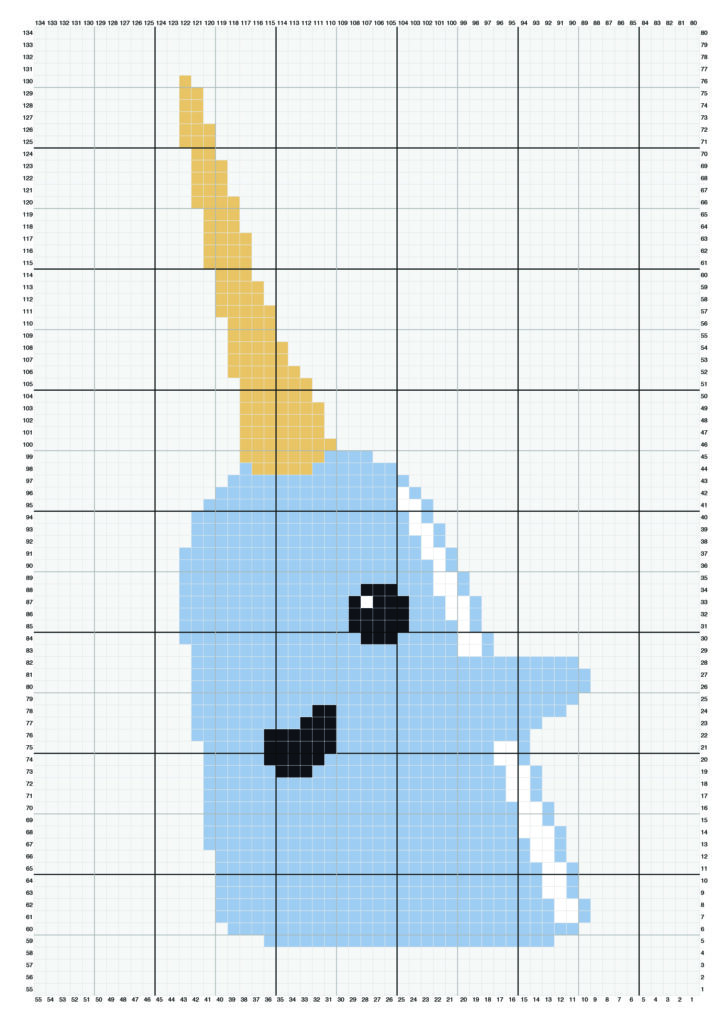
– Baby Sheep Graph. This graph will cost you $2.50. It is the most adorable cross stitch pattern by GreatHome and available for purchase HERE on Etsy. When I saw it on Pinterest, I knew I had to have it! The instant download file comes with the pixel graph you will need. Keep in mind that you do not need to purchase this pattern to create a C2C graphgan. You can use ANY pixel graph pattern and follow the instructions below.
Click Here to purchase the Baby Sheep Graph
– Size G Crochet Hook. Typically I would use size H but this graph was 73×79 squares and I new a smaller hook would keep it from becoming too big.
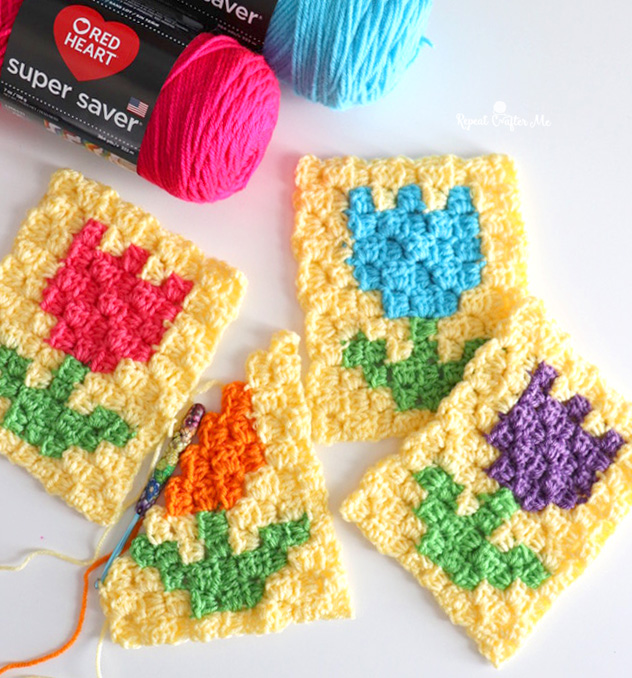
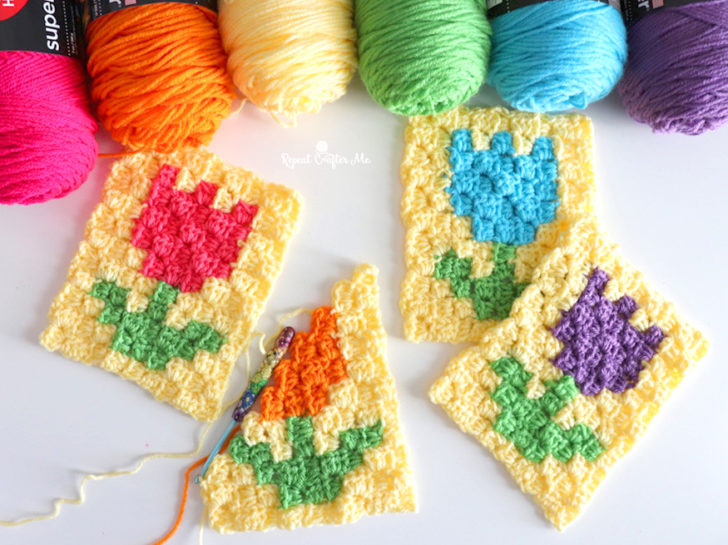
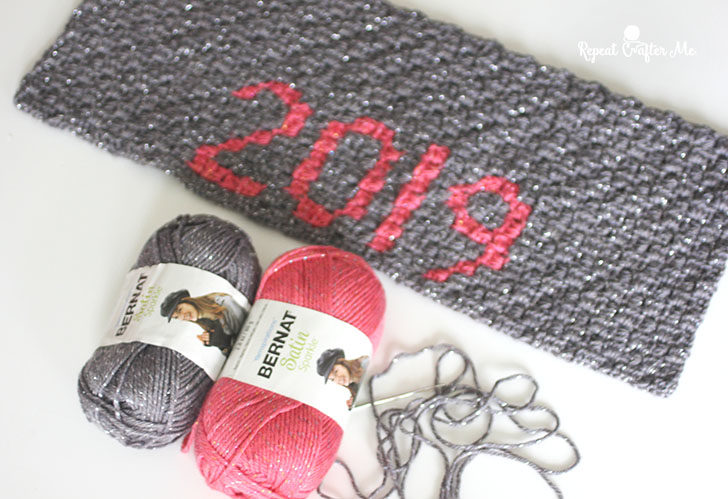
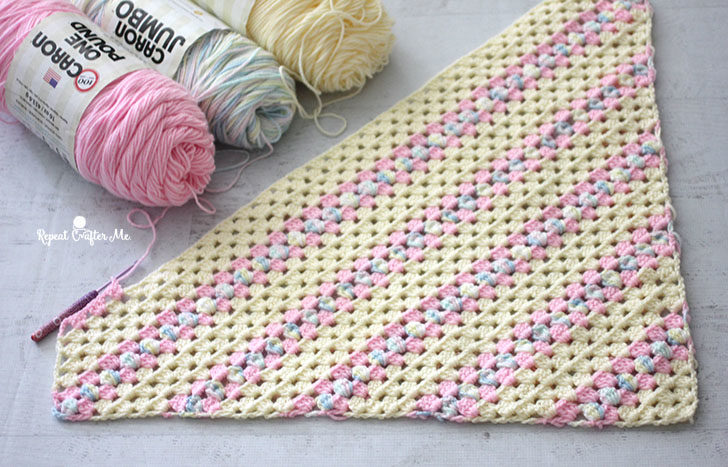
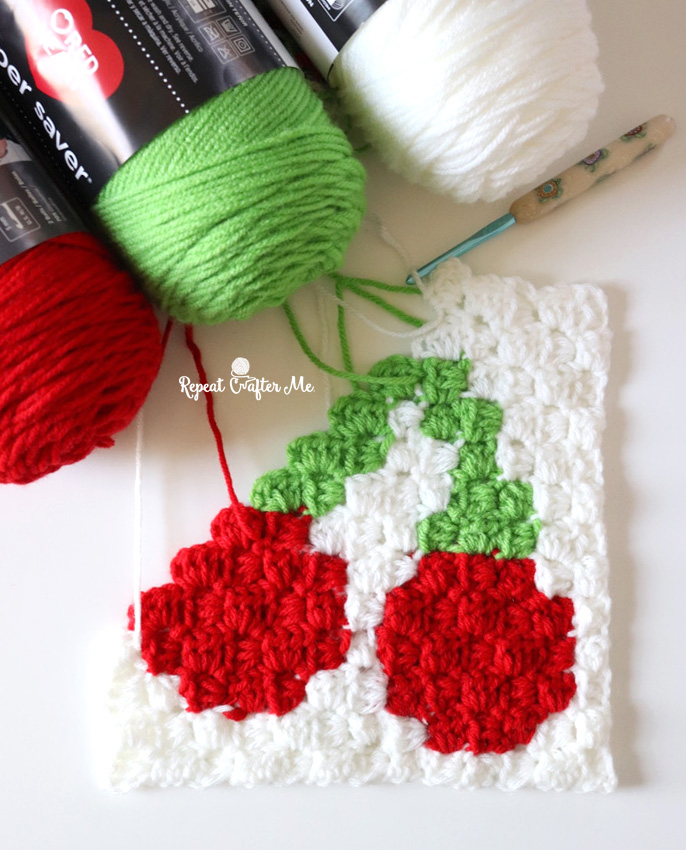
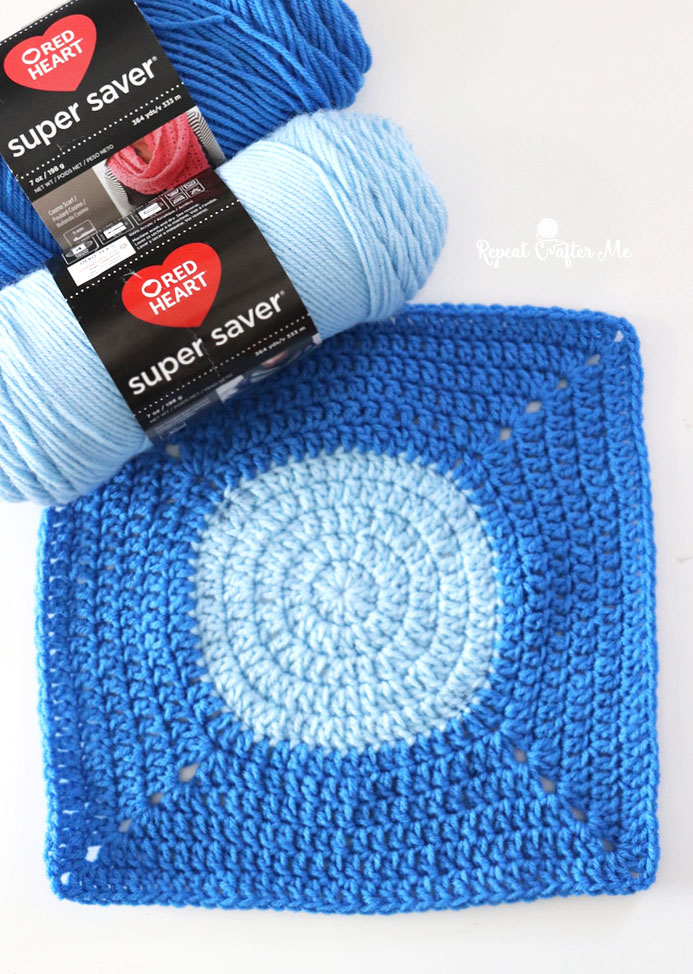
– Worsted weight yarn. I used Lion Brand Vanna’s Choice in Beige, Silver Blue, White, Pink, and Antique Rose.
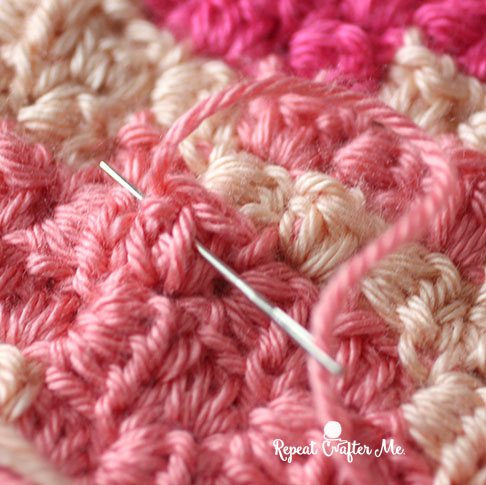
– Tapestry needle
– Pen to mark your squares as you go!
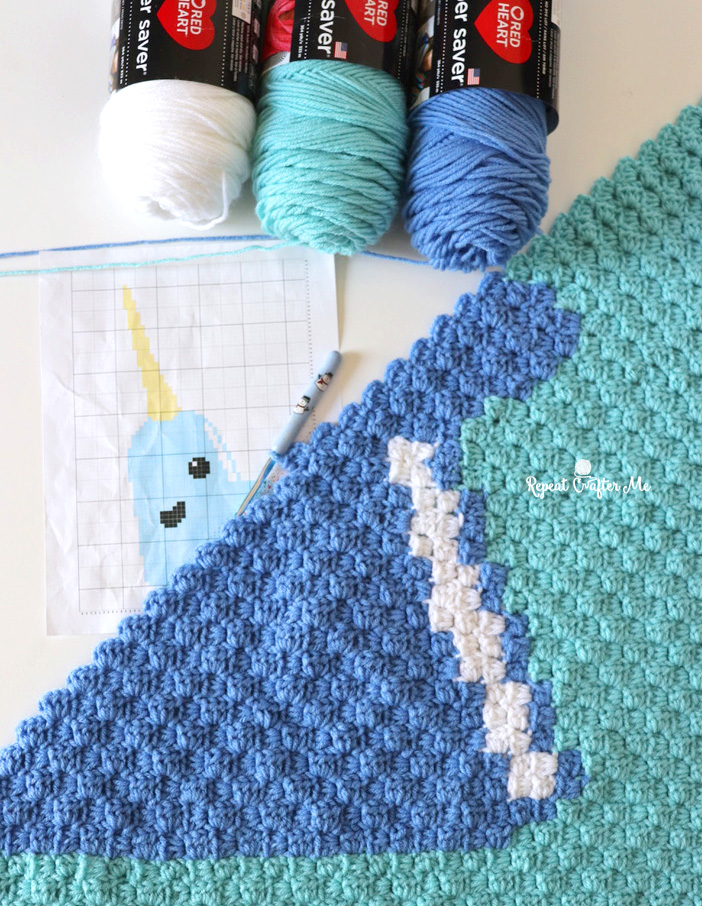
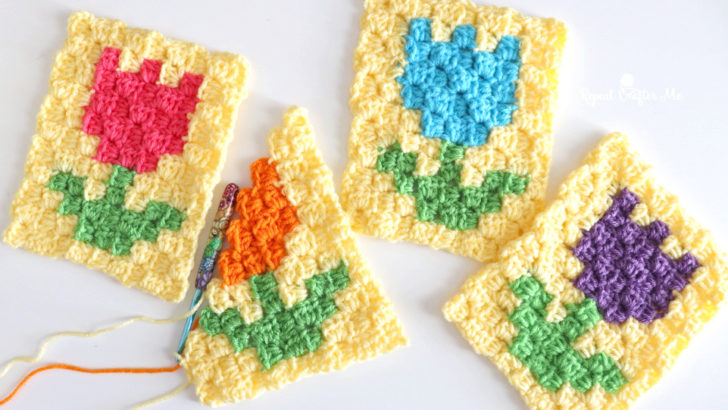
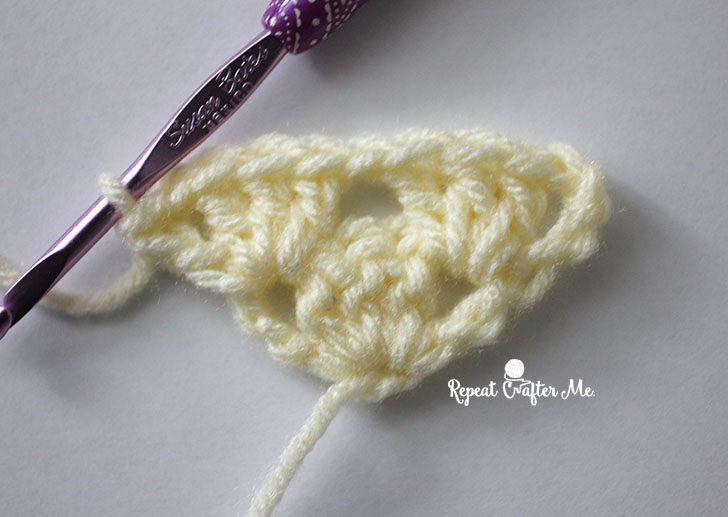
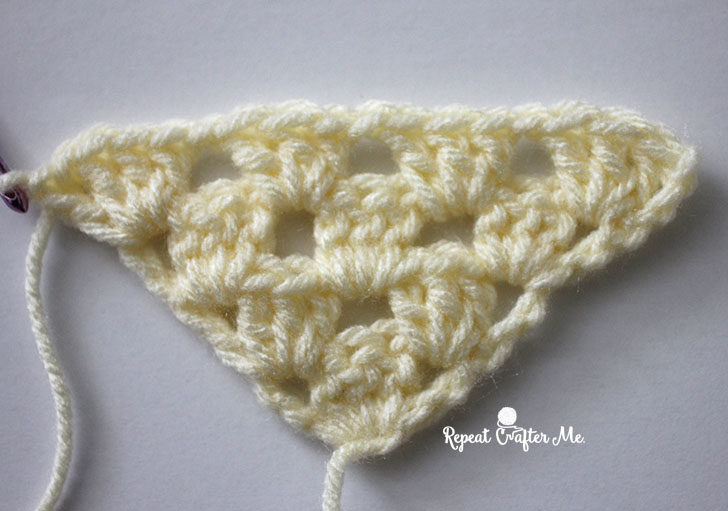
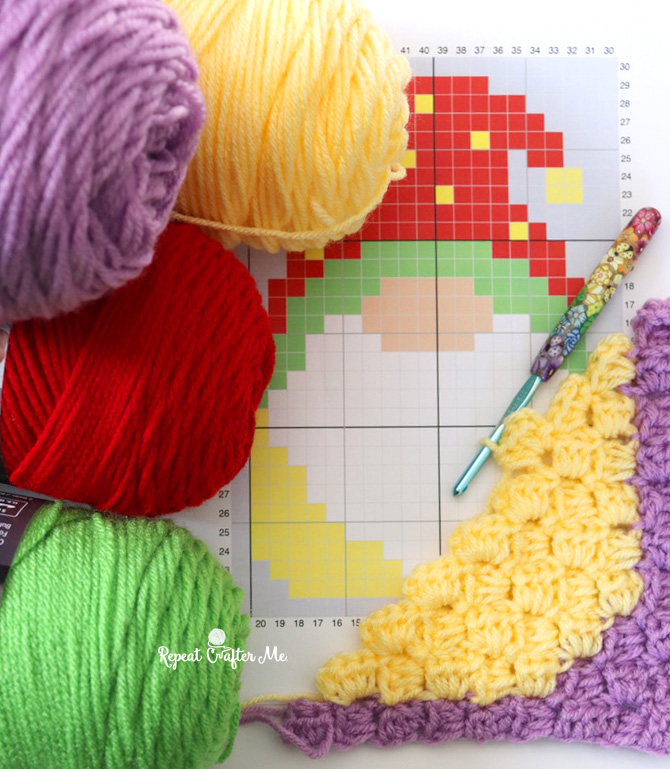
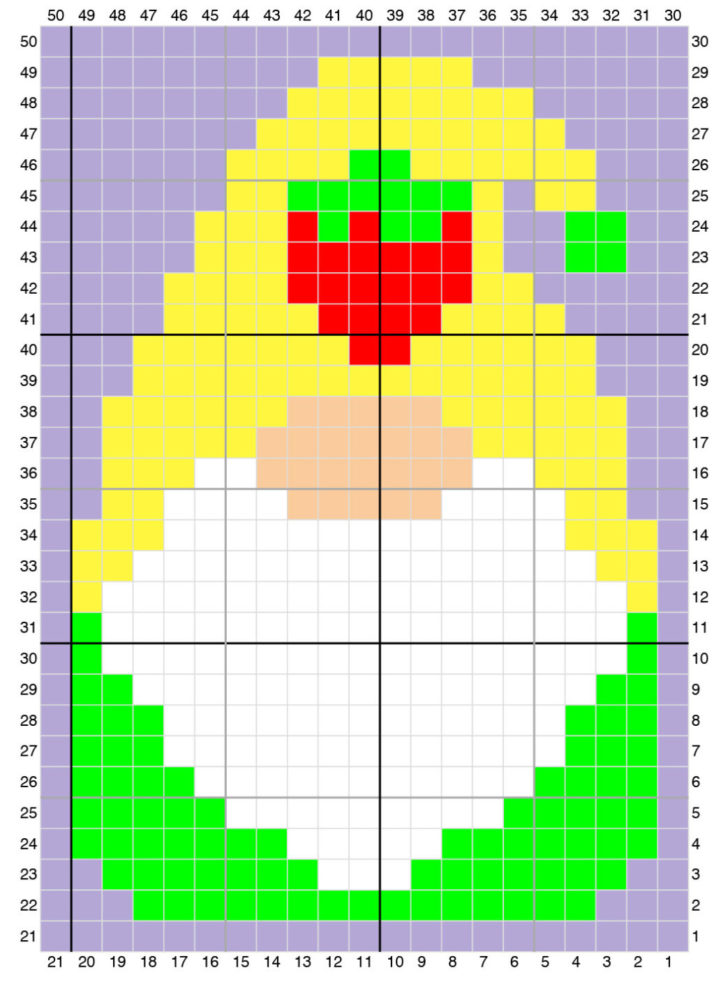
I took a lot of video throughout the creation of this project… but when I looked back on it, it seemed to be too confusing. I decided to show you how to make a C2C by crocheting a small graph. That way you can see how to start, make increases, create your “maintain” rows, and then how to do the decreases. You can apply the techniques in the video to a large more complex graphgan.

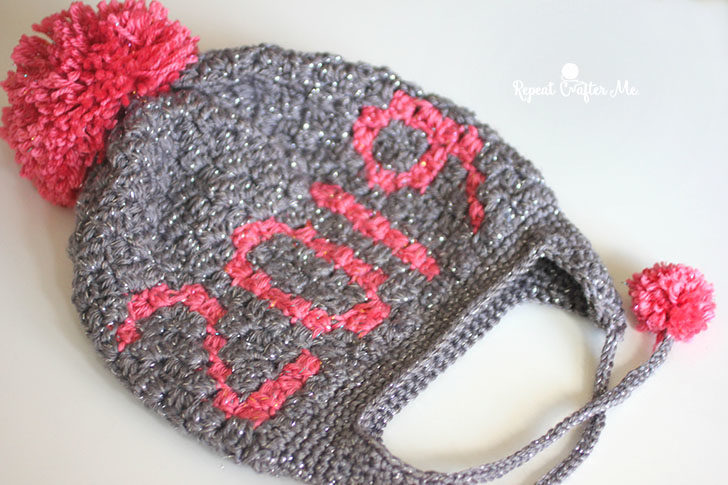
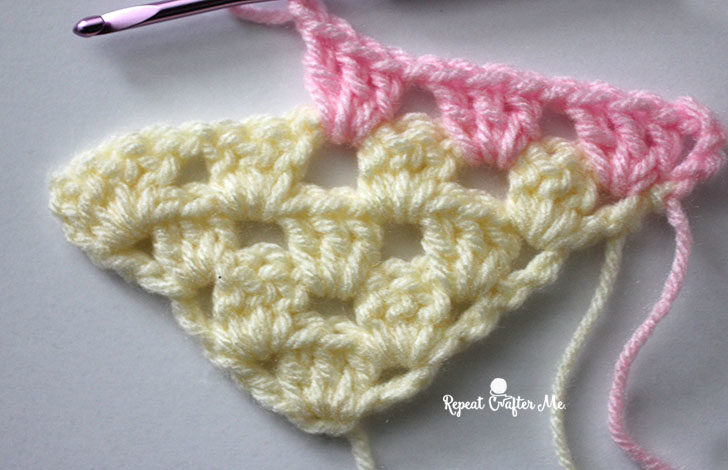
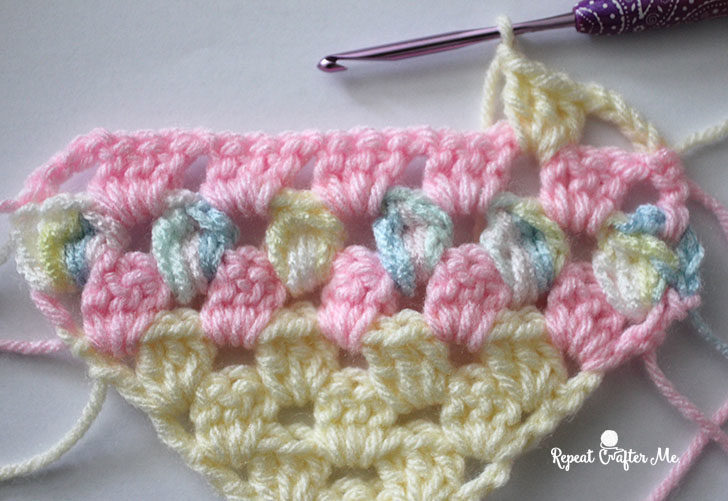
Here is a separate video on how to make color changes!

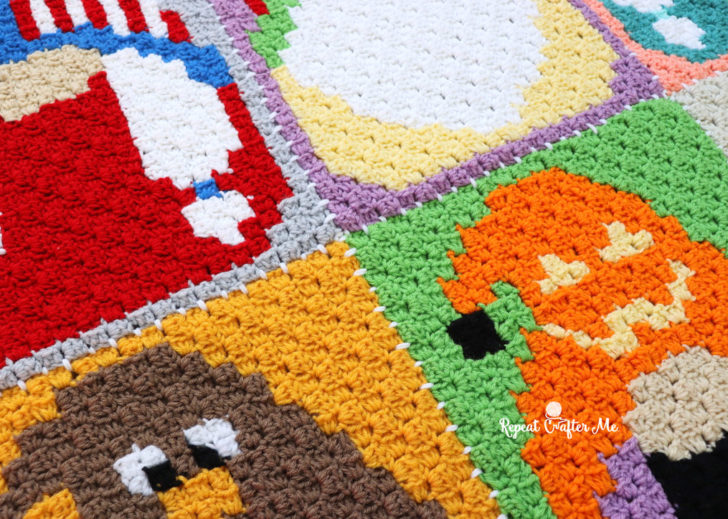
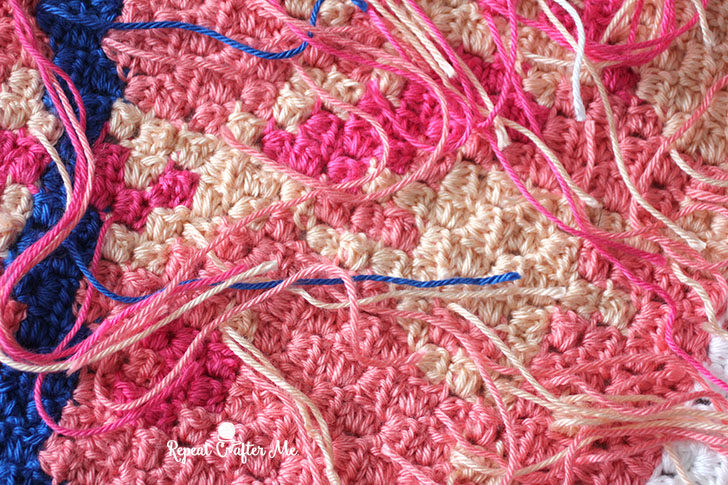
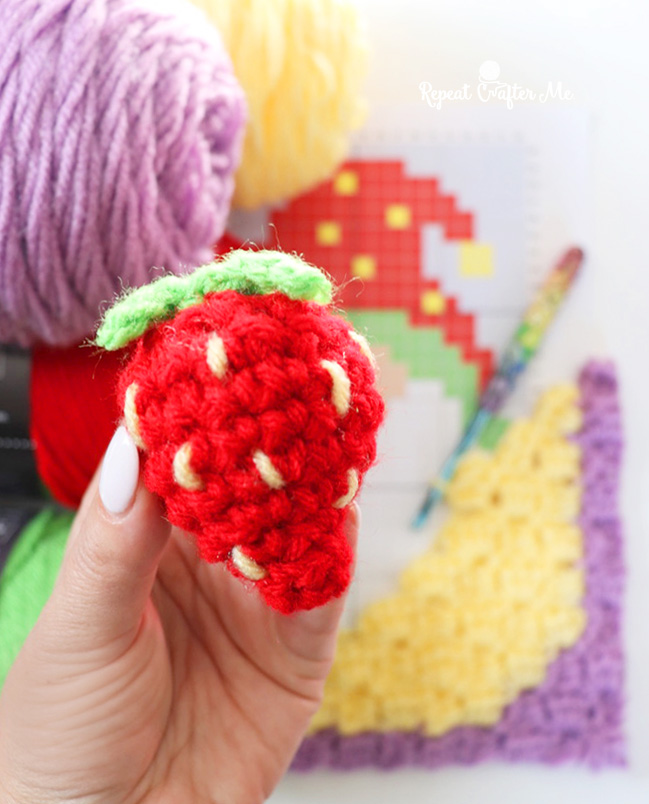
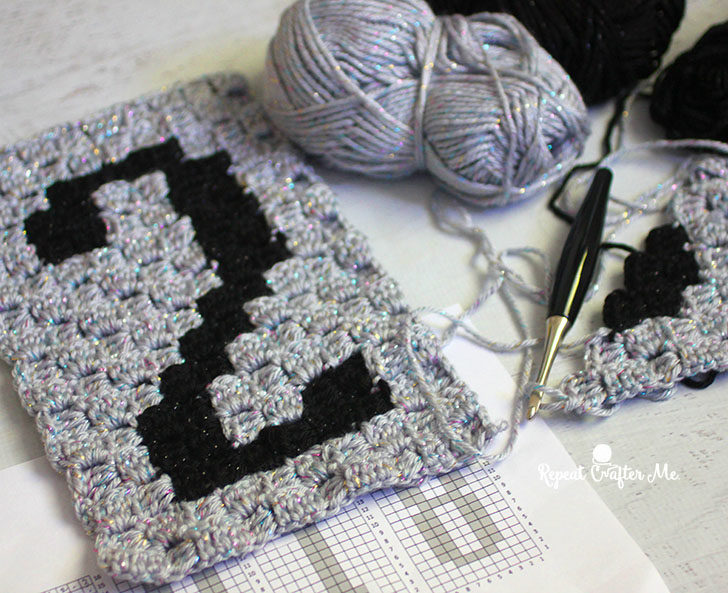
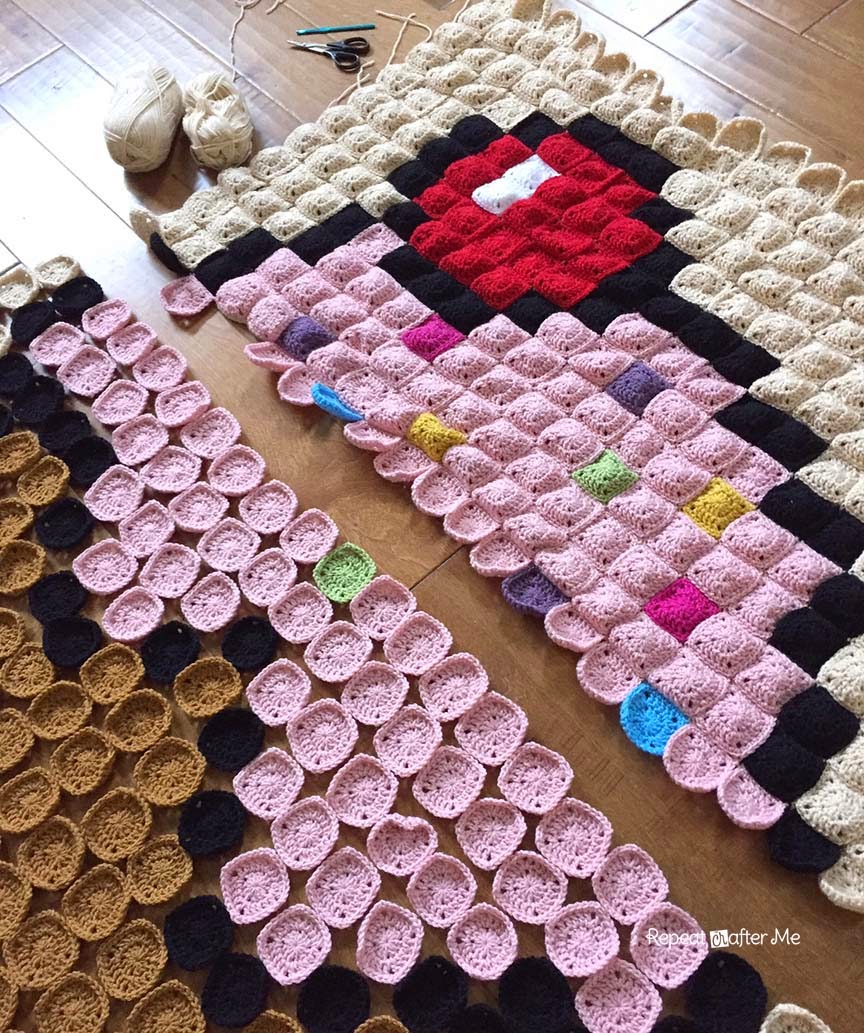
Remember to mark off each square as you go! Double check your work to make sure you haven’t missed a square. If one thing doesn’t line up, the whole design will be thrown off.
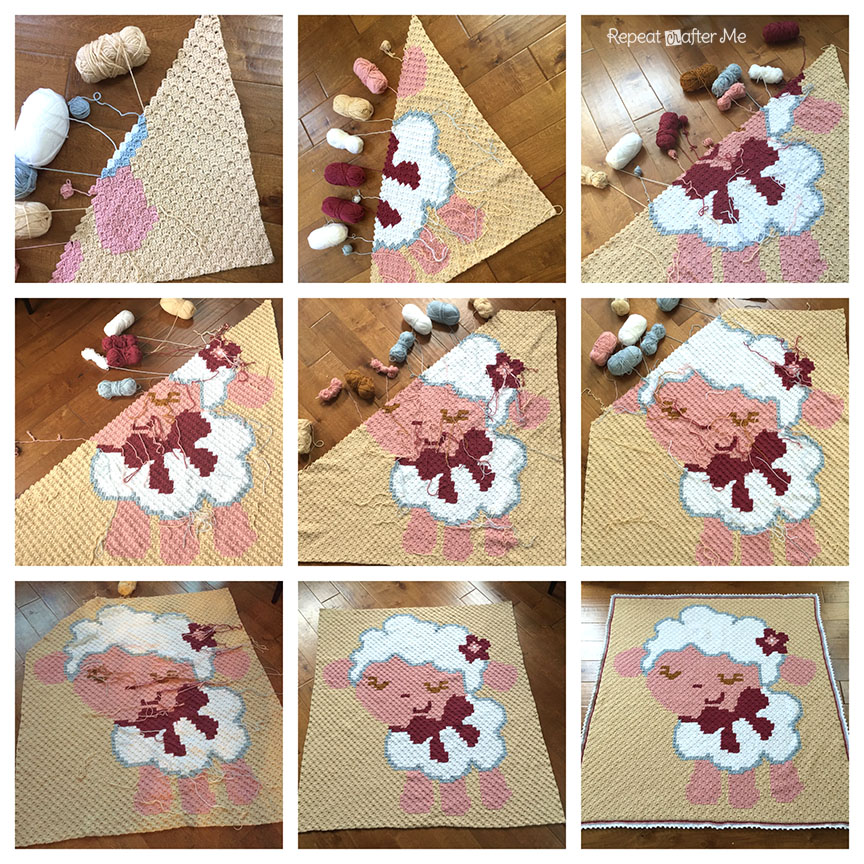
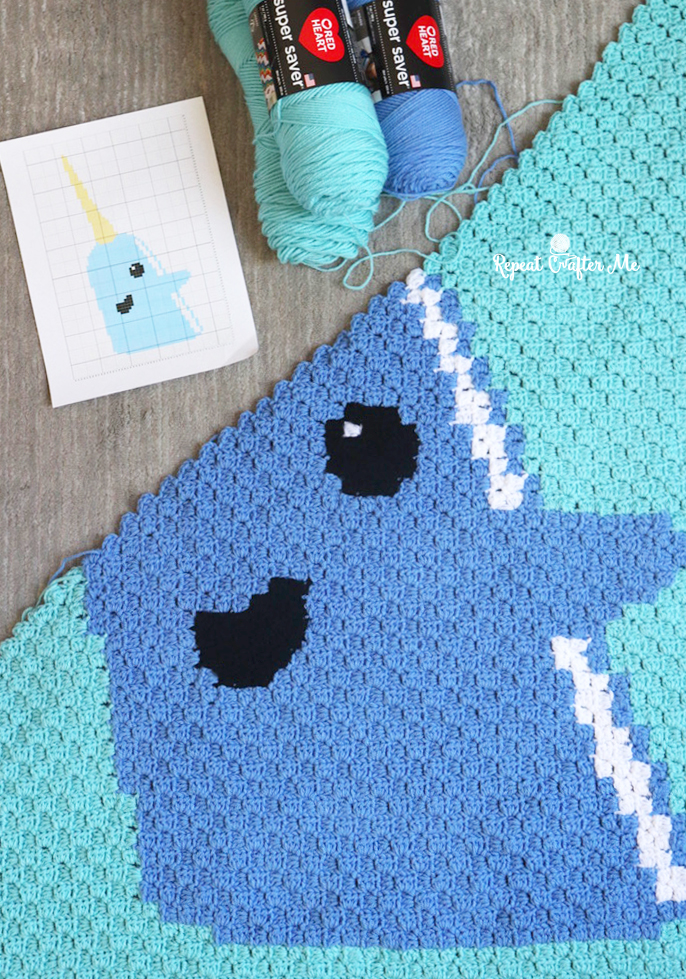
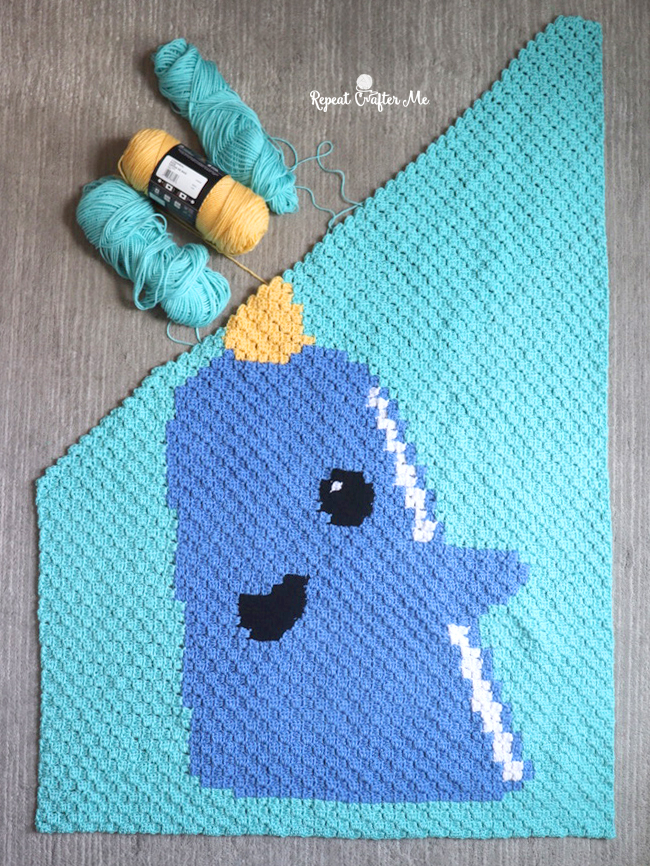
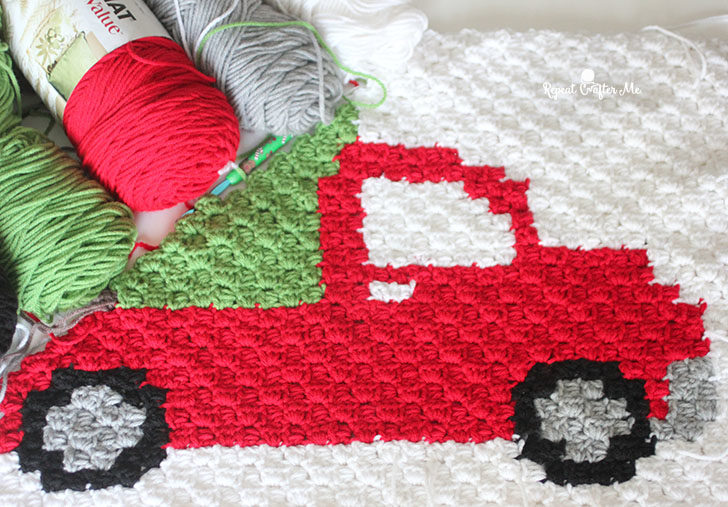
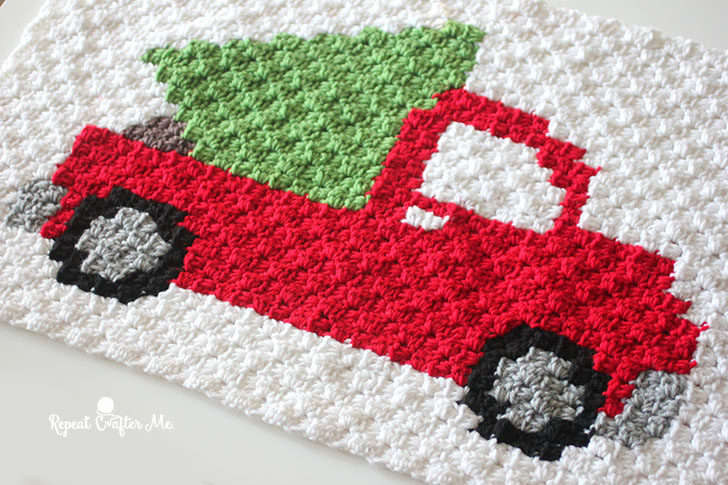
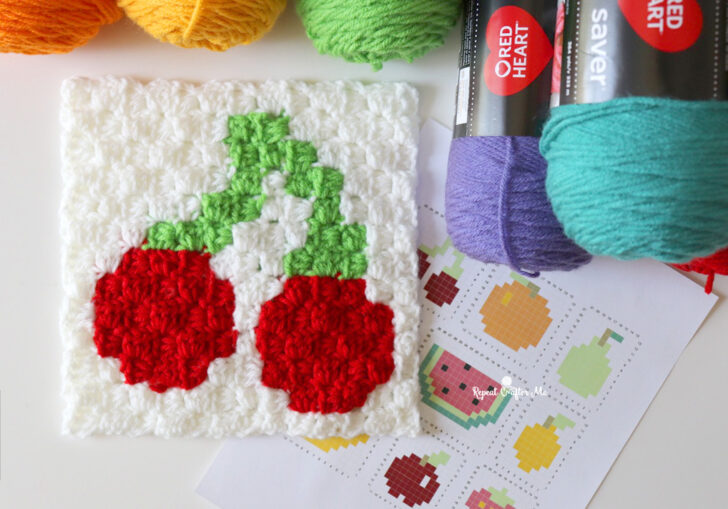
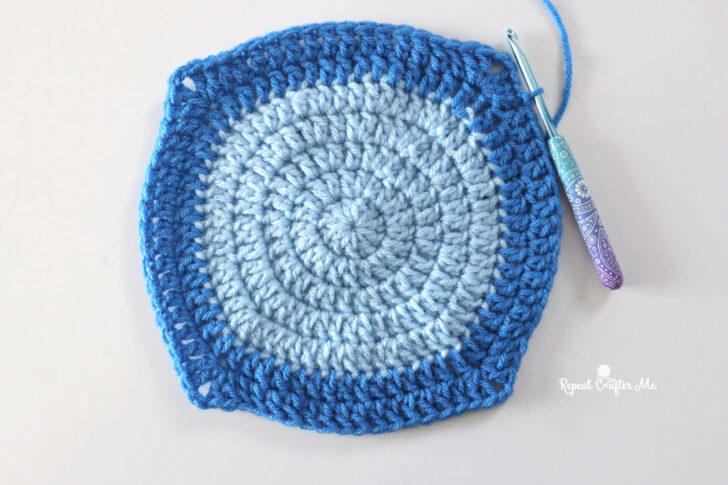
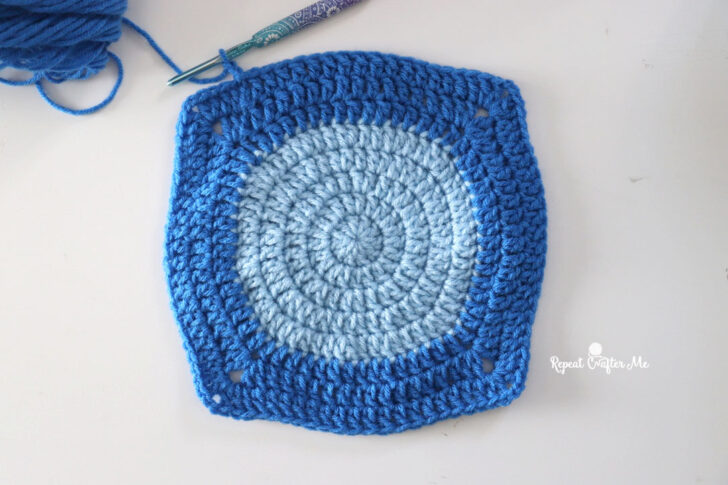
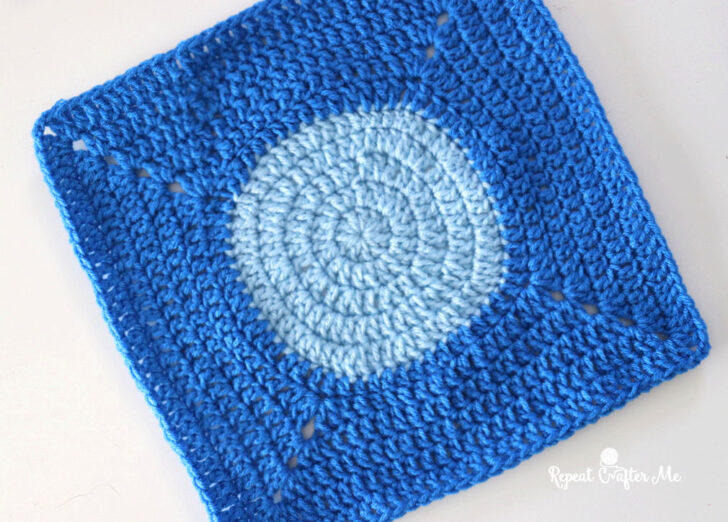
The entire C2C Graphgan took me a little over a week to complete. The finished size is approximately 58×64 inches and the graph was 73×70 squares. You can see my day to day progress in the pictures below!

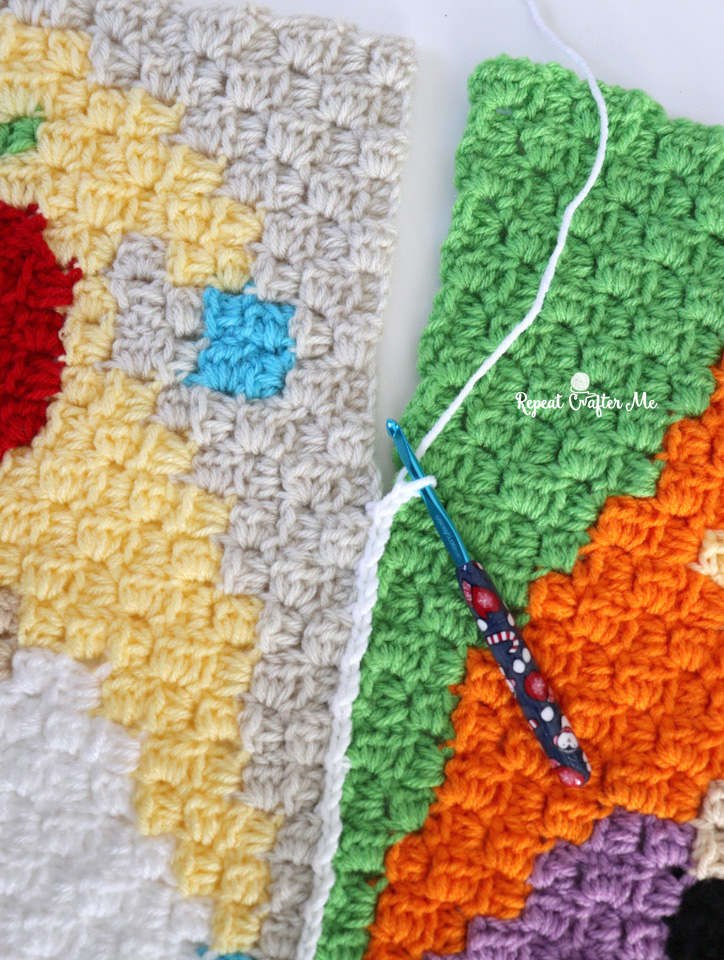
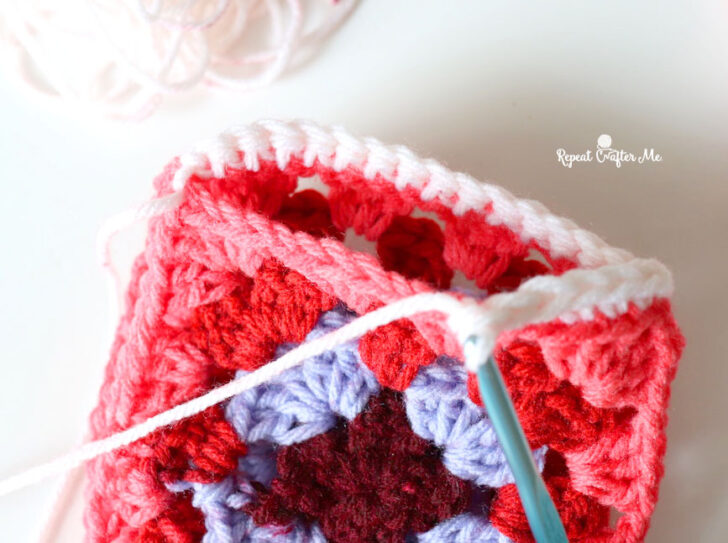
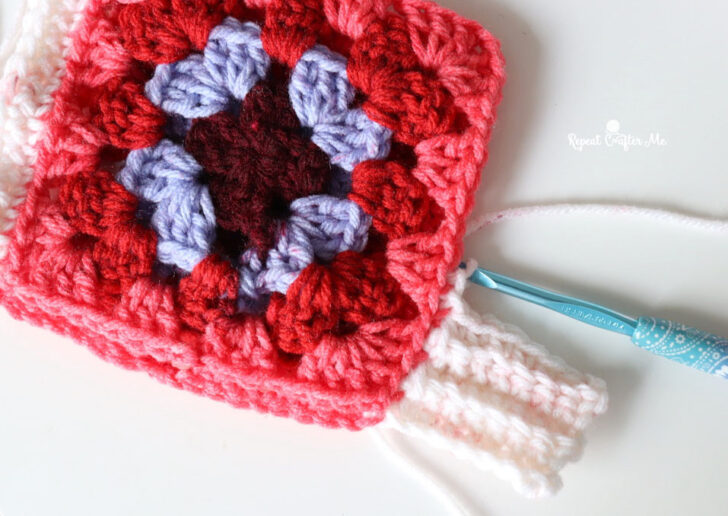
Now lets talk about the border! 
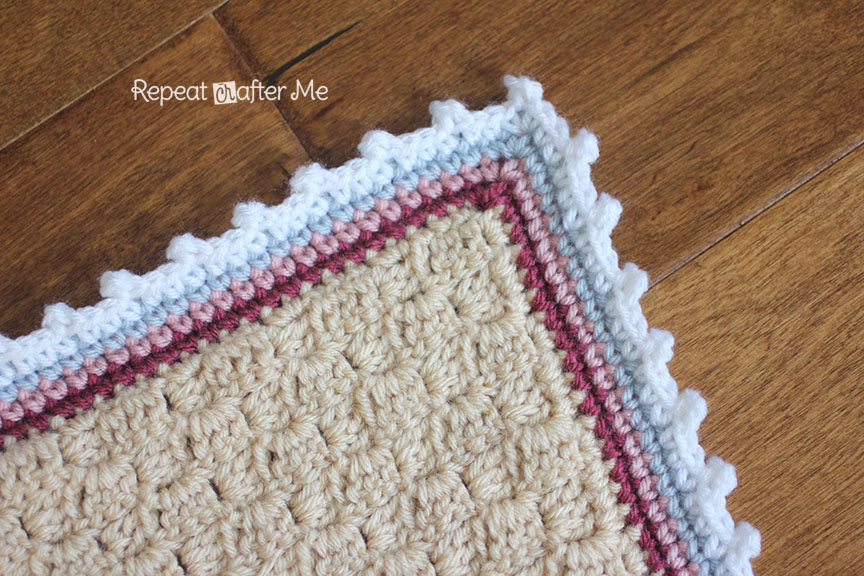
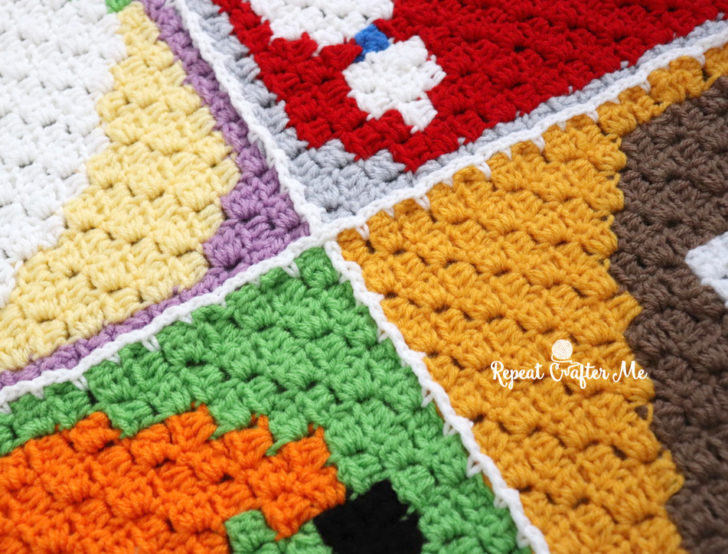
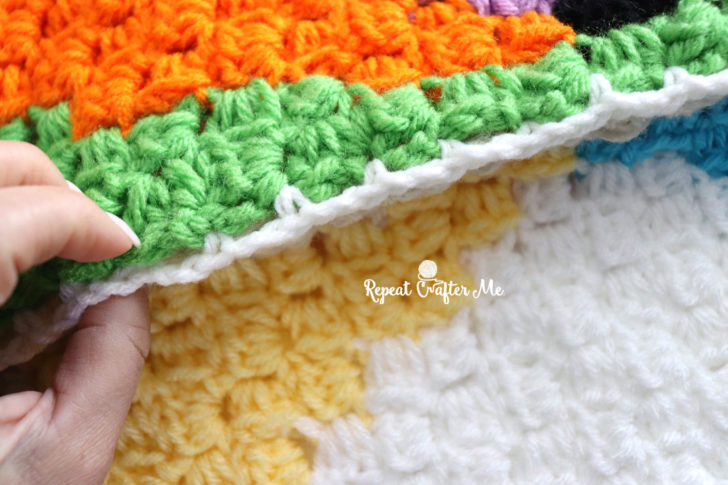
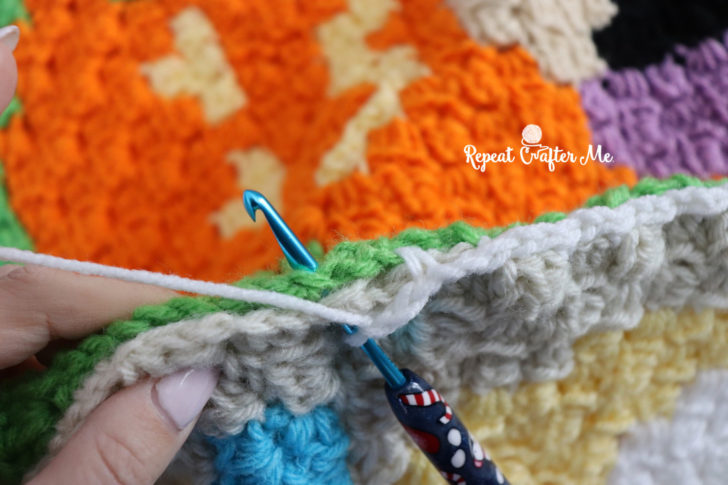
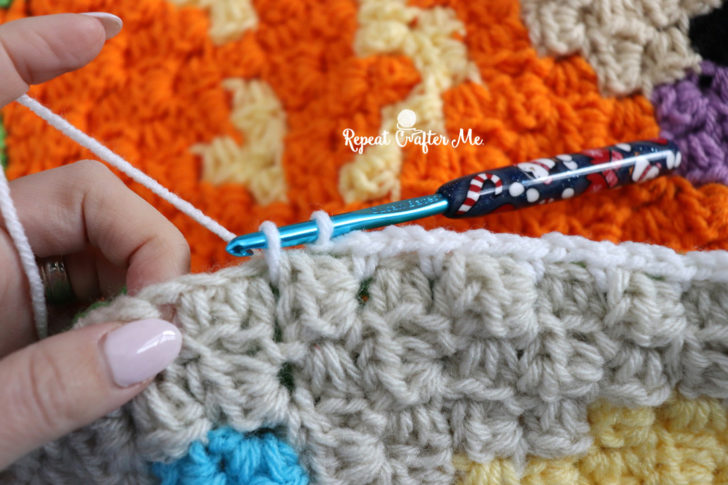
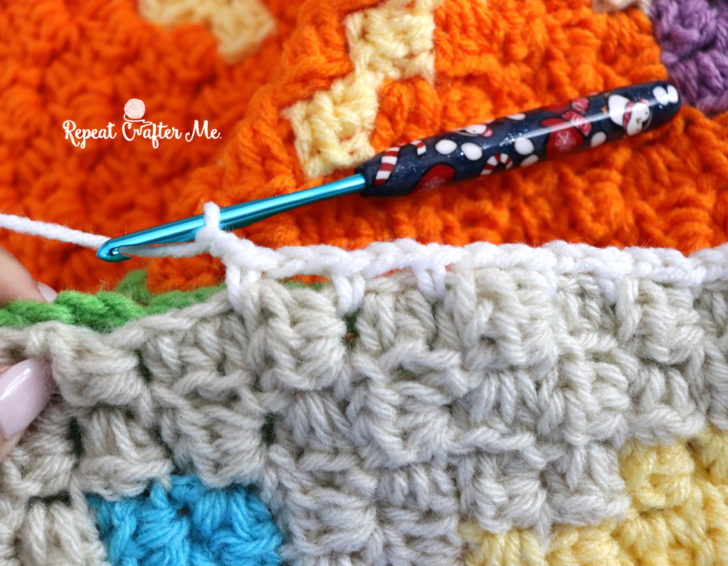
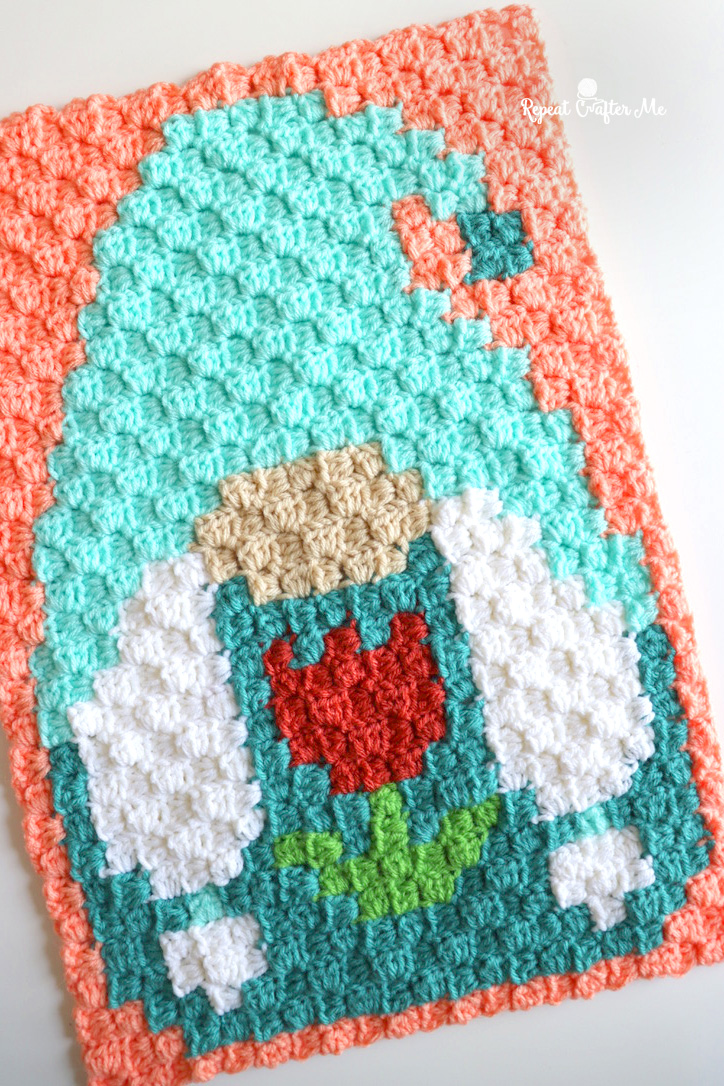
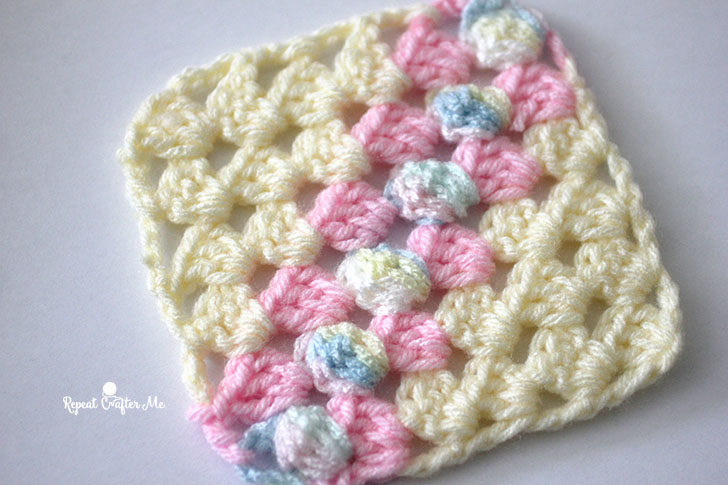
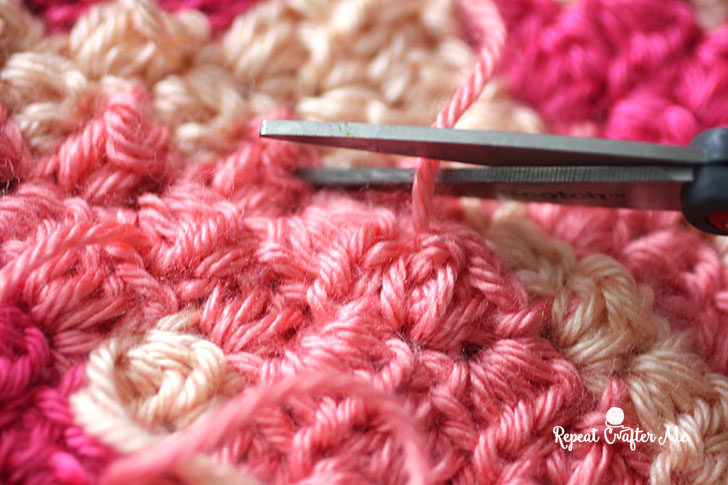
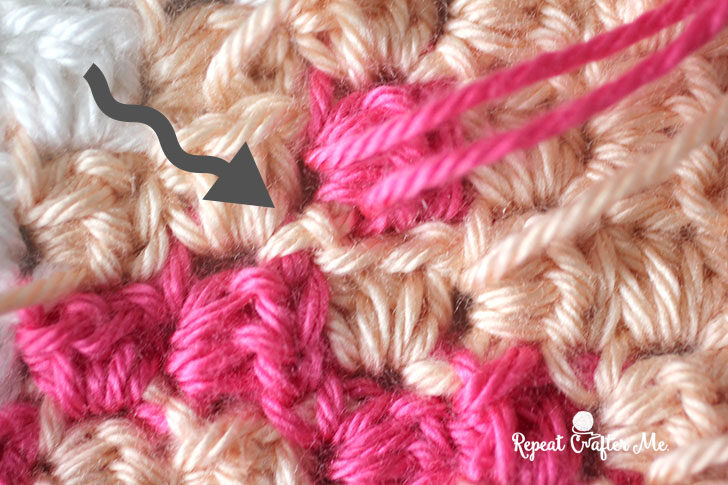
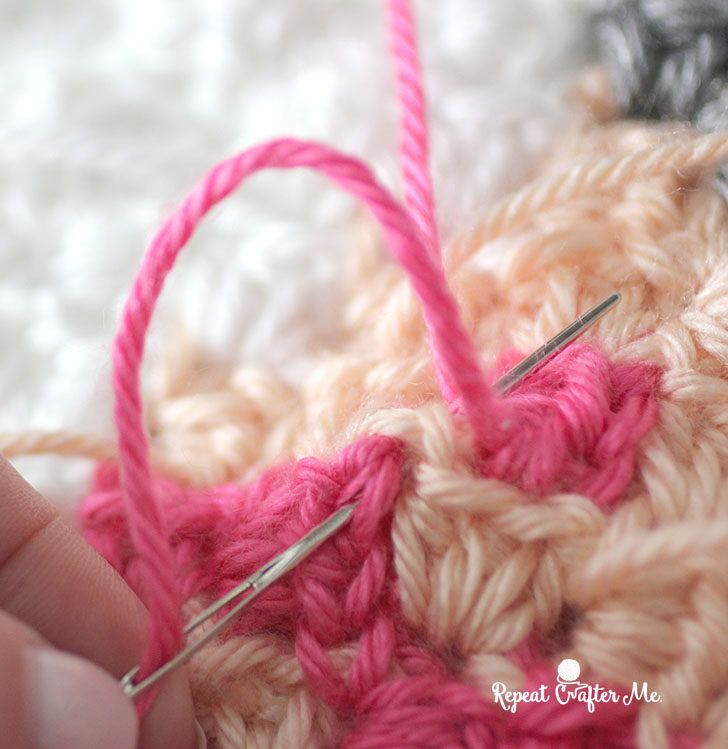
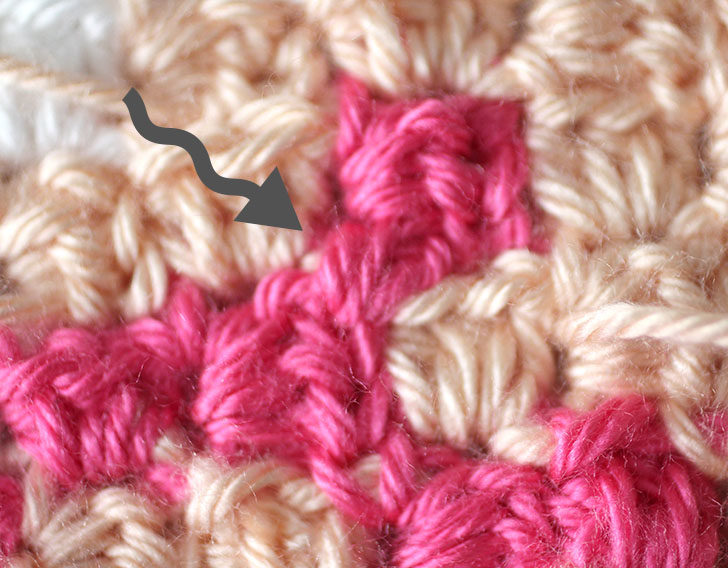
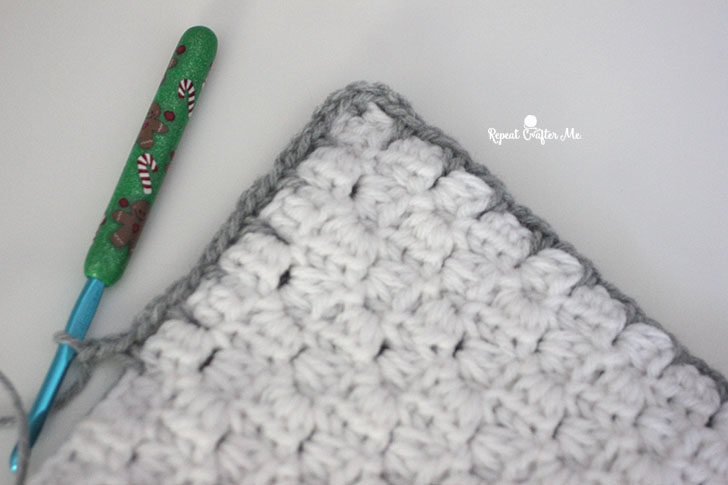
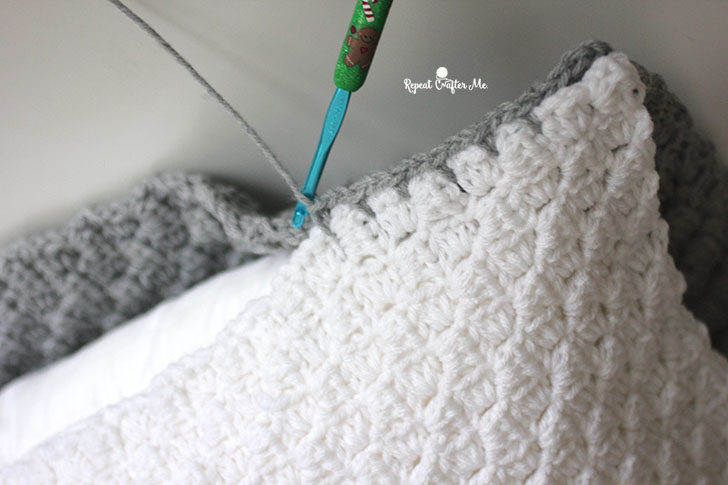
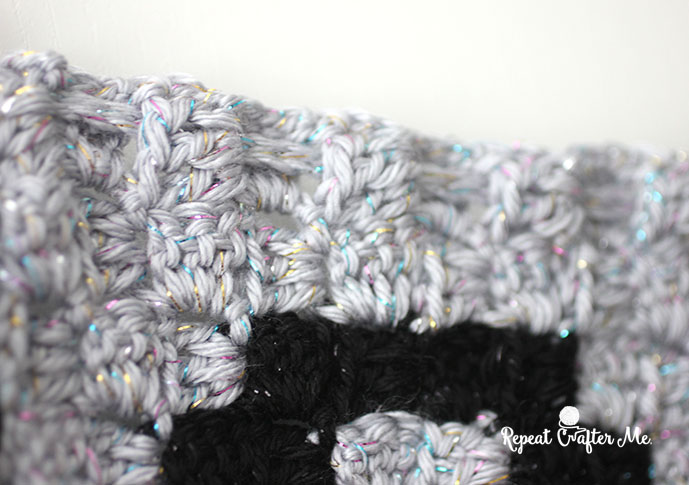
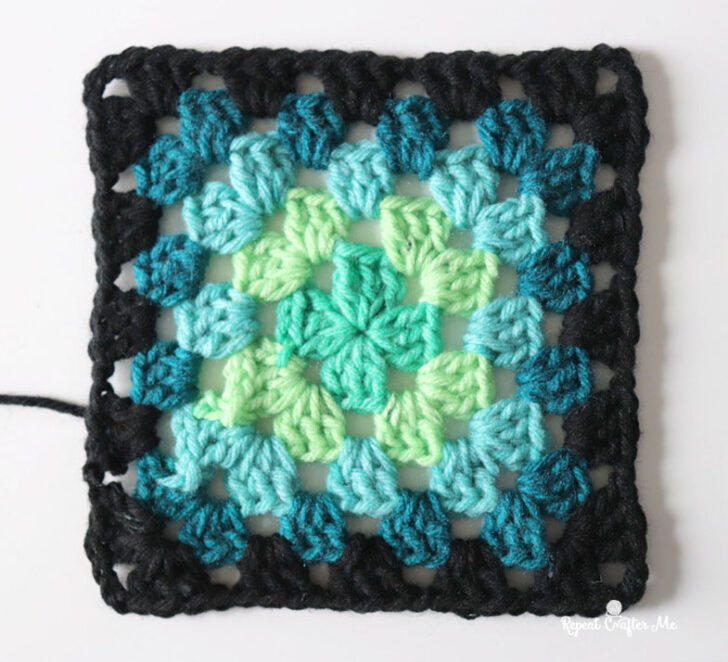
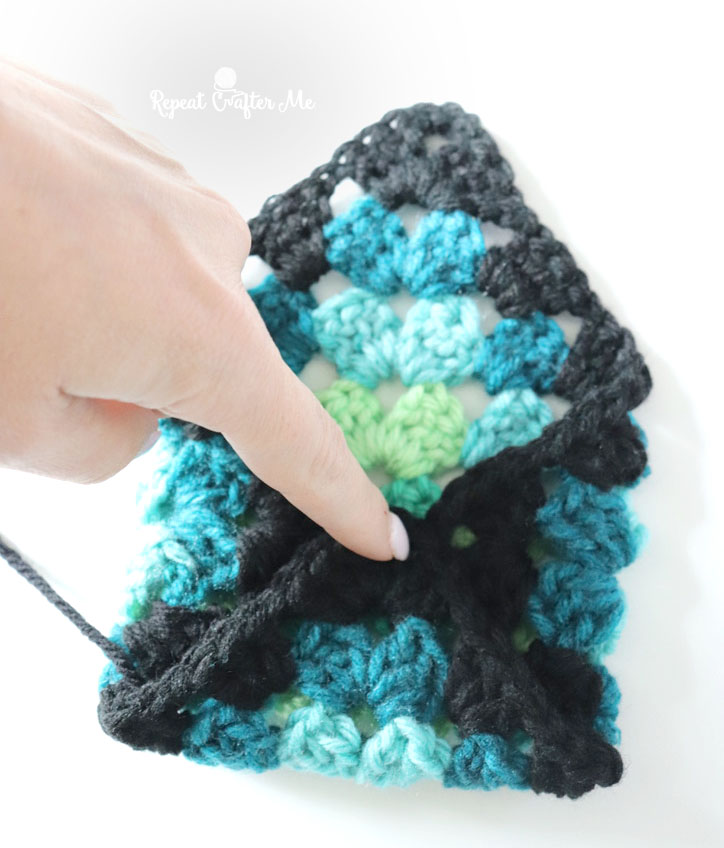
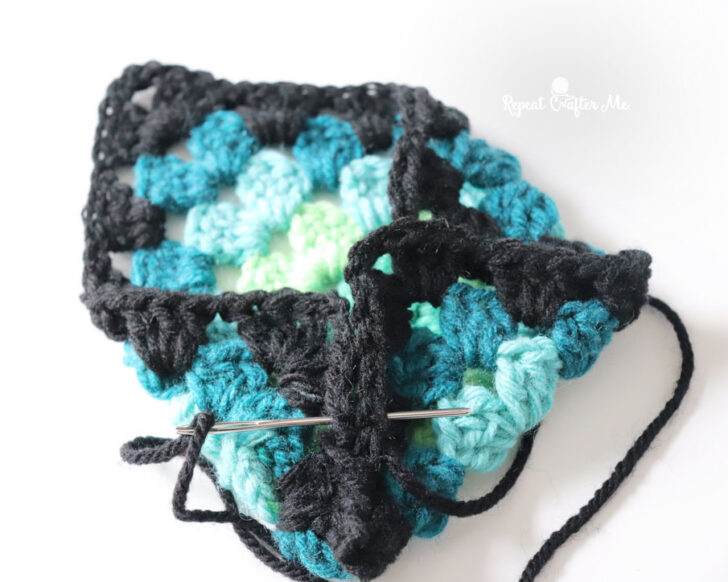
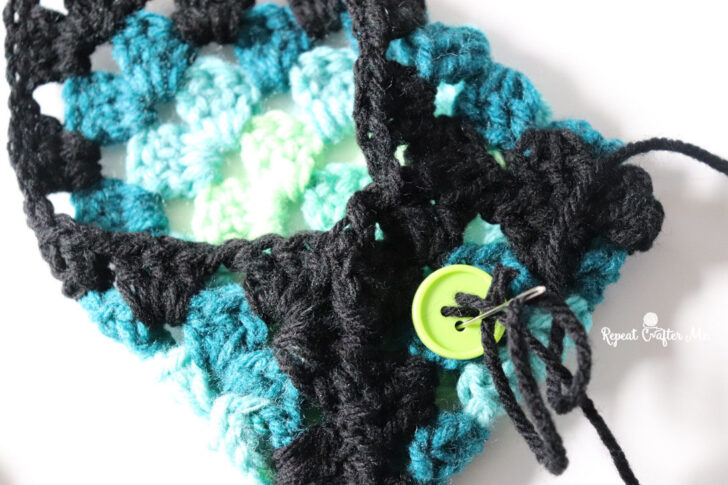
When you finish the C2C you will notice your edges will have a combination of a chain followed by 3 double crochets. To make a single crochet border, you want to make 2 SC in the chain parts and one SC over each double crochet part. This will create a nice even edge.
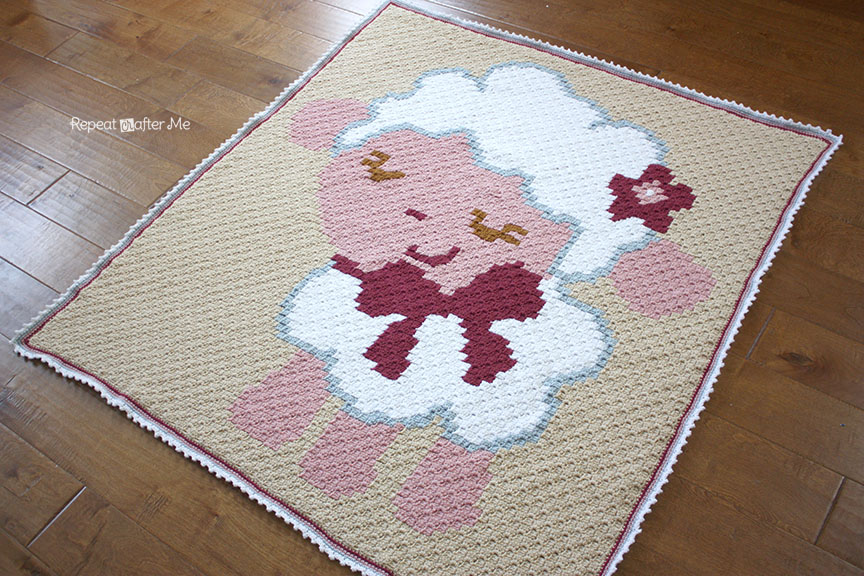
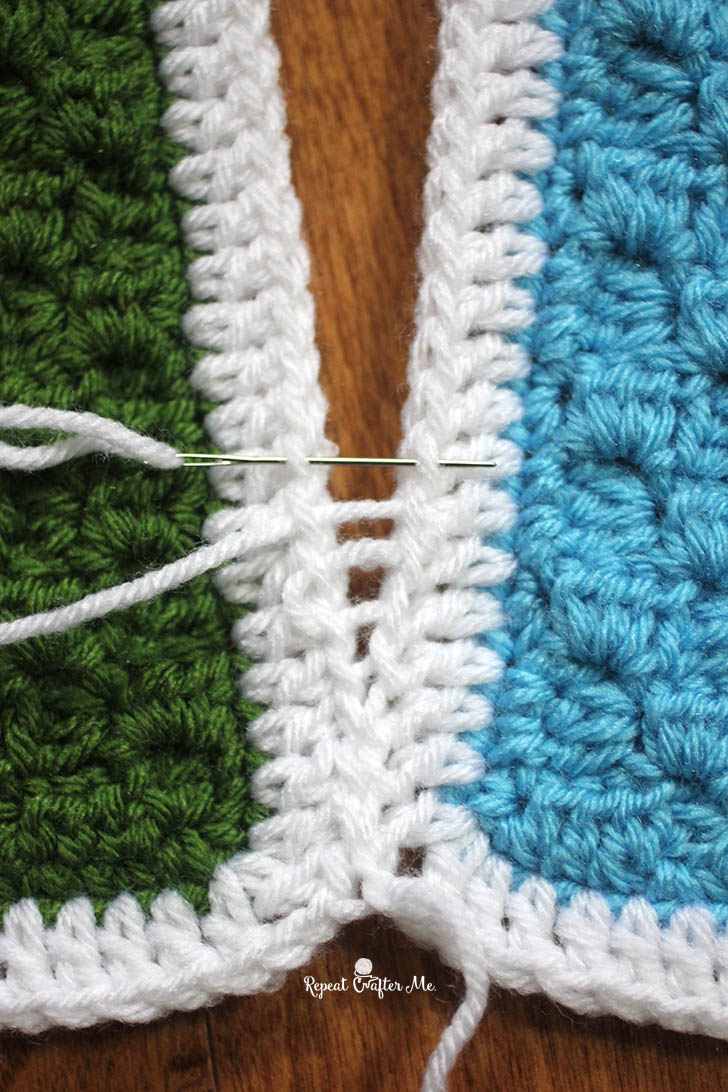
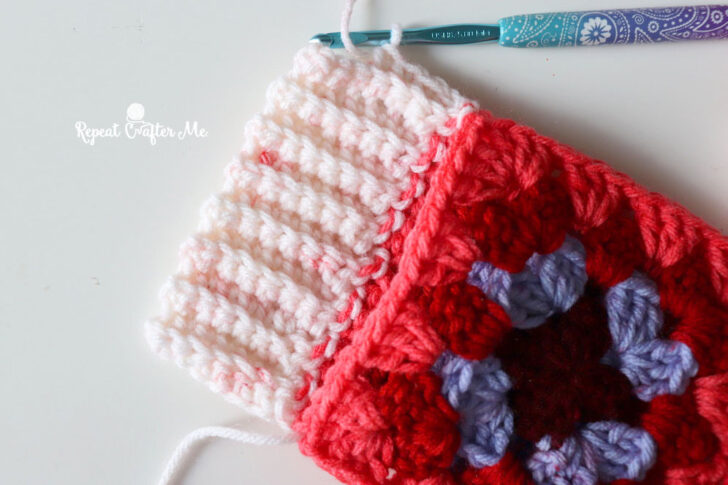
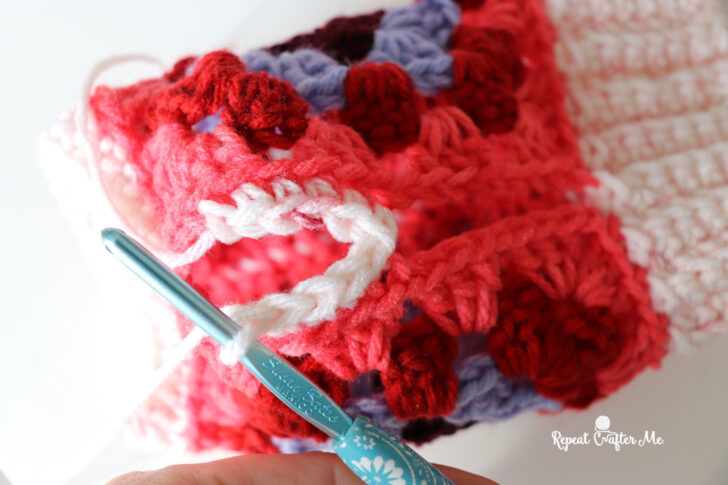
I made a simple border using 4 rows of single crochets (first beige, then antique rose, then pink, then blue) finishing with a picot edging in white. Each corner needs to have a SC + 2 chains + SC.  The picot edging is 3 SC, *chain 3, slip stitch to first chain, SC in next 3 stitches, repeating from *. Try your best to land on a picot in each corner. If you need to add in an extra SC or skip a stitch, it really won’t be that noticeable. Getting a clean corner is more important!

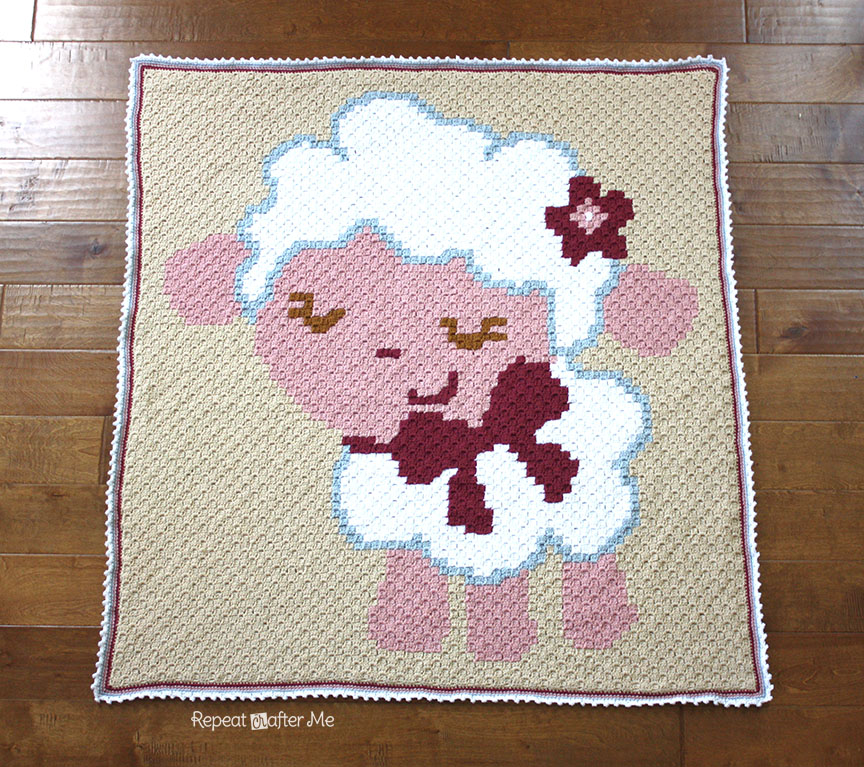
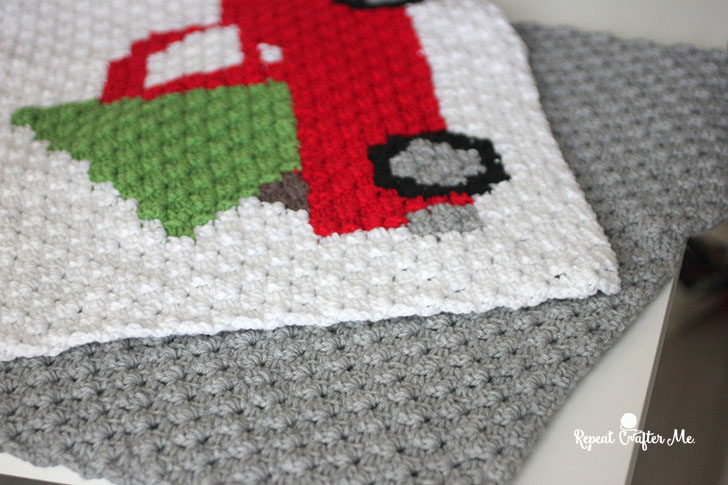
The back is just as beautiful as the front (as pictured below)! The image is just reversed.

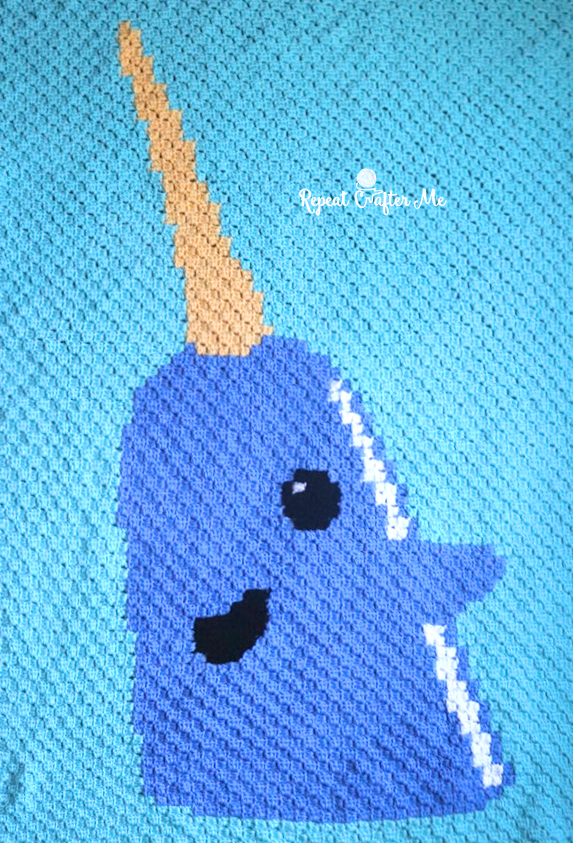
I didn’t plan this out but I love a happy accident! This C2C graphgan fits perfectly on a twin size bed!

I hope you like my baby sheep C2C! Looking forward to seeing what you create as well!
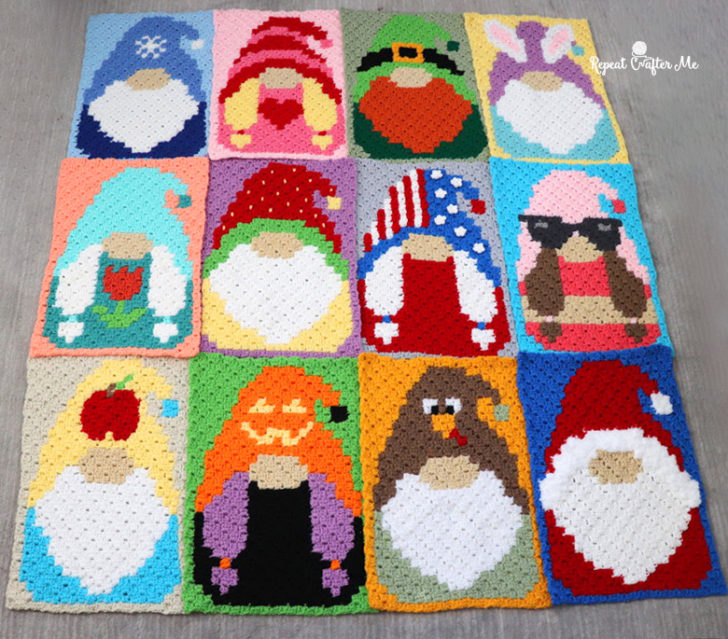
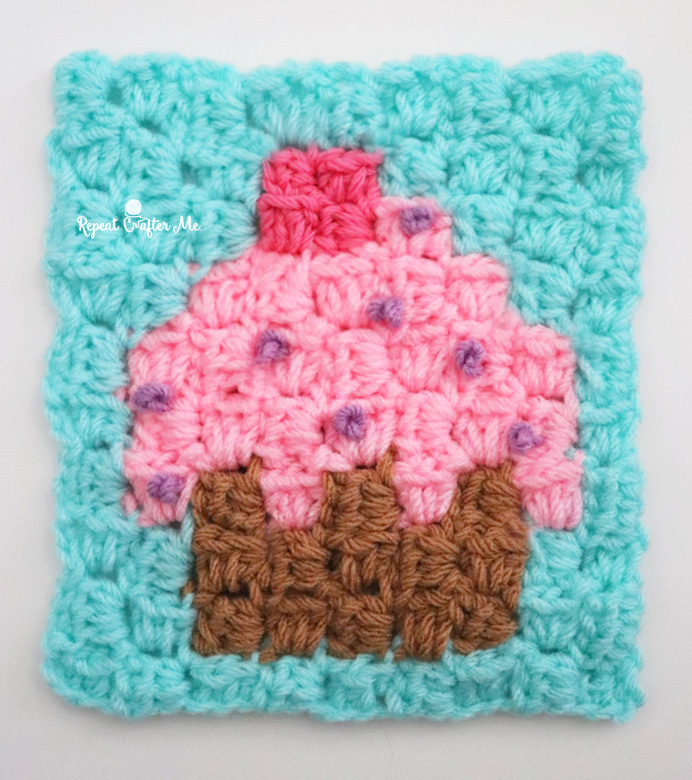
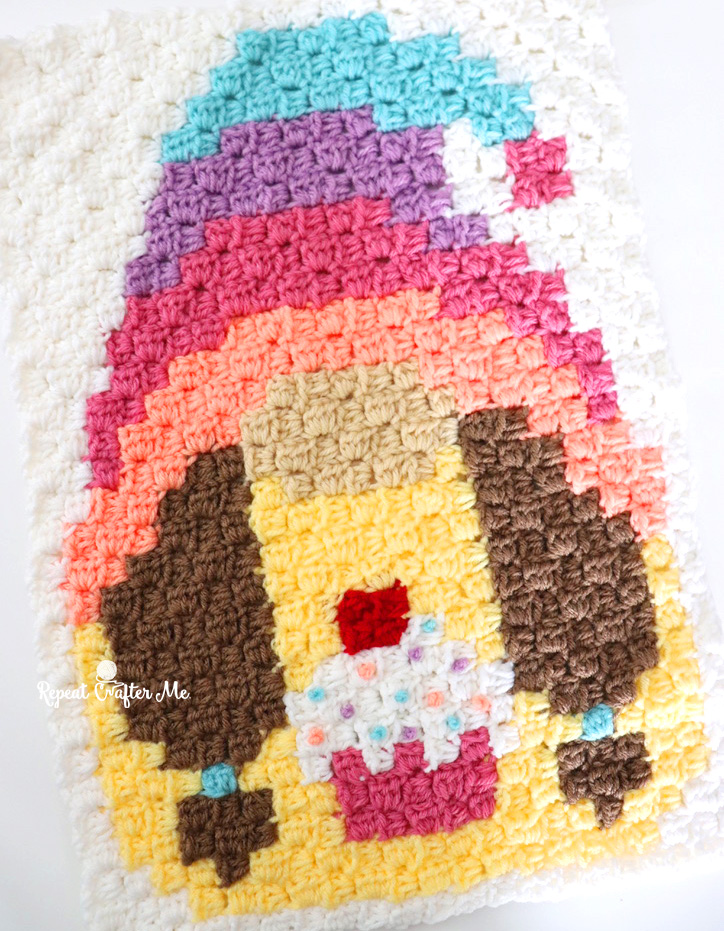
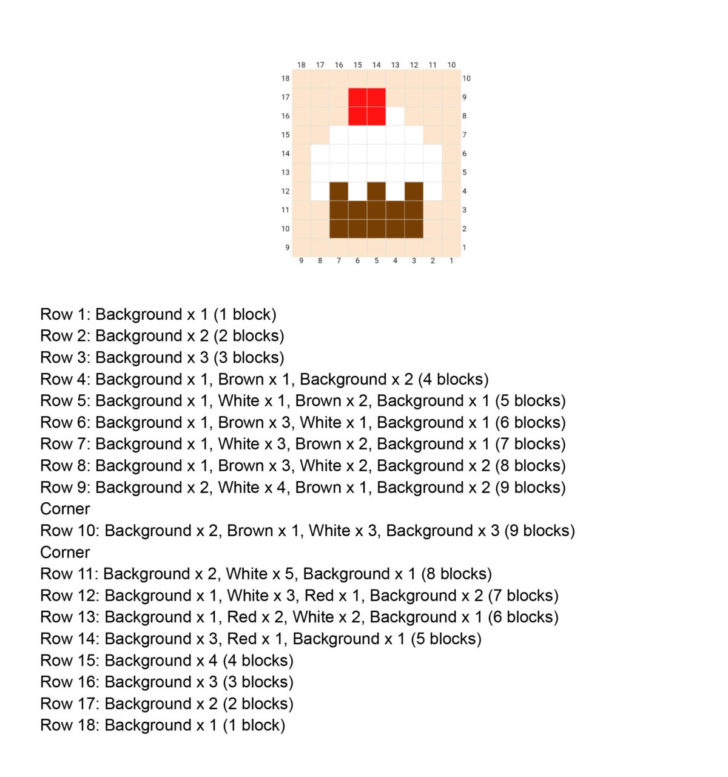
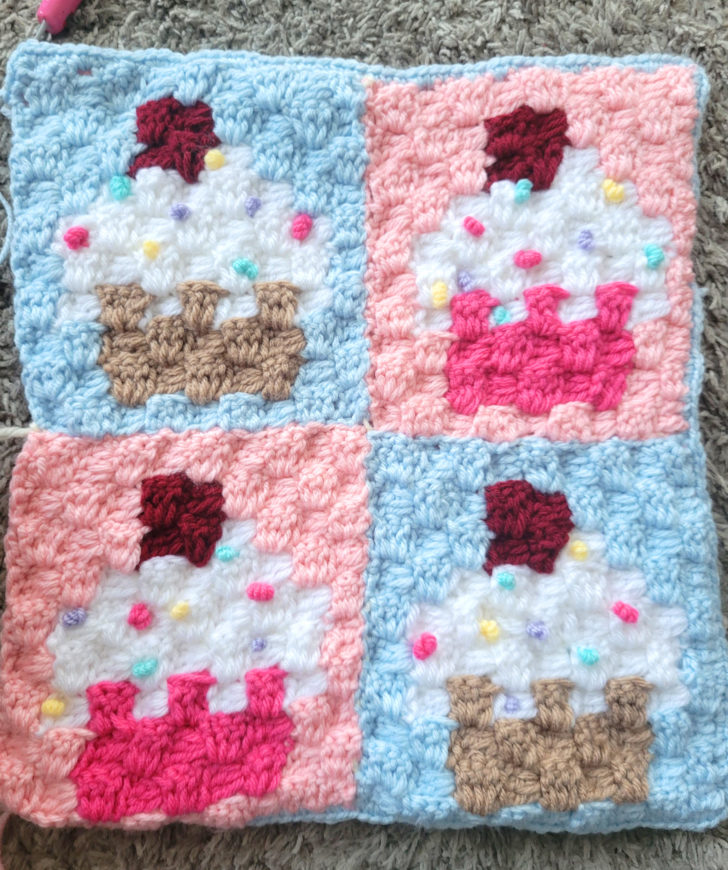
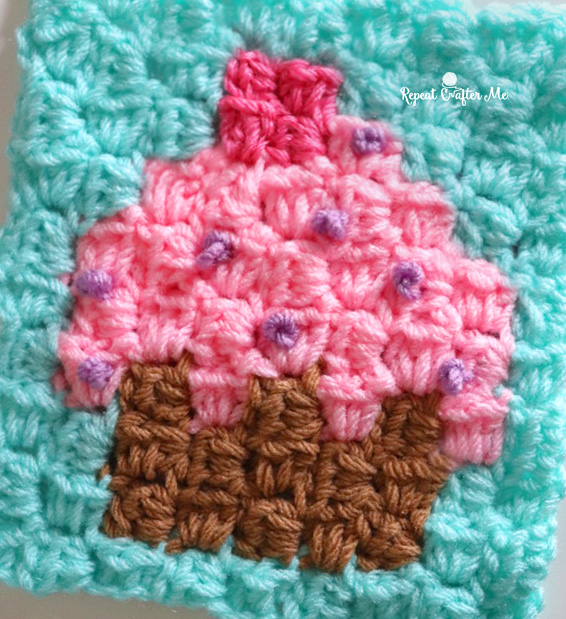
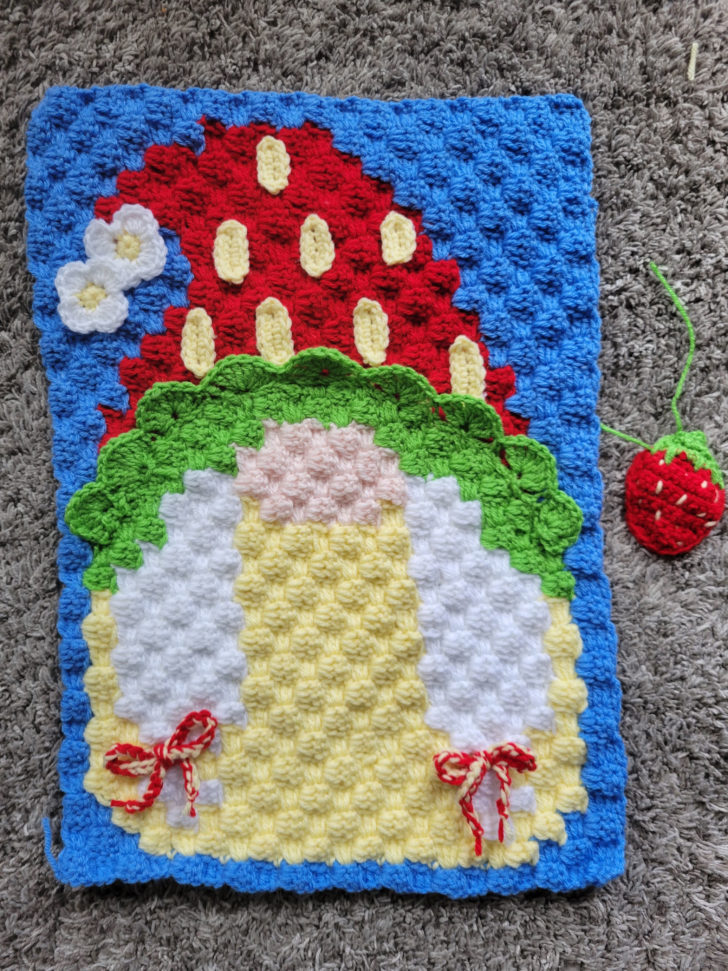
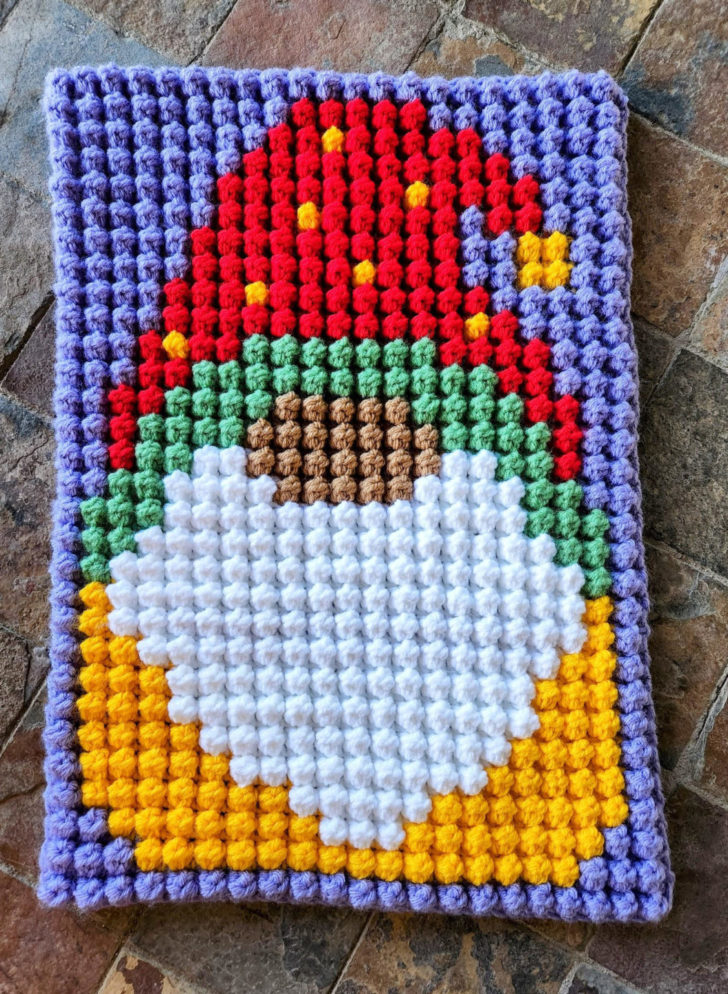
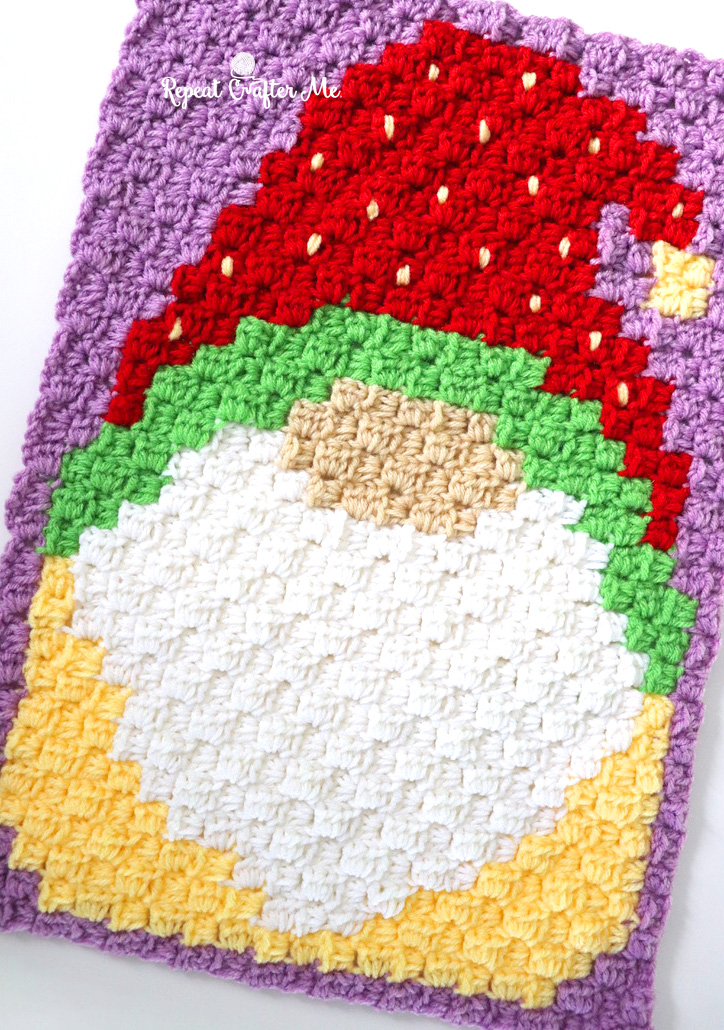
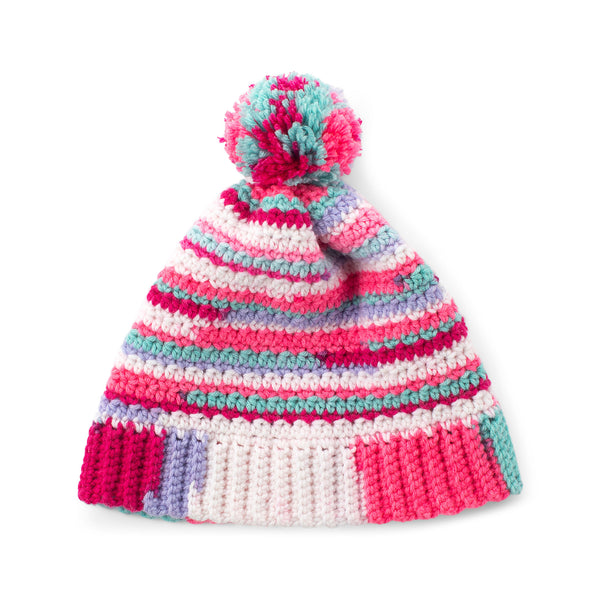
If you like this C2C blanket you may also like my Cupcake Pixel Square Blanket 
or my Bobble Stitch Pixel Blanket!

*** You may make and sell products from my patterns but if you do I ask that you link back to my post. Please do not copy and post this pattern and claim it as your own. Please do not re-publish photos as your own.*** 
Want more free patterns? Keep in touch on my Repeat Crafter Me Facebook Page for new pattern sneak peeks and when they will be available on my blog! And feel free to post pictures of your finished hats and/or links to your shops on my Facebook wall so all can see. Be sure to also follow me on Instagram! I love when you tag me (@repeatcrafterme)!

NEW!! I would love for you to join my brand new private Facebook group: Repeat Crafter Me Crochet. Tons of kind and supportive women with crocheting skills of all levels. Post your current projects, ask questions, and get inspired!

Filed Under: Crocheting, Uncategorized 70 Comments

Easy Corner-to-Corner Crochet Joining Technique

December 2, 2022

It’s time to join our crochet gnomes! This tutorial will work with any corner-to-corner crochet project and the best part is that you DON’T need a border on each of your individual C2C pieces! This is a very simple and effective technique. If you have already made individual borders along each of your gnome panels, don’t worry, you have lots of joining options that I will list out at the bottom of this post.

The first thing I would do is lay out all of your gnome panels in the correct order and position you want them. Choose a yarn color that you want to join your C2C panels with. I am choosing white – simple and clean! You are going to want to join all the seams, first going vertically, then going horizontally down the line. I try to explain this better in my video below:

Holding two of the panels together, you will be making a Single Crochet stitch between the pixel blocks, then make a chain 2 and reach your hook over to the next space between pixel blocks and make another SC. Continue until you have joined all the C2C panels.

The backside has a cool stitched look to it as well!

Alternate joining methods if your C2C panel has a border on it:
Join using the Braided Join Single Crochet as seen in my Corner-to-Corner Celebration Blanket.

Slip Stitch the front loops together as seen in my C2C Bird Blanket

Basic Single Crochet Join as seen in my Emoji Blanket:

And last but not least, one of my absolute favorite blankets and join techniques (but also the most time consuming) is the Tapestry Needle Lace Join (similar to a mattress stitch) that I used on my Christmas Character C2C Blanket.

Get all the details on the 2022 Gnome Project RIGHT HERE!
It’s never too late to start this blanket.

Up next will be a tutorial on how to crochet a border for you gnome blanket!

Filed Under: Crocheting 10 Comments

Corner-to-Corner Crochet Cupcake

June 17, 2022

If you’ve been following the 2022 Gnome Project, you might have noticed this cute little cupcake from my Bonus Birthday Gnome. Here is the individual cupcake pixel graph and written pattern curtesy of Jennifer Freeman from My Beautiful Disasters! You could easily make this into a fun multi-colored cupcake blanket or pillow or purse or any other fun and festive project that uses granny square sized pieces. Finished Size of these squares is about 6.5 x 6.5 inches and they work up very quickly! An easy corner-to-corner project that won’t take you hours to crochet.

Get the Bonus Birthday Gnome design HERE. It includes material lists, hook size, yarn colors, and more details about this year-long CAL!


I love using the bright and beautiful colors from the Red Heart Super Saver line of yarn. Shop the colors on Yarnspirations.com

Get the Written CUPCAKE Pattern PDF HERE or just follow along below.

I love the pillow that Jennifer is making! Be sure to check out her ETSY shop HERE for many adorable C2C designs!


Learn how to make French Knot Sprinkles on my Repeat Crafter Me YouTube Page


Be sure to tag me in all your cute cupcake creations using @RepeatCrafterMe on social media!

FOLLOW ME for more FREE Crochet!
Repeat Crafter Me Facebook
Repeat Crafter Me Instagram
Repeat Crafter Me Pinterest
Repeat Crafter Me YOUTUBE


Filed Under: Crocheting 19 Comments

Corner-to-Corner Crochet Tulip

May 6, 2022

Are you new the concept of Corner-to-Corner Crochet (aka C2C)? Or need some help with the logistics of how to change colors and increase/decrease? Let me help you! I have filmed a long video tutorial because I am walking you through this Tulip C2C block from start to finish! I am using the Half Double Crochet stitch and Red Heart Super Saver Yarn in these beautiful bright Spring colors!
Grab the Yarn: Red Heart Super Saver in Lemon, Spring Green, Grenadine, Medium Purple, Turqua, and Pumpkin. Thank you to Red Heart Yarns for sending me these lovely shades of yarn to work with!

Make a whole bunch of these blocks and stitch them together for a blanket. Or maybe just crochet a couple and create a pouch or small tote bag. How about a table runner? So many ways to use these tiny tulips! I will be sure to have a follow-up post with directions on how to make a border and attach the blocks.

Corner-to-Corner Crochet lets you create a variety of images and pictures and designs using a pixel graph. These graphs are made up of squares. Each square is equal to a Chain 2 + 3 HDC stitches. You will start in the corner (I prefer the lower right hand corner) and you will work diagonally in rows until you get the upper left hand corner.

I will show you how to carry your yarn and increase/decrease on the edges. Increases start with a chain 5, when it’s time to decrease you will slip stitch along the edge to start your next square.

To prepare, I suggest creating 2-3 balls of the background color (Lemon Yellow) because you will need to have several strands attached at one time. With the other colors, you can pull for the center of the skien. It doesn’t use much yarn!

Materials:
– Red Heart Super Saver Yarn in Lemon, Spring Green, Grenadine, Medium Purple, Turqua, and Pumpkin
– Size H Crochet Hook
– Tulip Pixel Graph GET IT HERE
– Tapestry Needle

Finished Size: Approximately 6 x 7.5 inches

I hope you find this video helpful! There are many C2C Crochet Tutorials out there but sometimes it’s beneficial to watch a few different ones for new perspectives.

Thanks to my friend Jennifer Freeman from My Beautiful Disasters for providing the Tulip C2C written pattern!
Sometimes it’s easier to see the color changes written out on paper rather than look at the picture graph.

Tulip Written Pattern (color changes):

Row 1: Background x 1 (1 block)

Row 2: Background x 2 (2 blocks)

Row 3: Background x 3 (3 blocks)

Row 4: Background x 4 (4 blocks)

Row 5: Background x 1, Green x 3, Background x 1 (5 blocks)

Row 6: Background x 1, Green x 3, Background x 2 (6 blocks)

Row 7: Background x 4, Green x 2, Background x 1 (7 blocks)

Row 8: Background x 2, Green x 2, Background x 4 (8 blocks)

Row 9: Background x 2, Pink x 2, Green x 1, Background x 1, Green x 1, Background x 2 (9 blocks)

Corner

Row 10: Background x 2, Green x 1, Background x 1, Pink x 3, Background x 2 (9 blocks)

Row 11: Background x 2, Pink x 4, Background x 1, Green x 1, Background x 1 (9 blocks)

Corner

Row 12: Background x 3, Pink x 4, Background x 1 (8 blocks)

Row 13: Background x 2, Pink x 3, Background x 2 (7 blocks)

Row 14: Background x 2, Pink x 3, Background x 1 (6 blocks)

Row 15: Background x 2, Pink x 1, Background x 2 (5 blocks)

Row 16: Background x 2, Pink x 1, Background x 1 (4 blocks)

Row 17: Background x 3 (3 blocks)

Row 18: Background x 2 (2 blocks)

Row 19: Background x 1 (1 block)

Which colors will you crochet your Tulips in?!

I should also mention that this pretty tulip is also a part of my May C2C Gnome! Check it out here.

Happy Mother’s Day weekend to all the moms! Hope it’s filled with a bit of fun and fiber!

FOLLOW ME for more FREE Crochet!
Repeat Crafter Me Facebook
Repeat Crafter Me Instagram
Repeat Crafter Me Pinterest
Repeat Crafter Me YOUTUBE

Filed Under: Crocheting 31 Comments

2019 Corner-to-Corner Crochet Hat

December 18, 2018

Sparkly and festive for your New Year’s Eve celebration but cute enough to wear all year! Make 2019 your best year yet and sport this corner-to-corner crochet hat! First you crochet the corner-to-corner (C2C) pattern using the pixel graph provided below. Then I show you how to stitch it up and turn it into an adorable earflap hat complete with pom-poms! I am using a size G hook and Bernat Satin Sparkle Yarn in colors Coral and Platinum. I chose this yarn because not only is it full of celebration sparkles but Coral is also the 2019 Pantone color of the year!

Materials:
– Bernat Satin Sparkle in Plantinum (2 skeins)
– Bernat Satin Sparkle in Coral (1 Skein)
Shop yarn HERE on Yarnspirations.com
– Size G Crochet Hook
– Tapestry Needle
– Jumbo Clover Pom-pom maker. Shop HERE.
– Small Clover Pom-pom maker. Shop HERE.
– 2019 pixel graph – download HERE

I used the corner-to-corner crochet method to make this blanket. Instead of using DC stitches like a traditional C2C, I used HDC. See THIS VIDEO on how to corner-to-corner crochet using the Half Double Crochet!

First you will want to download the 2019 Pixel Graph. You can do that HERE.

Keep in mind that your numbers will not be reversible. The 2019 will be backwards on the backside which will become the inside of your hat.

This pattern is sized for a Teen/Adult size hat. You could take away rows on either side of the graph to make the width of the hat smaller, but then your numbers would no longer be on the front. They would wrap around the entire hat. You could use this graph to crochet the 2019 in SC stitches (like a graphgran). So use a basic SC hat pattern (like THIS one from Yarnspirations) and add in the 2019 using SC stitches in the middle of the hat.

If you aren’t familiar with the C2C technique, I have a video class available HERE for purchase that teaches you this technique! The CrochetCrowd also has a very helpful video tutorial for FREE that shows you the basic technique of corner-to-corner crochet. Check that out HERE.

Once you have the C2C portion finished, you will stitch it up, add the brim, earflaps, and pom-poms! Let me walk you through this process with the video below.

Stitch up the C2C piece, creating a circle. Then weave tapestry needle in and out of top portion and pull tight to cinch top of hat together. Weave in ends.

Attach yarn at bottom of hat and SC around making anywhere from 60-70 SC stitches along the bottom. The more SC stitches you make, the looser it will be. Exact count doesn’t matter.

SC around the brim for 3 rounds (more if you want it longer).
Then add on earflaps:

Earflap 1: 
Chain 1, SC in next 12, chain 1, turn
Row 2: SC decrease, SC in next 8, SC decrease, chain 1, turn
Row 3: SC across (10 SC)
Row 4: SC decrease, SC in next 6, SC decrease, chain 1, turn
Row 5: SC across (8 SC)
Row 6: SC decrease, SC in next 4, SC decrease, chain 1, turn
Row 7: SC across ( 6 SC)
Row 8: SC decrease, SC in next 2, SC decrease, chain 1, turn
Row 9: SC across (4 SC)
Row 10: Make 2 SC decreases, chain 1, turn
Row 11: SC decrease, fasten off, weave in ends

On opposite side of hat attach yarn and make second earflap.

Earflap 2:

Join yarn, chain 1, SC in next 12, chain 1, turn
Row 2: SC decrease, SC in next 8, SC decrease, chain 1, turn
Row 3: SC across (10 SC)
Row 4: SC decrease, SC in next 6, SC decrease, chain 1, turn
Row 5: SC across (8 SC)
Row 6: SC decrease, SC in next 4, SC decrease, chain 1, turn
Row 7: SC across ( 6 SC)
Row 8: SC decrease, SC in next 2, SC decrease, chain 1, turn
Row 9: SC across (4 SC)
Row 10: Make 2 SC decreases, chain 1, turn

Row 11: SC decrease, and continue to SC around hat and earflaps, when you get to the top of each earflap: chain 35 (or as long/short as you wish), slip stitch in 2nd chain from hook and the rest of the way down the chain. Continue to SC around the hat and fasten off when you get the entire way around.

Now make a jumbo pom-pom for the top of the hat and two small pom-poms for the earflaps!

Fun and Festive! Happy Holidays and Happy New Year to all!

***You may make and sell products from my patterns but if you do I ask that you link back to my post. Please do not copy and post this pattern and claim it as your own. Please do not re-publish photos as your own.***
Want more free patterns? Keep in touch on my Repeat Crafter Me Facebook Page for new pattern sneak peeks and when they will be available on my blog! And feel free to post pictures of your finished hats and/or links to your shops on my Facebook wall so all can see. Be sure to also follow me on Instagram! I love when you tag me (@repeatcrafterme)!

Filed Under: Crocheting 7 Comments

How to Crochet Corner-to-Corner using the Granny Stitch

May 13, 2018

I’m so happy to see the excitement around this new project I’m working on! I’m creating a Corner-to-Corner (C2C) blanket but this time I am using the Granny Stitch! The granny stitch is a crowd favorite and I’m so excited to show you that you can use this stitch while working diagonally in the corner to corner format. I’ve created a video for you with a small swatch of this project. This was the easiest way to teach both the increases and decreases. The finished blanket that I am working on will be in a separate blog post that is coming soon! There is a very special story behind this project and the colors I chose to use but I want to save that for later 🙂

Materials:
– Caron One Pound yarn in Cream and Soft Pink. 
– Caron Jumbo yarn in Baby Rainbow. 
Shop HERE at Yarnspirations.com
Get 20% off Caron One Pound with Code RCMCARON20
offer valid: May 14 to 30, 2018
– Size G Crochet Hook
– Tapestry Needle

Granny Stitch =  3 DC + chain 1
Puff Stitch =  Yarn over, insert the hook in the stitch, yarn over, draw the yarn through the stitch, yarn over, and draw the yarn through the 2 loops on the hook. In the same stitch, repeat until you have 6 loops on your hook, yarn over, and pull through all the loops.

C2C Granny Stitch Pattern:
Starting with yellow
Magic Ring, Chain 4 + 3 DC + Chain 1 + DC all in magic ring, pull tight, chain 4, turn
Row 2: working in first chain space, 3 DC + chain 1, working in last chain space, 3 DC + chain 1 + DC, chain 4, turn
Row 3: working in first chain space, 3 DC + chain 1, working in next chain space, 3 DC  + chain 1, working in last chain space, 3 DC + chain 1 + DC, chain 4, turn
Row 4: working in first chain space, 3 DC + chain 1, working in next chain space,3 DC + chain 1, working in next chain space, 3 DC  + chain 1, working in last chain space, 3 DC + chain 1 + DC, change to pink yarn, chain 4, turn
Row 5: working in first chain space, 3 DC + chain 1, working in next chain space, 3 DC  + chain 1,working in next chain space, 3 DC  + chain 1, working in next chain space, 3 DC  + chain 1, working in last chain space, 3 DC + chain 1 + DC, change to rainbow yarn, chain 5, turn
Row 6: Special Stitch (Puff Stitch) in this row!! Totally optional.
working in first chain space, Puff Stitch + chain 2, continue Puff Stitch + chain 2 in the rest of the chain spaces until last space, Puff Stitch + chain 2 + DC, change back to pink yarn, chain 4, turn
NOTE: Continue pattern as you’ve been doing with increases until ready to decrease. The tutorial below will now shows decreases for my small sample square but you will most likely want to create a larger blanket.
Row 7: SKIP first chain space, make 3 DC + chain 1 in next chain space, continue the granny stitch (3 DC + chain 1) in all chain spaces until you reach the last chain space, DC in last chain space, change to yellow yarn, chain 4, turn
Row 8: SKIP first chain space, make 3 DC + chain 1 in next chain space, continue the granny stitch (3 DC + chain 1) in all chain spaces until you reach the last chain space, DC in last chain space, chain 4, turn
Row 9: SKIP first chain space, make 3 DC + chain 1 in next chain space, continue the granny stitch (3 DC + chain 1) in all chain spaces until you reach the last chain space, DC in last chain space, chain 4, turn
Row 10: SKIP first chain space, make 3 DC + chain 1 in next chain space, 3 DC + chain 1 in next chain space, DC in last chain space, chain 4, turn
Row 11: SKIP first chain space, make 3 DC + chain 1 in next chain space, DC in last chain space, fasten off and weave in ends.

Check back soon to see my finished Granny Stitch C2C blanket! I do have one more little twist to it and a fun little back story about the blanket to tell you guys! If you get started on the C2C granny stitch be sure and tag me on social media using the hashtag #RepeatCrafterMe and if you use the same yarn please be sure to tag #Yarnspirations 🙂

*** You may make and sell products from my patterns but if you do I ask that you link back to my post. Please do not copy and post this pattern and claim it as your own. Please do not re-publish photos as your own.***

Keep in touch on my Repeat Crafter Me Facebook Page and my Repeat Crafter Me Instagram Page for new pattern sneak peeks and when they will be available on my blog! And feel free to post pictures of your finished hats and/or links to your shops on my Facebook wall so all can see.


Filed Under: Crocheting 35 Comments

How To Weave In Your Ends On Corner-to-Corner Crochet

March 6, 2018

One of the most frequent questions I get asked is how do I weave in my ends, especially on corner-to-corner (C2C) crochet projects. I’ve posted a few quick videos on my Facebook page a few times over the years, but thought it warranted a full blog post to clear up any confusion!

The method I use is pretty simple: with your tapestry needle, weave in the strand 3-5 times within the same color square as the yarn strand and snip! You want to make sure you don’t weave your end in a straight line, otherwise there is a chance your project could come unraveled. So purposely weave from differently angles and directions.

Snip yarn fairly close to your project! If you have woven the strand in tightly, it won’t come unraveled!

With C2C crochet, your will sometimes get squares of the same color that are unconnected. Use your ends to your advantage! Weave the yarn over both corners of the squares that you want connected to perfect the design and image you want on your blanket.

Here is full video tutorial on how I weave in my ends!

Finished blanket post coming soon!

Filed Under: Crocheting 201 Comments

Corner-to-Corner Crochet Class

October 14, 2016

c2ccrochetclass

I have more exciting news for you guys! A little over a week ago I told you guys that I authored my first book, Corner-to-Corner Lap Throws for the Family. Everyone has been so supportive. You blew me away with the kinds words and purchase orders, making my book a #1 Best Seller on Amazon in the crocheting category! Yay! Well now I am excited to tell you that in addition to the book, I also filmed a video class with Annie’s!! Learn Corner-to-Corner Crochet teaches you the C2C technique and walks you through each step of how to make an adorable baby blanket by following the graph, crocheting each stitch, changing colors, adding borders, joining, and more! This is a step-by-step video so you actually see first hand how it is done. Many of you have been asking for a C2C video tutorial for some time now and I hope this online video class will answer all of your questions and show you how easy this technique truly is!

cdv13

I encourage you to take a look at the promo video so you can get and idea of what is included in my video class:

http://repeatcrafterm.wpengine.com/wp-content/uploads/2016/10/CDV13_Promo.mp4

In Learn Corner-to-Corner Crochet you’ll learn how to:

  • Work the corner-to-corner pattern to make solid and multicolored squares.
  • Read and work from a graph to create adorable animal squares.
  • Join squares into a blanket using Mattress Stitch.
  • Add single crochet edging to squares and the outside edge of your blanket.

Class includes complete step-by-step instructions and graphs to complete a precious animal-themed baby blanket. This special blanket will be the hit of the next baby shower! The lucky mom-to-be will be thrilled to receive such a thoughtful gift.

Annie’s online classes include downloadable and printable class patterns in PDF format in addition to the online video content. You can view online classes at your convenience, 24/7, 365 days a year from any mobile device, both tablet and non-tablet (phones, iPod Touch, etc.) but classes are best viewed on tablets or computers. All Annie’s online classes and DVDs have closed captioning.

CLICK HERE to find more class information and to purchase for immediate download! 
For one week only you can enjoy 20% off the purchase price! Enter keycode ZIMCRNR at the checkout or CLICK HERE for the coupon!
(this coupon expires October 21st at midnight)

c2cclass_3

Annie’s films their classes in the small Amish town of Berne, Indiana. I flew out there this past summer and it was such a cool experience to see what goes into the making of a crochet class and to explore the little  town. Here are a few fun pictures of my trip!

berneclocktower

The Clock Tower in downtown Berne.

img_8679

Behind the camera! Coffee was a must during the long days of filming 🙂

meandjennifer

I had the pleasure of meeting fellow crochet Jennifer Pionk of A Crocheted Simplicity!
Keep your eye out on her blog because she has a video class coming out soon too!!

Now how about a GIVEAWAY!! Enter to win my class Learn Corner-to-Corner Crochet for FREE!
There will be two winners drawn to increase your chances! Open worldwide! Enter using the rafflecopter widget below.

 
a Rafflecopter giveaway

Filed Under: Crocheting 7 Comments

I Wrote a Crochet Book! Corner-to-Corner Lap Throws for the Family

October 4, 2016

c2cbook5

I have something exciting to tell you guys! I wrote a crochet book! And it features one of my favorite techniques: C2C crochet! Corner-to-Corner Lap Throws for the Family includes 5 super cute designs: Woodland Animals, Snowman, Simple Stripes, Sheep, and a Sweet Dreams Baby Blanket. If you aren’t familiar with C2C, instead of a written pattern, you follow a pixel graph which allows you to incorporate virtually any character or image you want into a crochet blanket. Don’t worry, this book includes detailed how-to instructions, step-by-step photos, charts, and written instructions all in a 20 page softbound book published by Annie’s Publishing!

CLICK HERE TO BUY IT NOW

133674-2

The woodland animal blanket has 4 parts to it: a fox, owl, hedgehog, and raccoon! So you are actually getting 4 designs in one blanket that you can mix and match or use individually. You won’t be able to resist this one and it’s perfect for the Fall season!

133674_1

The super cute snowman is going to be a big hit this winter! An easy design that you must add to your Christmas crochet to-do list!

133674_3

If you are new to the C2C technique, you may want to start with simple stripes! A bold look that works up quickly. You will get the hang of it in no time – I promise!

133674_2

A little sheep makes a cute rug or extend the border to make the blanket even larger! A detailed tutorial on how to crochet borders around your blankets is outlined in the book 🙂

133674_4

Sweet dreams little one! You can even include writing in your C2C blankets! The moon and star design is adorable plus you can feel free to easily change the background color.

133674_5

Currently, Corner-to-Corner Lap Throws For the Family is available on Amazon for Pre-Order or you can BUY IT NOW straight from the Annie’s Publishing website in two formats: The paperback book for $8.99 or electronic download. Electronic download is available as a PDF and in formats compatible with your e-reader.

c2cbook_3

Thank you so much to all my Repeat Crafter Me readers and social media followers who have supported me through my years of blogging and crocheting! I wouldn’t have had the opportunity to write a book without your encouragement and love of my patterns and designs. Your positive comments and reassuring words have kept me going 🙂

c2cbook1

I would like to GIVE AWAY 5 copies of my book! 5 winners will each receive a copy of Corner-to-Corner Lap Throws for the Family. Enter using the Rafflecopter widget below. Open worldwide!

a Rafflecopter giveaway


Filed Under: Crocheting 42 Comments

June Strawberry Gnome C2C Crochet

June 1, 2022

Happy June! Since it’s strawberry season, we thought strawberries would be the perfect theme for this months gnome! The hat is designed as an upside down strawberry with the leafy green brim. There are several ways you can make the seeds. I am providing a few different graphs and will talk all about them below. This is the 6th gnome in our 2022 Gnome Project which means we are halfway through the year! If you are new to the gnomes, Jen from Day by Day Clay and Crochet Group and I have team up for a very fun YEAR-LONG collaboration! Each month Jen will create a Gnome Polymer Clay Crochet Hook and I will create a matching Gnome Corner-to-Corner Crochet block. Our designs will be holiday and seasonal themed so for the month of January we made a Winter Gnome, February we created a sweet Valentine Gal Gnome, March we have a Leprechaun, April is an Easter Bunny, May sports a sweet spring Tulip Flower, and June is Strawberries!

At the end of the 12 months I will be stitching the gnomes together to make a large blanket! The blanket panels will sit 4 across so this June panel will sit under our valentine gnome.

Get the January Gnome HERE

Get the February Gnome HERE

Get the March Gnome HERE

Get the April Gnome HERE

Get the May Gnome HERE

Be sure to use the hashtag #2022gnomeproject in your social media posts so we can all follow along and see your finished gnomes!

Below is a sneak peek picture of Jen’s June Gnome polymer clay tulip cane! Jen makes the hooks (and posts them for sale in Day by Day Clay and Crochet Group) and I make the crochet patterns (which are posted for free here each month)! I love hooks with polymer clay handles because not only are the designs fun, festive, and cute, but they create an ergonomic handle which helps to ease pain and tension caused by the motions of crochet. Read more about these crochet hooks HERE.

I’m using colors from our previous designs so hopefully you have many of these yarns on hand. You will need these colors from the Red Heart Super Saver line: Cherry Red, Lemon Yellow, Spring Green, and Orchid (or whatever color you used for the Bunny Gnome hat). Of course feel free to get creative and use whatever yarn colors you like!

Materials:
– Red Heart Super Saver Yarn in Cherry Red, Lemon Yellow, Spring Green, Orchid, White
– You probably won’t need more than one skein of taupe brown for the gnome nose. Use the same skein for all 12 or change it up and use any color of your choice for the nose! Feel free to choose your own hair color as well. Change it up or use white for the beard/braids.
– Size H Crochet Hook
-Tapestry needle
– Pixel Graphs

I have a few options for you! You can crochet the seeds right into the C2C but beware that they will be square. The graph with the yellow seed squares will probably look best if you are using the popcorn stitch instead of corner to corner crochet. I suggest using the graph with the solid red hat and then stitching on the seeds afterwards. I am also providing a graph with a small strawberry if you prefer. You will also need to stitch on the seeds at the end. And of course I am also giving you boy and girl gnome options!

June Boy Gnome with SEEDS
Boy Gnome without SEEDS
June Girl Gnome
Boy Gnome with Strawberry

Finished Size of the Gnome Crochet Rectangle: 20 inches tall x 14 inches wide

Corner-to-Corner Crochet lets you turn almost any image into a pixel graph and then from a pixel graph into a crocheted piece! The Corner-to-Corner technique basically means the you start in one corner (the lower right hand is most common place to start) and crochet diagonally in rows until you get to the other corner. You follow the pixel graph to create the color changes that make up the picture of the gnome. One pixel square = a chain 2 + 3 HDC stitches. Please note that I am using HDC stitches for the C2C instead of DC. You can use either! The DC is more common but keep in mind that your gnome rectangle will end up slightly bigger if using Double Crochet.

If C2C is confusing to you, don’t worry, my friends at The Crochet Crowd have the perfect beginner tutorial! And the best part is that they chose to use a few of my projects as the examples so you can’t go wrong! Get The Crochet Crowd Corner-to-Corner Crochet using HDC (half double crochet) HERE.

I have also created a C2C YouTube Tutorial using the tulip flower from our May Gnome:

Big THANK YOU to Jennifer Freeman of “My Beautiful Disasters” (Find her HERE on FB!) for writing out the C2C written pattern for the January, February, March, April, May, and June Gnomes (and the bonus gnome patterns below as well)! This is very helpful since many of you like to use the written rows to crochet instead of following the graph. She also added a ton of fun detail to her June gnome and I had to include it in this post so you could get some ideas on how to customize this cutie!

June Gnome WRITTEN PATTERN Boy with seeds hat

WRITTEN PATTERN Girl no seeds

WRITTEN PATTERN Boy and Girl with just the strawberry on hats

WRITTEN PATTERN Boy no seeds hat

Diane of Stitch Therapy is making the gnomes using the POPCORN STITCH! I love the way the strawberry seeds look using the popcorn stitch. Thank you Diane for writing up the popcorn stitch patterns for all the months!

GET THE POPCORN STITCH STRAWBERRY GNOME HERE

To stitch on the seeds, take your tapestry needle and weave a strand of yellow yarn 3 times around the same spot. Fasten off and weave in ends. Or you could stitch on crocheted seeds!

I also made a cute little crochet strawberry! Get that pattern HERE

FOLLOW ME for more FREE Crochet!
Repeat Crafter Me Facebook
Repeat Crafter Me Instagram
Repeat Crafter Me Pinterest
Repeat Crafter Me YOUTUBE

Filed Under: Crocheting 24 Comments

Crochet C2C Pickup Truck Tree Pillow

November 27, 2018

The holidays are in full swing and I’m sure many of you are bringing home your Christmas tree this week! Which inspired me to make this little red pickup truck tree pillow! I use the corner to corner crochet technique and my “throw pillow” turned out to be the size of a standard bed pillow but it is still super cute and functional. You can never have too many cozy christmas pillows! You could also use the graph below and crochet it using SC stitches instead of C2C for a much smaller pillow. Or it doesn’t have to be a pillow at all. I considered making it a wall hanging or even part of blanket. You could easily add a big thick border!

Materials:
– Bernat Super Value yarn in Berry Red, Lush Green, White, Gray, Black, and Brown. You only need one skein each. With just a little bit of the Gray/Black/Brown. Shop all colors HERE on Yarnspirations.com
– Size H Crochet Hook
– Pickup Truck Pixel Graph
– Pickup Truck color change pattern HERE
– Tapestry Needle
– Standard size pillow (if making into a pillow)

I used the corner-to-corner crochet method to make this blanket. Instead of using DC stitches like a traditional C2C, I used HDC. See video below on how to corner-to-corner crochet using the Half Double Crochet!

First you will want to download the Pickup Truck Tree Pixel Graph. You can do that HERE. When you are done, it will be reversible! The same image will appear on either side (the truck will just be facing the other direction). If you aren’t familiar with the C2C technique, I have a video class available HERE for purchase that teaches you this technique! The CrochetCrowd also has a very helpful video tutorial for FREE that shows you the basic technique of corner-to-corner crochet. Check that out HERE.

JUST ADDED! Jenn from Jenn’s Creative Crochet has graciously created the written color change pattern for this project! I know this helps out so many of you who don’t like counting each pixel square. You can get the free downloadable PDF of the written color change pattern HERE. 

You can follow Jenn’s Creative Crochet HERE on facebook and find her own pixel graph designs HERE in her Etsy shop! 

ALSO NEWLY ADDED! I forgot to post a second version of this graph! I had come up with two versions originally… one with the tree laying sideways and one with the tree standing up upright. Wanted to pass along this other graph to those that might like it better! Get the Pickup Truck Tree Graph Version #2 HERE.

If you are going to make this into a pillow you will need to make another C2C piece the same size as the pickup truck piece but in a solid color (I chose gray). You can follow the blank graph below.

No need to add borders! You will simply crochet the two pieces together! Make a SC between each “square” along the edges, chain 2, and SC in the next space. When you get to the corners you will want to make a SC in the corner. See picture below.

Insert pillow before completely closing!

Happy Holidays and Happy Crocheting!

***You may make and sell products from my patterns but if you do I ask that you link back to my post. Please do not copy and post this pattern and claim it as your own. Please do not re-publish photos as your own.***

Want more free patterns? Keep in touch on my Repeat Crafter Me Facebook Page for new pattern sneak peeks and when they will be available on my blog! And feel free to post pictures of your finished hats and/or links to your shops on my Facebook wall so all can see. Be sure to also follow me on Instagram! I love when you tag me (@repeatcrafterme)!

Filed Under: Crocheting 35 Comments

Crochet New Years Banner

December 23, 2017

Happy New Year! It’s almost 2018! And to celebrate I thought I would whip up a little C2C (corner to corner) crochet banner! Each number is crocheted separately so the project goes pretty quickly. I used the fun and festive Caron Simply Soft Party Yarn that has speckles of metallic woven throughout. This piece really sparkles and shines in person! Add a little fringe and tassels for extra flair!

Materials:
– Caron Simply Soft Party Yarn in Silver and Black. Shop these colors and more shades in the same line HERE on Yarnspirations.com.

– Size H Crochet Hook. I am using the Furls Odyssey Hooks!
– Tapestry Needle
– Pixel Graph – Download HERE.

I used the Corner-to-Corner (C2C) method to crochet the graph.If you aren’t familiar with the C2C technique, I have a video class available HERE for purchase that teaches you this technique! The Crochet Crowd also has a very helpful video tutorial for FREE that shows you the basic technique of corner-to-corner crochet. Check that out HERE.

Once all of your numbers are done, add a little fringe to the bottom!

To string up, crochet a long chain (200 chains or more) and then slip stitch all the way down chain. Weave long chained rope in between the C2C squares as in picture bellow.

Have a safe and healthy New Year! Be sure to stick around and see all the new projects and FREE crochet patterns I have in store for you in 2018!

*** You may make and sell products from my patterns but if you do I ask that you link back to my post. Please do not copy and post this pattern and claim it as your own. Please do not re-publish photos as your own.***

Keep in touch on my Repeat Crafter Me Facebook Page for new pattern sneak peeks and when they will be available on my blog! And feel free to post pictures of your finished hats and/or links to your shops on my Facebook wall so all can see.


Filed Under: Crocheting 14 Comments

Pixel Square Blanket: The Layout and Joining

April 19, 2015

Here is an update on how my pixel blanket is coming along! Things are really starting to come together and as you can see I am making a cupcake!!

Yesterday I was feeling a little discouraged because all I had was a pile of distorted looking pixels squares and a heap of loose ends… so I decided to lay it out and see what it would look like.
Check out this time-lapse video of the squares all laid out after I finished all of them and wove in the ends!
Each square is about 2.5×2.5 inches wide and the blanket will be 21 squares across and 23 squares down. The finished size will be approximately 60×65 inches. 

You can find the PIXEL SQUARES PATTERN in my previous post HERE.

I am using a peeler bead graph that I found over at Kandi Patterns.
Here are the breakdown of the squares:
Cream (background) = 206
I made an extra row of cream squares on the top and bottom. That was an additional 42 squares (248 squares total) 
Red = 19 
Black = 75 
Brown = 50 
Pink = 120 
White = 2 
Purple= 3 
Dark Pink = 2 
Green = 2
Yellow = 2
Blue = 2
I will be joining the squares using THIS technique by Kara from Petals to Picots. You can find the full tutorial HERE on her blog! 

I used two skeins of Vanna’s Choice yarn in beige to join the squares. First joining them with slip stitches horizontally and then joining them vertically, row by row.

Be sure to join from corner to corner (begin in the “chain” corner stitch of your pixel squares)

I will update you with more pictures on my Facebook and Instagram pages as I continue to work on this pixel blanket! And of course there will be a final post when it is complete that will show the finished pixel blanket and it will give details about the border. Stay tuned!

Yes the squares do bubble out a bit when using this joining technique. It doesn’t bother me a bit and I like the added dimension!


Filed Under: Crocheting, Uncategorized 26 Comments

About Me

Hello and welcome to all my fellow Crafters, Crocheters, and Crockpotters!
I hope you find lots of projects, patterns and recipes here that inspire you. Feel free to repeat anything you see on this blog!

A little about me:

For as long as I can remember I have always been crafty and had a love of art, crafts, and creating. In 2011 I taught myself how to crochet and seemed to have unleashed a hidden talent I never knew I had. I quickly began designing my own pieces and writing my own patterns. I currently post all my crochet patterns and tutorials for free! I learned by following free patterns so I am happy to pay it forward and hope my patterns help and inspire you.

I graduated from the University of Washington in 2001 with a degree in Visual Arts and began a career as a graphic designer. I worked professionally as a graphic designer for 6 years and still do occasional freelance work. In 2005 I met the most amazing man. We married in 2008 and shortly after got pregnant with our first son! We then relocated from Seattle to Portland, Oregon and welcomed our second son and two years later, our baby girl Zoe. Because life likes to keep us on our toes, we most recently made the move from Portland to Orange County, California for my husbands job. We are loving our new neighborhood and can’t get enough of the beautiful California weather. The kids are now  8, 6, and 4 years old and love to model my crochet creations (especially Zoe!)

Thank you to Lissarie Photography for the beautiful family photos! You can find her on Facebook and Instagram!

I feel so lucky to be able to stay at home with my kids and also work full time on my blog! Six years ago I started Repeat Crafter Me so I could share with you some of things we do at home throughout the week like kids crafts, DIY projects, crochet patterns, and crock pot recipes. In the past 2 years I’ve transitioned over to publishing mostly all FREE crochet patterns. The good people at Yarnspirations.com help to sponsor a lot of my posts and I truly enjoy creating fun, cute, and seasonal crochet projects for you each week! My idea list is always a mile long and my kids continue to inspire new designs. So if you love to crochet, you are in the right place!

Last year I published my first book: Corner to Corner Lap Throws for the Family. If you are obsessed with C2C crochet like I am then I encourage you to check it out HERE!

I would love to hear from you so don’t be afraid to leave a comment or send me an email at [email protected]

Happy Crafting, Crocheting and Crockpotting!

Animal Square CAL

January 24, 2023

Welcome to my new Crochet-Along for 2023! So many of you enjoyed the C2C Gnome CAL last year that I’ve had many requests for a new monthly project. This year will be all about Animal Squares!! These are simple crochet squares that are embellished with adorable animal faces! These squares work up quickly and won’t take you more than an hour or two. This project is extremely beginner friendly and will be less pressure (for me and you) so no need to rush or set aside multiple days in your busy schedule. You can start these anytime!

The first square is already done! It’s an adorable Polar Bear Square. YOU CAN FIND THE PATTERN + VIDEO TUTORIAL FOR THE POLAR BEAR SQUARE HERE.

Note: CAL stands for Crochet-A-Long (typically written crochet-along or just abbreviated to CAL)

How this CAL works:
Each month (January through December of 2023) I will post a new Crochet Animal Square. These won’t necessarily be holiday themed but many of them will be seasonal (for instance, the polar bear represents winter and has a cute little blue scarf on). A few animals are random because I like the colors and it fits with the overall design 🙂 At the end of the year, I will be stitching these all together to make a blanket! But they could also be turned into a pillow(s), a scarf, or any other creative way you’d like to use them.

Unlike last year, I won’t have these ready on the 1st of the month, but I do promise to have the patterns available within the first 15 days of each month. I will also have video tutorials to accompany each pattern where I walk you through each square. The videos will be available on my Repeat Crafter Me YOUTUBE Channel! Be sure to subscribe HERE.

Embellish to your liking! Don’t feel like you have to add all of the animal elements I provide to each square. For instance, maybe you want to leave off the scarf on the polar bear square. Or skip making the toe pads on the paws. There will be other little extra designs like that throughout the year. But also feel free to add your own flair to each square! I encourage you to make these as fun and festive as you want.

The Yarn:
I am using colors from the Red Heart Super Saver line! This is my go-to yarn because it has so many different coordinating shades. It’s a worsted weight acrylic yarn that holds up and is readily available online and in most local craft stores. It doesn’t take much yarn to make these squares. Less than half a skein and some of the colors will repeat throughout. Don’t feel like you need to purchase new yarn, feel free to use what you have in your stash! But if you do purchase some yarn, you can browse the colors of Red Heart Yarn HERE on Yarnspirations.com.

The Backside of the Squares:
The backside of your squares will be messy. But we will cover this up and make them look finished and nice. One option is to make two of each square and stitch them together with the backs facing each other. Another option is to stitch on a fleece backing to the banket in the end. I have done this before with my Reindeer Blanket (SEE IT HERE). Have another idea on how to hide the backside and all those woven ends? Let me know in the comments!

Sizing:
Each square is approximately 7×7 so the finished blanket will be more of a lap size or baby blanket size. There will be 3 squares across and 4 squares down. I plan on thick borders! It’s going to be so cute!

Share your Square!
Be sure to share your finished squares on social media using #AnimalSquareCAL and by tagging @RepeatCrafterMe.

Alternate Animal Designs:
I don’t have plans to make more than one square for each month. I am trying to keep this project simple and manageable 🙂 BUT if all goes well, I will consider extending the project into next year and providing more squares!

If you missed the corner-to-corner crochet Gnome CAL last year, no worries! The patterns are still free right here on RepeatCrafterMe.com.

I’m not trying to give too much away but I am so excited about this project and have all the animals already sketched out! I use clip art and cartoon images to design most of my cute crochet projects like this one. I have the remaining months blurred out so there is some element of surprise but I’m sure you can already guess a few of them 🙂

Happy Crocheting!

FOLLOW ME for more FREE Crochet!
Repeat Crafter Me Facebook
Repeat Crafter Me Instagram
Repeat Crafter Me Pinterest
Repeat Crafter Me YOUTUBE

Filed Under: Crocheting 7 Comments

Polar Bear Crochet Square

January 19, 2023

I’ve got a cute crochet square for your winter project to-do list! This polar bear square won’t take you long to whip up and you can embellish more or less to your liking. Start with a basic single crochet square and then add the face. How cute are those little paws and that fringed scarf?! I decided that I need to make more animal themed squares so they can all be joined together.. which means I will be hosting another year long crochet-along! I am still working out the details of how I am going to do the monthly animal squares but stay tuned for more. In the meantime, feel free to get started on this polar bear!

Materials:
– Red Heart Super Saver in White, Dusty Gray, and Turqua, and a bit of black
Shop all these colors and more on Yarnspirations.com

– Size H Crochet Hook
– Safety Nose (optional)
– Tapestry Needle

Polar Bear Square Pattern:

First let’s make the Square:

With white yarn
Chain 21, SC in second chain from hook and the rest of the way down chain, chain 1, turn
Row 2-23: SC in each stitch across, chain 1, turn
now continue making a SC in the 3 sides (2 Chains in each corner)
join in gray, fasten off white, SC in each stitch all the way around 4 sides making 2 SC in each corner.

Fasten off weave in ends.

Note: It’s a good idea to measure your square so you know it is in fact square after row 23. Add more or less rows to accommodate if needed. We all crochet with a different tension so size can vary.

Ears (make 2):
with white yarn
Magic Ring, chain 1 and make 6 SC in ring, do not join, chain 1, turn
Row 2: 2 SC in each stitch across, fasten off leaving long tail.
Stitch onto top two corners of square.

Snout:
with gray yarn
magic ring, chain 2 and making 8 DC + 4 HDC, join to first DC, chain 1
Round 2: 2 SC in each stitch around, join, fasten off leaving long tail
Stitch on nose with black yarn and tapestry needle or attach a safety nose and then sew snout onto square in the middle about 6 rows down from top.


Scarf:
with turquoise blue yarn
Chain 24, DC in 4th chain from hook and the rest of the way down chain, chain 3 and slip stitch to join to the last chain, fasten off leaving long tail.
small Scarf piece:
Chain 13, DC in 4th chain from hook and the rest of the way down chain, fasten off leaving long tail. In last DC, attach a few strands of yarn to make “tassels”. 

The small scarf piece will overlap the long scarf in the middle. 

Feet (make 2) :
starting with gray yarn
magic ring, chain 1 and make 12 SC, join to first SC with white yarn
Round 2: 2 SC in first 7 stitches, 2 DC in last 5 stitches, fasten off leaving long tail.

Optional: Stitch on little toes with a strand of gray yarn and tapestry needle.
Stitch feet on to bottom corners of square.

Don’t forget to stitch on eyes! (I show you how in the video tutorial below)

I made a video tutorial! Crochet a polar bear square step-by-step with me:

Yes, the backside of your square will be messy. My idea is to make two squares and stitch them together back-to-back but I also like the idea of adding fleece fabric to the back. I am working on some solutions so that when this is a larger blanket (or pillow or scarf), it will be beautiful on both sides!

I hope you are excited for more Animal Crochet Squares!

FOLLOW ME for more FREE Crochet!
Repeat Crafter Me Facebook
Repeat Crafter Me Instagram
Repeat Crafter Me Pinterest
Repeat Crafter Me YOUTUBE

Filed Under: Crocheting 8 Comments

Square Snowman Crochet Blanket

January 4, 2023

New Year, New Crochet! I hope everyone is ready for lots of fun free crochet projects in 2023. I am starting off the year with this Square Snowman Blanket made of simple stitches and sporting a cute cartoonish smile! It’s the perfect project to get on your hook this winter. Make it as large as you’d like and feel free to add more embellishments like a few black buttons down the front or maybe a little top hat! Changing the scarf color is an easy way personalize it for multiple people. As always, I am excited to see your versions of this design!

The blanket works by starting with a circle and then adding in corner stitches so it becomes a square. I love how he looks like those popular melted snowman cookies you see around the holidays 🙂 Starting with a circle allows a nice place to attach the face pieces. This project is a spin-off of my Gingerbread Crochet Blanket that you can see HERE.

Materials:
– Red Heart Super Saver in white (you will need at least 3 skeins)
– Red Heart With Love in Blue Hawaii (or any color of your choosing for the scarf!)
Side note: I really love the shades of blue in the “With Love” line. SEE THEM ALL HERE
– Red heart Super Saver in carrot orange (nose), black (eyes), and baby pink (cheeks)
Shop all these colors and more HERE on Yarnspirations.com!

– Size H Crochet Hook
– Tapestry needle
– Large Clover Pom-Pom Maker (optional)

Finished Size: Approximately 42 x 42 inches

Square Snowman Blanket Pattern:
Starting with white yarn
Magic Ring, chain 2 and make 12 DC in ring, join to first DC, chain 2 
Round 2: 2 DC in each stitch around, join, chain 2 (24 DC)
Round 3: 2 DC in each stitch around, join, chain 2 (48 DC)
Round 4: DC in each stitch around, join, chain 2 (48 DC)
Round 5: 2 DC in first stitch, DC in next stitch, repeat around, join, chain 2 (72 DC)
Round 6: DC in each stitch around, join, chain 2 (72 DC)
Round 7: 2 DC in first, DC in next 7 stitches, join, chain 2 (81 DC)
Round 8: 2 DC in first, DC in next 8 stitches, join, chain 2 (90 DC)
Round 9: 2 DC in first, DC in next 9 stitches, join, chain 2 (99 DC)
Round 10: 2 DC in first, DC in next 10 stitches, join, chain 2 (108 DC)
Round 11: DC in first 26 stitches, 2 DC + chain 2 + 2 DC all in next stitch, DC in next 26 stitches, 2 DC + chain 2 + 2 DC all in next stitch, DC in next 26 stitches, 2 DC + chain 2 + 2 DC all in next stitch, DC in next 26 stitches, 2 DC + chain 2 + 2 DC in last stitch, join to first DC, chain 2
Round 12-16: DC in each stitch around and make 2 DC + chain 2 + 2 DC in each of the 4 corners, join to first DC, chain 2
Round 17-21: Join back in blue yarn, chain 2, DC in each stitch around and make 2 DC + chain 2 + 2 DC in each of the 4 corners, join to first DC, chain 2
Join back in white yarn and fasten off blue yarn for remainder of blanket.
Round 22-35: DC in each stitch around and make 2 DC + chain 2 + 2 DC in each of the 4 corners, join to first DC, chain 2
Fasten off and weave in ends or feel free to continue to crochet in rounds of white to make the blanket bigger!

Eyes (make 2):
with black yarn
Magic Ring, chain 1 and make 6 SC in ring, join, chain 1
Round 2: 2 SC in each stitch around, join, fasten off leaving long tail to stitch the eyes onto blanket.
Optional: Add in a little bit of white yarn with your tapestry needle to make the “eye sparkle”

Carrot Nose:
with orange yan
Chain 9, SC in second chain from hook and in next stitch, HDC in next 2, DC in next 2, TC in last two,
now continue to SC around all the edges of the nose and along the back of the last TC made. When you get to the tip of the carrot nose, make a SC + chain 1 + SC so it can still keep its pointy shape.

Smile:
Surface Slip Stitch on a smile! Video tutorial below:
Note: if you don’t want to surface slip stitch onto your blanket, you can crochet 5-6 small black circles for a classic snowman smile! use Round 1 of the eyes to make the circles.

Cheeks (make 2):
with pink yarn
Magic Ring, chain 1 and make 8 SC in ring, join, chain 1
Round 2: 2 SC in each stitch around, join, chain 1 (16 SC)
Round 3: SC in each stitch around, join, fasten off leaving long tail (16 SC)
Stitch onto face, on either side of the smile.

Scarf Piece/Fringe:
with blue yarn
Chain 14, DC in 3rd chain from hook and the rest of the way down chain, Chaim 2, turn (12 DC)
Row 2-6: DC in each stitch across, chain 2, turn (12 DC)
Fasten off after row 6.
Create fringe on the bottom edge by looping two pieces of yarn (cut yarn about 12 inches in length) through every other stitch.

Don’t forget to add on 4 large “snowball” pom-poms to the 4 corners!

If you like this project, you might like my Gingerbread Blanket as well!
Get the GINGERBREAD BLANKET PATTERN HERE

Did you know I also design free crochet patterns for Yarnspirations.com?! Yep! I am a proud Stitch Ambassador for Yarnspirations and create several designs for their website + host a yearly crochet-along! Click the link below to browse the patterns!
—–> Free Repeat Crafter Me Patterns on Yarnspirations.com <—–

FOLLOW ME for more FREE Crochet!
Repeat Crafter Me Facebook
Repeat Crafter Me Instagram
Repeat Crafter Me Pinterest
Repeat Crafter Me YOUTUBE

Filed Under: Crocheting 19 Comments

Crochet Mini Granny Stitch Sweater

December 26, 2022

If you want to get your Tuna & Bones CAL stuffies ready for winter, then you will need to stitch them up a mini granny stitch sweater! This pattern is based off of the Granny Sweater Ornament pattern that you can find for free RIGHT HERE on Yarnspirations.com. But to make it fit Tuna the Cat and Bones the Dog, you will need to crochet it in rows instead of rounds. So I have updated the pattern to accommodate these changes. Written pattern is below.

Did you join in our Tuna & Bones CAL?! If not, it is never too late to start! I hosted a 3 week crochet-along over where I showed you how to make these adorable and easy amigurumi cat and dog toy stuffies!

YOU CAN FIND ALL THE Lessons RIGHT HERE. IT’S NEVER TOO LATE TO START!
The patterns will always be available for free on Yarnspirations.com

Choose any colors you want for you sweaters! I suggest using Red heart Super Saver in two colors. I am using a Size H Crochet hook as well.

Granny Sweater Pattern in ROWS:

With main sweater color

Chain 12, 2 DC in 4th chain from hook, chain 1 and skip a chain, 3 DC + chain 2 + 3 DC in next, chain 1 and skip a chain, 3 DC in next, chain 1 and skip a chain, 3 DC + chain 2 + 3 DC in next, chain 1 and skip a chain, 3 DC in last, chain 3, turn

Row 2: 2 DC in first stitch (chain 3 counts as DC), chain 1, make 3 DC in the first chain space, chain 1, 3 DC + chain 2 + 3 DC in corner chain space, chain 1, 3 DC in next chain space, chain 1, 3 DC in next chain space, chain 1, 3 DC + chain 2 + 3 DC in corner chain space, chain 1, 3 DC in next chain space, chain 1, 3 DC in top of chain 3 from previous round (the last stitch), 

Join in “stripe color”, fasten off main sweater color, chain 3, turn

Row 3: 2 DC in first stitch (chain 3 counts as DC), chain 1, 3 DC in first chain space, chain 1, 3 DC in next chain space, chain 1, skip corner, 3 DC in next chain space, chain 1, 3 DC in next space, chain 1, 3 DC in next space, chain 1, skip corner, 3 DC in next space, chain 1, 3 DC in next space, chain 1, 3 DC in top of chain 3 from previous round (the last stitch),  chain 3, turn

Row 4: 2 DC in first stitch (chain 3 counts as DC), chain 1, *3 DC in chain space, chain 1, repeat from * across row and make 3 DC in top of chain 3 from previous round (the last stitch), fasten off stripe color and join back in main sweater color, chain 3, turn (you should have 10 granny cluster stitches)

Row 5: 2 DC in first stitch (chain 3 counts as DC), chain 1, *3 DC in chain space, chain 1, repeat from * across row and make 3 DC in top of chain 3 from previous round (the last stitch), chain 3, turn (you should have 11 granny cluster stitches)

Row 6: 2 DC in first stitch (chain 3 counts as DC), chain 1, *3 DC in chain space, chain 1, repeat from * across row and make 3 DC in top of chain 3 from previous round (the last stitch), chain 1, turn (you should have 12 granny cluster stitches)

Row 7: SC in each stitch including the chain spaces, fasten off weave in ends or leave a long tail if you want to stitch the sweater to your stuffie.

Now let’s add the arms:

With stripe color
join in to the corner chain 2 space of one of the arms, chain 3 + 2 DC, chain 1, 3 DC in armpit (where the two colors meet), chain 1, 3 DC on the other side of armpit, chain 1 and join to top of the chain 3, (you should have 3 granny cluster stitches)

Round 2: slip stitch over so you are working in chain space, chain 3 + 2 DC in first space, chain 1, 3 DC in next space, chain 1, 3 DC in last space, join to top of first chain 3, fasten off strip color


Round 3: join in main sweater color in first chain space, chain 3 + 2 DC in first space, chain 1, 3 DC in next space, chain 1, 3 DC in last space, chain 1 and join to top of the chain 3

Round 4: slip stitch over so you are working in chain space, chain 3 + 2 DC in first space, chain 1, 3 DC in next space, chain 1, 3 DC in last space, join to top of first chain 3, chain 1


Round 5: SC in each stitch including the chain spaces, fasten off weave in ends.

Repeat to make second arm.

Stitch up sweater on the back of your stuffie. You could use buttons if you want it to be removable.

You can find the original Granny Sweater Ornament pattern for free RIGHT HERE on Yarnspirations.com.

You can find the patterns for Tuna the Cat and Bones the Dog RIGHT HERE!

FOLLOW ME for more FREE Crochet!
Repeat Crafter Me Facebook
Repeat Crafter Me Instagram
Repeat Crafter Me Pinterest
Repeat Crafter Me YOUTUBE

Filed Under: Crocheting 26 Comments

Tuna and Bones Toy Duo Crochet-Along LESSON 2

December 8, 2022

Welcome to week 2 of our Tuna the Cat and Bones the Dog Toy Duo Crochet-Along! And this time they have come ready for the holiday party in their granny stitch sweaters! Remember those cute Granny Sweater Ornaments I taught you how to make last week? Well if you work the pattern in rows instead of rounds, they fit Tuna and Bones! It is so much fun to dress up this adorable duo.

Get the sweater pattern HERE

It’s not too late to join in the fun, you can sign up to get the lessons emailed directly into your inbox HERE anytime! SIGN UP FOR THE TUNA & BONES CROCHET ALONG HERE

Over the course of three weeks, we’ll be stitching up this crochet cat and dog stuffie set in the super-versatile Red Heart Super Saver yarn. This simple project is easy to customize and perfect for gifting. It features both a bright and neutral version to suit your taste. Work your feline-canine bestie duo in the suggested shades or create a combo that’s uniquely yours.

YOU CAN FIND WEEK ONE and TWO Lessons RIGHT HERE

About LESSON 2:

This week I will be teaching you how to create all the cute little components for our furry friends. Learn to work up the ears, arms, feet and tail in the round using single crochet increases and decreases. Complete the same steps for both the cat and dog stuffies, the only difference between the two will be your colors and ear shape. Adding your stuffing gradually to the appendages while you work helps to fill narrow corners and keep the fullness distributed equally without lumps. Don’t attach your components just yet, as we’ll be putting them all together in Week 3!

Follow each week as we bring this adorable toy together in separate parts. Make sure to share your progress along the way on the Yarnspirations Stitch Squad Group, tag @Yarnspirations on Instagram and tag your posts with #TunaBonesCAL22 or #YARNSPO. We’re excited to see how you customize your duo!

Last week I made another fun and Christmassy version of Bones and lovingly names him JINGLES. Check him out HERE. So many ways to personalize for the holiday season or anytime of year!

SIGN UP FOR THE TUNA & BONES CROCHET ALONG HERE
Go straight to Lesson 1 and 2 HERE
Stay tuned for Lesson 3 which will be posted on Thursday December 15th!

Filed Under: Crocheting 24 Comments

Crochet C2C Gnome Blanket

December 7, 2022

Here it is in all it’s glory! The 2022 Gnome Corner-to-Corner Crochet Blanket!! It has been such a fun year! Each month I released one gnome C2C panel that was holiday or season themed which also matched a polymer crochet hook by Jen at Day by Day Clay and Crochet. Now we finally get to see all the gnome pieces stitched together to become a beautiful blanket!

If you haven’t started the project or are just learning about it, no worries! The patterns for the gnomes will always be available right here on RepeatCrafterMe.com for free! You can find all the links to the individual gnomes HERE on the Gnome Landing Page. I will be compiling an ad-free PDF at some point for those that would like an easy document to navigate and/or print out.

Zoe and I had a heck of time trying to photograph this blanket! It’s BIG! and heavy!
Finished Size = approximately 57 x 61 inches without the border. The border adds another 3 inches on each side.

Here are some important links for this gnome blanket project:

Gnome Landing Page
How to Join the Gnome panels
How to make a Border on your Gnome blanket
Adding Gnome Pom-Poms to the 4 corners!

GET THE JANUARY WINTER GNOME HERE
GET THE FEBRUARY VALENTINE GNOME HERE
GET THE MARCH LEPRECHAUN GNOME HERE
GET THE APRIL BUNNY GNOME HERE
GET THE MAY TULIP FLOWER GNOME HERE
GET THE JUNE STRAWBERRY GNOME HERE
GET THE JULY PATRIOTIC GNOME HERE
GET THE AUGUST SUMMER GNOME HERE
GET THE SEPTEMBER FALL GNOME HERE
GET THE OCTOBER HALLOWEEN GNOME HERE
GET THE NOVEMBER TURKEY GNOME HERE
GET THE DECEMBER SANTA GNOME HERE

BONUS HOLIDAY GNOMES


Plus, be sure to check out each individual months page for lots of other design options.

Will there be another year-long crochet along in 2023? Maybe! I haven’t decided. Right now I am enjoying a lot of Christmas crocheting and finishing up some other patterns.

If you are craving a CAL, please be sure to check out my Tuna the Cat & Bones the Dog Crochet-Along that I am hosting over at Yarnspirations.com! It’s never too late to SIGN UP and get the weekly LESSONS. One pattern = Two cute stuffed animals!

Can’t wait to see all of your finished blankets. Remember, there is no rush. Whether you finish tomorrow or 5 years from now, please be sure to tag me on social media and use the hashtag #2022gnomeproject.

Happy Crocheting!

FOLLOW ME for more FREE Crochet!
Repeat Crafter Me Facebook
Repeat Crafter Me Instagram
Repeat Crafter Me Pinterest
Repeat Crafter Me YOUTUBE

Filed Under: Crocheting 16 Comments

Gnome Pom-Poms

December 6, 2022

We couldn’t finish our 2022 gnome project without a little razzle dazzle! Instead of putting basic pom-poms on the 4 corners of the blanket, I made GNOME Pom-Poms! A fun and easy twist to really make this blanket extra special. And if you aren’t making the gnome blanket, you can absolutely use these adorable gnome pom-poms as ornaments, gift toppers, garland, and more!

You can find the Gnome Blanket Pattern HERE

I made a video tutorial but will also post the written pattern below

Pom-Pom:
First create a fluffy pom-pom using the Large Clover Pom-Pom Maker and Red Heart Super Saver yarn in white. Leave the long strands you tie your pom-pom with hanging out. Don’t trim.

Gnome Hat:
Magic Ring, chain 1 and make 4 SC in ring, join, chain 1
Round 2: 2 SC in first stitch, SC in next, repeat around, join, chain 1 (6 SC)
Round 3: SC in each stitch around, join, chain 1 (6 SC)
Round 4: 2 SC in first, SC in next 2, repeat around, join, chain 1 (8 SC)
Round 5: 2 SC in first, SC in next 3, repeat around, join, chain 1 (10 SC)
Round 6: 2 SC in first, SC in next 4, repeat around, join, chain 1 (12 SC)
Round 7: 2 SC in first, SC in next 5, repeat around, join, chain 1 (14 SC)
Round 8: 2 SC in first, SC in next 6, repeat around, join, chain 1 (16 SC)
Round 9 2 SC in first, SC in next 7, repeat around, join, chain 1 (18 SC)
Round 10: SC in each stitch around, join, fasten off, weave in ends. (18 SC)

Gnome Nose:
Magic Ring, chain 2 and make 2 HDC + 2 SC + 2 HDC + 2 SC in ring, pull tight and join to first HDC, fasten off leave long tail.

Assembling your pom-pom gnome:
with tapestry needle, weave your long strands from tying your pom-pom up through the top of the hat and weave or tie so the hat is secure. You can now use the strands that are sticking out the top of the hat for a loop to hang as an ornament or for whatever you tie your gnome to.

stitch the nose onto the bottom loops of the hat and through the middle of the pom-pom so it is secure.


FOLLOW ME for more FREE Crochet!
Repeat Crafter Me Facebook
Repeat Crafter Me Instagram
Repeat Crafter Me Pinterest
Repeat Crafter Me YOUTUBE

Filed Under: Crocheting 24 Comments

Crocheting a Border on a C2C Blanket

December 4, 2022

Let’s make a border on our Gnome Corner-to-Corner Crochet Blanket! This technique will work on any C2C blanket and you can make the border as skinny or thick as you’d like. I took the background color from all 12 gnome panels and made a round on the border with each color.

I have a video tutorial for this border on my Repeat Crafter Me Youtube Page as well:

You can find all the patterns for the #2022GnomeProject HERE on the Gnome Landing Page

If you haven’t joined your gnome panels yet, I have a tutorial for that RIGHT HERE

The first thing you will need to do to create your border is to take white (or whatever color you joined your panels with and create starting border around the entire blanket. This will be a single crochet between each pixel block + chain 2 + SC between the next pixel block.

When you get to the corners make a SC + chain 2 + SC in each corner.

Round 2 of your border you will make 2 SC in each chain 2 space from the previous round. Again making a SC + chain 2 + SC in each corner.

Round 3 and beyond of your border is simple SC stitches in any color of your choices for as many rounds of you like. Be sure to make a SC + chain 2 + SC in each corner.

I have one more thing I want to add to this blanket before the big reveal! Stay tuned for more this coming week!

Filed Under: Crocheting 28 Comments

December Santa Gnome C2C Crochet

November 28, 2022

Christmas has come early! I’m posting our 12th and final gnome of the #2022gnomeproject a few days before the 1st of December. Isn’t our Santa so cute and festive with his fuzzy brimmed hat?! I used Bernat Pipsqueak yarn for the furry parts and it really is easy to work with when you are using the C2C crochet stitches. We still have a lot of ground to cover with this project: Joining the panels, Adding a border, AND I want to post a few other holiday themed gnome options as well. So expect all of that in the coming week or so.

It really is going to be a crazy start to December because I also have a Crochet-Along starting December 1st in collaboration with Yarnspirations. I will show you how to make Tuna the Cat and Bones the Dog Stuffies! They are so cute and a great beginner amigurumi project. Two animals made from the exact same pattern! Sign up for the Crochet-Along HERE

Now back to our Santa Gnome! In this post you will find the graphs for Santa and Mrs. Santa Claus but stay tuned because I will post several other graphs in a follow-up blog post. I love Christmas crochet so I really went over the top this month and have enough designs to make a holiday gnome blanket!

If this is the first time you are hearing about this gnome project, don’t worry, it is NEVER too late to join in! Let me explain what it is all about: In January 2022, Jennifer from Day by Day Clay and Crochet and I teamed up for a HUGE year-long project! Each month Jen creates a Gnome Polymer Clay Crochet Hook and I create a matching Gnome Corner-to-Corner Crochet panel. We focused on holiday and seasonal gnome designs. The pixel graph and how-to for the crochet portion of the collab will be right here on Repeat Crafter Me and you can purchase the coordinating clay hook from Jen on her Facebook page “Day by Day Clay and Crochet Group!”

To learn more about these polymer clay crochet hooks, you should think about joining the Day By Day Clay and Crochet PATREON! See the membership levels HERE.

Day by Day Clay and Crochet shares process videos, tutorials, pictures, and depending on the level of support also sends free gifts and offers $.50 shipping on orders of her hooks. Additionally, the patrons in the top two tiers, VIP and Gold Levels, are invited to join a smaller, select Facebook group where more of the behind the scenes activities are shared with an amazing community of supportive crafters.

Here is a sneak peak of this months gnome clay crochet hook! Her December hook will go on sale soon: —> DAY BY DAY CLAY AND CROCHET GROUP

The 12 months of Gnomes will be stitched together (very soon) to make a big blanket! You don’t necessarily need to add a border to each gnome piece but can if you want. I did not at this time. And of course you can use your gnomes for many other projects. Pillows, wall hangings, and more!

You can find all the monthly Gnome designs in one spot! Check out The Gnome Landing Page and be sure to use the hashtag #2022gnomeproject in all your social media posts!

If you are new to the Corner-to-Corner Crochet technique, let me explain a little bit about it as well. C2C lets you turn almost any image into a pixel graph and then from a pixel graph into a crocheted piece! The Corner-to-Corner technique basically means the you start in one corner (the lower right hand is most common place to start) and crochet diagonally in rows until you get to the other corner. You follow the pixel graph to create the color changes that make up the picture of the gnome. One pixel square = a chain 2 + 3 HDC stitches. Please note that I am using HDC stitches for the C2C instead of DC. 
Below is a Corner-to-Corner Video Tutorial using a part of my May Gnome graph.

For our December Gnome C2C Panel, you will need the following materials:
– Red Heart Super Saver Yarn in colors White for the beard, Cherry Red for the body/hat and Blue for the background. Feel free to choose any shade of blue OR a different christmassy color for the background. I chose blue instead of green or gold because I used those colors for the Halloween and Turkey gnome. Buff Beige or whatever skin color suits you for the nose.
– Bernat Pipsqueak for the Santa hat brim and pom-pom. You can buy this fur yarn HERE on Yarnspirations.com.
– Size H Crochet Hook
– Tapestry Needle
– Boy December Santa Gnome Graph HERE
– Girl Mrs Claus December Gnome Graph HERE
– Both Santa Gnomes WRITTEN PATTERN HERE

You will see that the beard is gray in the graph. This is so you can follow along with the color changes for the brim and beard. In the written pattern the white is written as “beard” and the girl as “hair” so you don’t get confused if you are using the pipsqueak yarn.

GET THE SANTA GNOME BOY AND GIRL WRITTEN PATTERN HERE

Jennifer Freeman of “My Beautiful Disasters” (Find her HERE on FB!) has been writing out the C2C written pattern for each month. She has been providing all the gnome graphs in written form! Thanks Jenny! She also has some really incredible C2C designs in her Etsy shop that you should check out! 

I also love Jenny’s GNOME PILLOW PALS! SEE THEM HERE.

Stay tuned for more Christmas and Holiday themed Gnome Designs!

Don’t forget to use the hashtag #2022gnomeproject so I can see and share your gnomes!
GNOME LANDING PAGE = ALL THE GNOMES IN ONE SPOT

Diane of Stitch Therapy is making the gnomes using the POPCORN STITCH! I love the way her gnomes are turning out and you can also find her Popcorn Stitch written patterns within each individual gnome post. She is very busy with her day job as a teacher and hasn’t been able to write up the past few months but she might be able to eventually get to them. I appreciate her doing this in her spare time!

Still not comfortable with the idea of Corner-to-Corner Crochet? Don’t worry, you can use single crochet stitches and crochet each gnome as a graphgan.
SpurView Goods has been uploading the single crochet written patterns HERE

Merry Christmas and Happy Holidays!

FOLLOW ME for more FREE Crochet!
Repeat Crafter Me Facebook
Repeat Crafter Me Instagram
Repeat Crafter Me Pinterest
Repeat Crafter Me YOUTUBE

Filed Under: Crocheting 13 Comments

November Turkey Gnome C2C Crochet

November 1, 2022

How is it already November?! The months are flying by and we now have 11 out of 12 gnomes in our 2022 Gnome Project! Our Thanksgiving gnome is wearing his Turkey hat and is ready for family gatherings and feasting. If you don’t celebrate US Thanksgiving, feel free to choose from some of our other options for this month! We have a sunflower, pumpkin, or poppy and you can use these same yarn colors or any colors of your choice.

Not sure what this gnome project is all about? Let me explain! Jennifer from Day by Day Clay and Crochet and I have teamed up for a HUGE year-long project! Each month Jen creates a Gnome Polymer Clay Crochet Hook and I create a matching Gnome Corner-to-Corner Crochet panel. We are focusing on holiday and seasonal gnome designs. The pixel graph and how-to for the crochet portion of the collab will be right here on Repeat Crafter Me and you can purchase the coordinating clay hook from Jen on her Facebook page “Day by Day Clay and Crochet Group!

The 12 months of Gnomes will be stitched together at the end to make a big blanket! You don’t necessarily need to add a border to each gnome piece but can if you want. I did not at this time. And of course you can use your gnomes for many other projects. Pillows, wall hangings, and more!

You can find all the monthly Gnome designs in one spot! Check out the Gnome Landing Page and be sure to use the hashtag #2022gnomeproject in all your social media posts!

Here is a sneak peak of this months gnome clay crochet hook! She nailed it with the matching turkey hat and we coordinate colors perfectly! Her November hook will go on sale soon: —> DAY BY DAY CLAY AND CROCHET GROUP

If you are new to the Corner-to-Corner Crochet technique, let me explain a little bit about it as well. C2C lets you turn almost any image into a pixel graph and then from a pixel graph into a crocheted piece! The Corner-to-Corner technique basically means the you start in one corner (the lower right hand is most common place to start) and crochet diagonally in rows until you get to the other corner. You follow the pixel graph to create the color changes that make up the picture of the gnome. One pixel square = a chain 2 + 3 HDC stitches. Please note that I am using HDC stitches for the C2C instead of DC. 
Below is a Corner-to-Corner Video Tutorial using a part of my May Gnome graph.

For our November Gnome C2C Panel, you will need the following materials:
– Red Heart Super Saver Yarn in colors Saffron or Gold for the background and beak, Frosty Green for the body, Cafe Latte Brown, a bit of red and black for the face, and Buff Beige or whatever skin color suits you for the nose and white for the beard or braids.
– Size H Crochet Hook
– Tapestry Needle
– Boy November Gnome Graph HERE
– Girl November Gnome Graph HERE

GET THE TURKEY GNOMES WRITTEN PATTERN HERE

Jennifer Freeman of “My Beautiful Disasters” (Find her HERE on FB!) has been writing out the C2C written pattern for each month. She provided all the versions you see above in written form and she provided the Poppy Graph for this month too. Thanks Jenny! She also has some really incredible C2C designs in her Etsy shop that you should check out! I also love Jenny’s gnome pillow pals! SEE THEM HERE.

GET THE TURKEY GNOMES WRITTEN PATTERN HERE

HERE ARE THE SUNFLOWER GNOME GRAPHS/PATTERN

HERE IS THE PUMPKIN GNOME GRAPH if you prefer to use the same idea from Septembers Apple Gnome.

AND HERE IS THE POPPY GNOME (Boy and Girl) PATTERN

Don’t forget to use the hashtag #2022gnomeproject so I can see and share your gnomes!
GNOME LANDING PAGE = ALL THE GNOMES IN ONE SPOT

Diane of Stitch Therapy is making the gnomes using the POPCORN STITCH! I love the way her gnomes are turning out and you can also find her Popcorn Stitch written patterns within each individual gnome post. She is very busy with her day job as a teacher and hasn’t been able to write up the past few months but she might be able to eventually get to them. I appreciate her doing this in her spare time!

Still not comfortable with the idea of Corner-to-Corner Crochet? Don’t worry, you can use single crochet stitches and crochet each gnome as a graphgan.
SpurView Goods has been uploading the single crochet written patterns HERE

Happy Thanksgiving and have a very Sweet November!

FOLLOW ME for more FREE Crochet!
Repeat Crafter Me Facebook
Repeat Crafter Me Instagram
Repeat Crafter Me Pinterest
Repeat Crafter Me YOUTUBE

Filed Under: Crocheting 13 Comments

October Halloween Gnome C2C Crochet

October 1, 2022

It’s officially spooky season! I love October and all the Halloween festivities that come along with it so of course our gnome for this month is outfitted in a jack-o-lantern hat and adorned in the perfect combination of Halloween colors. If you don’t celebrate Halloween, don’t worry! You can use the apple from last month and turn it into a pumpkin!

 This is our 10th gnome of the blanket. Only 2 more gnomes to go in our #2022gnomeproject!

Not sure what this gnome project is all about? Let me explain! Jennifer from Day by Day Clay and Crochet and I have teamed up for a HUGE year-long project! Each month Jen creates a Gnome Polymer Clay Crochet Hook and I create a matching Gnome Corner-to-Corner Crochet panel. We are focusing on holiday and seasonal gnome designs. The pixel graph and how-to for the crochet portion of the collab will be right here on Repeat Crafter Me and you can purchase the coordinating clay hook from Jen on her Facebook page “Day by Day Clay and Crochet Group!

The 12 months of Gnomes will be stitched together at the end to make a big blanket! You don’t necessarily need to add a border to each gnome piece but can if you want. I did not at this time. And of course you can use your gnomes for many other projects. Pillows, wall hangings, and more!

You can find all the monthly Gnome designs in one spot! Check out the Gnome Landing Page and be sure to use the hashtag #2022gnomeproject in all your social media posts!

Here is a sneak peak of this months gnome clay crochet hook! I LOVE the glow in the dark polymer clay she used! Her October hook will go on sale soon: —> DAY BY DAY CLAY AND CROCHET GROUP

f you are new to the Corner-to-Corner Crochet technique, let me explain a little bit about it as well. C2C lets you turn almost any image into a pixel graph and then from a pixel graph into a crocheted piece! The Corner-to-Corner technique basically means the you start in one corner (the lower right hand is most common place to start) and crochet diagonally in rows until you get to the other corner. You follow the pixel graph to create the color changes that make up the picture of the gnome. One pixel square = a chain 2 + 3 HDC stitches. Please note that I am using HDC stitches for the C2C instead of DC. 
Below is a Corner-to-Corner Video Tutorial using a part of my May Gnome graph.

For our October Gnome C2C Panel, you will need the following materials:
– Red Heart Super Saver Yarn in colors Pumpkin, Spring Green, Orchid, Black, Lemon Yellow, and Buff Beige or whatever skin color suits you for the nose and white for the beard or braids.
– Size H Crochet Hook
– Tapestry Needle
– Girl Jack-O-Lantern Hat Graph (choose any color for her braids)
– Boy Jack-O-Lantern Hat Graph (choose any color for his beard)

HERE IS THE PUMPKIN GNOME GRAPH if you prefer to use the same idea from Septembers Apple Gnome.

Jennifer Freeman of “My Beautiful Disasters” (Find her HERE on FB!) has been writing out the C2C written pattern for each month. She provided all the versions you see above in written form. Thanks Jenny! She also has some really incredible C2C designs in her Etsy shop that you should check out! 

GET THE WRITTEN C2C PATTERN FOR BOTH BOY AND GIRL OPTIONS HERE
And Jenny converted the Leprechaun Gnome to Witch Hat colors!
GET THOSE WRITTEN PATTERNS HERE

I love Jenny’s gnome pillow pals! SEE THEM HERE.

Diane of Stitch Therapy is making the gnomes using the POPCORN STITCH! I love the way her gnomes are turning out and you can also find her Popcorn Stitch written patterns within each individual gnome post. She will have September and October written up as soon as she can. She is a librarian and teacher at an elementary school and has a lot going on. She is doing this for us for free in her spare time 🙂

Still not comfortable with the idea of Corner-to-Corner Crochet? Don’t worry, you can use single crochet stitches and crochet each gnome as a graphgan.
SpurView Goods has been uploading the single crochet written patterns HERE

When you are weaving in your ends, you will want to connect some of the blocks that aren’t touching in the jack-o-lantern mouth. Just like we did for the snowflake on our January gnome.

Don’t forget to use the hashtag #2022gnomeproject so I can see and share your gnomes!
GNOME LANDING PAGE = ALL THE GNOMES IN ONE SPOT

FOLLOW ME for more FREE Crochet!
Repeat Crafter Me Facebook
Repeat Crafter Me Instagram
Repeat Crafter Me Pinterest
Repeat Crafter Me YOUTUBE

Filed Under: Crocheting 30 Comments

Fall Crochet Squares Pillow

September 24, 2022

I made a set of Fall themed crochet squares this week and decided to stitch them together to make a 16×16 pillow! I used a joining technique called the zigzag slip stitch and I love the way it turned out! These Autumn granny squares include a Pumpkin, Scarecrow, Sunflower, and Acorn which would make a beautiful blanket as well. Especially if you paired them with solid color crochet squares. Lots of possibilities and designs to think about!

You can find each Fall Themed Crochet Square pattern and material list in their individual posts.
Click the links below:
Pumpkin Square
Scarecrow Square
Sunflower Square

Acorn Square

To join the crochet squares together I used a fun slip stitch technique which I demonstrate in the YouTube Video below:

You will want to make a back panel for the pillow. I am using Red Heart Super Saver in Cafe Latte for the back, a size H Crochet Hook, and used the pattern below:

Magic Ring, chain 2 and make 16 DC in ring, join to first DC, chain 2
Row 2: DC in first 3, 2 DC + chain 2 + 2 DC in next (corner), DC in next 3, 2 DC + chain 2 + 2 DC, DC in next 3, 2 DC + chain 2 + 2 DC, DC in next 3, 2 DC + chain 2 + 2 DC and join to first DC, chain 2
Round 3-12: DC in each stitch and make 2 DC + chain 2 + 2 DC in each corner, join, chain 2
Fasten off after round 12 and weave in ends.

Single crochet the edges of the two panels together around a 16×16 pillow form. You can purchase them at Michaels Craft Store!

Happy Fall Y’all!

FOLLOW ME for more FREE Crochet!
Repeat Crafter Me Facebook
Repeat Crafter Me Instagram
Repeat Crafter Me Pinterest
Repeat Crafter Me YOUTUBE


Filed Under: Crocheting 16 Comments

Crochet Acorn Square

September 23, 2022

This tiny tree nut is the perfect addition to my Fall themed crochet squares! The Acorn is a simple circle to a square crochet pattern with just a few tweaks to give it’s shape and then an easy round of double crochets to make the acorn top.

Materials:
– Red Heart Super Saver Yarn in Cornmeal (acorn), Bernat Super Value in Topaz (acorn top), and Bernat Super Value in Rouge (background)
Feel free to choose different shades! Shop all yarn HERE on Yarnspirations.com
– Size H Crochet Hook
– Tapestry Needle

Acorn Granny Square Pattern:
starting with cornmeal yarn
Magic Ring, chain 2 and make 16 DC in ring, join to first DC, chain 2
Round 2: 2 DC in each stitch around, join, chain 2 (32 DC)
Round 3: 2 DC in first stitch, DC in next, repeat around,
join in rouge colored yarn, chain 1
Round 4: SC in first 2 stitches, HDC, DC, 2 DC + chain 2 + 2 DC in next, DC, HDC, SC in next 7, HDC DC, 2 DC + chain 2 + 2 DC in next, DC, HDC, SC in next 2, skip 3 DC, SC in next 2 (this is what makes the little acorn point), HDC, DC, 2 DC + chain 2 + 2 DC in next, DC, HDC, SC in next 7, HDC DC, 2 DC + chain 2 + 2 DC in next, SC in last 5, join, chain 2
Round 5-6: DC in each stitch around making 2 DC + chain 2 + 2 DC in each corner, NOTE: When you get to the part in Round 5 where you skipped 3 stitches, you will want to make 3 DC over the skipped part.
Fasten off, weave in ends.
Optional: the little 3 DC stitches that you skipped will be hanging over the background color and can be stitched down as you weave in ends.

Acorn Top:
with topaz yarn
Chain 16, DC in 3rd chain from hook and rest of the way down chain, now working on other side of chain, SC, HDC, DC in next 4, 2 DC in next, chain 4 + SC in 3rd chain from hook + next chain, 2 DC in next, DC in next 4, HDC, SC, slip stitch to join and fasten off leaving long tail.

I will work on getting a video tutorial up on my Repeat Crafter Me YouTube page soon!

Get all the Fall Crochet Squares:
Pumpkin Square
Scarecrow Square
Sunflower Square
Acorn Square (this post)

FOLLOW ME for more FREE Crochet!
Repeat Crafter Me Facebook
Repeat Crafter Me Instagram
Repeat Crafter Me Pinterest
Repeat Crafter Me YOUTUBE

Filed Under: Crocheting 13 Comments

Crochet Sunflower Square

September 23, 2022

I made this crochet sunflower square as a part of my Fall crochet square series but this one would be fun for many seasons and occasions! I putting 4 of these Fall themed crochet granny squares together to make a throw pillow. Even though I am in Arizona and it’s still 100 degrees out, I am feeling those Autumn vibes and I’m ready to bring out my Fall decor!

Materials:
– Red Heart Super Saver Yarn in colors Country Blue (background), Saffron yellow (petals), and Cafe Latte (center). Shop these colors on Yarnspirations.com
– Size H Crochet Hook
– Tapestry Needle

Sunflower Granny Square Pattern:
starting with cafe latte yarn
Magic Ring, chain 2 and make 16 DC in ring, join to first DC, chain 2
Round 2: 2 DC in each stitch around, join, chain 2 (32 DC)
Round 3: 2 DC in first stitch, DC in next, repeat around,
join in Country Blue yarn, chain 1
Round 4: IN BACK LOOPS ONLY (we will use the front loops later) SC in first 2 stitches, HDC, DC, 2 DC + chain 2 + 2 DC in next, DC, HDC, SC in next 7, HDC DC, 2 DC + chain 2 + 2 DC in next, DC, HDC, SC in next 7, HDC DC, 2 DC + chain 2 + 2 DC in next, DC, HDC, SC in next 7, HDC DC, 2 DC + chain 2 + 2 DC in next, SC in last 5, join, chain 2
Round 5-6: DC in each stitch around making 2 DC + chain 2 + 2 DC in each corner
Fasten off, weave in ends.
Now let’s make the petals:
GO BACK TO ROUND 4 AND WORK IN THE FRONT LOOPS ONLY.
Join in Saffron yellow yarn and *chain 4, skip 2 stitches, join with slip stitch, repeat from * around.
Round 2 of petals: Working in first chain space, SC + HDC + 2 DC + chain 2 + 2 DC + HDC + SC + Slip stitch to join all in same chain space. Reach over to the next chain space and repeat. Makes 16 petals.
Fasten off and weave in ends.

I will work on getting a video tutorial posted on my Repeat Crafter Me YouTube page.

Get all the Fall Crochet Squares:
Pumpkin Square
Scarecrow Square
Sunflower Square (this post)
Acorn Square

FOLLOW ME for more FREE Crochet!
Repeat Crafter Me Facebook
Repeat Crafter Me Instagram
Repeat Crafter Me Pinterest
Repeat Crafter Me YOUTUBE

Filed Under: Crocheting 9 Comments

Crochet Scarecrow Square

September 21, 2022

I’m making a set of Fall themed crochet squares and this Scarecrow was the first to go on my hook! A simple circle to square crochet square with just a few embellishments. Grab that Red Heart Super Saver Yarn in all those autumn shades and let’s get started!

Materials:
– Read Heart Super Saver Yarn in colors Buff Beige and Saffron for the main square and then Cafe Latte for the hat, Petal Pink for the cheeks, Cornmeal for the straw hair, and Pumpkin for the nose.
Feel free to use what you have on hand or shop the colors HERE on Yarnspirations.com
– Size H Crochet Hook
– Tapestry Needle
– Two small black safety eyes or black buttons
– Strand of black yarn or embroidery thread for the smile.

Size: Approximately 7.5×7.5 inches

Circle to Square Granny Square Pattern:
starting with beige yarn
Magic Ring, chain 2 and make 16 DC in ring, join to first DC, chain 2
Round 2: 2 DC in each stitch around, join, chain 2 (32 DC)
Round 3: 2 DC in first stitch, DC in next, repeat around,
join in saffron yarn, chain 1
Round 4: SC in first 2 stitches, HDC, DC, 2 DC + chain 2 + 2 DC in next, DC, HDC, SC in next 7, HDC DC, 2 DC + chain 2 + 2 DC in next, DC, HDC, SC in next 7, HDC DC, 2 DC + chain 2 + 2 DC in next, DC, HDC, SC in next 7, HDC DC, 2 DC + chain 2 + 2 DC in next, SC in last 5, join, chain 2
Round 5-6: DC in each stitch around making 2 DC + chain 2 + 2 DC in each corner
Fasten off, weave in ends.

Scarecrow Hat:
with cafe latte yarn
chain 17, SC in second chain from hook and the rest of the way down chain, chain 1, turn (16 SC)
Row 2: SC Decrease, SC in next 12, SC Decrease over last two, chain 1, turn (14 SC)
Row 3: SC in each stitch across, chain 1, turn (14 SC)
Row 4: SC Decrease, SC in next 10, SC Decrease over last two, chain 1, turn (12 SC)
Row 5: SC in each stitch across, chain 1, turn (12 SC)
Row 6: SC Decrease, SC in next 8, SC Decrease over last two, chain 1, turn (10 SC)
Row 7: SC in each stitch across, chain 1, turn (10 SC)
Row 8: SC Decrease, SC in next 6, SC Decrease over last two, chain 1, turn (8 SC)
Row 9: SC in each stitch across, chain 1, turn (8 SC)
Row 10: SC Decrease, SC in next 4, SC Decrease over last two, chain 1, turn (6 SC)
Row 11: SC in each stitch across, chain 1, turn (6 SC)
Row 12: SC Decrease, SC in next 2, SC Decrease over last two, chain 1, turn (4 SC)
Row 13: SC Decrease twice, chain 1, turn
Row 14: SC Decrease and continue to SC around edges of hat, when you get to the bottom of the hat, *SC + chain 2 (SC in second chain from hook) + SC back the same stitch, skip a stitch and repeat from *
Fasten off leaving long tail to stitch hat onto top of head.
Flip bottom of hat up.
Cut 8 strands of cornmeal color yarn about 10 inches in length. Knot on the underside of hat before you stitch hat onto the head.

Nose:
with pumpkin color yarn
Chain 7, SC in second chain from hook, HDC in next, DC in remaining chains, fasten off leaving long tail to stitch onto face.

small black buttons or safety eyes go on either side of the top of nose.

Cheeks (make 2):
with petal pink yarn
Magic Ring, chain 1 and make 10 SC in ring, fasten off leaving long tail to stitch onto face.

With tapestry needle, stitch a smile between the cheeks!

My plan is to make this into a pillow with a few other Fall themed squares so I am not worried about how the back of the square looks.

Stay tuned for more!

FOLLOW ME for more FREE Crochet!
Repeat Crafter Me Facebook
Repeat Crafter Me Instagram
Repeat Crafter Me Pinterest
Repeat Crafter Me YOUTUBE


Filed Under: Crocheting 69 Comments

Nicki’s Crochet Podcast Episode 19

September 10, 2022

Nicole is the boss babe behind Nicki’s Homemade Crafts & Crochet and I had the honor of being interviewed by her in her new Crochet Podcast! She has been such a huge support to so many crochet designers and has a great way of bringing all of us together on projects. I loved chatting with her AND I answered lot of questions behind my Corner-to-Corner Crochet designs and amigurumi patterns… PLUS I gave some top secret info into what I have on the horizon!

WATCH EPISODE 19 OF THE CROCHT PODCAST WITH NICKI + SARAH HERE

Thank you Nicki for being such a bright light in the crochet community! We appreciate you!

And thanks to everyone for your continued support with my book Crochet Cute Critters!

Filed Under: Crocheting 17 Comments

September Fall Gnome C2C Crochet

September 1, 2022

Hello Fall! We have a variety of designs for the September Gnome! Maybe you are celebrating back-to-school, or enjoy apple picking season, or maybe you want your gnome to be decked out in autumn beauty sunflowers… whatever your preference, I have the graphs for you! I chose to make the boy gnome with the apple on his hat for my blanket (because I have done several girl gnomes in a row) BUT I do love the girl gnome with the pencil hat and apple on her tummy. And of course I LOVE the sunflower gnome. I don’t want to give too much away but the sunflower gnome would be a good design for November as well. So grab the graph and decide how you want to use it!

 This is our 9th gnome of the blanket. 3 more gnomes to go in our #2022gnomeproject!

Not sure what this gnome project is all about? Let me explain! Jennifer from Day by Day Clay and Crochet and I have teamed up for a HUGE year-long project! Each month Jen creates a Gnome Polymer Clay Crochet Hook and I create a matching Gnome Corner-to-Corner Crochet panel. We are focusing on holiday and seasonal gnome designs. The pixel graph and how-to for the crochet portion of the collab will be right here on Repeat Crafter Me and you can purchase the coordinating clay hook from Jen on her Facebook page “Day by Day Clay and Crochet Group!

The 12 months of Gnomes will be stitched together at the end to make a big blanket! You don’t necessarily need to add a border to each gnome piece but can if you want. I did not at this time. And of course you can use your gnomes for many other projects. Pillows, wall hangings, and more!

You can find all the monthly Gnome designs in one spot! Check out the Gnome Landing Page and be sure to use the hashtag #2022gnomeproject in all your social media posts!

Here is a sneak peak of this months gnome clay crochet hook! Her September hook will go on sale soon: —> DAY BY DAY CLAY AND CROCHET GROUP

If you are new to the Corner-to-Corner Crochet technique, let me explain a little bit about it as well. C2C lets you turn almost any image into a pixel graph and then from a pixel graph into a crocheted piece! The Corner-to-Corner technique basically means the you start in one corner (the lower right hand is most common place to start) and crochet diagonally in rows until you get to the other corner. You follow the pixel graph to create the color changes that make up the picture of the gnome. One pixel square = a chain 2 + 3 HDC stitches. Please note that I am using HDC stitches for the C2C instead of DC. 
Below is a Corner-to-Corner Video Tutorial using a part of my May Gnome graph.

For our September Fall Gnome C2C Panel, you will need the following materials:
– Red Heart Super Saver Yarn in colors Turqua, Lemon Yellow, Cherry Red, Aran (background), a bit of Cafe Latte for the stem and Spring Green for the leaf, and Buff Beige or whatever skin color suits you for the nose and white for the beard or braids.
– Size H Crochet Hook (and a size F hook for the stars)
– Tapestry Needle
– Girl September Gnome Pixel Graph (pencil hat and apple on body)
– Boy September Gnome Pixel Graph (just apple on hat)
– Sunflower Girl
– Sunflower Boy


Jennifer Freeman of “My Beautiful Disasters” (Find her HERE on FB!) has been writing out the C2C written pattern for each month. She provided all the versions you see above in written form. Thanks Jenny! She also has some really incredible C2C designs in her Etsy shop that you should check out! 

Apple Gnomes Written Pattern

Pencil Gnomes Written Pattern

Sunflower Gnomes

Diane of Stitch Therapy is making the gnomes using the POPCORN STITCH! I love the way her gnomes are turning out and you can also find her Popcorn Stitch written patterns within each individual gnome post. She will have this months Apple Boy Gnome posted soon!

Still not comfortable with the idea of Corner-to-Corner Crochet? Don’t worry, you can use single crochet stitches and crochet each gnome as a graphgan.
SpurView Goods has been uploading the single crochet written patterns HERE

Don’t forget to use the hashtag #2022gnomeproject so I can see and share your gnomes!

I love how all the gnome are coming together and you can see bits of colors repeating throughout.

FOLLOW ME for more FREE Crochet!
Repeat Crafter Me Facebook
Repeat Crafter Me Instagram
Repeat Crafter Me Pinterest
Repeat Crafter Me YOUTUBE

Filed Under: Crocheting 21 Comments

Cochet C2C Bookcase Blanket

August 24, 2022

If you missed my LIVE Lunch & Learn over at the Yarnspirations Facebook page, don’t worry you can watch the replay HERE! I demonstrated a portion of the Caron Crochet Corner-to-Corner Bookcase Blanket which is a new pattern that you can download for free on Yarnspirations.com. Perfect for book lovers and also a fun back-to-school project! I took the succulent cactus portion and made it into a small 11 x 11 pixel graph as an easy example of how to approach a corner-to-corner crochet project. I think this cute area of the blanket would make a fun mini pillow so I am posting this little graph below but be sure to head over to Yarnspirations.com to download the full blanket pattern!

Caron Bookcase Blanket Pattern and Graph

In my example, I am using Red Heart Super Saver Yarn in colors Soft White, Light Sage, and Carrot! Such a pretty combo! The pattern suggest using Caron Colorama O’Go which is a great choice for the bigger blanket because you can get 5 colors all in one O’Go and they are very easy to separate.


Head over to the Yarnspirations Facebook Page to see my 30 minute Lunch & Learn demonstration!

Thanks to Yarnspirations for having me as a Lunch & Learn guest today!

Filed Under: Crocheting 20 Comments

Canning Jar Crochet Squares

August 20, 2022

For those of you that love crochet but also love canning, this one is for you! During the Fall season we enjoy lots of farmers market goodies like jams, jellies, pickles, and honey which inspired me to make canning jar crochet squares! It started out with a design for a Ball brand mason jar but my ultimate goal is to create a blanket using all different colored jars of various canned goods. I am using iron-on appliqués of fruits but I will give some suggestions for other ways to make the labels below.

Materials:
– Worsted weight yarn in any color of your choosing! I am using a lot of different colors from Red Heart Super Saver, Bernat Super Value, and Red Heart with Love. Use what you have on hand or shop colors HERE on Yarnpirations.com
– Size H Crochet Hook
– Tapestry Needle
– Iron-on Appliques


Finished Size: approximately 7 x 6 inches

Canning Jar Pattern:
with jar color
Chain 8, DC in 3rd chain from hook and next 5, 4 DC in last, now working on other side of chain, DC in next 5, 4 DC in last, join to first DC, chain 2
Round 2: DC in first 5, 2 DC in next 4, DC in next 5, 2 DC in last 4, join to first DC, chain 1
Round 3: SC in first 7, 2 SC in next 6, SC in next SC in next 7, 2 SC in last 6, 
Join in background yarn color, chain 1
Round 4: HDC in first 8, 2 DC + chain 1 + 2 DC in next, HDC in next 8, 2 DC + chain 1 + 2 DC in next, HDC in next 9, 2 DC + chain 1 + 2 DC in next, HDC in last, join, chain 2
Round 5: DC in each stitch around making 2 DC + chain 1 + 2 DC in each of the 4 corners, join, chain 1
Round 6: SC in each stitch around making 2 SC + chain 2 + 2 SC in each corner, fasten off and weave in ends.

Jar top: 
with gray or brown yarn
chain 7, 2 SC in second chain from hook, SC in each chain until last, make 2 SC in last, fasten off.

Jar label:
with cream colored yarn
Magic Ring, chain 1 and make 2 SC + 3 HDC + 2 SC + 3 HDC, join to first SC, chain 1
Round 2: 2 SC in first 3 stitches, 2 HDC in next 2 stitches, 2 SC in next 3, 2 HDC in remaining 2 stitches, fasten off leaving long tail.

There are several options for the fruit embellishments for the labels. I am using iron-on patches that are hot-glued on to the crochet jar label… but as you can see, the iron-ons come in sooo many different sizes and not many of them will fit on the jar label. You could crochet or stitch on a fruit with yarn (unfortunately I don’t have a pattern) or use buttons, charms, or even use your cricut maker to make vinyl words or images. THIS is a great tutorial by Moogly on how to attach circut cut vinyl onto crochet.

Happy Canning and Crocheting!

FOLLOW ME for more FREE Crochet!
Repeat Crafter Me Facebook
Repeat Crafter Me Instagram
Repeat Crafter Me Pinterest
Repeat Crafter Me YOUTUBE

Filed Under: Crocheting 24 Comments

Halloween Crochet Cups

August 15, 2022

In another installment of my Crochet Cups, I present you with a set of Halloween versions!! Hopefully you have the hang of this pattern and can take these ideas and add on to them and make even more designs! Below I will show you how to make a Ghost, Frankenstein, Candy Corn, Cat, Jack-o-lantern, and Witch. Be sure to check out my Christmas Cups, Birthday Bear Cup, and Bunny Cup too if you aren’t familiar with this project.

Materials:
– Red Heart Super Saver Yarn in colors Black, Spring Green, Pumpkin Orange, Saffron Yellow, White, and Medium Purple. You can shop these colors HERE on Yarnspirations.com!
– Size K Crochet Hook and size G Crochet Hook
– Tapestry Needle
– Safety Eyes (solid black, colored, or whatever you prefer!)
– Pink safety nose for cat

Basic Solid Color Cup Pattern (Cat, Ghost, Pumpkin):
with a DOULBE STRAND of white (ghost), black (cat), or orange (pumpkin jack-o-latern) yarn
Magic Ring, chain 1 and make 10 SC in ring, join to first SC
Round 2: 2 SC in each stitch around, join, chain 1 (20 SC)
Round 3: SC in each stitch around, join, chain 1 (20 SC)
Round 4: Working in back loops for this round only, SC in each stitch around, join, chain 1 (20 SC)
Round 5: 2 SC in first stitch, SC in next 3, repeat around, join, chain 1 (25 SC)
Round 6-11: SC in each stitch around, join, chain 1 (25 SC)
Round 12: Reverse SC in each stitch around, join, fasten off weave in ends.

Jack-O-Lantern Face:
size down to a G Hook and I suggest using a thin worsted weight yarn like Caron Simply Soft
Smile: Chain 20, SC in second chain from hook, HDC in next, DC decrease over next two, chain 3 and slip stitch to the same spot as your decrease, slip stitch in next 4 chains, chain 3, DC decrease (starting in spot where you have your chain 3), DC in next, DC decrease, chain 3 and slip stitch to the same spot as your decrease, slip stitch in next 3 chains, chain 3, DC decrease (starting in spot where you have your chain 3), DC, HDC, SC in last. Fasten off leaving long tail to stitch onto cup.
Triangle Eyes (make 2):
Size down to a G Hook
chain 5, SC in second chain from hook and the rest of the way down chain, chain 1, turn (4 SC)
Row 2: make 2 SC Decreases, chain 1, turn
Row 3: SC in each stitch, chain 1, turn (2 SC)
Row 4: SC Decrease, chain 1, turn
Row 5: Make one SC and fasten off leaving long tail to stitch eyes above mouth.

Cat Ears (make 2):
Size down to a G Hook
with single strand of purple yarn
Chain 7, SC in second chain from hook and the rest of the way down chain, chain 1, turn (6 SC)
Row 2: SC Decrease along first two stitches, SC in next two, SC Decrease along last two, chain 1, turn
Row 3: SC in each stitch arcross, chain 1, turn (4 SC)
Row 4: SC Decrease twice, chain 1, turn
Row 5: SC in each stitch, chain 1, turn (2 SC)
Row 6: SC Decrease and continue to SC along all edges, join in black yarn and SC around all edges again (make 2 SC in the corners), fasten off an leave long tail to stitch onto back of cup!
Add pink safety nose, two colored safety eyes and stitch on a few whiskers with purple yarn.

Ghost Mouth:
with single strand of black yarn
Magic Ring, chain 1 and make 2 SC, 2 HDC, 2 SC, 2 HDC, and join to first SC and fasten off leaving long tail. Stitch onto middle of ghost cup and add black safety eyes.

Frankenstein Cup:
starting with DOUBLE STRAND of green yarn
Magic Ring, chain 1 and make 10 SC in ring, join to first SC
Round 2: 2 SC in each stitch around, join, chain 1 (20 SC)
Round 3: SC in each stitch around, join, chain 1 (20 SC)
Round 4: Working in back loops for this round only, SC in each stitch around, join, chain 1 (20 SC)
Round 5: 2 SC in first stitch, SC in next 3, repeat around, join, chain 1 (25 SC)
Round 6-10: SC in each stitch around, join, chain 1 (25 SC)
join in DOUBLE STRAND of black yarn after round 10, chain 1
Round 11: SC in first, Spike Stitch one row down in next, Spike Stitch two rows down in next, Spike Stitch one row down in next, SC in next, repeat around, join, chain 1
Round 12: Reverse SC in each stitch around, join, fasten off weave in ends.
Stitch on a little scar with a strand of gray or black yarn and add on two black safety eyes and a smile!

Candy Corn Cup:
starting DOUBLE STRAND with saffron yellow yarn
Magic Ring, chain 1 and make 10 SC in ring, join to first SC
Round 2: 2 SC in each stitch around, join, chain 1 (20 SC)
Round 3: SC in each stitch around, join, chain 1 (20 SC)
Round 4: Working in back loops for this round only, SC in each stitch around, join, chain 1 (20 SC)
Round 5: 2 SC in first stitch, SC in next 3, repeat around, join, chain 1 (25 SC)
Round 6: SC in each stitch around, join, chain 1 (25 SC)
join in DOUBLE STRAND of pumpkin orange yarn
Round 7-10: SC in each stitch around, join, chain 1 (25 SC)
join in DOUBLE STRAND of white yarn
Round 11: SC in each stitch around, join, chain 1 (25 SC)
Round 12: Reverse SC in each stitch around, join, fasten off weave in ends.

Witch Cup:
starting with DOUBLE STRAND of green yarn
Magic Ring, chain 1 and make 10 SC in ring, join to first SC
Round 2: 2 SC in each stitch around, join, chain 1 (20 SC)
Round 3: SC in each stitch around, join, chain 1 (20 SC)
Round 4: Working in back loops for this round only, SC in each stitch around, join, chain 1 (20 SC)
Round 5: 2 SC in first stitch, SC in next 3, repeat around, join, chain 1 (25 SC)
Round 6-10: SC in each stitch around, join, chain 1 (25 SC)
join in DOUBLE STRAND of purple yarn after round 10, chain 1
Round 11: SC in each stitch around, join, chain 1 (25 SC)
Round 12: Reverse SC in each stitch around, join, fasten off weave in ends.

Cut 10 strands of purple yarn and weave them halfway through and knot along 5 spaces of sides of cup.

Knot strands together at bottom to make “pigtails”
Stitch on a smile and add two safety eyes

Witch Hat:
Size down to a G or H Hook
with single strand of black yarn
Chain 7, SC in second chain from hook and the rest of the way down chain, chain 1, turn (6 SC)
Row 2: SC Decrease along first two stitches, SC in next two, SC Decrease along last two, chain 1, turn
Row 3: SC in each stitch arcross, chain 1, turn (4 SC)
Row 4: SC Decrease twice, chain 1, turn
Row 5: SC in each stitch, chain 1, turn (2 SC)
Row 6: SC Decrease and continue to SC along all edges, when you get to bottom corners, chain 2 and make 2 SC in second chain, join back to bottom edge of hat and then finish SC along edges. Fasten off and leave long tail to stitch onto back of cup! Slip Stitch a strand of orange yarn along bottom of hat.


These Crochet Cups are the perfect size for halloween candy and treats!

FOLLOW ME for more FREE Crochet!
Repeat Crafter Me Facebook
Repeat Crafter Me Instagram
Repeat Crafter Me Pinterest
Repeat Crafter Me YOUTUBE


Filed Under: Crocheting 29 Comments

August Summer Gnome C2C Crochet

August 1, 2022

We are soaking up that last bit of summer with our August Gnome! They are beach ready in their bikini, board shorts, and sunglasses! A few extra bonus designs as well that are too cute to leave out so be sure to scroll down! This is our 8th gnome and completes the second row of the blanket. 4 more gnomes to go in our #2022gnomeproject!

Not sure what this gnome project is all about? Let me explain! Jennifer from Day by Day Clay and Crochet and I have teamed up for a HUGE year-long project! Each month Jen creates a Gnome Polymer Clay Crochet Hook and I create a matching Gnome Corner-to-Corner Crochet panel. We are focusing on holiday and seasonal gnome designs. The pixel graph and how-to for the crochet portion of the collab will be right here on Repeat Crafter Me and you can purchase the coordinating clay hook from Jen on her Facebook page “Day by Day Clay and Crochet Group!

The 12 months of Gnomes will be stitched together at the end to make a big blanket! You don’t necessarily need to add a border to each gnome piece but can if you want. I did not at this time. And of course you can use your gnomes for many other projects. Pillows, wall hangings, and more!

You can find all the monthly Gnome designs in one spot! Check out the Gnome Landing Page and be sure to use the hashtag #2022gnomeproject in all your social media posts!

Here is a sneak peak of this months gnome clay crochet hook! Her August hook will go on sale soon: —> DAY BY DAY CLAY AND CROCHET GROUP

For our August Summer Gnome C2C Panel, you will need the following materials:
– Red Heart Super Saver Yarn in colors Turqua (background), Papaya (bikini), Baby Pink (hat), Cafe Latte (hair), Charcoal (sunglasses), Dusty Gray (reflection), and Buff Beige or whatever skin color suits you! Please note that Papaya is from the Red Heart with Love line of yarn but you could easily substitute for Coral or Flamingo. ALSO, please feel free to choose any color for the bikini or board shorts!
– Size H Crochet Hook (and a size F hook for the stars)
– Tapestry Needle
– Girl August Gnome Pixel Graph
– Boy August Gnome Pixel Graph

GET THE WRITTEN PATTERN FOR THE AUGUST GNOMES HERE

If you are new to the Corner-to-Corner Crochet technique, let me explain a little bit about it as well. C2C lets you turn almost any image into a pixel graph and then from a pixel graph into a crocheted piece! The Corner-to-Corner technique basically means the you start in one corner (the lower right hand is most common place to start) and crochet diagonally in rows until you get to the other corner. You follow the pixel graph to create the color changes that make up the picture of the gnome. One pixel square = a chain 2 + 3 HDC stitches. Please note that I am using HDC stitches for the C2C instead of DC. 
Below is a Corner-to-Corner Video Tutorial using a part of my May Gnome graph.

If you are working on the C2C version, I recommend making a 6 SC circle for the belly button and adding it after! Otherwise the belly button will look like a square.

Jennifer Freeman of “My Beautiful Disasters” (Find her HERE on FB!) has been writing out the C2C written pattern for each month. She also has some really incredible C2C designs in her Etsy shop that you should check out! She created a few BONUS GRAPHS for this month! I LOVE the Flamingo Float Girl and Scuba Steve! AND you can always change the color of the bikini or the boy bathing suit 🙂

FLOATIES! GET THE GRAPH AND WRITTEN PATTERN HERE

SCUBA DIVERS! GET THE GRAPH AND WRITTEN PATTERN HERE

I love Jennifers canvas gnomes!! These should give you some really great ideas for color combos as well.

Who is working on the popcorn stitch gnomes?! Diane of Stitch Therapy is making the gnomes using the POPCORN STITCH! I love the way her gnomes are turning out and you can also find her Popcorn Stitch written patterns within each individual gnome post.

She wrote up the Girl Bikini Gnome version already and you can find it HERE. Thank you Diane!!! So grateful for your help!
(Picture below is of last months watermelon gnome.. August popcorn stitch gnome picture coming soon!)

Still not comfortable with the idea of Corner-to-Corner Crochet? Don’t worry, you can use single crochet stitches and crochet each gnome as a graphgan.
SpurView Goods has been uploading the single crochet written patterns HERE

Don’t forget to use the hashtag #2022gnomeproject so I can see and share your gnomes!

FOLLOW ME for more FREE Crochet!
Repeat Crafter Me Facebook
Repeat Crafter Me Instagram
Repeat Crafter Me Pinterest
Repeat Crafter Me YOUTUBE

Filed Under: Crocheting 10 Comments

Crochet Grinch Heart Pillow

July 22, 2022

“And what happened, then? Well, in Whoville they say – that the Grinch’s small heart grew three sizes that day. And then – the true meaning of Christmas came through, and the Grinch found the strength of ten Grinches, plus two!” – How the Grinch Stole Christmas!

I have one more Christmas in July project for you and then I promise to focus on the other seasons leading up to the holidays 🙂 This Grinch pillow was such an easy project because it began with my Heart in a Circle Pattern and all I had to do was change the colors! I found a fantastic shade of green yarn: Red Heart Comfort in color Melon and it’s perfect for any Grinch project! Paired with Red Heart Super Saver in Cherry Red and you have a Grinch inspired heart pillow! The best part is the pocket in the back that holds a book! Slip in a copy of “How The Grinch Stole Christmas” and you have a great holiday gift for your kids, grandkids, teachers, librarians, and more!


Materials:
– Red Heart Comfort yarn in Melon – Shop HERE on Yarnspirations.com
– Red Heart Super Saver in Cherry Red
(strand of black yarn for a grinch smile is optional
– Size H Crochet Hook
– 12 x12 Pillow Form – Get it HERE at Michaels.com
– How the Grinch Stole Christmas book

Grinch Pillow

Make 2 Heart panels

Starting with red yarn for the heart
Chain 11, DC in 4th chain from hook, HDC in next, SC in next, 3 SC in next, SC in next, HDC in next, DC in next, 4 DC in last, 
Now working on other side of chain
DC in first, HDC in next, SC in next, skip 2 stitches, SC in next, HDC in next, 5 DC in last, join to first DC, chain 1
Round 2: SC in first 4, 3 SC in next, SC in next 4, 2 SC in next 4, SC in next 2, skip two stitches, SC in next 2, 2 SC in last 4, 
Switch to green yarn, join, chain 1
Round 3: SC in first, HDC in next, 2 DC in next 2, DC in next 3, 2 DC in next 2, HDC in next, SC in next 7, HDC in next, 2 DC in next 2, DC, deep DC, DC, 2 DC in next 2, HDC, SC in remaining stitches making 2 SC in last, join, chain 1 (40)
Round 4: SC in first 26, DC in next 3, SC in last 11 (40 stitches in round) 
Round 5: SC in each stitch around, join, chain 1 (40 SC)
Round 6: 2 SC in first, SC in next 3, repeat around, join, chain 1
Round 7: 2 SC in first, SC in next 4, repeat around, join, chain 1
Round 8: SC in first 5, SC + chain 1 + SC in next to make a corner, SC in next 14, corner, SC in next 14, corner, SC in next 14, corner, SC in remaining 9 stitches, join, chain 1
Round 9-17: SC in each sttich around making a SC + chain 1 + SC in each corner, join, chain 1
Fasten off weave in ends.

Pocket Panel:
with green yarn
Chain 35, SC in second chain from hook and remaining chains, chain 1, turn (34 SC)
Row 2-18: SC in each stitch across, chain 1, turn (34 SC)
Fasten off an weave in ends.
Stitch on a grinch smile with a tapestry needle and strand of black yarn (optional)

Finishing:
Place the two heart squares back to back with the pocket panel on one side. SC all the edges together. Add your Pillow form before completely closing!

Be sure to follow my social media accounts for short videos on how I stitched together this project!

To be honest, I am trying my best to keep up with the current social media trends and algorithms to keep my business going.

Thank you for your support!


Repeat Crafter Me Facebook
Repeat Crafter Me Instagram
Repeat Crafter Me Pinterest
Repeat Crafter Me YOUTUBE


Filed Under: Crocheting 46 Comments

July Patriotic Gnome C2C Crochet

July 1, 2022

Grab that Red, White, and Blue yarn because our July Gnome is looking very patriotic in all those Stars and Stripes! Don’t worry, if you aren’t in the USA, we have a watermelon design that you may like as well as a Canadian flag gnome to celebrate Canada Day! Lots of options and wherever you are in the world, I hope you can find a fun way to customize the July gnome to your liking!

Not sure what this gnome project is all about? Let me explain! Jennifer from Day by Day Clay and Crochet and I have teamed up for a HUGE year-long project! Each month Jen creates a Gnome Polymer Clay Crochet Hook and I create a matching Gnome Corner-to-Corner Crochet panel. We are focusing on holiday and seasonal gnome designs. The pixel graph and how-to for the crochet portion of the collab will be right here on Repeat Crafter Me and you can purchase the coordinating clay hook from Jen on her Facebook page “Day by Day Clay and Crochet Group!

The 12 months of Gnomes will be stitched together at the end to make a big blanket! You don’t necessarily need to add a border to each gnome piece but can if you want. I did not at this time.

You can find all the monthly Gnome designs in one spot! Check out the Gnome Landing Page and be sure to use the hashtag #2022gnomeproject in all your social media posts!

Here is a sneak peak of this months gnome clay crochet hook! Her July hook will go on sale on July 4th HERE: —> DAY BY DAY CLAY AND CROCHET GROUP

For our 4th of July Gnome C2C Panel, you will need the following materials:
– Red Heart Super Saver Yarn in colors Cherry Red, White, and Blue. Feel free to use any color for the nose!
– Size H Crochet Hook (and a size F hook for the stars)
– Tapestry Needle
– Girl July Gnome Pixel Graph
– Boy July Gnome Pixel Graph
– Teeny Tiny Crochet Stars Tutorial

GET THE WRITTEN PATTERN FOR THE 4TH OF JULY GNOMES HERE

If you are crocheting the Watermelon Gnome, I suggest these colors:
– Red Heart Super Saver Yarn in colors Shocking Pink, Perfect Pink, Spring Green, and Paddy Green (plus nose, hair, and background color)

If you are new to the Corner-to-Corner Crochet technique, let me explain a little bit about it as well. C2C lets you turn almost any image into a pixel graph and then from a pixel graph into a crocheted piece! The Corner-to-Corner technique basically means the you start in one corner (the lower right hand is most common place to start) and crochet diagonally in rows until you get to the other corner. You follow the pixel graph to create the color changes that make up the picture of the gnome. One pixel square = a chain 2 + 3 HDC stitches. Please note that I am using HDC stitches for the C2C instead of DC. 
Below is a Corner-to-Corner Video Tutorial using a part of my May Gnome graph.

Jennifer Freeman of “My Beautiful Disasters” (Find her HERE on FB!) has been writing out the C2C written pattern for each month. She REALLY helped me this month by creating all of the watermelon designs and the Canada Day design! Jennifer also has some really incredible C2C designs in her Etsy shop that you should check out!

I also love how her gnomes look on plastic canvas!!

GET THE WRITTEN PATTERN FOR THE GIRL/BOY WATERMELON GNOMES (VERSION 1) HERE

GET THE WRITTEN PATTERN FOR THE GIRL/BOY WATERMELON GNOMES (VERSION 2) HERE

GET THE WRITTEN PATTERNS FOR THE CANADA DAY GNOMES HERE

Crocheted and Designed by Jennifer Freeman!


Diane of Stitch Therapy is making the gnomes using the POPCORN STITCH! I love the way her gnomes are turning out and you can also find her Popcorn Stitch written patterns within each individual gnome post. She is working on the watermelon version and I will have it posted soon!

UPDATE!! The popcorn stitch watermelon girl gnome is now available! GET IT HERE.
Thanks Diane!

Still not comfortable with the idea of Corner-to-Corner Crochet? Don’t worry, you can use single crochet stitches and crochet each gnome as a graphgan.
SpurView Goods has been uploading the single crochet written patterns HERE

OK back to the 4th of July Gnome!

A tip that I want to share before you get started, is that the stripes portion of the hat is not that complicated. Just make sure you wind small balls of red and white (one for each stripe) and then you will pull up the yarn strand from the previous row as you crochet. This makes it super clean and easy to manage.


After you have made your corner-to-corner crochet panel, you will want to create teeny tiny crochet stars with white yarn to add to the blue portion of the gnome hat. This will give you the stars and stripes! You can find the Teeny Tiny Crochet Star Tutorial HERE

If you want your stars on the other side, just flip the gnome over! It’s reversible and a mirror image!

Have a fun and safe 4th of July to those who are celebrating!

Get all of the Gnome Patterns HERE. We have 7 posted so far plus a bonus birthday gnome!

FOLLOW ME for more FREE Crochet!
Repeat Crafter Me Facebook
Repeat Crafter Me Instagram
Repeat Crafter Me Pinterest
Repeat Crafter Me YOUTUBE

Filed Under: Crocheting 26 Comments

Patriotic Granny Stitch Crochet Tank Top

June 27, 2022

It’s a party in the USA! Zoe and I are ready for all the 4th of July festivities with matching Red, White, and Blue Crochet Crop Tops! This is the same pattern as I posted a few weeks ago (FIND IT HERE) but I just switched up the colors. I also increased the the stitch count on my top so it was an adult size Small. Pattern notes below.


Materials:
– Red Heart Super Saver Yarn in Cherry Red, White, and Blue. Shop these perfectly patriotic colors on Yarnspirations.com!
– Size H Crochet Hook
– Tapestry needle

Get the original Granny Stitch Top pattern HERE (kids size)

I have figured out that the way to increase your starting chain is to make sure the count is divisible by 3. So I started with a chain of 90 for my adult size small top. Add or subtract multiples of 3 to that number to get your desired size. I originally started with a chain of 102 for myself thinking that would be a good fit but it was way too big for me. So once you get your starting chain, then you add your rounds of granny stitches. I did 5 rounds of blue (you work from the bottom up), then 5 rounds of white, and then 5 rows of red. I left a 6 granny stitch space on either side for the armholes and chained 35 for each strap.

If you make this top for yourself, please let us know the stitch count in the comments! We can all join together to become testers since we are all different sizes!

Crochet Granny Stitch Top Size Small:
starting with blue
Chain 90 and join to first chain to make a circle, chain 3 + 2 DC all in first chain (this makes you first granny stitch cluster), skip two stitches, 3 DC in next, skip two stitches, 3 DC in next, repeat around and join to your first stitch (the top of the chain 3). You should have 30 granny stitch clusters
Round 2-5: slip stitch over so you are working in the first space between the granny clusters, make a chain 3 + 2 DC, make 3 DC in the next space, and repeat around making 3 DC in all the spaces, join to the first chain 3 stitch. (30 granny stitch clusters)
Round 6-10: fasten off blue yarn and join in white yarn to the first space between the granny clusters, make a chain 3 + 2 DC, make 3 DC in the next space, and repeat around making 3 DC in all the spaces, join to the first chain 3 stitch. (30 granny stitch clusters)
fasten off white yarn after round 10
Row 11: Lay your piece flat. You will want join in your red yarn and make 10 granny stitch clusters along the front (still working in those spaces between the granny clusters from previous row), chain 1 and turn.
Row 12-15: slip stitch over so you are working in the first space between the granny stitch clusters, granny stitch clusters until you reach the last space, chain 1, turn
You should have 6 granny stitches along the top at the end of row 15.
Now turn the top over and do the same on the backside (repeating rows 11-15). You should have 6 granny stitch clusters on either side of the top that will be the armpits.
Weave in ends!

Now lets make the straps:
Starting at the top corner of the front of the top, join in red yarn and SC along armpit of top, when you get around the armpit and to the top corner of the back of the top, chain 30 and join to the top corner where you started. fasten off.
Do this on the other top corners/armpit area of the tank.
Refer to the original post HERE for pictures of what this should look like

Now for the ribbing! I am using a really easy technique by Daisy Farm Crafts called the Back Loop Single Crochet Ribbed Border. I LOVE the way she does this ribbing on her blankets because it works right along the edge and you don’t need to sew any pieces together. Below is a very easy video tutorial for the DFC YouTube Page. Although she is showing you how to do it on a blanket, you apply the same technique to the edges of this tank top! For the bottom of the tank top I attached my blue yarn and did the exact same stitch count as Tiffany from Daisy Farm Crafts. So the ribbing along the bottom is a total of 7 SC long. For the top of the tank top, I joined in my pink yarn at the top and made a chain 4 which means my ribbing is 3 SC in length. You will work along the top edges of the tank top and continue along the chain straps. It will be one big circle of ribbing. Do not work ribbing along the armpit spaces.

Happy 4th of July from State 48!

Check out a little video short of Zoe and I in our tanks: https://youtube.com/shorts/RbFVOyeUicc?feature=share

FOLLOW ME for more FREE Crochet!
Repeat Crafter Me Facebook
Repeat Crafter Me Instagram
Repeat Crafter Me Pinterest
Repeat Crafter Me YOUTUBE

Filed Under: Crocheting 25 Comments

Birthday Gnome C2C Crochet

June 14, 2022

Hey! It’s my Birthday!!! I’ve designed a bonus birthday gnome to celebrate! You can use this gnome as replacement for your birthday month or a family/friends birthday in the blanket or just use this gnome on it’s own. As always, I am including a boy and girl option with either the cute cupcake on the tummy or up on the hat. Please feel free to choose your own colors and mix and match the designs. The striped hat has a lot of color changes so you might want to stick with a solid color. I used brown hair for my girl to match my own brown hair so you can customize your gnome to fit the birthday person!

I am making little french knots for the sprinkles on the cupcake and it works perfectly! I have a very short YouTube Tutorial below on how to make a french knot.

If you aren’t familiar with the gnome project, head over to the THIS Gnome Landing Page Post! It gives all the details of what this fun year-long project is all about and will answer your questions about Corner-to-Corner Crochet!

Birthday Gnome Materials:
– Red Heart Super Saver Yarn in colors Lemon, Cafe Latte, Light Raspberry, Orchid, White, Aruba Sea and Blushing Peach for the Red Heart with Love line.
Shop all colors at Yarnspirations.com

– Size H Crochet Hook
– Tapestry Needle
– Get the Girl Birthday Gnome Graph HERE
– Get the Boy Birthday Gnome Graph HERE

THANK YOU to Jennifer Freeman of “My Beautiful Disasters” (Find her HERE on FB!) for writing out the C2C written patterns for both the girl and boy birthday gnomes!

Here is the WRITTEN PATTERN GIRL Pattern

Jennifer made this adorable boy gnome version as well as the super cute canvas gnomes below!! Feel free to contact her on her FB page for more details about her incredible canvas designs!
She also has an ETSY shop with lots of corner-to-corner designs!


Here is the WRITTEN PATTERN BOY Pattern

The popcorn stitch birthday gnome will be coming soon from Diane of Stitch Therapy!

And a very happy birthday to everyone else who is celebrating a birthday in the month of June!

Filed Under: Crocheting 17 Comments

  • 1
  • 2
  • 3
  • …
  • 8
  • Next Page »

Let’s Connect!

  • Email
  • Facebook
  • Instagram
  • Pinterest
  • Twitter
Hi and thanks for stopping by! I'm Sarah, the crafter, crocheter and occasional crockpotter behind this blog. As a wife and mom of 3 my days are busy but I always find time to pick up my crochet hook or indulge in something crafty. I have a passion for crafting and crocheting and offer my patterns and tutorials for free! I hope you enjoy everything you find here and please feel free to repeat after me!

Crochet Cute Critters on Sale!

Privacy

Follow by Email

© 2023 · Repeat Crafter Me · Site by High Note Designs